Oh, the joy of a perfectly cooked medium-rare burger! That alluring pink center, the tender bite, the irresistible aroma – it's a culinary experience that never fails to satisfy. Over the years, I've had my fair share of burger mishaps, from dry, overcooked patties to ones that crumbled under the weight of toppings. But through trial and error, I've finally cracked the code to creating the ultimate medium-rare burger, and I'm excited to share my secrets with you.
This isn't just a recipe; it's a journey through the art of burger-making. We'll explore the importance of choosing the right beef, learn the nuances of grinding, and master the techniques of grilling and searing. We'll even delve into the world of toppings and sauces, uncovering some hidden gems that will elevate your burger game to new heights.
So, grab your apron, gather your ingredients, and let's embark on this delicious adventure together. By the end, you'll be a burger master, ready to wow your friends and family with your culinary prowess.
(Part 1) The Foundation: Choosing the Right Beef

Imagine building a house. You wouldn't start without a solid foundation, would you? The same principle applies to crafting a truly delicious burger. It all begins with the beef – the heart and soul of your creation.
The Importance of Fat Content
Think of fat as the secret ingredient. It's what makes the burger juicy, flavorful, and utterly satisfying. A lean burger might sound appealing on paper, but in reality, it'll likely end up dry and disappointing. Aim for a fat content of 20-25%, which will give you that perfect balance of leanness and richness. If you're using a pre-ground blend, check the label for the fat percentage. If you're grinding your own beef, a mix of chuck, sirloin, and brisket will provide the ideal balance of flavor and texture.
Understanding Beef Grades
You've probably noticed terms like "Select," "Choice," and "Prime" on your beef packages. These are USDA grades that indicate the quality of the beef based on factors like marbling, texture, and overall tenderness. While "Prime" is the highest grade, offering the most luxurious marbling, "Choice" is often more readily available and still delivers excellent flavour. Don't be afraid to experiment with different grades to find your personal favourite. For burgers, the difference is often less about the grade and more about the fat content.
The Grind: Fine or Coarse?
The grind of your beef plays a significant role in the texture of your burger. A fine grind creates a dense and compact patty that holds its shape well on the grill, perfect for those who prefer a more classic burger experience. A coarse grind, on the other hand, results in a looser patty with a more rustic feel, ideal for those who enjoy a more pronounced meaty texture. For a medium-rare burger, I recommend a fine to medium grind, offering a balance of texture and juiciness. This allows the patty to cook evenly while retaining that juicy, flavorful core.
Making Your Own Grind: A Personal Touch
If you're feeling adventurous, consider grinding your own beef. This gives you complete control over the blend and allows you to create a custom patty tailored to your taste preferences. Just be sure to use a meat grinder and chill the meat beforehand for a smoother grind. The result? A burger that tastes like pure, unadulterated beef perfection.
(Part 2) Shaping the Patty: A Masterclass in Technique
Now that you have the perfect beef, it's time to shape those patties. This might seem like a simple step, but it's crucial for ensuring even cooking and achieving that coveted medium-rare finish.
Forming the Perfect Patty
Start by dividing your ground beef into equal portions. I typically aim for 4-5 ounces per patty, which is a satisfying size for a burger without being overwhelming. Gently form the beef into balls, avoiding overworking it. This helps to maintain the tenderness of the meat. Then, gently flatten each ball into a disc about 1/2 inch thick, using your palm to create a slightly indented center. This little trick allows the patty to cook evenly and prevents a dome from forming, which can lead to uneven cooking and a dry center.
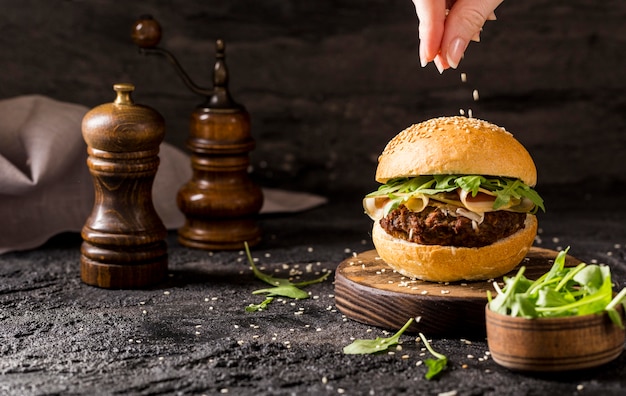
Seasoning: Simple is Best
Resist the urge to overload your burger with seasonings. The goal is to enhance the natural flavor of the beef, not mask it. A simple sprinkle of salt and freshly ground black pepper is all you need. I like to season the patties generously on both sides just before grilling. This ensures that the seasoning adheres well to the surface and infuses the patty with a delicious depth of flavor. If you're feeling fancy, a sprinkle of garlic powder or onion powder can add a subtle depth of flavor, but use them sparingly.
Refrigerate for a Better Result
Before grilling, it's crucial to refrigerate the patties for at least 30 minutes. This helps the fat solidify, resulting in a burger that holds its shape and cooks more evenly. The cold temperature also prevents the patty from releasing too much moisture during grilling, ensuring a juicy, flavorful burger. Trust me, this is a crucial step for achieving that perfect medium-rare finish.
(Part 3) The Grill: Your Burger's Playground
Now comes the fun part: grilling! This is where your burger transforms from a humble patty to a culinary masterpiece. But before you light the coals, let's talk about the essentials for a successful grilling experience.
The Right Grill: Charcoal vs. Gas
Whether you're a charcoal purist or a gas enthusiast, the choice of grill is ultimately a matter of personal preference. charcoal grills offer that smoky, rustic flavor that many find irresistible. The intense heat and uneven cooking surface can also lead to beautifully charred crusts on the burger. Gas grills, on the other hand, are convenient and offer more precise temperature control, making them ideal for those who prefer a more predictable grilling experience. I personally prefer charcoal for that smoky aroma, but both methods can deliver fantastic results.
Mastering the Temperature
The key to a perfect medium-rare burger is maintaining the right temperature. You want a hot grill – think 450-500°F (232-260°C) – for a good sear. This intense heat creates a crisp crust while preventing the patty from drying out. If you're using a gas grill, aim for medium-high heat. For charcoal grills, use hot coals that are ashed over. You can test the temperature by holding your hand a few inches above the grill. If you can only hold it for a second or two before it gets too hot, you're good to go.
Avoiding Pitfalls: Grill Mistakes to Avoid
Here are a few common grilling mistakes to steer clear of, ensuring your burger journey remains smooth sailing:
- Don't overcrowd the grill. Give your burgers space to cook evenly. If you're grilling multiple patties, cook them in batches to prevent overcrowding. The lack of space can cause uneven cooking and a decrease in temperature, leading to a less than ideal burger.
- Don't press down on the patties. This will squeeze out the juices, resulting in a dry, disappointing burger. Let the patty cook undisturbed, allowing it to release its natural juices and develop a delicious crust.
- Don't flip too often. Let the patties form a good crust before flipping, typically after 2-3 minutes per side. This allows the Maillard reaction to occur, creating the flavorful crust and locking in the juices.
(Part 4) The Art of Searing: Achieving that Perfect Crust
The sear is what elevates a burger from ordinary to extraordinary. It's the beautiful, crispy crust that encases the juicy center, adding a depth of flavor and locking in all those delicious juices. Here's how to master the art of searing:
Preheating the Grill
Before placing your patties on the grill, make sure it's scorching hot. The hotter the grill, the quicker and more even the sear, creating a delicious crust without overcooking the interior. If you're using a gas grill, preheat it for about 10-15 minutes on high heat. For charcoal grills, make sure the coals are ashed over and radiating intense heat.
The Importance of Time
Searing takes time, but it's worth it. Resist the urge to rush the process. Let the patties sit undisturbed for 2-3 minutes per side, allowing them to develop a good crust before flipping. This might seem like a long time, but it's essential for creating that perfect balance of crispy crust and juicy interior.
Signs of a perfect sear
You'll know your burger has achieved a perfect sear when the crust is crisp and slightly charred, while the centre remains juicy and pink. The patty should easily release from the grill, indicating that the crust is well-formed.
(Part 5) The Crucial Flip: Timing is Everything
Flipping your burger is a crucial moment, and it requires a delicate touch. Timing is everything, so listen to your instincts and trust the signs.
Signs It's Time to Flip
Here are a few signs that indicate it's time to flip your burger:
- The patty has formed a nice crust and is no longer sticking to the grill. This indicates that the crust is well-formed and the patty is ready to be flipped without sticking or tearing.
- The edges of the patty have begun to brown. This is a sign that the patty is cooking evenly and developing a delicious crust.
- The patty has cooked for 2-3 minutes per side. This is a general guideline for searing, ensuring that the patty develops a crispy crust while retaining its juicy interior.
Don't Press Down
Resist the temptation to press down on the patty with a spatula. This will only squeeze out the juices and result in a dry burger. Let the patty cook undisturbed, allowing it to release its natural juices and develop a delicious crust.
Flipping Technique
When flipping, use a thin spatula and lift the patty gently to avoid breaking it. Turn it once and let it cook for another 2-3 minutes, or until it reaches your desired level of doneness.
(Part 6) The doneness test: Finding Your Perfect Pink
The most important part of making a medium-rare burger is ensuring it's cooked to the right level of doneness. Here are a few methods for checking the temperature and achieving that perfect pink center.
The Thumb Test
This is a classic, albeit slightly imprecise, method. Press the center of the patty with your thumb. If the feel matches the firmness of your thumb, it's rare. If it's closer to your index finger, it's medium-rare. If it's firm like your pinky, it's well-done. This test is useful for estimating the doneness, but it's best to use a meat thermometer for a more accurate reading.
The Temperature Method
For a more accurate result, use a meat thermometer. Insert it into the thickest part of the patty, avoiding the bone. A medium-rare burger should have an internal temperature of 130-135°F (54-57°C). This is the ideal temperature range for a juicy, flavorful burger with a perfect pink center.
The Visual Cue
The most obvious sign of a medium-rare burger is the colour of the centre. It should be a beautiful, juicy pink. If it's brown all the way through, it's overcooked. If it's still red, it's undercooked. Trust your eyes – they're a reliable indicator of doneness, especially when combined with other methods.
The Resting Period
After removing the burger from the grill, let it rest for 5-10 minutes before slicing. This allows the juices to redistribute throughout the patty, resulting in a more tender and flavorful burger. The resting period is crucial for achieving that perfect balance of juiciness and tenderness.
(Part 7) Toppings and Sauces: Elevate Your Burger Game
The toppings and sauces you choose can transform your burger from ordinary to extraordinary. Here are some ideas to inspire your culinary creativity.
Classic Toppings
These are the staples of burger-dom, offering a taste of tradition and comfort. They complement the beef beautifully and create a satisfying and familiar burger experience.
- Cheese: Cheddar, Swiss, American, or Monterey Jack are all excellent choices, offering different flavour profiles and melting characteristics. Cheddar provides a sharp bite, Swiss has a nutty flavour, American melts smoothly, and Monterey Jack has a mild, slightly sweet flavour.
- Lettuce: Crisp and refreshing, it adds a welcome crunch and balances the richness of the beef. Choose a leafy green like romaine or iceberg lettuce for a classic burger feel.
- Tomato: Juicy and tangy, it balances the richness of the beef and adds a burst of freshness. Choose a ripe, firm tomato for the best flavour and texture.
- Onion: Red onion, white onion, or caramelized onions add a unique flavour profile and texture. Red onions provide a sharper bite, white onions are milder, and caramelized onions offer a sweet and savory complexity.
- Pickle: Dill pickles offer a tangy and crunchy contrast, cutting through the richness of the beef and adding a refreshing element. Choose crunchy, dill pickles for the best texture and flavour.
Gourmet Toppings
For a touch of elegance, try these unique and flavorful additions. They add a touch of sophistication to your burger and create a more complex flavour profile.
- Arugula: This peppery green adds a distinctive flavour to your burger and creates a beautiful contrast with the richness of the beef. It also adds a lovely visual element to your burger.
- Caramelized Onions: Sweet and savory, they elevate any burger with their rich flavour and soft texture. Caramelized onions add a touch of sweetness and depth to the burger.
- Roasted Peppers: Adds a smoky sweetness to the mix and provides a delightful textural contrast to the burger. Red bell peppers, yellow bell peppers, or a combination of both are excellent choices.
- Bacon: crispy bacon is always a welcome addition, adding a salty crunch and a layer of richness to the burger. Choose thick-cut bacon for the best flavour and texture.
- Avocado: Creamy and healthy, avocado adds a richness and texture to the burger. Choose a ripe avocado for the best flavour and texture. It also adds a touch of elegance to your burger.
Sauce Options
Don't forget about the sauce! Here are a few ideas to complete your burger experience. Choose a sauce that complements the flavour profile of your toppings and the overall burger experience.
- Ketchup: A classic choice, but choose a high-quality ketchup for the best flavour. Look for a ketchup made with real tomatoes and minimal added sugars. A good ketchup will enhance the flavour of your burger without being overly sweet.
- Mustard: Yellow mustard, Dijon mustard, or stone-ground mustard add a tangy kick. Yellow mustard is a classic choice, Dijon mustard adds a more complex flavour, and stone-ground mustard offers a rustic and earthy flavour.
- Mayo: A creamy and satisfying base for your toppings. Use a high-quality mayonnaise for the best flavour and texture. Look for a mayo made with real eggs and minimal added ingredients.
- bbq sauce: Sweet and smoky, BBQ sauce adds a delicious touch to a burger. Choose a BBQ sauce that complements the flavours of your toppings. A sweet and smoky sauce pairs well with classic toppings, while a tangy and spicy sauce works well with more adventurous toppings.
- Homemade Sauce: Get creative and whip up your own special sauce, like a chipotle mayo, a jalapeno ranch, or a garlic aioli. Homemade sauces add a personal touch to your burger and allow you to create a flavour profile that is uniquely yours.
(Part 8) The Final Touches: Assembling Your Masterpiece
Now that you've cooked your perfect medium-rare burger and selected your toppings, it's time to assemble the final masterpiece. This is the moment where all your hard work comes together in a symphony of flavours and textures.
Building the Perfect Stack
Start with a toasted bun. It's the base of your creation, so choose a bun that's sturdy enough to hold all the toppings. Toasting the bun adds a delicious crispness and prevents it from becoming soggy. Next, add your burger patty, allowing it to rest for a few minutes so the juices redistribute. The resting period allows the patty to relax, ensuring that the juices are evenly distributed throughout the patty, resulting in a more tender and flavorful burger. Next, add your cheese, letting it melt slightly before adding the other toppings. Then, layer on your favourite toppings, building a tower of flavour and texture. Finish with your chosen sauce, adding a final touch of deliciousness.
The Bite: A Moment of Culinary Bliss
Now it's time to enjoy the fruits of your labour. Take a big bite and savour the flavour. The juicy meat, the crispy crust, the melting cheese, the crunchy toppings, all coming together in a symphony of taste. This is the reward for all your hard work and dedication to crafting the perfect medium-rare burger. This is the moment you've been working towards, and it's time to savor every delicious bite.
FAQs
1. What if I overcook my burger?
If you accidentally overcook your burger, don't despair! While it might not be medium-rare, it can still be delicious. Try adding a generous amount of toppings and sauces to compensate for the dryness. The added moisture and flavour will help to create a more satisfying experience. You can also experiment with a different cooking method next time, like grilling over indirect heat or using a cast iron skillet. These methods allow for more even cooking and reduce the risk of overcooking.
2. Can I make a medium-rare burger in the oven?
Yes, you can bake a medium-rare burger in the oven. Preheat the oven to 400°F (204°C). Place the patties on a baking sheet and bake for 10-12 minutes, flipping halfway through. Use a meat thermometer to check for doneness. This method is particularly useful if you're grilling multiple burgers at once, as it allows for more even cooking. It's also a great option for those who don't have a grill or prefer to avoid the smoke and mess of grilling.
3. What are some good sides to serve with a burger?
There are endless possibilities when it comes to sides. Classic choices include fries, potato salad, coleslaw, onion rings, and mac and cheese. These sides complement the burger perfectly and provide a satisfying meal. If you're feeling adventurous, try grilled corn on the cob, a side salad, or even a baked sweet potato. The key is to choose sides that complement the flavour of your burger without overpowering it. A good side should enhance the overall dining experience, creating a balanced and delicious meal.
4. How long can I store ground beef in the refrigerator?
Ground beef should be stored in the refrigerator for a maximum of 1-2 days. It's best to use it as soon as possible after purchase to ensure optimal freshness and flavour. Storing ground beef for too long can lead to a decrease in quality and a potential risk of foodborne illness. Always check the "use-by" date on the package and refrigerate the meat promptly after purchase.
5. What are some tips for storing leftover burgers?
Leftover burgers can be stored in the refrigerator for up to 3-4 days. Make sure to wrap them tightly in plastic wrap or aluminum foil to prevent drying out. When reheating, avoid using the microwave, as it can make the burger tough. Instead, reheat it in a skillet over medium heat or in the oven. Remember to check the internal temperature to ensure it's heated through before serving. Leftovers can be used for a variety of dishes, like burger sliders, burger bowls, or even as a filling for a hearty sandwich.
Everyone is watching

Perfect Rice Every Time: The Ultimate Guide to Cooking Rice
Cooking TipsAs a self-proclaimed foodie, I've always been a bit obsessed with rice. It's the foundation of countless cuisi...

Prime Rib Roast Cooking Time Chart: Per Pound Guide
Cooking TipsPrime rib roast. Just the name conjures images of lavish dinners, crackling fires, and hearty laughter. It’s ...

How Long to Bake Potatoes in the Oven (Perfect Every Time)
Cooking TipsBaked potatoes are a staple in my kitchen. They're incredibly versatile, delicious, and surprisingly easy to m...

The Ultimate Guide to Cooking Asparagus: Tips, Techniques, and Recipes
Cooking TipsAsparagus. The mere mention of this spring delicacy conjures up images of vibrant green spears, crisp and burs...

Ultimate Guide to Cooking the Perfect Thanksgiving Turkey
Cooking TipsThanksgiving. Just the word conjures up images of overflowing tables laden with delicious food, the scent of r...