There's a certain magic to a perfectly cooked ny strip steak. That succulent, tender, and oh-so-flavorful piece of meat is a culinary dream come true. Over the years, I've spent countless hours in the kitchen, experimenting with different techniques and grilling methods, all in pursuit of that elusive steak perfection. And let me tell you, the journey has been delicious! Today, I'm sharing my secrets to crafting the most incredible NY strip steak right on your stovetop. Get ready to impress your tastebuds and elevate your dinner game to new heights.
Part 1: The Steak – Choosing Your Star Ingredient

The NY Strip: A Cut Above
Let's face it, the foundation of a great steak is the cut itself. The NY strip, also known as a new york strip, is a classic choice for a reason. Its beautiful marbling, those streaks of intramuscular fat, make all the difference. It's like the secret ingredient that delivers juicy, melt-in-your-mouth tenderness and an incredible depth of flavor. Think of it as the star of the show, ready to shine!
Thickness Matters – A Steak With Substance
Now, the thickness of the steak plays a crucial role in how it cooks. You'll want to go for a steak that's at least 1 inch thick, ideally 1.5 inches. Why? Because a thicker steak cooks more evenly and retains its juices better, preventing it from drying out. Imagine biting into a steak that's juicy all the way through, a real testament to a well-chosen cut.
Quality Is King – Don't Skimp on Flavor
Here's a little secret I've learned over the years: Don't skimp on the quality of your steak. Invest in a cut from a reputable butcher or a grocery store known for its high-quality meat. If you're lucky enough to have a local butcher, they're usually happy to guide you towards the perfect steak, often offering cuts that you won't find in a regular grocery store. Think of it as a culinary adventure, where you're choosing the best possible starting point for a truly exceptional meal.
Part 2: Preparing the Steak – Getting Ready for the Spotlight

Pat It Dry – The Foundation of a Crisp Sear
Before you even think about turning on the stove, pat your steak dry with paper towels. This simple step might seem insignificant, but it makes a world of difference. Why? Because a dry surface helps the steak develop a beautiful, crispy sear, locking in those delicious juices. It's all about maximizing flavor, and a dry steak is the first step towards achieving that goal.
Seasoning Magic – Enriching the Flavor Profile
Now, the seasoning! This is where you add your personal touch and truly bring out the best in your steak. My go-to seasoning combination is a generous sprinkle of good-quality kosher salt and freshly ground black pepper. It's simple yet incredibly effective, allowing the natural flavor of the steak to shine. I like to use a coarse grind for the pepper, as it adds a bit of texture and complexity.
Feel free to experiment with other seasonings. A touch of garlic powder or onion powder can add a nice depth of flavor, while a sprinkle of smoked paprika or chili powder can introduce a subtle heat. Just remember, less is more when it comes to seasoning. You don't want to overwhelm the natural flavor of the steak.
The Art of Resting – Patience Pays Off
Once you've seasoned your steak, let it rest at room temperature for about 30 minutes. This step might seem like a waiting game, but it's a crucial one. Allowing the steak to come to room temperature ensures that it cooks evenly throughout. You wouldn't want to throw a cold steak into a hot pan, right? That's a recipe for uneven cooking and a less than perfect steak. Patience, my friend, is key to unlocking the full potential of your steak.
Part 3: The Equipment – Your culinary arsenal
cast iron skillet: The Ultimate Sear Master
For the best results, invest in a cast iron skillet. It's the ultimate tool for achieving a perfectly crisp and flavorful sear. Cast iron heats up incredibly evenly and retains heat exceptionally well, creating the ideal environment for cooking steak to perfection. If you're looking for that restaurant-quality sear, a cast iron skillet is your best friend.
But don't despair if you don't have a cast iron skillet. A heavy-bottomed stainless steel skillet will also work, just be sure to preheat it thoroughly before adding the steak. The key is to have a skillet that can maintain a high, even heat, crucial for achieving that coveted sear.
meat thermometer: Your Doneness Guide
A meat thermometer is a must-have tool for any serious steak enthusiast. It's your ultimate guide to achieving your desired level of doneness. There are basic digital thermometers, and even more advanced probe thermometers that can monitor the internal temperature of the steak while it's cooking. With a meat thermometer, you can ensure that your steak is cooked to perfection, every time.
Tongs: Your Steak's Safekeepers
You'll need sturdy tongs to safely flip your steak and maneuver it around the pan without disrupting the beautiful sear. Invest in a pair with a good grip, so your steak doesn't slip and slide around. You want to maintain that beautiful crust, and tongs are the perfect tool to help you do just that.
Part 4: Heating the Skillet – Getting Ready for the Action
High Heat: A Sizzling Start
Get your skillet scorching hot. This is non-negotiable! You want the oil to be shimmering and almost smoking, creating the perfect environment for a beautifully browned sear. If you're using a cast iron skillet, preheat it over medium-high heat for about 5 minutes. You'll know it's ready when a drop of water sizzles and evaporates instantly. For a stainless steel skillet, preheat over medium-high heat for about 3 minutes.
Oiling Up: The Right Lubricant for the Job
Once your skillet is screaming hot, add a generous amount of oil. I prefer using a neutral oil with a high smoke point, like grapeseed oil or avocado oil. These oils can withstand high temperatures without burning or smoking, ensuring that the oil doesn't impart any unwanted flavors to your steak. The goal is to achieve a beautiful sear without the risk of burning the oil or the steak.
Part 5: Cooking the Steak – The Grand Performance
Searing: Creating a Crispy Crust
When the oil is shimmering and almost smoking, carefully place your steak in the pan. Resist the urge to move it around too much. Let it sit undisturbed for about 3-4 minutes per side. This is the crucial step that creates that beautiful, caramelized crust, which is not only visually stunning but also adds an incredible depth of flavor. Think of this as the moment the steak truly comes alive!
Medium-Rare: The Perfect Balance
For a medium-rare steak, which is my personal favorite, you'll cook it for about 3 minutes per side. This creates a tender, juicy steak with a slightly pink center. But remember, cooking times can vary depending on the thickness of your steak and your stovetop's heat. That's why a meat thermometer is your best friend!
Internal Temperature: The Doneness Checklist
Use your trusty meat thermometer to check the internal temperature of the steak. A medium-rare steak should reach an internal temperature of 130-135°F. For medium, aim for 140-145°F, and for medium-well, aim for 150-155°F.
Don't be afraid to experiment! The key is to find the level of doneness that you enjoy the most. A meat thermometer takes the guesswork out of cooking steak and ensures that you get it just right every time.
Resting: The Final Touch for Tenderness
Once the steak reaches your desired temperature, remove it from the pan and let it rest for about 5-10 minutes. This is a crucial step that allows the juices to redistribute throughout the steak, resulting in a more tender and flavorful cut. While the steak is resting, you can prepare your sides and create a delicious sauce to complement the dish.
Part 6: The Finishing Touches – Adding Extra Sparkle
Herb Butter: A Burst of Flavor
While the steak is resting, whip up a simple herb butter to add a burst of flavor and fragrance. Simply combine softened butter with fresh herbs like parsley, thyme, and rosemary. You can also add a pinch of garlic powder or lemon zest for an extra layer of complexity. The herb butter adds a refreshing touch to the steak and complements the rich flavors beautifully.
Pan Sauce: Elevating the Experience
For a truly decadent finishing touch, consider making a pan sauce. This is a simple but oh-so-delicious way to enhance the flavors of the steak and elevate the dish to new heights. Simply deglaze the pan with a bit of red wine or broth, scraping up any browned bits from the bottom. Add a knob of butter and some fresh herbs, and you'll have a delicious sauce to drizzle over your steak.
The pan sauce is a testament to the power of using the leftover flavors in the pan to create something truly special. It's a delicious way to maximize the flavor potential of your steak and turn a simple meal into an unforgettable experience.
Part 7: Serving It Up – The Grand Reveal
Plating Perfection: A Culinary Masterpiece
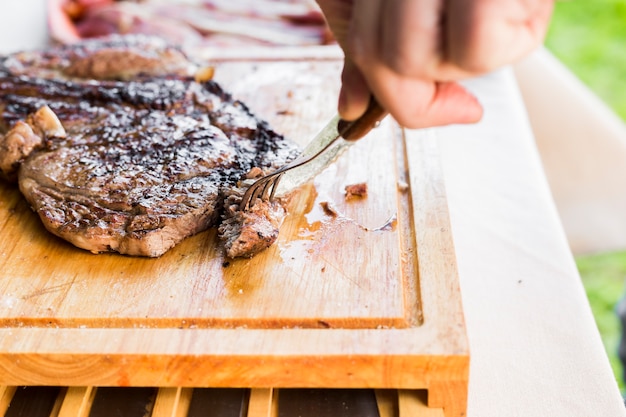
Now, for the grand finale! Slice your steak against the grain, meaning you slice perpendicular to the direction of the muscle fibers. This technique creates tender and juicy bites, allowing the flavors to burst in your mouth with each delicious bite. Arrange the steak slices on a plate, add a dollop of herb butter, and drizzle with your pan sauce, if you made one.
side dish Symphony: Complementary Flavors
Complete your steak dinner with a selection of delicious sides. Roasted vegetables, creamy mashed potatoes, a fresh green salad, or even a crispy potato gratin will complement your steak perfectly. These side dishes provide a variety of textures and flavors, creating a well-rounded and satisfying meal.
Think of the side dishes as the supporting cast, adding their own unique notes to the overall culinary masterpiece. The possibilities are endless, allowing you to customize your meal according to your preferences and create a truly personalized dining experience.
Part 8: FAQs – Answering Your Steak Queries
1. How do I know if my pan is hot enough?
When the oil is shimmering and almost smoking, you know your pan is ready for the steak. This signifies that the pan has reached the optimal temperature for creating a beautiful sear.
2. Can I use a different oil?
Yes, but choose a neutral oil with a high smoke point, like grapeseed oil, avocado oil, or canola oil. Avoid olive oil, as it has a lower smoke point and can burn easily. The goal is to use an oil that can withstand high heat without burning or adding any unwanted flavors to your steak.
3. Can I cook the steak on a lower heat?
You can, but you won't achieve the same beautiful sear. A high heat is essential for creating the crisp, flavorful crust that makes a steak truly special.
4. How long should I rest the steak?
Rest the steak for at least 5 minutes, but 10 minutes is even better. This allows the juices to redistribute throughout the steak, resulting in a more tender and flavorful cut. Don't rush the resting process; it's a crucial step for a truly exceptional steak.
5. How do I know if the steak is cooked to my liking?
The best way to determine the doneness of your steak is by using a meat thermometer. It's the most accurate way to ensure that your steak is cooked to your desired level of doneness.
However, if you don't have a meat thermometer, you can use the "finger test." Press the center of the steak with your finger. If it feels similar to your thumb when pressed gently, it's rare. If it feels like the tip of your nose, it's medium-rare. Keep in mind that this is a less precise method, but it can be helpful in a pinch.
Part 9: Conclusion – A culinary journey of Flavor
Cooking a perfect NY strip steak on the stovetop is a culinary journey worth embarking on. With the right ingredients, techniques, and a little patience, you can create a steak that's juicy, tender, and bursting with flavor. It's a testament to the power of simple ingredients and skillful preparation, resulting in a truly unforgettable dining experience.
So, gather your ingredients, put on your chef's hat, and get ready to enjoy a steak that'll leave you feeling satisfied and wanting more. Remember, the journey is just as rewarding as the destination. Happy cooking!
Everyone is watching

Perfect Rice Every Time: The Ultimate Guide to Cooking Rice
Cooking TipsAs a self-proclaimed foodie, I've always been a bit obsessed with rice. It's the foundation of countless cuisi...

Prime Rib Roast Cooking Time Chart: Per Pound Guide
Cooking TipsPrime rib roast. Just the name conjures images of lavish dinners, crackling fires, and hearty laughter. It’s ...

How Long to Bake Potatoes in the Oven (Perfect Every Time)
Cooking TipsBaked potatoes are a staple in my kitchen. They're incredibly versatile, delicious, and surprisingly easy to m...

The Ultimate Guide to Cooking Asparagus: Tips, Techniques, and Recipes
Cooking TipsAsparagus. The mere mention of this spring delicacy conjures up images of vibrant green spears, crisp and burs...

Ultimate Guide to Cooking the Perfect Thanksgiving Turkey
Cooking TipsThanksgiving. Just the word conjures up images of overflowing tables laden with delicious food, the scent of r...