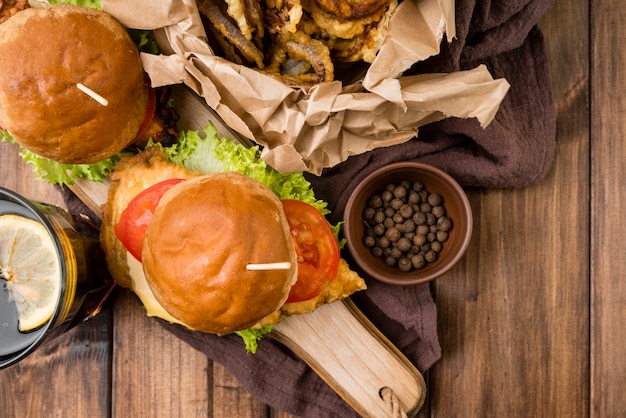
Ah, the burger. It's a culinary masterpiece, a symphony of textures and flavours, and a timeless favourite that never fails to bring people together. But achieving that perfect burger, with its crispy sear, juicy interior, and melting cheese, isn't just about throwing a patty on the grill and hoping for the best. It's an art form, a dance between heat and time, that requires a little knowledge, a pinch of patience, and a whole lot of passion.
Forget the pre-made patties, those bland, factory-produced things. We're talking about the real deal, handcrafted from good quality, freshly ground beef, seasoned with a sprinkle of salt and pepper, and grilled to perfection. It's a journey that starts with the right ingredients, involves a bit of intuition and technique, and culminates in a burger that's pure bliss.
So, let's dive into the world of burger grilling and unlock the secrets to achieving that perfect cook. We'll delve into the science behind the grill, the nuances of different cuts of meat, and the all-important question: how long should you grill your patty to reach your desired level of doneness? By the end of this journey, you'll be a burger grilling maestro, confidently crafting delicious burgers that will make your friends and family jealous.
Part 1: The Science of Burger Grilling: It's All About Heat and Time
Before we talk cook times, let's understand the fundamental principles of burger grilling. It's all about achieving a perfect sear – that crispy, flavorful crust on the outside while keeping the inside juicy and tender. It's a delicate balance of heat and time, and knowing how to manage both is key.
1.1. The Power of Heat: A Hot Grill is Your Best Friend
Heat is the driving force behind a delicious burger. It's what creates that beautiful sear, locking in the juices and developing those rich, savory flavours. A hot grill is essential. Aim for a temperature between 400-450°F (200-230°C). This high heat will allow for a quick cook, ensuring that your patty doesn't dry out. Imagine it like a quick, intense burst of energy for your burger, giving it that delightful crust without sacrificing its internal tenderness.
1.2. Time: A Delicate Dance with Doneness
Time, however, is a double-edged sword. Too short a cook time, and your burger will be raw. Too long, and it will be dry and tough. The key is finding that sweet spot where the outside is cooked through, and the inside remains juicy and pink. This requires a bit of intuition and understanding of how heat affects the patty.
1.3. The Art of the Flip: One and Done for a Perfect Burger
Flipping your patty is another critical step. You want to flip your burger just once, ideally when it's developed a nice crust on the bottom. This prevents the patty from sticking, ensures even cooking, and helps achieve that perfect sear. Resist the urge to constantly peek and prod; let the patty do its thing. It’s like a graceful waltz – one smooth, confident move for a flawless result.
Part 2: Beef Basics: choosing the right cut for Your Burger
The quality of your beef is the foundation of any great burger. Forget those pre-made patties from the supermarket, often packed with fillers and low-quality meat. Instead, head to your local butcher and get yourself some freshly ground beef. Choose cuts like chuck, sirloin, or even a blend of the two. These cuts have the perfect fat content for juicy, flavorful burgers, making every bite a delight.
2.1. Fat is Your Friend: Juiciness and Flavor in Every Bite
Fat, my friends, is your friend when it comes to burgers. It adds juiciness and flavor, making the patty more tender and succulent. Aim for a fat content of around 20%, but don’t be afraid to go a bit higher for extra richness. It’s like the secret ingredient that elevates your burger from good to extraordinary. You can also add a bit of suet to your ground beef for extra flavour and moisture, giving it that extra oomph.
2.2. Gentle Handling for a Tender Patty
Once you have your ground beef, handle it gently. Don’t overwork it, as this can make the patty tough. Simply form your patties into your desired size and thickness, and try not to press them too hard. A slight indentation in the centre will help prevent the patty from puffing up during cooking. It's like handling a delicate piece of art – a light touch is key for a beautiful result.
Part 3: Crafting the Perfect Patty: Seasoning and Shaping for Success
Before your patties hit the hot grill, there are a few simple yet crucial steps to elevate their flavour and ensure they cook evenly.
3.1. Salt and Pepper: The Essential Duo
Salt and pepper are the simplest yet most effective seasonings for burgers. Season your patties generously just before grilling. The salt will help draw out moisture, while the pepper adds a touch of heat and complexity. Resist the temptation to add other spices at this stage, as you want to let the natural flavour of the beef shine through. However, you can always add those extras later, like garlic powder, onion powder, or even a pinch of paprika for a bit of colour.
3.2. Grill Marks: Adding Visual Appeal to Your Burger
For those iconic grill marks, use a grill press or a spatula to press the patty down firmly on the grill. This creates a beautiful cross-hatch pattern, making your burgers look even more delicious. Just be careful not to press down too hard, as you don’t want to squeeze all the juices out of the patty. It’s all about creating those beautiful marks without compromising the patty’s tenderness.
Part 4: The Cook Times: A Guide to Doneness for Every Preference
Now, let's get down to the heart of the matter: the cook times. Keep in mind that these are just guidelines. The actual cooking time will vary depending on the thickness of your patties, the heat of your grill, and the level of doneness you desire.
4.1. Rare: A Bold Choice for the Adventurous
For a rare burger, you’re looking for a centre temperature of 125°F (52°C). The interior should be red and juicy, with a very slight amount of pink in the middle. This is for the daring burger enthusiast who appreciates the raw, unadulterated flavour of the meat.
Cook Time:
For a 1-inch thick patty, cook for 2-3 minutes per side.
4.2. Medium Rare: The Sweet Spot for Many
Medium rare is the sweet spot for many burger lovers. The centre should be a vibrant pink, with a slight amount of browning around the edges. It’s a delicious balance of tenderness and flavour, satisfying both the meat lovers and those who prefer a bit more cooked burger.
Cook Time:
For a 1-inch thick patty, cook for 3-4 minutes per side.
4.3. Medium: A Classic Choice for a Well-Balanced Burger
For a medium burger, you want the centre to be mostly pink, with a hint of grey starting to appear. It should be firm to the touch. This is a classic choice, offering a well-balanced flavour and texture that appeals to a wide range of palates.
Cook Time:
For a 1-inch thick patty, cook for 4-5 minutes per side.
4.4. Medium Well: For Those Who Prefer a Little More Cooking
Medium well is a good option for those who prefer a bit more cooked burger. The centre should be mostly grey, with a touch of pink remaining. It's a good compromise for those who want a more cooked burger without sacrificing too much juiciness.
Cook Time:
For a 1-inch thick patty, cook for 5-6 minutes per side.
4.5. Well Done: Fully Cooked and Thoroughly Enjoyable
Well done burgers are cooked through and through, with no pink remaining. They can be a bit dry, but some people prefer this level of doneness. It’s a matter of personal preference, and there's nothing wrong with enjoying a well-done burger.
Cook Time:
For a 1-inch thick patty, cook for 6-7 minutes per side.
Part 5: The Essential Tools: Temperature Checkers and Thermometers
To ensure your burgers are cooked to your desired level of doneness, it’s a good idea to invest in a good quality meat thermometer. This handy tool will take the guesswork out of grilling, allowing you to check the internal temperature of your patties without having to cut into them.
5.1. digital meat thermometer: Accuracy and Convenience Combined
Digital thermometers are quick and easy to use. Simply insert the probe into the thickest part of your patty and wait for the temperature to register. Most digital thermometers have a timer function, making it even more convenient. They provide accurate readings, ensuring your burger is cooked to your precise specifications.
5.2. Instant-Read Thermometer: For Speedy and Precise Readings
Instant-read thermometers are designed for quick, accurate readings. They are particularly useful for checking the temperature of smaller patties or thin cuts of meat. They're ideal for those who want a fast and reliable temperature check, ensuring their burgers are cooked just right.
5.3. Thermometer Tips: Using Your Tool Like a Pro
Here are a few tips for using a meat thermometer effectively:
- Always ensure your thermometer is clean and sanitized before and after use. This ensures hygiene and accurate readings.
- Insert the probe into the thickest part of the patty, avoiding any bones or fat. This gives you the most accurate reading of the core temperature.
- Avoid touching the probe during the measurement, as this can affect the accuracy of the reading. Keep your hands off the probe for the best results.
- Don’t leave the probe in the patty for an extended period, as this can affect the cooking process. A quick check is all you need for accurate results.
Part 6: The Art of Resting: Unlocking the Juiciest Burger
After you take your burgers off the grill, it’s important to let them rest for a few minutes. This allows the juices to redistribute throughout the patty, resulting in a more tender and flavorful burger. It’s like a little pause for the patty to relax and regain its moisture.
6.1. Why Resting Matters: A Scientific Explanation
When you cook a burger, the heat causes the muscle fibres to contract, squeezing out the juices. During the resting period, the fibres relax, allowing the juices to be reabsorbed back into the patty. This process creates a more evenly cooked and juicy burger, making every bite a delight.
6.2. Resting Time: Patience is Key for a Juicy Burger
The ideal resting time for a burger is about 5-10 minutes. Cover the patties loosely with foil to keep them warm and prevent them from drying out. It's a small step, but it makes a big difference in the final flavour and texture of your burger.
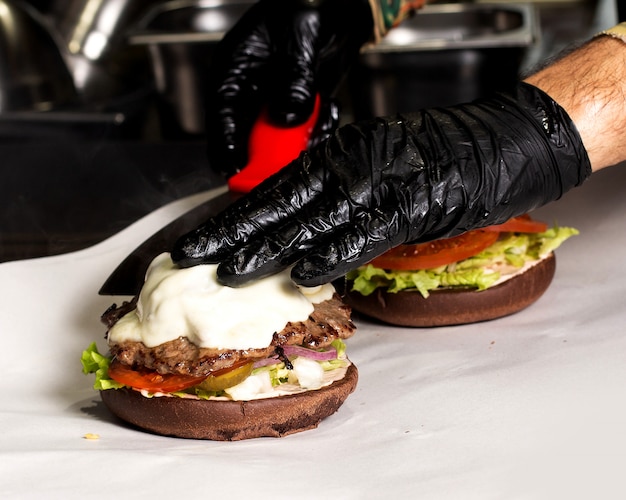
Part 7: Assembling Your Burger Masterpiece: The Bun, the Toppings, and the Magic
Now comes the fun part: assembling your masterpiece. You’ve got the perfect patty, cooked to your desired level of doneness, and it’s time to build your ultimate burger experience.
7.1. Choose Your Bun: The Foundation of a Great Burger
The bun is the foundation of your burger, so choose wisely. Go for a soft, slightly toasted bun that can hold up to the juiciness of your patty and the weight of all the toppings. Toasted sesame seed buns are a classic choice, but you can also experiment with brioche, pretzel buns, or even gluten-free options. It's a crucial decision, one that can elevate your burger to new heights.
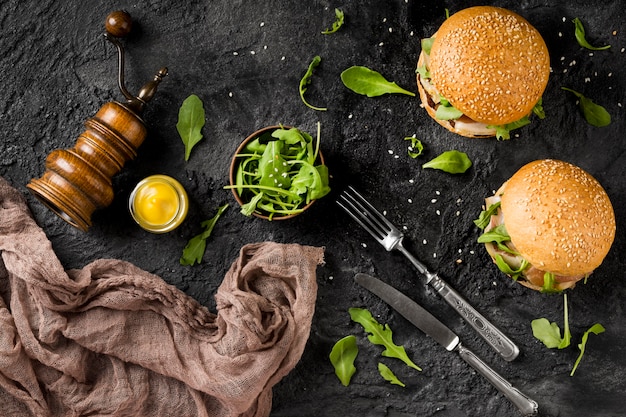
7.2. The Art of Toppings: A Symphony of Flavours
Toppings are where you can really get creative and personalize your burger. There are no hard and fast rules here, so let your taste buds guide you. However, there are some classic combinations that never fail to impress.
- Classic Cheese: American cheese, cheddar, Swiss, Monterey Jack – the choice is yours. Choose a cheese that complements the flavour of your burger and your personal preference.
- Freshness Factor: Lettuce, tomato, onion, pickles – these add a refreshing contrast to the rich flavors of the patty and cheese. They provide that burst of freshness that balances out the richness of the burger.
- Savoury Sensations: Bacon, caramelized onions, grilled mushrooms, sautéed peppers – these toppings add a layer of depth and umami to your burger. They add an extra dimension of flavour to your burger, making it even more satisfying.
- Sauce it Up: Ketchup, mustard, mayonnaise, bbq sauce, sriracha mayo – the options are endless. Experiment with different sauces to find your perfect burger combination. Choose a sauce that complements the flavour of your burger and your personal preference.
Part 8: FAQs: Common Questions and Solutions
Now that you’re a burger grilling pro, let’s address some common questions that might pop up.
8.1. What if My Patty Sticks to the Grill?
Sometimes, even with a hot grill, your patty can stick. This is usually because the grill is not clean enough, or the patty is too cold. To prevent sticking, preheat your grill properly, use a good quality grilling oil, and make sure your patties are at room temperature before you put them on the grill. If your patty does stick, don’t force it. Use a spatula to gently loosen it from the grill, and try not to break it.
8.2. What if My Burger is Cooking Unevenly?
If your burger is cooking unevenly, it’s likely because the heat of your grill is not consistent. Try to rotate your patty during cooking, making sure that it receives an even amount of heat on all sides. You can also use a grill press to ensure even cooking, but be careful not to press down too hard.
8.3. What if My Burger is Too Dry?
A dry burger is a common problem, but it can be easily avoided. Make sure you use a good quality cut of beef with enough fat content. Don’t overcook your burgers, and let them rest for a few minutes after cooking to allow the juices to redistribute. You can also add a bit of moisture to your burger by using toppings like lettuce, tomato, or onions.
8.4. What if My Burger is Too Greasy?
If your burger is too greasy, it’s likely because you used a cut of beef with too much fat or you didn’t drain off excess grease while cooking. Try to use a leaner cut of beef, or drain off any excess grease after cooking. You can also use a grill press to help squeeze out some of the fat.
8.5. Can I Cook Burgers in the Oven?
Yes, you can cook burgers in the oven, but you won’t get that same delicious chargrilled flavour. To oven-bake burgers, preheat your oven to 400°F (200°C). Place your patties on a baking sheet lined with parchment paper and bake for 10-15 minutes, flipping them halfway through. Check the internal temperature with a meat thermometer to ensure they are cooked to your desired level of doneness.
Part 9: Final Thoughts: Embrace Your Inner Burger Grill Master
There you have it, my friends – a comprehensive guide to achieving burger grilling perfection. It's a journey that starts with understanding the basics, choosing the right ingredients, mastering the cook times, and taking those essential resting steps. With patience, a bit of experimentation, and a sprinkle of grill-master intuition, you’ll be crafting delicious burgers that will impress your friends and family, making every burger night a culinary triumph. So, grab your grill, gather your ingredients, and get ready to conquer the art of burger grilling.
Now, go forth and grill!
Everyone is watching

Prime Rib Roast Cooking Time Chart: Per Pound Guide
Cooking TipsPrime rib roast. Just the name conjures images of lavish dinners, crackling fires, and hearty laughter. It’s ...

How Long to Bake Potatoes in the Oven (Perfect Every Time)
Cooking TipsBaked potatoes are a staple in my kitchen. They're incredibly versatile, delicious, and surprisingly easy to m...

Perfect Rice Every Time: The Ultimate Guide to Cooking Rice
Cooking TipsAs a self-proclaimed foodie, I've always been a bit obsessed with rice. It's the foundation of countless cuisi...

The Ultimate Guide to Cooking Asparagus: Tips, Techniques, and Recipes
Cooking TipsAsparagus. The mere mention of this spring delicacy conjures up images of vibrant green spears, crisp and burs...

Ultimate Guide to Cooking the Perfect Thanksgiving Turkey
Cooking TipsThanksgiving. Just the word conjures up images of overflowing tables laden with delicious food, the scent of r...