Ah, the T-bone steak. It's a culinary icon, a symbol of indulgence, and a dish that always manages to bring a smile to my face. There's something so satisfying about the perfect T-bone, cooked to juicy perfection with a crispy crust, and bursting with flavour. For years, I've been on a quest to master this classic dish, and after countless experiments in my own kitchen, I'm finally ready to share my secrets for achieving the perfect T-bone steak in a frying pan, every single time.
(Part 1) Choosing Your Weapon of Choice: The T-Bone
Let's start with the star of the show: the T-bone steak itself. Now, you might think, "Isn't a T-bone just a T-bone?" Well, not quite. There's more to it than meets the eye. You see, the quality of the steak plays a huge role in the final result. It's not just about the cut – the breed, the age, and even the way the animal was raised can all contribute to the flavour and tenderness of your steak.
The Cut: A Symphony of Flavour and Texture
The T-bone steak is a classic for a reason. The combination of tenderloin and strip steak on one bone provides a diverse range of flavour and texture. It's a truly unique dining experience. When selecting your T-bone, look for a well-marbled piece with even fat distribution. This means the steak will be juicy and flavorful, and the fat will render beautifully during cooking, adding to the deliciousness.
Imagine this: as you take a bite, the tenderloin melts in your mouth, its delicate flavour contrasting with the bold, robust flavour of the strip steak. It's a culinary masterpiece waiting to be unleashed.
The Breed: A World of Flavour Profiles
You'll often find T-bone steaks from various breeds, each offering a unique flavour profile. Here's a peek into the world of T-bone breeds:
- Angus: Renowned for its marbling and rich flavour. Think of a luxurious, decadent steak experience.
- Hereford: Offers a leaner option with a more pronounced beefy taste. Perfect if you're looking for a steak with a little more bite.
- Wagyu: The ultimate indulgence. Wagyu is known for its incredibly high marbling and buttery texture, delivering a truly melt-in-your-mouth experience.
The Age: A Matter of Tenderness and Intensity
The age of the animal also impacts the flavour and texture. Younger animals tend to have more tender meat, while older animals offer a more intense flavour. It's all about personal preference, but for a tender and flavorful T-bone, aim for an animal that's been aged for at least 21 days. This dry-aging process enhances the flavour and tenderness of the meat.
Think of it as a fine wine, ageing gracefully and developing complex flavours over time. A well-aged T-bone steak boasts a deep, rich flavour and a meltingly tender texture, making every bite an absolute delight.
(Part 2) Preparing the Battlefield: Setting the Stage
Now that we've chosen our weapon of choice, it's time to prepare the battlefield. This involves getting the right equipment and ensuring the perfect environment for cooking our T-bone steak to perfection.
The Frying Pan: Your Essential Culinary Ally
A good frying pan is essential for searing a T-bone steak. Cast iron is my personal favourite. It heats evenly and retains heat incredibly well, creating a beautiful crust on the steak. However, a heavy-duty stainless steel pan can also do the trick.
Think of your frying pan as your culinary ally, helping you achieve that perfect sear. It's the foundation of your T-bone steak success.
The Heat: High Heat for a Beautiful Crust
High heat is key for a perfect sear. You want the pan to be scorching hot before adding the steak. Aim for medium-high to high heat on your stovetop.
Imagine the sizzling sound as the steak hits the pan, creating a symphony of deliciousness. The high heat is what creates that irresistible crust, locking in the juices and flavours.
The Oil: Your Secret Weapon for a Crispy Crust
A high-heat oil like avocado oil, grapeseed oil, or peanut oil is ideal for searing. These oils have high smoke points, which means they can withstand the high temperatures without burning or smoking excessively.
Think of the oil as your secret weapon, allowing you to achieve that perfect sear without burning the steak. It's the key to creating that beautiful, crispy crust that adds a layer of flavour and texture to your T-bone.
The Seasoning: Simple is Best
Keep it simple and let the flavour of the steak shine. Salt and pepper are all you really need. Season liberally right before cooking, allowing the seasoning to adhere to the meat.
Think of salt and pepper as the perfect complements to the steak's natural flavours. They enhance the taste and create a delicious contrast, without overpowering the meat.
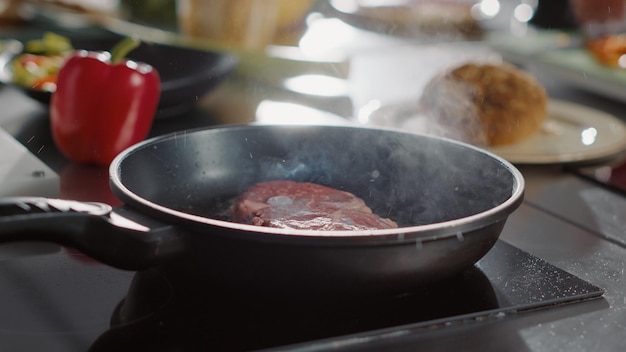
(Part 3) The Art of Searing: A Symphony of Flavour
The moment we've all been waiting for: searing the steak. It's a crucial step, and one that demands a steady hand and a keen eye for detail. This is where the real magic happens, transforming a simple cut of meat into a culinary masterpiece.
The Technique: Creating a Beautiful Crust
Pat the steak dry with paper towels to remove excess moisture, then generously season with salt and pepper. Preheat your pan over high heat until it's smoking hot. Add the oil and let it heat up. Place the steak in the pan and sear for 2-3 minutes per side, ensuring a beautiful golden-brown crust.
Imagine the beautiful, golden-brown crust forming on the outside of the steak, the result of the high heat and the right oil. It's a testament to your culinary skills and a promise of flavourful goodness within.
The Signs of Perfection: Visual Cues for a Perfect Sear
As the steak sears, you'll notice it begin to release its juices. This is a good sign! It indicates that the meat is cooking evenly. You'll also see a delicious crust forming on the outside. A beautiful, crispy crust is a sign of a perfectly seared steak.
Imagine the steak sizzling in the pan, releasing its juices and creating a mouthwatering aroma. It's a visual feast, and a sign that you're on the right track to steak perfection.
Avoiding Mistakes: Common Mistakes and How to Avoid Them
The biggest mistake people make when searing a steak is overcrowding the pan. This will lower the temperature and prevent a proper sear. Always ensure there's enough space between each steak in the pan to allow for even cooking.
Think of your frying pan as a stage, where each steak deserves its own spotlight. Don't overcrowd the pan, as it will lead to uneven cooking and a less-than-perfect sear.
(Part 4) Reaching Your Desired Level of Doneness: Finding Your perfect steak
The level of doneness is a personal preference. Some people prefer their steaks rare, while others enjoy them well-done. It's about understanding the different levels of doneness and finding what works best for you.
Understanding Doneness: A Guide to Steak Preferences
Here's a quick guide to the different levels of doneness:
| Level of Doneness | internal temperature | Description |
|---|---|---|
| Rare | 125-130°F (52-54°C) | Red center, cool to the touch, very soft |
| Medium-Rare | 130-135°F (54-57°C) | Pink center, slightly warm, springy to the touch |
| Medium | 135-140°F (57-60°C) | Pink center, warm to the touch, firm |
| Medium-Well | 140-145°F (60-63°C) | Very little pink, hot to the touch, very firm |
| Well-Done | 145°F and above (63°C and above) | No pink, very hot, extremely firm |
Using a Thermometer: The Ultimate Tool for Accuracy
The most accurate way to check the doneness of your steak is with a meat thermometer. Insert the thermometer into the thickest part of the steak, making sure not to touch the bone. Aim for the desired internal temperature listed in the table above.
Think of a meat thermometer as your culinary guide, ensuring you achieve the perfect level of doneness every time.
The "Touch Test": A Simple Guide for Doneness
If you don't have a thermometer, you can use the "touch test". Gently press the centre of the steak. Here's how it works:
- Rare: The steak will feel soft and jiggly, like a jelly.
- Medium-Rare: The steak will feel slightly firmer than rare, but still springy, like a firm jelly.
- Medium: The steak will feel firm to the touch, like a well-made sponge cake.
- Medium-Well: The steak will feel very firm, like a firm piece of bread.
- Well-Done: The steak will be extremely firm and hard to the touch, like a hard piece of wood.
Think of the touch test as a simple guide for doneness, but remember that it's not as accurate as a meat thermometer.
(Part 5) Resting: The Crucial Cooling Down Period
After searing and cooking your steak to perfection, it's time for a crucial step that's often overlooked: resting. This allows the juices to redistribute throughout the steak, resulting in a more tender and flavorful final product.
Why Resting is Essential: Unlocking Tenderness and Flavour
When you cook a steak, the juices are forced to the surface. If you cut into it immediately, those juices will spill out, leaving you with a dry, disappointing steak. Resting allows the juices to redistribute evenly, resulting in a tender and flavorful steak that's juicy from edge to edge.
Think of resting as a crucial step in the steak's culinary journey, allowing it to regain its composure and achieve maximum tenderness and flavour.
How to Rest: Simple Steps for a juicy steak
Transfer the steak to a cutting board and cover it loosely with foil. Let it rest for 5-10 minutes, depending on the thickness of the steak. This allows the internal temperature to equalize, ensuring a juicy and flavorful steak.
Think of the resting period as a time for the steak to relax and allow its juices to redistribute, resulting in a more enjoyable dining experience.
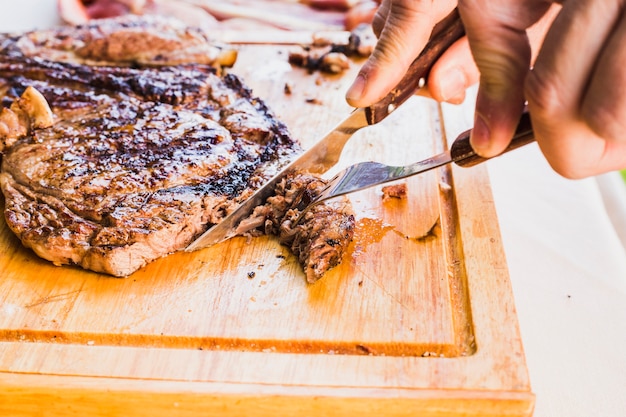
(Part 6) Slicing and Serving: Unveiling the Culinary Masterpiece
Finally, it's time to unveil your culinary masterpiece! Slicing the steak correctly is crucial for presentation and ensuring even distribution of flavour. The right technique will enhance the visual appeal of your steak and showcase the beautiful marbling.
The Technique: Slicing Against the Grain for Tenderness
Slice the steak against the grain, which means cutting across the muscle fibres. This will result in more tender and easier-to-chew pieces of steak. Cut the steak into thin slices, about 1/2 inch thick.
Think of slicing against the grain as the final touch, enhancing the tenderness and creating a more enjoyable eating experience.
The Presentation: Adding a Touch of Flair
Arrange the sliced steak on a plate or platter. You can garnish with your favorite sides, such as roasted vegetables, mashed potatoes, or a simple salad. Don't be afraid to get creative and add a touch of flair to your presentation.
Think of the presentation as the finishing touch, showcasing your culinary masterpiece and creating a visually appealing dining experience.
(Part 7) Elevate the Experience: The Perfect Accompaniments
A perfect T-bone steak deserves equally impressive accompaniments. Whether you're going for a classic combination or exploring bold new flavours, the right sides can elevate the dining experience to a whole new level.
Classic Combinations: Timeless Flavour Pairings
For a classic steak experience, you can't go wrong with a side of creamy mashed potatoes, sautéed mushrooms, or a simple green salad. The simplicity of these sides allows the flavour of the steak to shine through.
Think of these classic combinations as the perfect complements to the rich flavour of the T-bone, enhancing the overall dining experience without overpowering the steak.
Bold Flavour Explorations: Creating a culinary adventure
If you're feeling adventurous, try pairing your T-bone steak with roasted vegetables like asparagus, Brussels sprouts, or butternut squash. You can also experiment with a flavourful chimichurri sauce, a zesty salsa verde, or a creamy béarnaise sauce.
Think of these bold flavour combinations as a culinary adventure, adding a layer of excitement and complexity to your steak dinner.
(Part 8) Master the Technique, Unleash Your Inner Chef
With these tips and tricks, you'll be well on your way to mastering the art of cooking a perfect T-bone steak in a frying pan. It's a dish that brings people together, sparks conversation, and leaves a lasting impression. Go forth, unleash your inner chef, and enjoy the incredible experience of cooking a perfect T-bone steak.
FAQs
Q: What's the best way to store T-bone steak?
A: It's best to store T-bone steak in the refrigerator on a plate lined with paper towels. This helps absorb excess moisture and prevents the steak from spoiling. You can also store it in the freezer for longer storage, but make sure to wrap it tightly in plastic wrap or aluminum foil to prevent freezer burn.
Q: Can I cook a T-bone steak from frozen?
A: While it's technically possible to cook a frozen T-bone steak, it's not recommended. It will take longer to cook and may result in uneven cooking and a tough texture. It's best to thaw the steak in the refrigerator overnight before cooking.
Q: How long should I sear the steak for?
A: The searing time will vary depending on the thickness of the steak. Generally, you should sear for 2-3 minutes per side to achieve a beautiful golden-brown crust.
Q: How do I know when the steak is done?
A: The most accurate way to check the doneness of your steak is with a meat thermometer. You can also use the touch test, but it's less reliable.
Q: What's the best way to prevent the steak from sticking to the pan?
A: Make sure the pan is scorching hot before adding the steak. This will prevent the steak from sticking. Also, use a high-heat oil like avocado oil or grapeseed oil, which have high smoke points and won't burn or smoke excessively.
Everyone is watching

Perfect Rice Every Time: The Ultimate Guide to Cooking Rice
Cooking TipsAs a self-proclaimed foodie, I've always been a bit obsessed with rice. It's the foundation of countless cuisi...

Prime Rib Roast Cooking Time Chart: Per Pound Guide
Cooking TipsPrime rib roast. Just the name conjures images of lavish dinners, crackling fires, and hearty laughter. It’s ...

How Long to Bake Potatoes in the Oven (Perfect Every Time)
Cooking TipsBaked potatoes are a staple in my kitchen. They're incredibly versatile, delicious, and surprisingly easy to m...

The Ultimate Guide to Cooking Asparagus: Tips, Techniques, and Recipes
Cooking TipsAsparagus. The mere mention of this spring delicacy conjures up images of vibrant green spears, crisp and burs...

Ultimate Guide to Cooking the Perfect Thanksgiving Turkey
Cooking TipsThanksgiving. Just the word conjures up images of overflowing tables laden with delicious food, the scent of r...