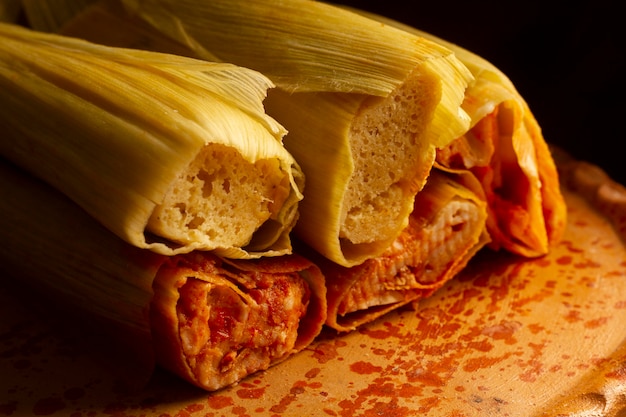
Let me tell you, there's nothing quite like sinking your teeth into a perfectly made tamale. The tender dough, the flavourful filling, that satisfying "snap" as you bite into the husk - it's a true culinary delight. But making tamales can seem daunting, especially if you've never done it before. Fear not, my friends! I'm here to guide you through the process, from gathering the right ingredients to achieving that picture-perfect result. Get ready to unlock the secrets of tamale-making, and I promise, you'll be surprised at how easy it is to create these delicious treats at home.
(Part 1) The Essential Ingredients: Your Tamale Toolkit
First things first, you need to gather your tools and ingredients. Think of it like setting up your kitchen for a culinary adventure!
The Tamale Pot: Your Faithful Companion
Let's start with the pot. You're going to need a large, sturdy pot with a steamer basket that fits snugly inside. I'm talking about a pot that can handle a good amount of steam and won't wobble when you're loading it up with those delicious tamales. The key is to ensure your tamales have plenty of room to stand tall, so they don't get squished or fall apart during the steaming process.
The Tamale Husks: Your Tamale's Protective Shell
Now, let's talk about the husks! The humble corn husk plays a crucial role in the tamale-making process. It's what gives the tamale its distinctive shape, and it's responsible for holding all those delicious flavours together. I prefer dried husks because they're readily available and easy to work with. But fresh husks work just as well! They're a little more finicky, but they add a unique aroma and flavour to your tamales. Look for husks that are flexible but not brittle, and make sure they're free from any holes or tears. You don't want any leaks in your tamale packaging!
The Dough: The Heart of the Matter
Right, the dough! This is where the real magic happens. You can buy pre-made masa dough, but honestly, there's something incredibly rewarding about making your own. It's a bit of a process, but the result is worth it. You'll need corn masa flour, lard or vegetable shortening, broth, baking powder, and salt. Now, you can use chicken broth, beef broth, or even vegetable broth. It's a matter of personal preference!
The Filling: A World of Flavours
This is where the fun truly begins! The filling is the heart and soul of your tamale. While traditional tamales often feature pork, chicken, or beef, the possibilities are endless. I've been known to experiment with all sorts of flavour combinations, from cheese and black beans to mushrooms and roasted peppers. The key is to use ingredients that complement each other and create a symphony of flavours in your mouth.
(Part 2) The Art of Preparing the Husks: A Gentle Touch
Now, let's get those husks ready. This is a crucial step because it's all about making sure those husks are nice and pliable so they can wrap your tamales beautifully.
The Soak: Rehydrating for Success
The first step is to give those dried husks a good soak. This helps them to regain their flexibility and become easier to work with. Simply place your husks in a large bowl or sink filled with warm water. Let them soak for about 30 minutes, or until they feel soft and pliable to the touch.
The Trim: Getting Rid of the Excess
Next, you'll want to trim off the excess. You'll find that the outer layer of the husk can be quite tough, so we want to remove that before we start folding. Carefully trim off the edges of each husk, using a sharp knife or kitchen shears. Take your time and be patient with this step.
The Folding: Folding Your Tamales Like a Pro
Here's where the art of tamale-making comes into play. This is the moment when you transform your simple husk into a beautiful little package for your filling.
Place your husk on a flat surface with the wide end facing you. Now, fold the pointed end down about an inch or two, creating a little pocket. This is where your delicious filling will go!
Spoon a generous amount of your filling into the center of the husk, leaving about an inch of space around the edges. Now, it's time to start folding. Take one side of the husk and fold it over your filling, creating a crease along the side. Repeat on the other side. You're basically creating a little pouch, with the filling snugly tucked inside.
Finally, fold the pointed end of the husk over the top of your filling, like a lid. Press down firmly to seal the edges. You've just created your very first tamale!
(Part 3) Crafting the Perfect Masa Dough: The Secret to a Delicious Tamale
Now, let's talk about the heart of your tamale - the masa dough. It's the foundation, the canvas upon which your filling will be showcased. Get ready for a delightful journey into the world of flavour and texture!
The Blend: Creating the Perfect Foundation
Start by gathering your ingredients: corn masa flour, lard or vegetable shortening, broth, baking powder, and salt. Grab a large bowl, and add the corn masa flour. Now, slowly add your lard or shortening, working it into the flour until the mixture is completely incorporated and crumbly. This step is crucial, so don't rush it! Think of it like making a pastry - you want the fat to be evenly distributed, which will give your tamales a tender, melt-in-your-mouth texture.
Next, add your warm broth, baking powder, and salt. Using a wooden spoon, mix everything together until you have a smooth, thick dough. The dough should be firm enough to hold its shape but not so stiff that it's difficult to work with.
The Taste Test: Ensuring the Flavour is Just Right
Time for a taste test! This is where you get to ensure the dough is seasoned to your liking. Take a small amount of the dough and taste it. If it needs a little extra flavour, add a pinch of salt or your favourite spices. You can also add a little bit of sugar if you prefer a sweeter taste. Remember, it's all about personal preference!
(Part 4) Filling Your Tamales: A Symphony of Flavours
Alright, let's get to the heart of the matter - the filling! This is your chance to let your culinary creativity shine. The possibilities are endless!
The Traditional Approach: A Classic for a Reason
For those who want to stick with the classic, I recommend a traditional pork filling. It's rich, flavourful, and always a crowd-pleaser. The key to a great pork filling is to slow-cook the meat until it's incredibly tender. It should practically melt in your mouth!
Start by browning the pork in a large pan. Add onions, garlic, and chillies, and simmer it until the pork is cooked through and the flavours have melded together.
A Vegetarian Twist: Flavourful and Delicious
If you're looking for a meatless option, there are plenty of delicious vegetarian fillings to explore. I'm particularly fond of a mushroom and black bean filling. The earthy mushrooms pair beautifully with the rich black beans, creating a satisfying combination of textures and flavours.
Sauté the mushrooms with onions and garlic until they're tender. Then, add in the black beans, chillies, and spices. Cumin, oregano, and paprika are my go-to choices, but feel free to experiment with your favourite spice combinations.
The Sweet Side of Tamales: A Delicious Dessert Option
Who says tamales have to be savoury? For those with a sweet tooth, there's a whole world of delicious dessert tamales waiting to be discovered. My favourite is a sweet corn and cinnamon filling.
Combine sweet corn kernels with cinnamon, sugar, and a touch of vanilla. You can also add in some dried fruit, like cranberries or raisins, for a touch of extra sweetness.
(Part 5) The Steam: Bringing Your Tamales to Life
Now, it's time to bring those tamales to life! This is the crucial stage where the steam works its magic, transforming your raw ingredients into a delicious, comforting meal.
The Setup: Creating the Steam Bath
Grab your large pot and steamer basket. Fill the pot with about an inch or two of water. Make sure the water is boiling before you add your tamales. The steam is what will cook the dough and filling, creating that perfect texture.
To prevent your tamales from sticking to the bottom of the steamer basket, you can place a few corn husks at the bottom of the basket. This creates a barrier and ensures that your tamales cook evenly.
The Placement: Arranging Your Tamales
Carefully arrange your tamales in the steamer basket, making sure they're standing upright, not lying down. If you have a large batch of tamales, you may need to do this in batches. Once the tamales are in the basket, place a layer of corn husks on top. This helps to keep them moist and ensures that they cook evenly.
The Duration: Steaming Until Perfection
Now, it's time to let the steam do its work. Steam your tamales for about 1 hour or until the dough is cooked through. To test if the dough is cooked, carefully remove one tamale from the steamer and unwrap it. The dough should be firm and not sticky.
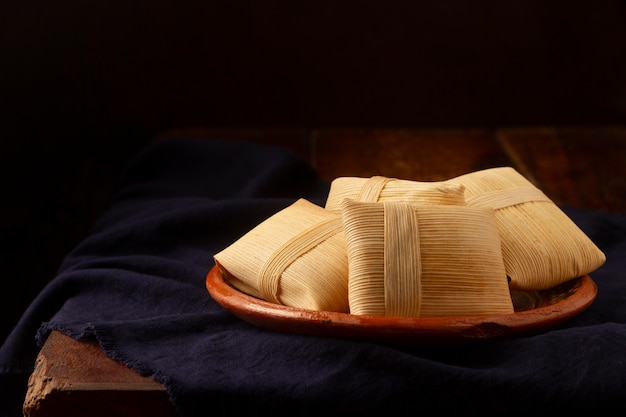
(Part 6) The Reveal: Unveiling the Perfect Tamale
It's finally time to reveal the fruits of your labor! After all that hard work, you're going to be rewarded with a delicious batch of homemade tamales.
The Cooling: Letting Them Rest
Remove your tamales from the steamer and let them cool for about 10 minutes. This allows them to cool down a little and become easier to handle. It also prevents them from falling apart when you're ready to unwrap them.
The Unveiling: Taking Off the Husks
Carefully remove the husks from your tamales. Start by peeling back the husk from one end of the tamale. Gently slide the tamale out of the husk.
The Taste Test: Savor the Flavours
And finally, the moment you've been waiting for - the taste test! Take a bite and savor the delicious flavours. You can enjoy your tamales on their own, or you can serve them with toppings like salsa, sour cream, guacamole, or a sprinkle of cheese.
(Part 7) Storing and Reheating: Keeping Your Tamales Fresh and Delicious
You've just made a beautiful batch of tamales, and you want to make sure they stay fresh and delicious. Here's how to store and reheat them properly.
Storage: Keeping Your Tamales Safe
You can store your leftover tamales in the fridge for up to 3 days. Wrap them tightly in plastic wrap or aluminium foil to keep them moist.
Reheating: Restoring the Flavours
When you're ready to enjoy your tamales, you can reheat them in the oven, microwave, or steamer.
For the oven, preheat it to 350 degrees fahrenheit. Wrap the tamales in aluminium foil and bake for about 15 minutes.
For the microwave, wrap the tamales in a damp paper towel and microwave on high for about 1 minute.
For the steamer, simply place the tamales in a steamer basket and steam for about 10 minutes.
(Part 8) Beyond the Basics: Exploring Variations and Techniques
Now that you've mastered the basics, let's explore some exciting variations and techniques to elevate your tamale game.
Tamale Toppings: Adding a Touch of Excitement
Tamales are incredibly versatile, and you can add a variety of toppings to enhance their flavour. Salsa is a classic choice, adding a burst of freshness and spice. You can also add sour cream for a creamy touch, guacamole for a touch of avocado goodness, or even a sprinkle of cheese for a savoury kick.
Tamale Styles: Expanding Your Repertoire
Did you know there are different tamale styles from various regions? You can explore tamales from the Yucatan peninsula in Mexico, known for their colourful fillings and delicate dough. Or try Oaxacan tamales, often filled with mole, a rich, complex sauce.
Tamale Dips: A Delicious Twist on Tradition
Instead of serving your tamales as a main dish, consider making a delicious tamale dip. Simply blend your tamale filling with cream cheese or sour cream to create a rich, flavourful dip. Serve it with tortilla chips, vegetables, or even crackers.
FAQs: Common Questions About Tamales
Let's address some common questions about tamales.
1. Can I Freeze Tamales?
Absolutely! You can freeze cooked tamales for up to 3 months. Wrap them tightly in plastic wrap and then aluminium foil. To reheat frozen tamales, place them in a steamer or microwave until they're heated through.
2. Can I Use Different Types of Corn Husks?
While corn husks are the most common type of husk used for tamales, you can also use banana leaves, which are often used in Latin American cuisine. Just be sure to soak them for a longer period of time to soften them.
3. Can I Make Tamales Without Using Lard?
Yes, you can! You can substitute lard with vegetable shortening or even olive oil. Just be aware that the taste and texture of your tamales may be slightly different.
4. How Do I Prevent My Tamales From Sticking Together in the Steamer?
To prevent your tamales from sticking together, make sure you use a steamer basket and place a few corn husks at the bottom of the basket. This will create a barrier between the tamales and the steamer.
5. What are the Best Spices to Use in Tamales?
The best spices for tamales depend on the filling you're using. For meat fillings, cumin, oregano, paprika, and chilli powder are great options. For vegetarian fillings, cumin, oregano, paprika, and garlic powder are good choices.
So, there you have it! My tips and tricks for making perfect tamales. Remember, it's all about patience, practice, and a whole lot of love. Now, go out there and make some magic! Your friends and family will be thanking you for it.
Everyone is watching

Perfect Rice Every Time: The Ultimate Guide to Cooking Rice
Cooking TipsAs a self-proclaimed foodie, I've always been a bit obsessed with rice. It's the foundation of countless cuisi...

Prime Rib Roast Cooking Time Chart: Per Pound Guide
Cooking TipsPrime rib roast. Just the name conjures images of lavish dinners, crackling fires, and hearty laughter. It’s ...

How Long to Bake Potatoes in the Oven (Perfect Every Time)
Cooking TipsBaked potatoes are a staple in my kitchen. They're incredibly versatile, delicious, and surprisingly easy to m...

The Ultimate Guide to Cooking Asparagus: Tips, Techniques, and Recipes
Cooking TipsAsparagus. The mere mention of this spring delicacy conjures up images of vibrant green spears, crisp and burs...

Ultimate Guide to Cooking the Perfect Thanksgiving Turkey
Cooking TipsThanksgiving. Just the word conjures up images of overflowing tables laden with delicious food, the scent of r...