For years, I was convinced that poaching eggs was some sort of culinary magic trick, only achievable by those with mystical powers and an apron full of Michelin stars. Every attempt ended in a rubbery, misshapen mess, leaving me feeling deflated and craving a hearty fry-up instead.
But then, a friend (who, let's be honest, is basically a cooking goddess) revealed the secrets to achieving those perfectly wobbly, golden yolks. It turns out, it's all about a few simple tricks and a bit of confidence. You don't need to be a professional chef to create restaurant-quality poached eggs right in your own kitchen!
So, join me on this journey to conquer the art of the poached egg. I'll be your guide, sharing the tips and techniques that helped me transform from poached egg disaster to master chef (well, at least in the breakfast department!).
(Part 1) The Essentials: Tools of the Trade
Before we dive into the actual poaching process, let's talk equipment. You don't need a fancy kitchen gadget empire to achieve poached egg perfection. Just a few key items are all you need.
1. A Saucepan
Think small, think sturdy. A small, deep saucepan is your best friend. You want enough space for your eggs to swim around comfortably but not so much that they get lost in the water. A saucepan with a non-stick base is also a bonus, as it will help prevent those stubborn egg white bits from sticking to the bottom.
2. A Slotted Spoon
You'll need a reliable slotted spoon to gently manoeuvre those poached beauties out of the water. Choose one with a wide surface area to avoid breaking the egg. Look for a spoon with a sturdy handle, as you'll be using it to lift the egg out of the water and drain it carefully.
3. A Ladle
Not essential, but very helpful. A ladle makes it easier to control the flow of water when adding it to the pan. It also comes in handy for gently releasing any rogue bits of egg white that might be clinging to the bottom of the pan.
4. A Bowl
This isn't just for cracking your eggs into. You'll need a bowl filled with cold water for the eggs to soak in before you poach them. This helps to ensure a smoother, rounder shape. It also helps to ensure the yolk stays intact when you crack the egg.
5. A Whisk
Okay, this is the secret weapon. A whisk helps to create a gentle swirl in the water, keeping the egg white contained and preventing it from spreading out. Think of it as a mini-whirlpool for your egg. This swirl helps create that beautiful, perfectly round shape that makes poached eggs look so elegant.
(Part 2) Prep: The Foundation of Flawless Poaching
Now that you've gathered your tools, let's prepare the battlefield. This is where precision and attention to detail come into play. A little bit of prep goes a long way when it comes to poaching eggs.
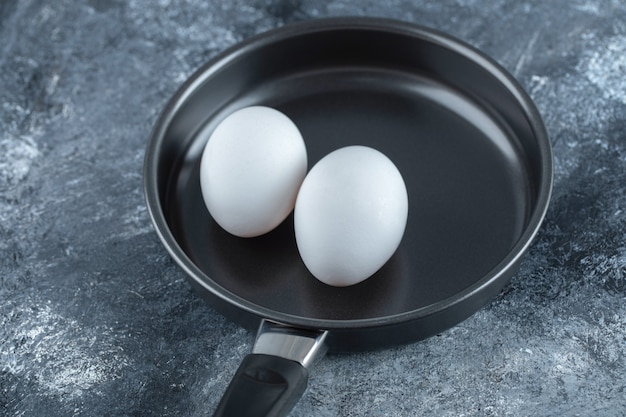
1. Choose Your Eggs
Start with fresh, high-quality eggs. Older eggs tend to have looser yolks, which can make them harder to poach. They might even break apart when you try to transfer them to the pan. And, trust me, no one wants a runny yolk that looks like it's about to explode.
2. The Cold Water Soak
This is the secret to achieving those perfectly round poached eggs. Before poaching, gently crack your eggs into a bowl of cold water. The cold water helps the egg white firm up, making it less likely to spread out when you add it to the pan. This step is crucial for achieving a nice, compact shape.
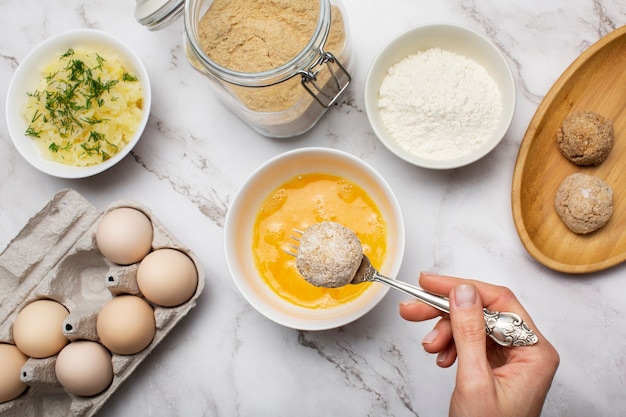
3. The Gentle Crack
When you crack your egg, try to keep the yolk intact. A few little cracks are okay, but if the yolk is broken, you'll end up with a messy, uneven poach. Crack the egg gently on a flat surface, avoiding any harsh movements that could damage the yolk.
4. The Whirlwind of Water
Here's where the whisk comes into play. Once the water in your saucepan is simmering, use your whisk to create a gentle swirl in the centre. This will help to keep the egg white contained and create that beautifully round shape. The swirl helps to direct the egg white inwards, preventing it from spreading out too much.
(Part 3) Poaching: The Art of the Game
This is the moment of truth. Now that you've prepped everything, it's time to get those eggs in the water and let the magic happen. Remember, slow and steady wins the race when it comes to poaching eggs.
1. The Gentle Drop
Carefully slide the egg from the bowl into the centre of the swirling water. Don't drop it from a height, as this can break the yolk. Let the egg gently glide into the water, allowing it to settle into the swirl.
2. The Low and Slow Approach
Lower the heat to a gentle simmer. You want the water to be just barely bubbling. This will help to prevent the egg white from cooking too quickly and becoming tough. A gentle simmer ensures that the egg cooks evenly and doesn't become rubbery.
3. The Patience Game
This is where your patience will be tested. Poaching takes time, approximately 3-4 minutes for a medium-cooked yolk. Resist the urge to peek at the egg constantly. You'll only disrupt the gentle cooking process. Patience is key to achieving a perfectly cooked egg.
4. The Test of Texture
If you're unsure if your egg is cooked to your liking, carefully use a spoon to lift it out of the water. A medium-cooked yolk should be wobbly but firm. If it's still too runny, gently return it to the water for a few more seconds. You can use a spoon to gently lift the egg out and check the texture of the yolk without disturbing it too much.
(Part 4) The Great Escape: Retrieving Your Poached Egg
The moment has come to remove your masterpiece from its watery bath. But be careful, it's time for a delicate dance!
1. The Slotted Spoon Strategy
Use your trusty slotted spoon to gently scoop the egg out of the water. Try to avoid scooping too much water, as this can make the egg soggy. Gently slide the spoon under the egg and lift it out, letting the excess water drain away.
2. The Gentle Drain
Once the egg is on the spoon, gently tilt it over the sink to allow any excess water to drain away. Don't be too rough, you don't want to break that beautiful yolk. Let the water drain naturally, avoiding any sudden movements.
(Part 5) Presentation: A Feast for the Eyes
You've done the hard work, now it's time to showcase your culinary creation. Presentation is key to making your poached eggs look and taste divine. A little bit of effort goes a long way!
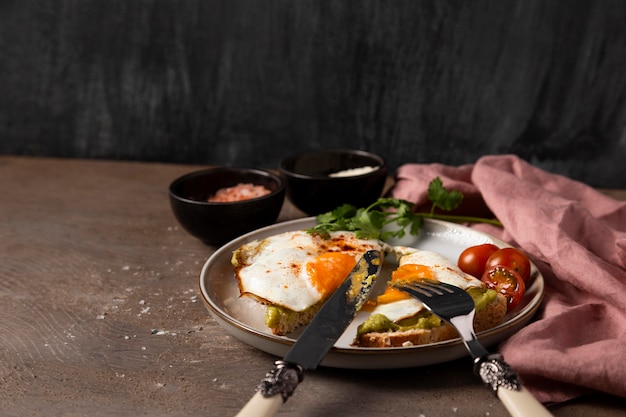
1. The Perfect Plating
A simple, yet elegant presentation will elevate your poached egg to new heights. Choose a plate that complements the dish, and arrange your poached egg on it with care. A clean, white plate will allow the colours of the egg to stand out.
2. The Garnish Game
A touch of greenery always adds a touch of freshness. A sprinkle of fresh herbs, such as parsley or chives, will make your poached eggs look extra fancy. You can also add a few slices of avocado or a dollop of hollandaise sauce for extra flavour and visual appeal.
3. The Accompanying Act
What will your poached egg be playing alongside? A slice of toasted sourdough, some avocado, or a dollop of hollandaise sauce will all make your poached egg sing. Consider a side of sauteed mushrooms, spinach, or smoked salmon for a complete and satisfying breakfast.
(Part 6) FAQs: Unlocking the Poached Egg Mystery
Got any burning questions about poaching eggs? I've got you covered. Here are some common queries and their answers.
1. What if the egg white spreads too much?
If the egg white spreads out too much, it's likely that the water wasn't hot enough when you added the egg. Try adding the egg to the water once it's reached a vigorous simmer. Also, make sure you're using a whisk to create a gentle swirl in the water, which helps to keep the egg white contained.
2. My yolk is too runny!
You can cook your egg for a little longer to achieve a firmer yolk. Just add it back into the simmering water for a few more seconds and test the texture again. If you prefer a firmer yolk, you can poach the egg for longer, up to 5 minutes.
3. How do I prevent the egg from sticking to the bottom of the pan?
The key is to use a non-stick saucepan and make sure the water is simmering gently. If you do notice any bits of egg white clinging to the bottom, use a ladle to gently release them. You can also add a splash of vinegar to the water, which helps to prevent the egg white from spreading out.
4. What's the best way to store leftover poached eggs?
Poached eggs are best eaten fresh. If you do have leftovers, store them in an airtight container in the refrigerator for up to 2 days. They can be reheated in the microwave or gently in a pan over low heat. However, reheating poached eggs can make the yolk a little more rubbery.
5. Why are my poached eggs so rubbery?
If your poached eggs are rubbery, it's likely that the water was too hot. Remember, the key is to maintain a gentle simmer. If the water is boiling too vigorously, the egg white will cook too quickly and become tough.
(Part 7) Poached Egg Variations: Beyond the Basics
Now that you've mastered the basics, let's explore some fun variations on the classic poached egg. These variations will add a touch of excitement to your breakfast routine!
1. The Spiced Poached Egg
Add a touch of flavour to your poached eggs by adding a pinch of your favourite spice to the water. Try a pinch of turmeric for a vibrant yellow hue or a sprinkle of smoked paprika for a smoky aroma. You can also experiment with other spices, such as cumin, coriander, or chili powder.
2. The Herb-Infused Poached Egg
For a fragrant touch, add a few sprigs of fresh herbs to the simmering water. Try thyme, rosemary, or basil for a delightful aromatic twist. These herbs will infuse the egg with their unique flavours and create a truly gourmet experience.
3. The Dressed-Up Poached Egg
Take your poached egg to the next level by adding some delicious toppings. A dollop of hollandaise sauce, a sprinkle of grated cheese, or a drizzle of hot sauce will elevate your breakfast masterpiece. You can also experiment with other toppings, such as sliced avocado, crumbled bacon, or roasted red peppers.
(Part 8) Conclusion: A Poached Egg Revolution
Congratulations! You've just joined the ranks of poached egg masters. With a few simple tips and tricks, you can now create delicious, perfect poached eggs every single time.
So, go forth and conquer your breakfast. And remember, practice makes perfect! The more you poach eggs, the better you'll become at it. You'll soon be wowing your friends and family with your culinary skills!
(Part 9) The Poached Egg Journey: A Table of My Experiences
Looking back on my own journey to poached egg perfection, I've documented my triumphs and mishaps in this table. It's a reminder that even the most experienced cooks have their moments of culinary struggle.
| Attempt | Outcome | Lessons Learned |
|---|---|---|
| 1 | Rubber, misshapen mess | Water too hot, no swirling |
| 2 | Slightly better, but yolk still runny | Not enough time, egg white spread too much |
| 3 | Decent, but yolk was a little too firm | Too much time, egg white cooked too much |
| 4 | Success! Perfectly wobbly yolk, beautiful shape | Perfect temperature, gentle simmer, cold water soak |
As you can see, it took a few tries, but the satisfaction of nailing that perfectly poached egg is truly rewarding. It's a journey, not a sprint! Don't be discouraged if your first few attempts aren't perfect. Keep practicing, and you'll get there eventually!
(Part 10) The Poached Egg Revelation: A Moment of Culinary Enlightenment
The moment I finally cracked the poached egg code, I felt a sense of accomplishment like no other. It wasn't just about the perfect egg; it was about conquering a culinary challenge that had intimidated me for years.
It made me realise that anything is possible in the kitchen, as long as you have the right tools, a bit of patience, and a willingness to learn.
So, my friends, embrace the challenge of the poached egg. It's a journey worth taking. And who knows, you might just discover your own culinary superpowers along the way.
Everyone is watching

Prime Rib Roast Cooking Time Chart: Per Pound Guide
Cooking TipsPrime rib roast. Just the name conjures images of lavish dinners, crackling fires, and hearty laughter. It’s ...

How Long to Bake Potatoes in the Oven (Perfect Every Time)
Cooking TipsBaked potatoes are a staple in my kitchen. They're incredibly versatile, delicious, and surprisingly easy to m...

Perfect Rice Every Time: The Ultimate Guide to Cooking Rice
Cooking TipsAs a self-proclaimed foodie, I've always been a bit obsessed with rice. It's the foundation of countless cuisi...

The Ultimate Guide to Cooking Asparagus: Tips, Techniques, and Recipes
Cooking TipsAsparagus. The mere mention of this spring delicacy conjures up images of vibrant green spears, crisp and burs...

Ultimate Guide to Cooking the Perfect Thanksgiving Turkey
Cooking TipsThanksgiving. Just the word conjures up images of overflowing tables laden with delicious food, the scent of r...