There's a certain satisfaction that comes with cracking open a perfectly cooked hard-boiled egg, isn't there? The yolk, a vibrant yellow, should be firm yet creamy, the white tender and free from any hint of rubberiness. It's a culinary masterpiece that, unfortunately, doesn't always come easily. I've been there, staring at a pot of eggs, the yolk a pale, rubbery mess, the white a tough, unyielding blob. Disastrous!
But over time, I've learned a thing or two about mastering the art of hard-boiling eggs. It's like discovering a secret code, a formula that unlocks the key to perfectly cooked eggs every single time. This is my ultimate guide to cooking time, filled with tips, tricks, and insights gleaned from countless kitchen experiments. So, grab your eggs, your pot, and let's embark on this culinary journey together.
Part 1: Understanding the Science Behind the Perfect Hard-Boiled Egg
Before we delve into the specifics of cooking time, let's first grasp the science behind the magic. The secret lies in the delicate interplay of heat, time, and the protein molecules within the egg. As heat penetrates the egg, the protein molecules start to denature and solidify, leading to the familiar firm texture of a hard-boiled egg. The challenge is to find the sweet spot – achieving the perfect balance where the yolk sets to the desired consistency without becoming dry and rubbery, and the white remains tender and moist.
1.1 Unveiling the Egg's Anatomy
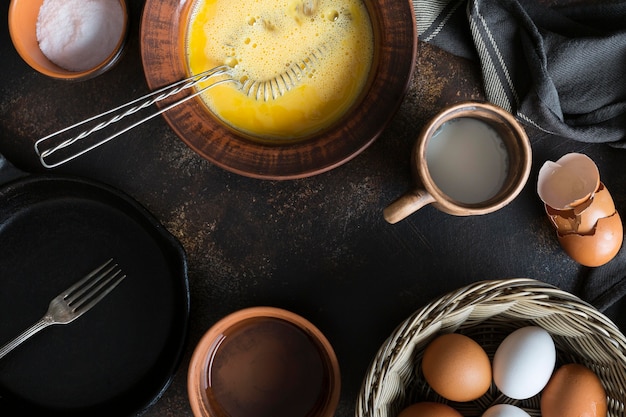
Let's start by getting acquainted with our culinary protagonist: the egg! It might seem deceptively simple, but it actually houses a complex network of proteins. The white, or albumen, is a clear, viscous liquid packed with protein. The yolk, that golden orb in the center, is also brimming with protein, along with fats, vitamins, and minerals. These proteins are the key players in our hard-boiling quest. It's their transformation, from liquid to solid, that determines the texture of our finished product.
1.2 The Role of Temperature in Hard-Boiling
The temperature of the water is the conductor of this protein transformation. The higher the temperature, the faster the proteins denature and solidify. But be warned, excessive heat can lead to a dry, rubbery yolk, a texture that's anything but delightful. To achieve the perfect balance, we need to strike the right chord between temperature and time.
1.3 The Importance of Time in the Hard-Boiling Process
Just like with most things in life, time is crucial in the world of hard-boiled eggs. The duration of the cooking process determines the degree of protein denaturation. A shorter cooking time will result in a softer yolk and a more tender white. Longer cooking times, on the other hand, lead to a firmer yolk and a tougher white. It's a delicate dance we need to master!
Part 2: choosing the right eggs for Hard-Boiling
Before you even think about the cooking time, you need to choose the right eggs. Just like with any ingredient, the quality of the egg directly impacts the end result.
2.1 Freshness Makes a Difference
I always advocate for using fresh eggs for the best results. Fresh eggs, with their firm whites and bright yolks, are more likely to yield a smooth, creamy texture. Older eggs, however, tend to have thinner whites and looser yolks, which can lead to a rubbery texture. Don't despair! You can still use older eggs, but you might need to adjust the cooking time slightly.
2.2 egg size and Shape: A Factor to Consider
Believe it or not, the size and shape of the egg can also affect the cooking time. Larger eggs, with their larger volume of white and yolk, naturally take longer to cook through. Smaller eggs, on the other hand, require less cooking time. It's all about finding that perfect balance to achieve that ideal texture.
Part 3: The Art of Bringing Eggs to Room Temperature
This might seem like a small detail, but bringing your eggs to room temperature before cooking makes a world of difference. It helps ensure even cooking and reduces the risk of cracking.
3.1 Why Room Temperature is Key
Cold eggs, when suddenly plunged into boiling water, can experience thermal shock, causing the shell to crack and potentially leaking egg white into the water. This can lead to uneven cooking and a less appealing final product. By bringing the eggs to room temperature, you eliminate this risk and allow the heat to penetrate the egg more evenly. It's all about creating a more harmonious cooking environment.
3.2 How to Bring Eggs to Room Temperature
Simply remove the eggs from the refrigerator about 30 minutes before you plan to cook them. If you're short on time, you can also run them under cold water for a few minutes. This will help to warm them up slightly.
Part 4: The Perfect Cooking Time: A Step-by-Step Guide
Now, let's get down to the heart of the matter - the ultimate guide to achieving perfectly cooked hard-boiled eggs. This method, tried and tested countless times, delivers consistently delicious results.
4.1 Gathering Your Supplies: A Culinary Checklist
Before you begin, make sure you have the following:
- Eggs (the number depends on your needs)
- Large saucepan
- Cold water
- Ice water
- Slotted spoon or strainer
4.2 The Boiling Process: A Step-by-Step Guide
Follow these steps meticulously for perfect results:
- Fill the saucepan with enough cold water to cover the eggs by at least an inch.
- Bring the water to a rolling boil over high heat.
- Carefully place the eggs in the boiling water using a slotted spoon or strainer.
- Immediately reduce the heat to a gentle simmer.
- Cover the saucepan with a lid.
4.3 The Timing is Crucial: Achieving Your Desired Texture
This is where my years of experimentation come into play. The ideal cooking time depends on your desired level of doneness. Here's a table outlining the recommended cooking times for different yolk consistencies:
| Yolk Consistency | Cooking Time |
|---|---|
| Soft yolk, very runny | 3 minutes |
| Soft yolk, slightly runny | 4 minutes |
| Soft yolk, creamy | 5 minutes |
| Hard yolk, firm but still creamy | 6 minutes |
| Hard yolk, firm and slightly dry | 7 minutes |
| Hard yolk, very firm and dry | 8 minutes |
4.4 The ice bath: A Crucial Step for Texture
Once the desired cooking time has elapsed, immediately drain the hot water from the saucepan and submerge the eggs in a bowl of ice water. This abrupt temperature change stops the cooking process and prevents the yolks from overcooking. Allow the eggs to cool in the ice bath for at least 10 minutes.
4.5 Peel, Serve, and Enjoy!
After cooling, gently peel the eggs under cold running water. The shell should slip off easily, revealing that perfect hard-boiled egg. And there you have it! Perfectly cooked hard-boiled eggs, ready to be enjoyed in all their glory.
Part 5: Mastering the Art of Peeling: A Guide to Effortless Removal
peeling hard-boiled eggs can be a frustrating experience, especially if you're not careful. The shell can stick to the white, resulting in a messy, unevenly peeled egg. But fret not, my friends, for I've discovered a few tricks that make peeling a breeze.
5.1 The Importance of Fresh Eggs in Peeling
As mentioned earlier, using fresh eggs is crucial for a smooth peeling experience. Fresh eggs have a firmer white, which makes it easier for the shell to separate cleanly.
5.2 The Tap-and-Roll Method: A Classic for a Reason
This tried-and-true method is a lifesaver. After cooling the eggs in the ice bath, gently tap the rounded end of each egg on a hard surface, like a countertop. This creates tiny cracks in the shell. Then, roll the egg between your palms, applying gentle pressure. The cracks will widen, making peeling much easier. It's like a mini massage for your eggs!
5.3 The Spoon Trick: A Helpful Tool
If the shell is still stubbornly clinging to the white, grab a teaspoon and gently insert it under the shell at the top of the egg. Pry the shell away from the white, working your way down the egg.
5.4 Peeling Under Water: A Lubricating Solution
Sometimes, peeling the egg under cold running water can help loosen the shell. The water acts as a lubricant, making it easier to separate the shell from the white.
Part 6: Common Mistakes to Avoid: Ensuring a Smooth Hard-Boiling Experience
Even with the best intentions, we can sometimes make mistakes. Here are a few common pitfalls to avoid:
6.1 Overcooked Eggs: A Common Issue
Overcooked eggs have a dry, rubbery yolk and a tough, chewy white. To avoid this, stick to the recommended cooking times, and always err on the side of caution.
6.2 Cracking Eggs During Cooking: Preventing Messes
Cracked eggs during cooking can be a real mess. To prevent this, bring the eggs to room temperature before cooking and add them gently to the boiling water.
6.3 Not Cooling the Eggs Properly: A Crucial Step
Failure to cool the eggs properly after cooking can result in overcooked yolks. Make sure to submerge the eggs in an ice bath immediately after removing them from the boiling water.
6.4 Using Old Eggs: Affecting Texture
Old eggs tend to have thinner whites and looser yolks, which can lead to a rubbery texture. If you're using older eggs, adjust the cooking time accordingly.
Part 7: Exploring Different Recipes: Hard-Boiled Eggs Beyond the Basics
Hard-boiled eggs are incredibly versatile, offering endless culinary possibilities. Here are a few ideas to get you started:
7.1 classic deviled eggs: A Time-Honored Treat
A classic for a reason! Deviled eggs are a delightful party appetizer, creamy and tangy, with a satisfying crunch. They're a crowd-pleaser, always a hit at gatherings.
7.2 egg salad Sandwiches: A Simple Yet Delicious Option
Perfect for a quick and easy lunch or snack, egg salad sandwiches are a delightful combination of creamy egg salad and crispy bread. They're the perfect on-the-go meal, packed with protein and flavor.
7.3 Egg and potato salad: A Comforting Classic
A satisfying and comforting dish, egg and potato salad is a staple for potlucks and picnics. It's a great way to use up leftover hard-boiled eggs, and it's always a crowd favorite.
7.4 Nicoise Salad: A French Delight
This elegant salad features hard-boiled eggs, tuna, olives, and fresh vegetables, a delightful and refreshing combination. It's a lighter option that's both flavorful and satisfying.
7.5 Eggs as a Garnish: Adding Color and Texture
Hard-boiled eggs add a burst of color and protein to salads, soups, and other dishes. They're a great way to add a touch of elegance and nutrition to your meals.
Part 8: FAQs: Addressing Common Hard-Boiled Egg Questions
Now, let's address some common questions about hard-boiling eggs:
8.1 How do I know if my eggs are fresh?
You can test the freshness of an egg by placing it in a bowl of cold water. A fresh egg will sink to the bottom, while an older egg will float. This simple test can help you choose the best eggs for hard-boiling.
8.2 Can I hard-boil eggs in the microwave?
While possible, it's not recommended. Microwaving eggs can lead to uneven cooking and potentially explode, which is a safety hazard. Stick to the traditional stovetop method for safer and more consistent results.
8.3 Can I reuse the water for cooking other things?
It's not recommended. The water used for hard-boiling eggs can have a sulfurous odor, which can affect the taste of other foods. It's best to use fresh water for other cooking purposes.
8.4 How long can I store hard-boiled eggs in the refrigerator?
Hard-boiled eggs can be stored in the refrigerator for up to a week. However, the yolk will gradually become more dry and rubbery over time. It's best to enjoy them fresh for the optimal texture and flavor.
8.5 What are the best hard-boiled eggs for deviled eggs?
For deviled eggs, a medium-sized egg with a firm yolk is ideal. This ensures a creamy, smooth texture when mashed. It's a simple tip that can elevate your deviled eggs to a new level of deliciousness.
There you have it, folks! My ultimate guide to hard-boiling eggs, a compilation of tips, tricks, and insights gleaned from years of culinary exploration. With this knowledge in hand, you'll be well on your way to achieving perfect hard-boiled eggs every single time. So go forth, experiment, and enjoy the deliciousness!
Everyone is watching

Prime Rib Roast Cooking Time Chart: Per Pound Guide
Cooking TipsPrime rib roast. Just the name conjures images of lavish dinners, crackling fires, and hearty laughter. It’s ...

How Long to Bake Potatoes in the Oven (Perfect Every Time)
Cooking TipsBaked potatoes are a staple in my kitchen. They're incredibly versatile, delicious, and surprisingly easy to m...

Perfect Rice Every Time: The Ultimate Guide to Cooking Rice
Cooking TipsAs a self-proclaimed foodie, I've always been a bit obsessed with rice. It's the foundation of countless cuisi...

The Ultimate Guide to Cooking Asparagus: Tips, Techniques, and Recipes
Cooking TipsAsparagus. The mere mention of this spring delicacy conjures up images of vibrant green spears, crisp and burs...

Ultimate Guide to Cooking the Perfect Thanksgiving Turkey
Cooking TipsThanksgiving. Just the word conjures up images of overflowing tables laden with delicious food, the scent of r...