You're staring at a raw chicken breast, a blank canvas for your next culinary masterpiece. But there's a question lingering in the back of your mind: How long does it take to bake a chicken breast at 350 degrees, and how can I ensure it comes out juicy and tender? As a seasoned cook with countless chicken breast adventures under my belt, I'm here to guide you through the process, sharing tips, tricks, and insights I've gathered over the years.
We'll embark on a culinary journey, starting with the fundamental steps of choosing the right chicken breasts and prepping them for a perfect bake. Then, we'll tackle the all-important question of baking time, considering factors like size, thickness, and even the type of baking method. We'll explore different approaches, from simple baking dishes to more sophisticated techniques using foil or parchment paper. And of course, we'll delve into the art of seasoning, unlocking flavour combinations that will elevate your chicken breast from ordinary to extraordinary.
But wait, there's more! We'll also dive into the crucial aspect of checking for doneness, ensuring your chicken is cooked through and safe to eat. And to finish off, we'll tackle common questions you might have about leftover chicken, reheating, and even freezing. So, grab a comfy seat, get ready to take notes, and let's embark on this chicken-baking adventure together!
Part 1: Choosing the Right Chicken Breast
1.1 Fresh or Frozen? The Great Debate
Let's be honest, we've all been there – staring at the frozen food aisle on a busy weeknight, desperately searching for a quick dinner solution. frozen chicken breasts can be a lifesaver, especially when time is tight. But if you have the luxury of planning ahead, fresh chicken breasts are the way to go! They boast a superior flavour and texture, often juicier and more tender. Just be sure to sniff them - a fresh chicken breast should smell clean and slightly sweet, not sour or off-putting.
1.2 Bone-in or Boneless, Skin-on or Skin-off?
This decision is entirely up to your personal preference and culinary goals. Bone-in chicken breasts, while taking a bit longer to cook, often retain more moisture because the bone acts like a natural heat conductor, helping to lock in the juices. Skin-on chicken breasts are a delicious choice for those who crave crispy skin and the added flavour it brings. But if you're watching your calorie intake, boneless, skinless chicken breasts are the way to go. Just remember, these cook faster, so adjust your baking time accordingly.
1.3 Size Matters: It's Not Just About the Chicken
Chicken breasts come in all shapes and sizes, and their size plays a crucial role in determining the baking time. Larger, thicker breasts need more time to cook through, while thinner, smaller breasts will be done more quickly. Make sure to assess the thickness of your chicken breasts before you start baking. It's all about finding that sweet spot – perfectly cooked, juicy chicken, without any dry, tough bits.
Part 2: Prepping Your Chicken Breasts for Success
2.1 The Importance of Patting Dry: It's All About the Skin
This step is crucial, my friend! Patting your chicken breasts dry with paper towels before placing them in the oven is key to achieving even cooking and, if you're keeping the skin on, a beautifully crisp skin. A damp surface can lead to steaming, resulting in soggy skin and uneven cooking. So grab those paper towels and give those chicken breasts a good pat!
2.2 Seasoning Secrets: Unleashing Flavour
Now, this is where the fun begins! Seasoning is an art form, and there's no right or wrong answer. Get creative and experiment with different combinations. You can keep it simple with salt and pepper, or explore more adventurous flavour profiles using herbs, spices, and even citrus zest. Here are some of my personal favourite flavour combinations:
- Classic: Salt, pepper, garlic powder, onion powder - a tried-and-true combination for a reason.
- Mediterranean: Dried oregano, thyme, lemon zest, salt, pepper - this combination adds a touch of bright and fresh flavour.
- Spicy: Paprika, cayenne pepper, garlic powder, onion powder, salt, pepper - for those who enjoy a little heat.
- Italian: Dried basil, oregano, garlic powder, salt, pepper - evokes the flavours of Italy.
No matter what flavour profile you choose, remember to rub the seasoning into the chicken breast, ensuring it's evenly coated on both sides.
2.3 Don't Forget the Fat: A Key to Juiciness
A little bit of fat goes a long way when it comes to keeping chicken breasts moist and juicy during baking. You can add a tablespoon or two of butter or olive oil to the bottom of your baking dish, or simply rub a thin layer directly onto the chicken breasts. The fat helps to create a barrier that prevents moisture loss, resulting in a tender, flavorful chicken breast.
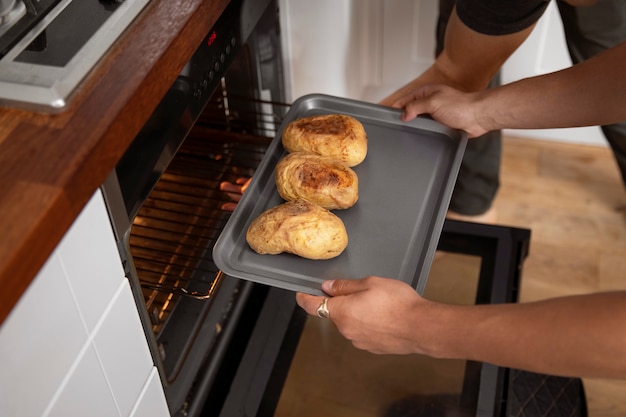
Part 3: Baking Your Chicken Breast at 350 Degrees

3.1 The Magic Number: 350 degrees fahrenheit (175 Degrees Celsius)
This is the gold standard temperature for baking chicken breasts, ensuring even cooking without over-browning. But remember, the baking time will vary depending on the size and thickness of the breasts, so be prepared to adjust accordingly.
3.2 The Baking Time Breakdown: A Rough Guide
Here's a rough guide for baking times at 350 degrees, but always remember, these are just estimates. The best way to ensure your chicken breasts are cooked through is to check the internal temperature with a meat thermometer.
| Size and Thickness of Chicken Breast | Baking Time (Approximate) |
|---|---|
| Thin (less than 1 inch thick) | 20-25 minutes |
| Medium (1-1.5 inches thick) | 25-30 minutes |
| Thick (1.5 inches or more) | 30-35 minutes |
However, keep in mind that these are just general guidelines. If you're baking multiple chicken breasts at once, the baking time might need to be adjusted slightly. It's always better to err on the side of caution and check the internal temperature.
3.3 Oven Placement: The Key to Even Cooking
The position of your baking dish in the oven can significantly affect how evenly your chicken breasts cook. Place your baking dish in the middle rack of your oven, ensuring it's not too close to the heating elements. This will help to ensure that all sides of the chicken breast cook at a consistent temperature.
Part 4: Baking Methods: Exploring Different Approaches
4.1 Simple Baking Dish: The Classic Approach
This method is straightforward and perfect for beginners. Place your seasoned chicken breasts in a baking dish, making sure they're not crowded. You can add a tablespoon or two of butter or olive oil to the bottom of the dish for added moisture. Bake until cooked through, checking the internal temperature with a meat thermometer.
4.2 Baking with Foil or Parchment Paper: For a Mess-Free Experience
If you're looking for a less messy option, try baking your chicken breasts in foil or parchment paper. Simply wrap each breast individually in foil or parchment paper, ensuring it's sealed tightly. This creates a steamy environment, helping to keep the chicken breast juicy and tender. Just be careful when opening the foil or parchment paper after baking, as it will be very hot.
4.3 Inverting for Crispy Skin: Achieving a Delicious Crunch
Craving a crispy skin on your chicken breast? You can try inverting the chicken breasts halfway through the cooking process. This involves flipping the chicken breasts over so the skin is facing downwards. This allows the exposed skin to crisp up beautifully in the oven. Just be careful not to overcook the chicken on the underside.
Part 5: Checking for Doneness: Ensuring Safety and Perfection
5.1 The Internal Temperature Test: The Golden Standard
The best way to know for sure if your chicken breasts are cooked through is to use a meat thermometer. The internal temperature should reach 165 degrees Fahrenheit (74 degrees Celsius) for safe consumption. If it's lower than that, pop those chicken breasts back in the oven for a few more minutes, checking the temperature again every few minutes.
5.2 The Visual Check: A Helpful Backup
If you don't have a meat thermometer, you can also check the chicken breast by slicing it open. The chicken should be white all the way through, with no pinkness left. If there's any pinkness, it needs to be cooked a little longer.
Part 6: Serving and Storage: Maximizing Your Chicken Breast
6.1 Rest Before Serving: Let Those Juices Redistribute
Once your chicken breasts are cooked through, resist the urge to dive right in. Let them rest for 5-10 minutes before slicing and serving. This allows the juices to redistribute throughout the chicken, resulting in a more tender and juicy piece of meat.
6.2 Leftovers: Storage and Reheating
Got leftovers? No problem! Store them in an airtight container in the refrigerator for up to 4 days. To reheat, you can microwave them, bake them, or pan-fry them. Just make sure to heat them thoroughly until they reach an internal temperature of 165 degrees Fahrenheit (74 degrees Celsius) to ensure safety.
Part 7: Tips and Tricks: Elevate Your Chicken Breast Game
7.1 Keep it Moist: Protecting Against Dryness
To prevent your chicken breast from drying out, try adding a small amount of liquid to your baking dish. You can use broth, wine, or even a simple mixture of water and lemon juice. This will create a steamy environment that helps to keep the chicken moist.
7.2 Don’t Overcrowd: Giving Your Chicken Space to Breathe
Make sure there's enough space between your chicken breasts in the baking dish. Overcrowding can lead to uneven cooking and soggy chicken.
7.3 Keep an Eye on the Skin: Achieving that Perfect Crisp
If you're baking skin-on chicken breasts, keep an eye on the skin as it cooks. You might need to adjust the baking time if you want crispy skin. You can also try flipping the chicken breasts over halfway through the cooking process to achieve crispy skin on both sides.
Part 8: FAQs: Addressing Common Questions
8.1 How long should I bake chicken breasts at 350 degrees?
The baking time for chicken breasts at 350 degrees depends on their size and thickness. Thin chicken breasts (less than 1 inch thick) will take around 20-25 minutes, medium-sized breasts (1-1.5 inches thick) will take about 25-30 minutes, and thick breasts (1.5 inches or more) will need 30-35 minutes. However, always check the internal temperature to ensure they’re cooked through.
8.2 Can I bake chicken breasts at a lower temperature?
Yes, you can bake chicken breasts at a lower temperature, but it will take longer. For example, if you bake them at 325 degrees Fahrenheit (160 degrees Celsius), it will take about 30-40 minutes for thin breasts, 40-50 minutes for medium-sized breasts, and 50-60 minutes for thick breasts.
8.3 What can I do with leftover cooked chicken breasts?
leftover chicken breasts are a versatile ingredient! You can use them in salads, sandwiches, soups, stir-fries, or even pizza. You can also shred them and use them in chicken salad or other recipes.
8.4 Can I freeze cooked chicken breasts?
Yes, you can freeze cooked chicken breasts. Let them cool completely, then wrap them tightly in plastic wrap or aluminum foil. Place them in a freezer-safe bag or container and freeze for up to 3 months.
8.5 How can I reheat cooked chicken breasts without drying them out?
To reheat cooked chicken breasts without drying them out, try baking them in a 350 degree oven for about 10-15 minutes. You can also reheat them in a pan with a little bit of butter or olive oil. Avoid microwaving them, as this can dry them out.
And there you have it! Your comprehensive guide to baking chicken breast at 350 degrees, packed with tips, tricks, and insights to help you create a delicious, juicy, and perfectly cooked chicken breast every time. Remember, practice makes perfect, so get out there, experiment with different flavours, and discover your own perfect baked chicken breast recipe. And hey, if you run into any snags or have any questions, don’t hesitate to reach out! Happy cooking!
Everyone is watching

Prime Rib Roast Cooking Time Chart: Per Pound Guide
Cooking TipsPrime rib roast. Just the name conjures images of lavish dinners, crackling fires, and hearty laughter. It’s ...

How Long to Bake Potatoes in the Oven (Perfect Every Time)
Cooking TipsBaked potatoes are a staple in my kitchen. They're incredibly versatile, delicious, and surprisingly easy to m...

Perfect Rice Every Time: The Ultimate Guide to Cooking Rice
Cooking TipsAs a self-proclaimed foodie, I've always been a bit obsessed with rice. It's the foundation of countless cuisi...

The Ultimate Guide to Cooking Asparagus: Tips, Techniques, and Recipes
Cooking TipsAsparagus. The mere mention of this spring delicacy conjures up images of vibrant green spears, crisp and burs...

Ultimate Guide to Cooking the Perfect Thanksgiving Turkey
Cooking TipsThanksgiving. Just the word conjures up images of overflowing tables laden with delicious food, the scent of r...