Let's face it, sometimes you just crave those crispy, juicy chicken strips. But who wants to deal with the mess and hassle of deep frying? I know I don't! So, I've been on a quest to find the ultimate oven-baked chicken strip recipe, and let me tell you, I finally cracked the code. This recipe is seriously easy, even if you're a cooking newbie, and it delivers that irresistible crunch without all the unhealthy grease. Get ready to discover the joy of oven-baked chicken strips that are just as good, if not better, than their deep-fried counterparts.
Part 1: My Journey to Crispy Perfection
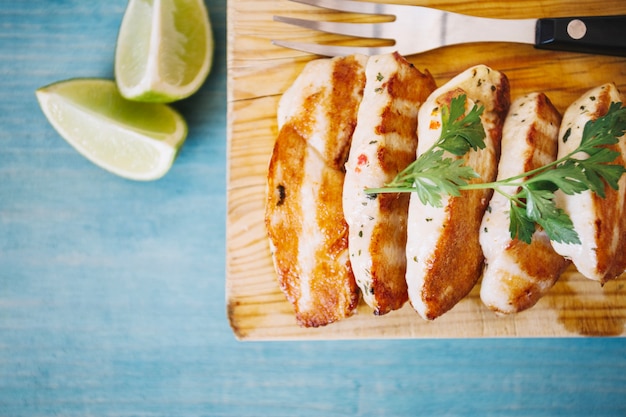
My love affair with chicken strips started at a young age. I'd devour those crispy bites at fast food joints, never realizing the secret behind their irresistible crunch was a deep fryer. But as I got older, the allure of deep frying faded. It felt like a lot of work, not to mention the mess! I tried a few oven-baked recipes, but they always ended up dry and bland. It was a real bummer, let me tell you. Then, one day, while browsing my favorite food blog, I stumbled upon a recipe that promised perfect crispy oven-baked chicken strips. I was skeptical, but I decided to give it a go, and let's just say, my taste buds were singing! It was a revelation! It was crispy on the outside, juicy on the inside, and bursting with flavor. The secret? A simple breadcrumb coating with a touch of magic. And guess what? I'm about to share it with you!
Part 2: Ingredients You'll Need
What you'll need for the chicken strips:
First things first, you'll need some good-quality chicken breasts. I prefer boneless, skinless ones, as they're easy to work with and cook evenly. And make sure to pat them dry before you start - we want those chicken strips nice and crisp, not soggy!
- Chicken: About 1 pound boneless, skinless chicken breasts, cut into strips about 1 inch thick and 2-3 inches long.
- Eggs: 2 large eggs, beaten. A simple but crucial ingredient for binding the breadcrumbs to the chicken.
- Milk: 1/4 cup milk (you can use regular, almond, soy, or whatever you have on hand). Milk adds moisture and helps the coating stick.
- Salt: 1 teaspoon salt (you can add more to taste, but I find 1 teaspoon is plenty). Salt brings out the flavor of the chicken.
- Black pepper: 1/2 teaspoon black pepper (feel free to experiment with different types of pepper, too!). Black pepper adds a subtle bite.
- Garlic powder: 1/2 teaspoon garlic powder (optional, but it adds a lovely punch of flavor). Garlic powder adds a savory, aromatic touch.
- Paprika: 1/2 teaspoon paprika (for a bit of warmth and color). Paprika adds a subtle sweetness and a beautiful reddish hue to the chicken.
- Breadcrumbs: 1 cup breadcrumbs (you can use plain or seasoned breadcrumbs. I like to use a mix of panko and regular breadcrumbs for extra crunch). Breadcrumbs form the crispy crust.
- Parmesan cheese: 1/4 cup grated Parmesan cheese (optional, but I highly recommend it. It gives the chicken strips a cheesy flavor and extra crispiness). Parmesan adds a salty, cheesy kick and helps create an even crispier crust.
Extra bits and bobs:
- Baking sheet: You'll need a baking sheet lined with parchment paper. This prevents sticking and makes for easy cleanup.
- Wire rack: A wire rack is handy for letting the chicken strips cool and crisp up. This helps to ensure that the chicken strips stay crispy, even after they're out of the oven.
Part 3: Let's Get Cooking!
Step 1: Prepare the Chicken
Alright, let's get those chicken breasts ready for their transformation! Lay them out on a cutting board and slice them into strips. You want them to be about 1 inch thick and 2-3 inches long. You can go for thicker or thinner strips depending on your preference, but keep them consistent so they cook evenly. This ensures that all the strips cook through at the same rate.
Now, grab a shallow dish and pour in your beaten eggs. Add the milk, salt, pepper, garlic powder, and paprika. Whisk it all together until it's nice and smooth. This mixture will help bind the breadcrumbs to the chicken and infuse it with flavor.
Step 2: Dip, Dip, Dip!
This is where the fun begins! Dip each chicken strip into the egg mixture, making sure it's fully coated. Then, gently press it into the breadcrumbs, coating it generously. You want a good, even layer of breadcrumbs all over. This ensures that the chicken strips are evenly coated and develop a beautiful crispy crust.
Repeat this process with all the chicken strips, making sure to press the breadcrumbs firmly against the chicken. This will help them stick during baking and prevent them from falling off.
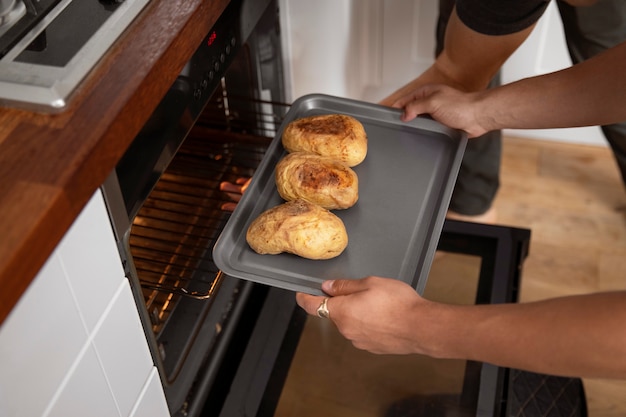
Step 3: Bake 'em Up!
Preheat your oven to 400 degrees Fahrenheit (200 degrees Celsius). While your oven is getting hot, arrange the chicken strips on a baking sheet lined with parchment paper. Leave some space between the strips so they have room to cook evenly. You can bake them in a single layer, or if you've got a ton of chicken strips, you can bake them in two batches. Just make sure to keep an eye on them!
Baking at a high temperature ensures that the chicken strips cook quickly and develop a crispy exterior.
Step 4: Bake and Enjoy!
Slide your chicken strips into the oven and bake for about 20-25 minutes. It's tempting to peek, but resist the urge for the first 15 minutes. Let those chicken strips get nice and golden brown. The baking time will depend on the thickness of your strips, but 20-25 minutes is a good starting point.
Once they're done, remove them from the oven and place them on a wire rack to cool and crisp up for a few minutes. This allows the chicken strips to cool and become even crispier. And that's it! You've officially created the most delicious oven-baked chicken strips ever.
Part 4: Tips for Oven Baked Chicken Strips
Now that you've got the basic recipe down, here are a few extra tips to help you create the perfect crispy chicken strips:
- Don't overcrowd the baking sheet: Give those chicken strips some breathing room! If they're too close together, they won't bake evenly and they might end up soggy. This allows for proper air circulation and prevents the chicken strips from steaming, ensuring a crispy result.
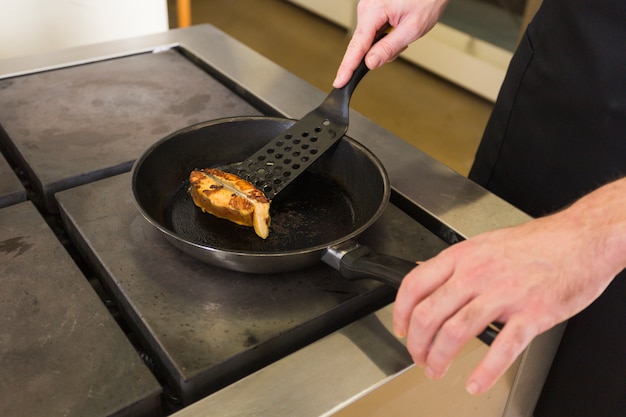
- Flip those chicken strips halfway through: This ensures that both sides get crispy and golden brown. You'll know when they're ready when they're golden brown and cooked through. Use a meat thermometer to check the internal temperature, which should be at least 165 degrees Fahrenheit (74 degrees Celsius).
- Experiment with your breadcrumbs: Want to add a bit of flavor? Try adding some herbs and spices to your breadcrumbs. Some of my favorites include Italian seasoning, garlic powder, onion powder, or even a little bit of cayenne pepper for a bit of heat. These additions will add a layer of complexity and intrigue to your chicken strips.
- Get creative with dipping sauces: Okay, so you've got your crispy chicken strips, but what about the dipping sauces? Get adventurous! Try a creamy ranch dip, a tangy honey mustard sauce, a spicy sriracha mayo, or even a classic bbq sauce. These sauces will enhance the flavor of your chicken strips and provide a delightful contrast.
- Make ahead: These chicken strips are perfect for meal prep! You can cook them in advance and store them in the fridge for up to 3 days. Just reheat them in the oven or microwave before serving. This is a great way to save time during busy weeks and have a delicious meal ready to go.
Part 5: Variations on the Theme
The beauty of this recipe is its flexibility. You can mix and match all sorts of different flavors and toppings to make your own unique chicken strip creation! Here are a few ideas to get you started:
Spicy Chicken Strips:
Add a pinch of cayenne pepper or paprika to your breadcrumb mixture for a fiery kick. If you like things really hot, you can even toss in some chopped jalape??os. This variation is perfect for spice lovers who want to add some heat to their meal.
Parmesan Chicken Strips:
Sprinkle a generous amount of grated Parmesan cheese over your chicken strips before baking for a cheesy, salty crunch. Parmesan adds a wonderful savory depth and a beautiful golden brown color to the chicken strips.
Garlic Herb Chicken Strips:
Combine some chopped garlic, fresh herbs like parsley, oregano, and thyme, and a pinch of salt and pepper into your breadcrumb mixture. This variation is perfect for those who enjoy a flavorful and aromatic garlic herb combination.
Honey BBQ Chicken Strips:
After baking, brush the chicken strips with a sticky honey BBQ sauce. Bake them for a few more minutes to let the sauce caramelize. This variation is perfect for those who love sweet and savory flavors. The honey BBQ sauce adds a touch of sweetness and a delicious glaze to the chicken strips.
Asian-Inspired Chicken Strips:
Add some ginger, garlic, and soy sauce to your egg mixture, and use panko breadcrumbs for a crispy, light texture. Serve with a sweet chili dipping sauce. This variation is perfect for those who enjoy Asian-inspired flavors. The ginger, garlic, and soy sauce add a unique aromatic touch, while the panko breadcrumbs create a light and airy texture. The sweet chili dipping sauce provides a delightful balance of sweet and spicy flavors.
Buffalo Chicken Strips:
Toss the cooked chicken strips in a spicy buffalo wing sauce for a tangy and fiery treat. This variation is perfect for those who love the classic buffalo wing flavor. The buffalo wing sauce adds a tangy and spicy kick that is sure to satisfy.
Part 6: Serving Suggestions
Now that you've got your crispy, delicious chicken strips ready, it's time to think about how to serve them up. Here are a few ideas to get those creative juices flowing:
For a Casual Lunch or Dinner:
Pair your chicken strips with some creamy mashed potatoes, a simple green salad, and a dollop of your favorite dipping sauce. This is a classic combination that is always a crowd-pleaser. The mashed potatoes provide a comforting base, the salad adds a refreshing touch, and the dipping sauce enhances the flavor of the chicken strips.
For a Fun Party Appetizer:
Serve your chicken strips with a variety of dipping sauces for a crowd-pleasing appetizer. Think ranch, honey mustard, sriracha mayo, and BBQ sauce. This is a great way to feed a crowd and provide everyone with their favorite dipping sauce.
For a Hearty Meal:
Serve your chicken strips with a side of rice, a colorful vegetable stir-fry, and a tangy Asian-inspired sauce. This is a satisfying and healthy meal that is sure to please. The rice provides a filling base, the vegetable stir-fry adds nutrients and color, and the tangy Asian-inspired sauce adds a delicious touch.
For a Light and Healthy Meal:
Pair your chicken strips with a bed of greens, a sprinkle of nuts, and a light vinaigrette dressing. This is a light and refreshing meal that is perfect for a healthy lunch or dinner. The greens provide a base, the nuts add crunch and protein, and the vinaigrette dressing adds a tangy touch.
Part 7: Storing and Reheating Your Chicken Strips
Okay, so you've made a whole batch of these amazing chicken strips, but you're not planning on eating them all at once (although, I wouldn't blame you if you did!). Here's how to store them properly and reheat them later:
Storing:
Once the chicken strips have cooled down completely, transfer them to an airtight container and store them in the fridge for up to 3 days. You can also freeze them for up to 2 months. Just make sure to wrap them well in plastic wrap or foil to prevent freezer burn. This prevents the chicken strips from drying out and ensures that they stay fresh.
Reheating:
To reheat your chicken strips, you can either bake them in the oven at 350 degrees fahrenheit (175 degrees Celsius) for about 10 minutes, or microwave them for 1-2 minutes. If you're reheating from frozen, you'll need to bake them for a bit longer, about 15-20 minutes. This ensures that the chicken strips are heated through and remain crispy.
Part 8: The Importance of Oven-Baked Chicken Strips
Let's be honest, we all love a good deep-fried treat, but those crispy chicken strips you get at the takeaway are often loaded with unhealthy fats. This is where oven-baked chicken strips come in! They're a much healthier alternative to their deep-fried counterparts, because they're baked instead of fried. This means they're lower in calories and fat, but still super delicious and satisfying.
You can also control the ingredients and seasonings, so you can make sure they're healthy and flavorful. And best of all, you can enjoy them guilt-free!
Part 9: FAQs
1. Can I use chicken tenders instead of chicken breasts?
Absolutely! Chicken tenders are a great alternative to chicken breasts. Just make sure you cut them into strips that are about 1 inch thick and 2-3 inches long. This ensures that the chicken tenders cook evenly and develop a crispy crust.
2. Can I use a different type of breadcrumb?
Yes! You can use any type of breadcrumb you like, but I recommend using panko breadcrumbs for a light, crispy texture. Panko breadcrumbs are larger and lighter than regular breadcrumbs, which results in a crispier and more airy texture.
3. What are some other dipping sauces I can try?
The possibilities are endless! Try ranch, honey mustard, sriracha mayo, BBQ sauce, blue cheese dressing, sweet chili sauce, or even a simple marinara sauce. There's a dipping sauce out there for every taste!
4. Can I bake the chicken strips at a different temperature?
Yes, you can bake the chicken strips at a lower temperature, but it will take longer to cook. Just make sure the internal temperature reaches 165 degrees Fahrenheit (74 degrees Celsius) for safe consumption. Baking at a lower temperature might result in a less crispy texture, but it's still a viable option.
5. Can I freeze the cooked chicken strips?
Yes, you can freeze cooked chicken strips. Just make sure to wrap them well in plastic wrap or foil to prevent freezer burn. They'll last in the freezer for up to 2 months. This is a great way to have a quick and easy meal ready to go whenever you need it.
Part 10: Oven-Baked Chicken Strips: A Lifesaver!
So, there you have it – my go-to oven-baked chicken strip recipe! It's simple, adaptable, and oh-so-delicious. Whether you're looking for a quick and easy lunch, a crowd-pleasing appetizer, or a healthy dinner option, this recipe is a real lifesaver. It's easy to prepare, healthy, and delicious, making it a perfect choice for any occasion.
Remember, the key to crispy oven-baked chicken strips is using a good breadcrumb coating and baking them at a high temperature. With a little bit of practice, you'll be making perfect chicken strips every time.
Now go forth and conquer the world of chicken strips! And please, don't forget to share your creations with me. I'd love to hear your feedback and see what delicious concoctions you come up with!
Part 11: A Final Word on Chicken Strips
Okay, I'm going to be honest – chicken strips have always been a bit of a guilty pleasure for me. I mean, who can resist those crispy, juicy bites? They're just so good! But the problem is, they're often loaded with unhealthy fats and calories. This recipe is a game changer. You can enjoy your favorite chicken strips guilt-free and without sacrificing flavor or texture!
So, go on – give it a try and let me know what you think!
Everyone is watching

Prime Rib Roast Cooking Time Chart: Per Pound Guide
Cooking TipsPrime rib roast. Just the name conjures images of lavish dinners, crackling fires, and hearty laughter. It’s ...

How Long to Bake Potatoes in the Oven (Perfect Every Time)
Cooking TipsBaked potatoes are a staple in my kitchen. They're incredibly versatile, delicious, and surprisingly easy to m...

Perfect Rice Every Time: The Ultimate Guide to Cooking Rice
Cooking TipsAs a self-proclaimed foodie, I've always been a bit obsessed with rice. It's the foundation of countless cuisi...

The Ultimate Guide to Cooking Asparagus: Tips, Techniques, and Recipes
Cooking TipsAsparagus. The mere mention of this spring delicacy conjures up images of vibrant green spears, crisp and burs...

Ultimate Guide to Cooking the Perfect Thanksgiving Turkey
Cooking TipsThanksgiving. Just the word conjures up images of overflowing tables laden with delicious food, the scent of r...