(Part 1) Choosing the Right Brisket: The Foundation of Flavour
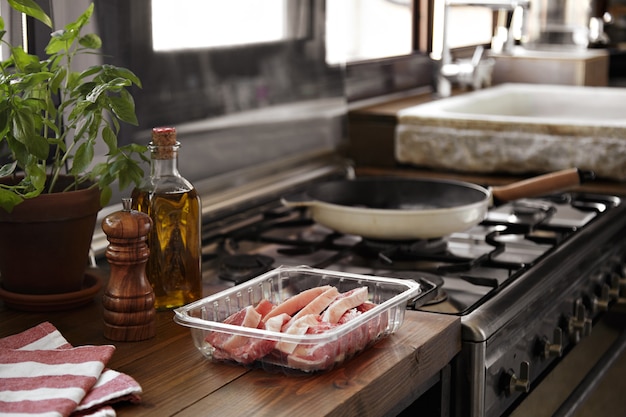
The first step on this brisket adventure is selecting the perfect starting point. Forget about those supermarket specials – we're going for the real deal, the classic brisket, brimming with rich marbling and inherent potential for melt-in-your-mouth tenderness.
brisket anatomy: A Quick Guide
Imagine the brisket as a two-part masterpiece. There's the point, also called the "deckle," which is thicker and boasts a higher fat content. It's this fat that gives us that incredible, melt-in-your-mouth texture we crave. The flat, on the other hand, is leaner, more rectangular, and offers a more consistent, even texture.
Personally, I'm a fan of the whole brisket, combining the point and the flat. It's a delicious symphony of textures and flavours, a more satisfying experience overall. But if you're seeking a simpler approach, the flat is a fantastic choice, just make sure it has a good layer of fat on top – that's our secret weapon for incredible flavour and tenderness.
Choosing the Right Beef:
Once you've settled on your cut, it's time to choose the beef itself. Look for a brisket that's well marbled – those streaks of fat throughout the meat are crucial. This fat renders during cooking, adding juicy flavour and moisture to your brisket. Don't be shy about fat; it's your friend in this game. I usually go for a brisket graded "Choice" or "Select," providing a great balance of flavour and tenderness. Now, if you're feeling extravagant, go for a "Prime" cut, but it's not essential for amazing results.
(Part 2) Preparing Your Brisket for Oven Cooking: The Art of Prepping
You've got your perfect brisket – now it's time to prepare it for its oven adventure. This part is key, so don't skip it!
Trimming the Brisket:
Give that brisket a good trim. We want to remove any excess fat that's not attached to the meat, as this can lead to uneven cooking and a greasy mess. But remember, don't go overboard. We need that fat for flavour and tenderness! I usually leave a good layer of fat on top and trim any excess from the sides and underside.
Seasoning the Brisket:
Now, the fun part: seasoning. This is where you can truly make your brisket unique, but before you start throwing on spices like confetti, let's lay down the foundation. Salt and pepper are essential, enhancing the natural flavour of the beef and creating a lovely crust. I like to use a coarse kosher salt and freshly ground black pepper, and they're the perfect starting point. Now for the rub, the magic touch.
My Go-To brisket rub:
I've been using this simple rub for years, and it never disappoints. You can find the full recipe on my website, but here's a peek:
- Brown sugar: Adds sweetness and a beautiful caramelized crust.
- Smoked paprika: That smoky flavour, just like barbecue.
- Garlic powder: You can't go wrong with garlic.
- Onion powder: Adds depth and complexity to the flavour profile.
- Black pepper: Essential for flavour.
- Cayenne pepper: For a bit of heat, adjust to your preference.
Mix all the ingredients together and rub it generously all over the brisket, ensuring you get into all the nooks and crannies. Let it sit in the fridge for at least 4 hours, or preferably overnight. This allows the flavours to penetrate the meat and develop a richer, more intense flavour.
(Part 3) Cooking Time: The Science of Brisket
We've reached the heart of the matter: the cooking process. Brisket is a bit of a diva when it comes to cooking time – it demands patience, dedication, and a bit of understanding about the science behind it all. The goal is to break down the connective tissue and render the fat, resulting in a tender and juicy brisket that'll make your tastebuds sing.
The Low and Slow Approach:
The secret to a perfect brisket lies in low and slow cooking. We're aiming for a temperature of around 250°F (121°C), allowing the meat to cook gently and evenly. It's a marathon, not a sprint. We're not trying to scorch the outside; we're seeking a tender, melt-in-your-mouth texture throughout. The general rule of thumb is to cook for about 1.5 to 2 hours per pound of brisket. But, as with everything, there are a few factors to consider:
Factors Affecting Cooking Time:
Here are some key factors that can influence the cooking time for your brisket:
- The size of the brisket: A larger brisket will obviously take longer to cook than a smaller one.
- The thickness of the brisket: A thicker brisket will need more time to cook through.
- The oven you're using: Different ovens can vary in temperature, so you might need to adjust the cooking time accordingly.
- Your personal preference: Some people prefer a brisket that's cooked to a slightly pinker colour, while others prefer it well done. Adjust the cooking time to suit your taste.
(Part 4) Oven-Cooking: The Process
Now, let's get into the specifics of the oven-cooking process.
Preheating the Oven:
Get your oven nice and toasty. Preheat it to 250°F (121°C). This ensures the brisket cooks evenly and doesn't get stuck in a temperature limbo.
Setting Up Your Oven:
Here's where I like to be a bit unconventional. Most people suggest a roasting pan, but I'm a big fan of the dutch oven – it helps trap moisture and creates a more even cooking environment. Now, if you don't have a Dutch oven, don't worry. A roasting pan will do just fine. Place the brisket fat-side up in your chosen vessel and then add a cup or two of liquid.
Liquid for the Brisket:
You're probably thinking, "What liquid?" This is your opportunity to get creative. I often use a combination of beef broth, apple cider vinegar, and a good quality beer. The vinegar helps tenderize the meat, and the beer adds a lovely complexity to the flavour. You can also use water or even apple juice, if that's what you've got. Just make sure it covers the bottom of the pan, enough to create a little pool of liquid for the brisket to baste in.
The First Few Hours:
Now, settle in, because this is where the waiting game begins. Pop that brisket into your preheated oven and let it cook for at least 4 hours. Don't worry, it's not going anywhere. The first few hours are crucial for rendering the fat and breaking down the connective tissue.
Checking the Brisket:
After about 4 hours, it's time to check on your brisket. It should be starting to look tender and juicy. Use a meat thermometer to check the internal temperature. Aim for a temperature of around 180°F (82°C) for the thickest part of the brisket.
Wrapping the Brisket:
Once the brisket has reached about 180°F (82°C), it's time to wrap it. This is where things get interesting. Wrap the brisket tightly in aluminum foil, creating a little package of deliciousness. The steam created inside will help to further tenderize the meat and lock in moisture. It's like giving the brisket a warm hug.
The Last Stretch:
Now, it's back into the oven for another 2-3 hours, or until the internal temperature reaches 195°F (91°C). Keep an eye on the brisket, and if the liquid starts to evaporate, you can add a little more water or broth to keep it moist.
The Rest:
Once the brisket has reached 195°F (91°C), it's time to give it a good rest. Take it out of the oven, keep it wrapped in foil, and let it sit for at least an hour, preferably longer. This allows the juices to redistribute throughout the meat, resulting in a juicier and more tender brisket. You can also use a cooler to help keep the brisket warm.
(Part 5) Testing for Doneness: The Moment of Truth
So, you've cooked your brisket for hours, wrapped it in foil, and let it rest. Now comes the moment of truth: testing for doneness.
The Probe Test:
The most reliable way to test for doneness is to use a meat thermometer. The brisket is done when it reaches an internal temperature of 195°F (91°C). Now, you can also use the probe test. Stick a fork into the thickest part of the brisket. It should slide in easily with minimal resistance. If you meet any resistance, it needs a little more time.
The Shred Test:
Another way to check if your brisket is done is by doing the shred test. Use two forks to pull apart a small piece of the brisket. If it shreds easily, then it's ready. If it's still a bit tough, give it a few more minutes in the oven.
(Part 6) Carving the Brisket: Unveiling the Masterpiece
Now that your brisket is perfectly cooked and rested, it's time to carve it up.
Tools for Carving:
You'll need a good, sharp knife and a carving fork. If you're feeling fancy, you can even use a carving board. It's not essential, but it does make the carving process a bit more elegant.
The Carving Technique:
Start by slicing the brisket against the grain. This means cutting across the direction of the muscle fibers. This will help you achieve a tender and juicy brisket. If you're using a whole brisket with both the point and the flat, you can separate them before slicing. The flat will slice more evenly, while the point will be a bit more irregular.
Storing Leftovers:
Got leftovers? That's a good thing! They can be stored in the fridge for up to 3 days. You can reheat them in the oven, but you can also use leftover brisket to make other dishes like sandwiches, tacos, or even soup.
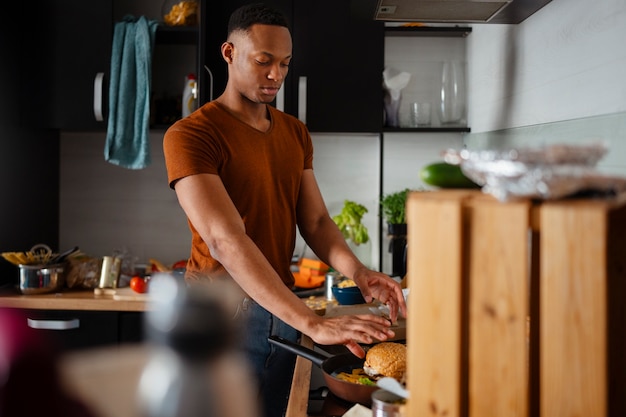
(Part 7) Serving Your Masterpiece: Presenting the Feast
Your brisket is now cooked to perfection, carved beautifully, and ready to be devoured. But how do you present this culinary masterpiece?
Serving Suggestions:
There are so many delicious ways to serve your brisket. Here are a few ideas:
- On a platter with mashed potatoes, gravy, and your favourite sides.
- In sandwiches with pickles, onions, and bbq sauce.
- As tacos with salsa, guacamole, and sour cream.
- With a simple salad or coleslaw.
Don't Forget the Sides:
Of course, no brisket feast is complete without some delicious sides. My favourites include:
- Coleslaw: A classic and refreshing side.
- Macaroni and cheese: A comforting and cheesy classic.
- Baked beans: A sweet and smoky side.
- Cornbread: A fluffy and crumbly side.
- potato salad: A creamy and tangy side.
(Part 8) Beyond the Basics: Tips and Tricks for Unforgettable Brisket
Alright, so we've covered the essentials, but let's talk about some of the finer points, those little tricks that can take your brisket from good to absolutely amazing.
The Power of Smoke:
If you're really serious about brisket, you'll want to explore the world of smoking. Smoking adds a deep, smoky flavour that simply can't be replicated in an oven. Now, I'm not saying you need to build a fancy smoker. You can use a simple charcoal grill or even a smoker box in your oven. Experiment and see what works for you.
The Importance of Patience:
Cooking a brisket is a test of patience. It takes time, but the results are worth it. Don't rush the process. Let the meat cook slowly and evenly.
Don't Be Afraid to Experiment:
Don't be afraid to experiment with different seasonings, rubs, and sauces. The possibilities are endless. Find what works best for you and have fun with it.
The Right Equipment:
Invest in good quality equipment. A reliable meat thermometer is essential. A good sharp knife is also crucial for carving. And, of course, a Dutch oven or a roasting pan is a must-have for cooking your brisket.
Troubleshooting:
No matter how much experience you have, sometimes things don't go as planned. Here are some common brisket problems and their solutions:
- Brisket is too dry: If your brisket is dry, it could be because you didn't cook it long enough or because you didn't wrap it properly. In the future, make sure to cook the brisket until it reaches an internal temperature of 195°F (91°C) and wrap it tightly in aluminum foil.
- Brisket is too tough: If your brisket is tough, it could be because you didn't cook it long enough or because you cooked it at too high a temperature. In the future, make sure to cook the brisket slowly and at a low temperature, and make sure to wrap it tightly in aluminum foil.
- Brisket is not tender: If your brisket is not tender, it could be because you didn't cook it long enough or because you didn't use enough liquid in the pan. In the future, make sure to cook the brisket for at least 1.5 to 2 hours per pound, and make sure to add enough liquid to cover the bottom of the pan.
FAQs: The Questions I Get Asked Most
Here are some of the questions I get asked most often about brisket.
| Question | Answer |
|---|---|
| How long does it take to cook a brisket in the oven? | The cooking time for a brisket in the oven will vary depending on the size and thickness of the brisket. Generally, it takes about 1.5 to 2 hours per pound of brisket to cook it to an internal temperature of 195°F (91°C). |
| What temperature should I cook brisket at in the oven? | The ideal temperature for cooking brisket in the oven is 250°F (121°C). This low and slow temperature allows the meat to cook evenly and tenderize without drying out. |
| What is the best way to test if a brisket is done? | The best way to test if a brisket is done is by using a meat thermometer. The brisket is done when it reaches an internal temperature of 195°F (91°C). You can also use the probe test, where you stick a fork into the thickest part of the brisket. It should slide in easily with minimal resistance. |
| What should I do if my brisket is too dry? | If your brisket is too dry, it could be because you didn't cook it long enough or because you didn't wrap it properly. In the future, make sure to cook the brisket until it reaches an internal temperature of 195°F (91°C) and wrap it tightly in aluminum foil. |
| What is the best way to reheat leftover brisket? | The best way to reheat leftover brisket is to wrap it tightly in aluminum foil and reheat it in a 300°F (149°C) oven for about 30 minutes, or until it is heated through. You can also reheat it in a slow cooker on low for a few hours. |
So, there you have it. My ultimate guide to cooking brisket in the oven. Remember, the key is to be patient, to enjoy the process, and to experiment. And most importantly, have fun!
Everyone is watching

Prime Rib Roast Cooking Time Chart: Per Pound Guide
Cooking TipsPrime rib roast. Just the name conjures images of lavish dinners, crackling fires, and hearty laughter. It’s ...

How Long to Bake Potatoes in the Oven (Perfect Every Time)
Cooking TipsBaked potatoes are a staple in my kitchen. They're incredibly versatile, delicious, and surprisingly easy to m...

Perfect Rice Every Time: The Ultimate Guide to Cooking Rice
Cooking TipsAs a self-proclaimed foodie, I've always been a bit obsessed with rice. It's the foundation of countless cuisi...

The Ultimate Guide to Cooking Asparagus: Tips, Techniques, and Recipes
Cooking TipsAsparagus. The mere mention of this spring delicacy conjures up images of vibrant green spears, crisp and burs...

Ultimate Guide to Cooking the Perfect Thanksgiving Turkey
Cooking TipsThanksgiving. Just the word conjures up images of overflowing tables laden with delicious food, the scent of r...