There's a reason why chili is a staple comfort food, especially when the weather turns chilly. A big, steaming bowl of chili is pure magic, but let's be honest, who has the time to stand over a stove for hours, stirring and simmering? That's where the instant pot comes in! This modern marvel has become my go-to for whipping up delicious chili in a fraction of the time. But let me tell you, finding the perfect cooking time for that ultimate chili experience can be a bit of a culinary puzzle. I've spent my fair share of time experimenting, going from overly mushy to slightly undercooked. But fear not, my fellow chili enthusiasts, I've finally cracked the code! In this article, I'm going to share my tips and tricks for achieving the perfect consistency and flavour in your Instant Pot chili, saving you the stress and ensuring a delicious dinner every time.
(Part 1) The Magic of the Instant Pot

First things first, let's talk about why the Instant Pot is such a game-changer for chili. For those unfamiliar, the Instant Pot is essentially a multi-functional pressure cooker that can do it all - from steaming vegetables to slow-cooking stews. But what makes it so brilliant for chili is its ability to cook everything quickly and evenly, resulting in tender, flavorful meat and a perfectly thick sauce. Now, let me tell you, I used to be a bit skeptical about pressure cookers. They always seemed a little intimidating, and I had visions of exploding pots and messy kitchens. But let me assure you, the Instant Pot is incredibly user-friendly, and once you get the hang of it, you'll be wondering how you ever lived without it.
Why the Instant Pot is a Chili Master
So, what's the deal with this magic pressure cooking technology? Well, the Instant Pot works by sealing in the steam and building up pressure inside the pot, which dramatically speeds up the cooking process. This means you can get a perfectly cooked chili in a fraction of the time it would take on the stovetop. Not only does it speed things up, but it also creates a wonderfully rich and flavorful sauce because all those delicious juices and aromas are trapped inside the pot. Plus, the Instant Pot is incredibly versatile. You can use it to cook different types of chili, whether you’re craving a classic beef chili, a spicy vegetarian chili, or a creamy white chili. The possibilities are endless!
(Part 2) The Importance of Timing
Now, here comes the crucial part: nailing the perfect cooking time. This is where my culinary journey gets a little more personal, and where I've learned some valuable lessons from my own chili-making mishaps. One time, I was in a hurry and threw everything into the Instant Pot, only to end up with a pot of mush. The meat was falling apart, and the vegetables were practically dissolving into the sauce. Another time, I was a little too cautious with the cooking time, and my chili came out a little too firm. The meat wasn't as tender as I liked, and the vegetables had a bit of a bite. Those experiences taught me that finding the sweet spot for cooking time is key to achieving that perfect chili texture.
Factors Affecting Cooking Time
Several factors can affect the optimal cooking time for your Instant Pot chili. First, you have to consider the type of meat you’re using. Beef tends to take a bit longer than ground turkey or chicken, and cuts of meat like chuck roast or brisket can require even more time to become tender. The amount of liquid you add to the pot can also play a role. Too much liquid, and your chili might be thin and watery. Too little, and it could be thick and heavy. And let's not forget the type of chili you're making. A simple chili with just a few ingredients will cook faster than one with a lot of beans, vegetables, and spices.
(Part 3) My Tried and True Recipes
Okay, so how do you find that perfect cooking time? Well, I've experimented with various recipes, adjusting the cooking times based on my own preferences and experience. Here are a couple of my favourite Instant Pot chili recipes that always get rave reviews:
Recipe 1: Classic Beef Chili
This is my go-to recipe for a hearty and satisfying chili. It's packed with flavour and has just the right amount of spice. Here's what you need:
Ingredients:
- 1 pound ground beef
- 1 large onion, chopped
- 2 cloves garlic, minced
- 1 (15-ounce) can diced tomatoes, undrained
- 1 (15-ounce) can kidney beans, drained and rinsed
- 1 (15-ounce) can pinto beans, drained and rinsed
- 1 (15-ounce) can black beans, drained and rinsed
- 1 (1.25-ounce) packet chili seasoning mix
- 1 teaspoon chili powder
- 1/2 teaspoon cumin
- 1/4 teaspoon cayenne pepper (optional)
- Salt and pepper to taste
Instructions:
- Sauté the onions and garlic in the Instant Pot until softened. This helps to bring out their natural sweetness and fragrance, enhancing the overall flavour of your chili.
- Add the ground beef and cook until browned, breaking it up into small pieces as it cooks. This helps to ensure even cooking and prevents large chunks of meat from forming.
- Stir in the diced tomatoes, beans, chili seasoning mix, chili powder, cumin, and cayenne pepper (if using). The chili seasoning mix adds a complex blend of flavors, while the individual spices allow you to customize the spiciness level to your liking.
- Season with salt and pepper to taste. Adjust the seasoning based on your personal preferences. Some people prefer a bolder, more robust flavor, while others prefer a milder taste.
- Secure the lid and set the valve to seal. This step is crucial for building up pressure inside the pot, which is essential for fast and even cooking.
- Cook on high pressure for 20 minutes. This cooking time is ideal for ground beef and ensures that it is tender and cooked through. The Instant Pot's pressure cooking capability allows for a significantly faster cooking time compared to traditional stovetop methods.
- Allow for a natural pressure release for 10 minutes, then release any remaining pressure manually. This natural pressure release helps to prevent the chili from becoming too mushy and allows the flavors to meld even further.
- Serve hot and enjoy! Garnish with your favorite toppings, such as shredded cheese, sour cream, or chopped onions, to personalize your chili experience.
Recipe 2: Spicy Vegetarian Chili
For those who prefer a meat-free option, this vegetarian chili is packed with flavour and a delicious kick. This is a perfect choice for a lighter and healthier option.
Ingredients:
- 1 tablespoon olive oil
- 1 large onion, chopped
- 2 cloves garlic, minced
- 1 (15-ounce) can diced tomatoes, undrained
- 1 (15-ounce) can black beans, drained and rinsed
- 1 (15-ounce) can kidney beans, drained and rinsed
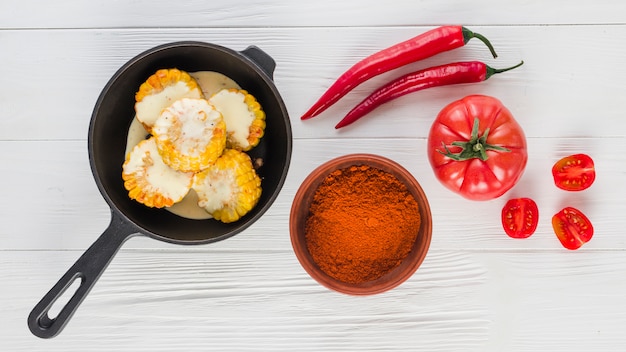
- 1 (15-ounce) can corn, drained
- 1 green bell pepper, chopped
- 1 red bell pepper, chopped
- 1 teaspoon chili powder
- 1/2 teaspoon cumin
- 1/4 teaspoon cayenne pepper (optional)
- Salt and pepper to taste
Instructions:
- Sauté the onions and garlic in the Instant Pot until softened. This step helps to bring out the natural sweetness and aroma of the onions and garlic, adding depth of flavor to your chili.
- Add the diced tomatoes, black beans, kidney beans, corn, green bell pepper, and red bell pepper. The combination of these ingredients provides a vibrant texture and a medley of flavors.
- Stir in the chili powder, cumin, and cayenne pepper (if using). The chili powder and cumin provide a warm, earthy base for the chili, while the cayenne pepper adds a kick of heat. Adjust the amount of cayenne pepper to your preferred level of spice.
- Season with salt and pepper to taste. Adjust the seasoning to your liking.
- Secure the lid and set the valve to seal. This step is essential for creating the necessary pressure for the Instant Pot to cook the chili quickly and evenly.
- Cook on high pressure for 10 minutes. This cooking time is ideal for the vegetables and beans in this recipe, ensuring they are tender and cooked through.
- Allow for a natural pressure release for 5 minutes, then release any remaining pressure manually. The natural pressure release allows the chili to simmer and meld the flavors further, resulting in a more harmonious and delicious taste.
- Serve hot and enjoy! This vegetarian chili is delicious on its own or can be topped with your favorite garnishes, such as avocado, shredded cheese, or chopped cilantro, for an extra layer of flavour and texture.
(Part 4) Mastering the Manual Release
Now, let's talk about the manual pressure release, a vital step in the Instant Pot chili process. After the cooking time is up, you’ll hear a little beep, signaling the end of the pressure cooking cycle. At this point, you have two options: a natural pressure release or a manual release.
Natural Pressure Release
A natural pressure release involves letting the pressure in the pot release naturally. This typically takes around 10 minutes for a chili, and it's a great option if you want a nice, thick chili. The longer the pressure naturally releases, the more time the flavors have to meld and the thicker the sauce will be.
Manual Pressure Release
On the other hand, a manual pressure release involves manually releasing the pressure by turning the valve to the venting position. This is a quicker option and can be useful if you're short on time or want to prevent the chili from getting too thick. But be warned, a manual release can sometimes result in a slightly thinner chili.
(Part 5) Adjusting for Different Meat Types
Remember how I mentioned that different types of meat require different cooking times? Here’s a quick guide for adjusting the cooking time based on the meat you’re using:
| Meat Type | Cooking Time |
|---|---|
| Ground Beef | 20 minutes on high pressure |
| Ground Turkey or Chicken | 15 minutes on high pressure |
| Chuck Roast or Brisket | 30-40 minutes on high pressure |
For tougher cuts like chuck roast or brisket, the extended cooking time ensures that they become incredibly tender and flavorful.
(Part 6) The Importance of Thickness
Ah, the great chili debate: Thick vs. thin! Personally, I love a nice, thick chili that clings to the spoon. But I understand some prefer a thinner chili that's easier to pour over rice or noodles.
Achieving a Thick Chili
If you’re aiming for a thick chili, you have a few options. First, you can use a natural pressure release for a longer period, as I mentioned earlier. This allows the chili to continue to simmer and thicken naturally. Second, you can add a cornstarch slurry to thicken the chili after cooking. Simply mix a tablespoon of cornstarch with two tablespoons of cold water, and then whisk it into the chili after it's finished cooking. Bring the chili to a simmer and cook for a few minutes until it reaches your desired thickness. The cornstarch acts as a thickening agent, creating a luscious and creamy consistency.
Achieving a Thin Chili
On the other hand, if you prefer a thinner chili, you can use a manual pressure release or add a little more liquid to the pot before cooking. You can also skip the natural pressure release entirely and vent the pressure immediately after cooking. This will result in a quicker release of pressure, leading to a thinner consistency.
(Part 7) Final Touches and Serving Suggestions
Your Instant Pot chili is almost ready! Now, it’s time for the final touches that elevate it from good to phenomenal.
Adding Flavor
Once your chili is cooked, give it a taste test and adjust the seasoning as needed. You can add more salt, pepper, chili powder, or cumin to your liking. You can also add a splash of vinegar or lime juice for a touch of brightness. These additions can enhance the chili's flavor profile and create a more complex taste experience.
Garnish Options
When it comes to serving, there are endless possibilities for garnishes. Here are some of my favorites:
- Sour cream or Greek yogurt: These creamy additions provide a tangy contrast to the chili's warmth and add a touch of richness.
- Shredded cheese: Cheddar, Monterey Jack, or Colby cheese are classic choices for chili. The melted cheese adds a savory and gooey element to the dish.
- Chopped fresh cilantro or parsley: These herbs add a fresh, vibrant flavor and a pop of green to your chili.
- Red pepper flakes: For those who like a little extra heat, a sprinkle of red pepper flakes can add a fiery kick.
- Avocado slices: Avocado adds a creamy and buttery texture and a subtle richness to the chili.
- Chopped onions: Red or white onions add a crunchy texture and a sharp, slightly sweet flavor to the chili.
- A dollop of salsa: A dollop of salsa adds a burst of fresh, tangy flavor and can elevate the chili's overall taste profile.
Serving Ideas
Serve your chili hot with a side of crusty bread, cornbread, or rice. Or, get creative and try topping it with your favorite toppings, such as shredded cheese, sour cream, avocado, and cilantro.
(Part 8) Tips and Tricks
Here are a few more tips and tricks to help you make the most of your Instant Pot chili experience:
- Don’t overcrowd the Instant Pot: If you're making a large batch of chili, you may need to cook it in batches to ensure even cooking and prevent overcrowding.
- Brown the meat before adding it to the pot for added flavor: This step creates a rich, caramelized flavor that enhances the overall taste of the chili.
- Use a good quality chili seasoning mix or create your own blend of spices: Experiment with different spice combinations to find your perfect chili flavor profile.
- Add a tablespoon of cocoa powder for a deeper, richer flavor: This unexpected ingredient adds a hint of sweetness and complexity to the chili.
- Feel free to experiment with different types of beans and vegetables: Get creative and try different bean combinations, such as black beans, kidney beans, pinto beans, and cannellini beans. You can also incorporate vegetables like corn, bell peppers, and zucchini for added texture and flavor.
- Don't be afraid to add your own personal touch!: Chili is a very versatile dish, so feel free to add your own favorite ingredients or spices to make it truly your own.
(Part 9) FAQs
Here are some common questions I often get asked about Instant Pot chili:
1. Can I freeze Instant Pot chili?
Absolutely! Instant Pot chili freezes beautifully. Let it cool completely before transferring it to airtight containers or freezer bags. It can be stored in the freezer for up to 3 months. To reheat, simply thaw it in the refrigerator overnight and then reheat it in the microwave, on the stovetop, or in the Instant Pot.
2. How long can I keep Instant Pot chili in the refrigerator?
Cooked Instant Pot chili can be stored in the refrigerator for up to 4 days. Make sure to store it in an airtight container.
3. Can I use different types of beans in my chili?
Yes! You can use any type of bean you like. Some popular choices include black beans, kidney beans, pinto beans, and cannellini beans. You can even use a mix of different beans.
4. Can I make a smaller batch of chili?
Of course! You can easily adjust the recipe to make a smaller batch. Just reduce the amount of ingredients proportionally.
5. What if my chili is too thick or too thin?
If your chili is too thick, you can add a little more liquid, such as broth or water. If it's too thin, you can thicken it with a cornstarch slurry, as I mentioned earlier.
I hope this comprehensive guide has helped you unlock the secrets of making perfect Instant Pot chili. Remember, don’t be afraid to experiment and find what works best for you. With a little practice, you’ll be whipping up delicious chili in no time!
Everyone is watching

Prime Rib Roast Cooking Time Chart: Per Pound Guide
Cooking TipsPrime rib roast. Just the name conjures images of lavish dinners, crackling fires, and hearty laughter. It’s ...

How Long to Bake Potatoes in the Oven (Perfect Every Time)
Cooking TipsBaked potatoes are a staple in my kitchen. They're incredibly versatile, delicious, and surprisingly easy to m...

Perfect Rice Every Time: The Ultimate Guide to Cooking Rice
Cooking TipsAs a self-proclaimed foodie, I've always been a bit obsessed with rice. It's the foundation of countless cuisi...

The Ultimate Guide to Cooking Asparagus: Tips, Techniques, and Recipes
Cooking TipsAsparagus. The mere mention of this spring delicacy conjures up images of vibrant green spears, crisp and burs...

Ultimate Guide to Cooking the Perfect Thanksgiving Turkey
Cooking TipsThanksgiving. Just the word conjures up images of overflowing tables laden with delicious food, the scent of r...