Ah, cornish hens! These little birds are a true culinary delight, aren't they? They're perfect for a cozy dinner for two or a special occasion, and they're surprisingly easy to cook. I've been making them for ages, trying out different recipes and techniques, and I've finally cracked the code for the ultimate roasted cornish hen. The key? That glorious 400-degree oven! It's the secret to crispy skin, juicy meat, and bursting flavor. Let me walk you through the steps, and you'll be amazed at how simple it is to achieve restaurant-quality results in your own kitchen.
(Part 1) The Cornish Hen: A culinary gem
First things first, let's chat about these delightful little birds. Cornish hens, also known as "squab hens," are a hybrid of a Cornish game hen and a White Rock hen. They're much smaller than regular chickens, usually weighing about 1.5 pounds each, and they have a wonderfully delicate flavor. They're the perfect size for a romantic dinner, though you can certainly roast a couple if you're having a larger gathering.
Why I'm a Cornish Hen Fanatic
I absolutely adore Cornish hens because they're so versatile. They're amazing roasted, of course, but they also shine in stews, soups, and even curries. Plus, they're relatively affordable, making them a fantastic choice for weeknight meals when you want something special without breaking the bank. And let's be honest, who doesn't love a bit of bird on their plate? It's a classic, comfort food kind of thing, isn't it?
(Part 2) Understanding the Crucial Role of Temperature
So, you've got your Cornish hens, you're ready to cook, but you're probably wondering – what's the magic number for the oven? Well, the secret to perfectly roasted Cornish hens is that 400-degree oven. This high heat is essential for achieving that golden-brown, crispy skin that's just irresistible. It also cooks the meat through quickly, ensuring it stays tender and juicy. No one wants dry chicken, right?
Don't Rush It: The Science of Cooking Time
Now, you might be thinking, "400 degrees? That's super hot! It'll be done in a flash!" Well, not exactly. Even with that high heat, a Cornish hen needs a good 30-40 minutes to roast to perfection. We're aiming for an internal temperature of 165 degrees Fahrenheit, that's about 74 degrees Celsius, to ensure the meat is fully cooked and safe to eat. That's where a trusty meat thermometer comes in handy. It's your kitchen superhero!
(Part 3) The Art of preparing cornish Hens for Roasting
Alright, our oven is preheated to 400 degrees, and our hens are ready to go. But before we pop them in, we need to give them a little prep to ensure they roast beautifully. It's all about enhancing their flavor and creating that gorgeous crispy skin we're aiming for.
Step 1: A Flavorful Salt and Pepper Rub
First things first, we need to season those hens. I like to keep it simple with a basic salt and pepper rub. Feel free to get creative with other spices like garlic powder, onion powder, or paprika, but for me, salt and pepper provide the perfect base. Generously rub the salt and pepper mixture all over the hens, including under the skin. This will create a deliciously seasoned crust.
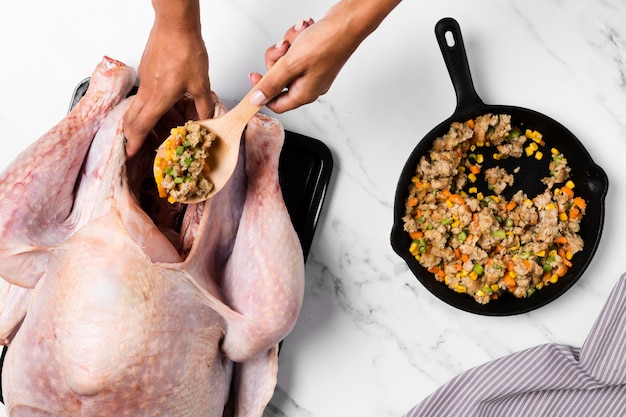
Step 2: Stuffing the Cavity with Flavor
Now, it's time to stuff the cavity of the hens. You can go with a classic bread stuffing or get creative with herbs, vegetables, or even fruit. I'm a fan of a mix of fresh herbs like rosemary, thyme, and sage, along with some chopped onions and garlic. This adds a beautiful depth of flavor to the hens, making them incredibly aromatic.
Step 3: Trussing for Even Cooking
Finally, we need to truss those hens. This involves tying the legs and wings together to prevent them from splaying out during cooking. It helps ensure that the hens cook evenly and maintain their shape, resulting in a beautiful presentation. You can use kitchen twine for this, or you can even use skewers if you prefer.
(Part 4) roasting time: The Magic Begins
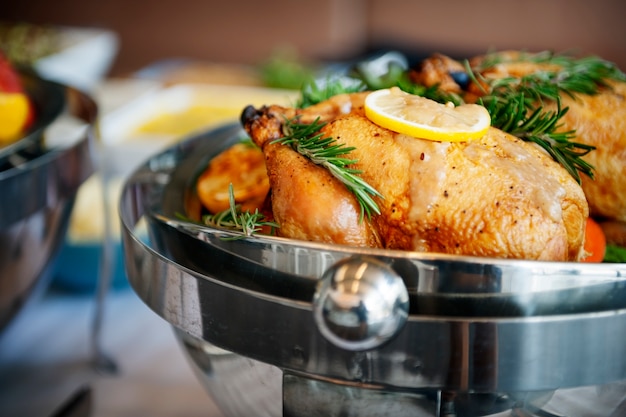
Alright, our prepped hens are ready to meet the heat! Place them on a roasting rack, which will help them cook evenly and allow the fat to drip away. This is essential for achieving that crispy skin we're aiming for. Set the rack on a baking sheet to catch any drippings. We don't want to waste that delicious juice, do we?
Basting: The Secret Weapon
Now, for the secret ingredient – basting! During the cooking process, every 15 minutes or so, grab that pan of juices and drizzle that beautiful, golden liquid over the hens with a spoon. It's like giving them a little hug of flavor! Basting not only keeps the hens moist but also adds a beautiful sheen to their skin, creating a truly irresistible finish. Remember, we're aiming for crispy, golden perfection!
Temperature Monitoring: Don't Forget Your Thermometer!
While your hens are roasting, keep a close eye on them. You'll know they're getting close when the skin is golden brown and the juices run clear when you pierce the thickest part of the thigh with a fork. Now, if you're a bit of a control freak like me, you'll have a meat thermometer at the ready. This is your best friend, ensuring the internal temperature reaches that crucial 165 degrees Fahrenheit. It's a sure sign those hens are ready for the plate!
(Part 5) Resting and Serving: A Touch of Patience for Perfection
Your Cornish hens are cooked to perfection! Don't be tempted to carve them immediately. Just like a good steak, they need a little time to rest before carving. This allows the juices to redistribute throughout the meat, ensuring a moist and flavorful result. Let them rest for about 10-15 minutes, covered loosely with foil.
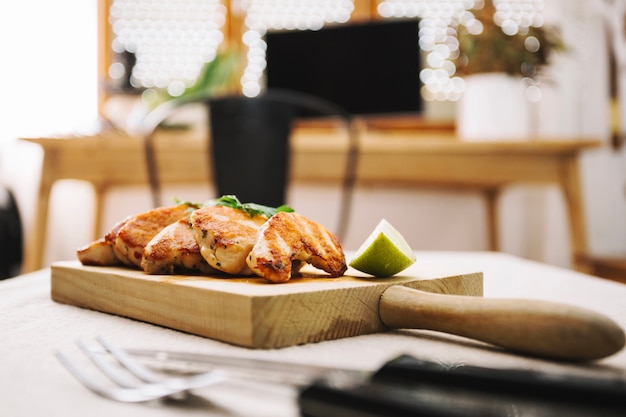
Carving Tips: A Culinary Dance
While the hens are resting, get your serving plates ready and any side dishes you've planned. Now, for the grand finale, carving. Start by carefully separating the legs from the breasts. Then, using a sharp carving knife, slice the breasts into thin slices. Voila! A beautifully roasted Cornish hen, ready to be devoured!
Delicious Side Dishes: Perfect Pairings
Now, I'm a big believer in balance on the plate. So, what goes with a delicious roasted Cornish hen? I find that a simple salad with a light vinaigrette pairs perfectly, providing a refreshing counterpoint to the richness of the bird. Roasted root vegetables like carrots, potatoes, and parsnips are another classic pairing, offering a satisfying sweetness and earthy flavor. And, of course, don't forget about a good gravy! Use the drippings from the pan to make a rich and flavorful gravy, adding another layer of deliciousness to your meal.
(Part 6) Cornish Hen Cooking Time: A Guide to Success
Now, let's talk about those cooking times. I know you're eager to get your hands on those delicious hens, so I've put together a handy table that provides a general guide for Cornish hen cooking times at 400 degrees. Keep in mind that these are just estimates, and cooking time can vary depending on the size of your hens and your oven.
| Hen Weight | Cooking Time |
|---|---|
| 1.5 pounds | 30-40 minutes |
| 2 pounds | 40-50 minutes |
| 2.5 pounds | 50-60 minutes |
Adjusting for Different Oven Sizes: A Note on Oven Variations
It's also important to consider the size of your oven. If you have a smaller oven, the hens may take a bit longer to cook. On the other hand, if you have a large oven, the cooking time might be a little shorter. Keep a close eye on your hens, and use that trusty meat thermometer to ensure they're cooked to perfection.
(Part 7) A Few Tips from the Kitchen: Mastering the Art
Now, I've been cooking cornish hens for years, and I've picked up a few tricks along the way. These little nuggets of wisdom can make a real difference in the final result, turning your roasted Cornish hens from good to extraordinary. Here are a few of my favorites:
Tip 1: Don't Overcrowd the Oven: Space for Success
When roasting multiple hens, make sure you give them enough space in the oven. Overcrowding can cause them to steam rather than roast, resulting in a less crispy skin and unevenly cooked meat. If you're short on space, you can always roast the hens in batches.
Tip 2: Embrace the Drippings: A Treasure Trove of Flavor
Those drippings from the roasting pan are pure gold! They're packed with flavor and can be used to make a delicious gravy, sauce, or even a flavorful broth. Don't just throw them away! Instead, strain them into a saucepan and reduce them over low heat to concentrate the flavor. This will give you a rich and flavorful base for your gravy.
Tip 3: Don't Be Afraid to Experiment: Unleash Your Culinary Creativity
While a simple salt and pepper rub is a classic, don't be afraid to experiment with different seasonings and stuffings. There are endless possibilities when it comes to flavoring Cornish hens. Try adding herbs like rosemary, thyme, or sage, or experiment with citrus zest, garlic powder, or paprika. You can also add chopped vegetables, fruits, or nuts to your stuffing for added flavor and texture. Just remember to keep it simple and let the flavor of the hens shine through.
(Part 8) FAQs: Your Cornish Hen Questions Answered
Now, I know you might have some questions. I've heard it all – from "What if I don't have a roasting rack?" to "Can I freeze Cornish hens?" So, let's tackle some common questions about Cornish hens and roasting them to perfection.
FAQ 1: Can I use a baking sheet instead of a roasting rack?
While a roasting rack is ideal for achieving crispy skin, you can certainly use a baking sheet if you don't have one. However, you'll want to ensure that the hens are positioned on the sheet so that they're not touching. This will help them cook evenly and prevent steaming. You might want to consider placing a wire rack inside the baking sheet to elevate the hens and allow better airflow.
FAQ 2: What can I do with leftover Cornish hens?
Leftover Cornish hens are a delicious base for a variety of dishes. You can shred the meat and use it in salads, sandwiches, or even tacos. It also works well in soups, stews, or even a comforting chicken pot pie. You can also freeze leftover Cornish hens for later use. Just make sure to wrap them tightly in plastic wrap and store them in an airtight container in the freezer.
FAQ 3: Can I freeze Cornish hens?
Yes, you can certainly freeze Cornish hens. Just make sure to wrap them tightly in plastic wrap and store them in an airtight container in the freezer. They can be frozen for up to 3 months. When you're ready to use them, thaw them in the refrigerator overnight before roasting. Just remember to add a few extra minutes to the cooking time.
FAQ 4: What is the best way to reheat a roasted Cornish hen?
The best way to reheat a roasted Cornish hen is in the oven. Preheat the oven to 350 degrees fahrenheit (175 degrees Celsius), and place the hen on a baking sheet. Heat it for about 15-20 minutes, or until it's heated through. You can also reheat it in the microwave, but it might not be as flavorful as reheating it in the oven.
FAQ 5: Can I substitute Cornish hens with regular chickens?
You can certainly substitute Cornish hens with regular chickens, but you'll need to adjust the cooking time. The cooking time for a whole chicken will be significantly longer, depending on the size of the chicken. Use a meat thermometer to ensure that the chicken is cooked to an internal temperature of 165 degrees Fahrenheit (74 degrees Celsius). A larger chicken will require more time and you may need to adjust the oven temperature accordingly to prevent burning.
(Part 9) Final Thoughts: A culinary adventure Awaits
And that, my friends, is the Cornish hen – a culinary gem that's as easy to cook as it is delicious to eat. Remember, it's all about that 400-degree oven, a little bit of pre-roasting prep, and keeping a close eye on your hens. With a bit of practice and a sprinkle of confidence, you'll be whipping up perfectly roasted Cornish hens in no time. Just imagine the compliments you'll receive! So, get your kitchen ready, put on your apron, and enjoy the delicious journey of Cornish hen roasting. Bon appétit!
Everyone is watching

Prime Rib Roast Cooking Time Chart: Per Pound Guide
Cooking TipsPrime rib roast. Just the name conjures images of lavish dinners, crackling fires, and hearty laughter. It’s ...

How Long to Bake Potatoes in the Oven (Perfect Every Time)
Cooking TipsBaked potatoes are a staple in my kitchen. They're incredibly versatile, delicious, and surprisingly easy to m...

Perfect Rice Every Time: The Ultimate Guide to Cooking Rice
Cooking TipsAs a self-proclaimed foodie, I've always been a bit obsessed with rice. It's the foundation of countless cuisi...

The Ultimate Guide to Cooking Asparagus: Tips, Techniques, and Recipes
Cooking TipsAsparagus. The mere mention of this spring delicacy conjures up images of vibrant green spears, crisp and burs...

Ultimate Guide to Cooking the Perfect Thanksgiving Turkey
Cooking TipsThanksgiving. Just the word conjures up images of overflowing tables laden with delicious food, the scent of r...