Let me tell you, there’s nothing quite like the aroma of a slow-roasted rib roast filling your kitchen. It's that kind of dish that screams "special occasion," but honestly, it’s so easy to make, you can whip it up any day of the week! I've been cooking up rib roasts for years, and I've learned a few tricks along the way that make all the difference. This guide will take you through every step, from choosing the perfect cut to carving the succulent masterpiece, so you can impress your guests and feel like a true culinary master.
choosing the right cut: It’s All About the Rib

(Part 1)
Let's talk about the star of the show - the rib roast! It's a cut of beef that comes from the rib primal, and it's known for its rich flavour and tender texture. Now, you have a few choices here:
prime rib vs. standing rib roast
Prime Rib: This is a cut of beef that's been aged for at least 21 days, giving it an incredibly rich flavour. You can usually find it at your local butcher shop or supermarket. Butcher shops often have a wider selection of cuts and sizes.
Standing Rib Roast: This is a larger cut that comes with the bone still attached. It’s often referred to as a “bone-in” roast and is usually a more impressive piece to serve, especially if you’re hosting a large gathering. It's a bit more work to cook, but it's also a real showstopper!
I usually opt for a standing rib roast because it just looks so impressive on the table. Plus, it’s a great way to feed a crowd!
Weight and Size
The weight and size of your rib roast will depend on how many people you're feeding. As a general rule, allow about 1 pound of beef per person. For a small gathering, a 3-4 pound roast will do the trick. If you're having a big family dinner, go for a 6-8 pound roast.
Fat Marbling
Here's a little secret: the more marbling the better! Marbling refers to the fat streaks throughout the meat, and it's what gives your rib roast its incredible flavour and juiciness. Look for a cut with good marbling, and don't be afraid of a little fat. It’s that fat that helps keep the roast moist and tender.
Prepping Your Rib Roast for Success: A Crucial First Step

(Part 2)
Once you've got your beautiful rib roast in hand, it's time to prep it for its starring role. This might sound tedious, but trust me, these steps will pay off big time:
Pat it Dry
The first thing you want to do is pat your roast dry with paper towels. This will help the seasoning adhere better and prevent your roast from steaming instead of browning.
Seasoning with Savoury Flair
Now, let's get to the fun part - seasoning! There's no right or wrong way to season your roast, but I like to keep it simple with salt, pepper, and garlic powder. You can also get creative with herbs and spices. I've even been known to add a sprinkle of onion powder for extra flavour. Remember to season generously on all sides!
A Touch of Salt
Here's a tip I learned from a seasoned chef: Salt your roast generously the night before cooking. This helps to season the meat from the inside out and creates a more flavourful roast. Don't be shy with the salt! The salt will draw out some of the moisture, but it will also help create a more tender and flavorful roast.
roasting techniques for a Delicious Outcome: Unlocking the Secrets

(Part 3)
Now we're getting to the heart of the matter: cooking your rib roast! I've tried different techniques over the years, and here are the two methods I find most reliable:
The Classic Oven Roast
This is the tried-and-true method that's always a winner. Here's how you do it:
Preheat and Place
Preheat your oven to 450°F (232°C). Place your rib roast on a roasting rack in a large roasting pan. This will ensure the roast cooks evenly and prevents it from sitting in its own juices. You can also add a cup of water to the bottom of the pan to help create steam and keep the roast moist.
High Heat for the First 15 Minutes
Start with a high heat for the first 15 minutes. This will help to sear the outside of the roast, creating a beautiful crust. It’s this browning that adds depth of flavour to the roast.
Reduce the Heat and Let it Simmer
After 15 minutes, reduce the oven temperature to 325°F (163°C). This will allow the roast to cook slowly and evenly, resulting in tender, juicy meat.
Cook Time and internal temperature
You'll need to cook the roast for about 15-20 minutes per pound for a medium-rare doneness. Use a meat thermometer to check the internal temperature. The roast is done when it reaches an internal temperature of 135°F (57°C) for medium-rare, 145°F (63°C) for medium, and 160°F (71°C) for medium-well. Remember, you can always cook the roast longer if you want a more well-done piece of meat.
Resting is Key
Once the roast is cooked, let it rest for at least 15 minutes before carving. This will allow the juices to redistribute throughout the meat, resulting in a more tender and flavorful roast. This resting period is essential for ensuring that the roast is juicy and flavorful.
The reverse sear: A Trend That Works
This method is becoming increasingly popular, and for good reason! It's a bit more involved, but it produces an incredibly tender and juicy roast. Here's how it works:
Low and Slow
Start by preheating your oven to 275°F (135°C). Place your rib roast on a roasting rack in a large roasting pan.
Patience is a Virtue
Cook the roast for about 2-3 hours, or until it reaches an internal temperature of 125°F (52°C) for medium-rare. This slow cooking process ensures that the meat cooks evenly and remains incredibly tender.
High Heat for the Final Touch
Once the roast has reached the desired internal temperature, crank up your oven to 500°F (260°C). Place the roast back in the oven and cook for 10-15 minutes, or until the outside is nice and crispy. This final sear creates a beautiful crust while maintaining the tenderness of the inside of the roast.
Rest and Enjoy
Let the roast rest for at least 15 minutes before carving.
Carving Your Rib Roast: The Grand Finale
(Part 4)
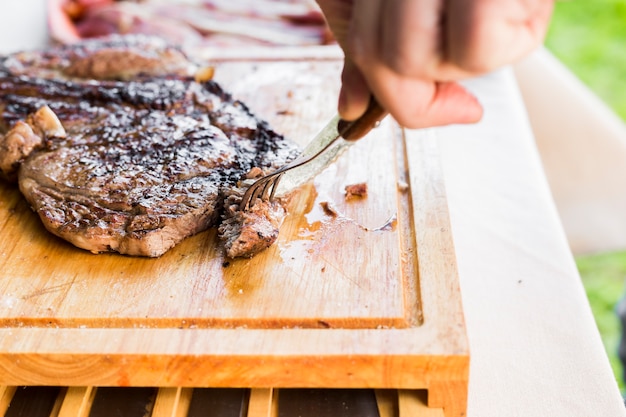
You've done all the hard work, and now it's time to reap the rewards! Carving a rib roast may seem intimidating, but it's actually quite simple. Here's what you need to know:
The Right Tools
Sharp carving knife: A good, sharp carving knife is essential for making clean, precise cuts. If you don't have a carving knife, a chef's knife will work just fine.
Carving fork: Use a carving fork to hold the roast steady while you're carving. This will help you keep a good grip on the roast while you’re slicing.
The Steps
1. Slice against the grain: The grain of the meat runs along the length of the roast. To make your slices tender and juicy, slice against the grain.
2. Carve between the bones: If you're working with a standing rib roast, carve between the bones. This will make it easier to slice the roast into even portions. You can also remove the bones from the roast after cooking, which will make carving even easier.
3. Serve and Enjoy: Once you've carved your roast, arrange it on a platter and serve with your favorite sides.
Delicious side dishes to Pair with Your Rib Roast: A Symphony of Flavours
(Part 5)
A rib roast deserves a supporting cast of delicious side dishes that complement its rich flavour. Here are a few of my favourites:
Creamy mashed potatoes: A Classic Match
creamy mashed potatoes are a classic side dish for a reason. They're simple to make and go perfectly with the richness of the roast. The creamy texture of mashed potatoes balances the richness of the roast beautifully.
Roasted Vegetables: A Colourful Addition
Roasted vegetables add a vibrant touch of colour and flavour to your meal. I love to roast brussels sprouts, carrots, and parsnips with a little olive oil, salt, and pepper. You can also roast other vegetables, such as asparagus, broccoli, or sweet potatoes.
green bean casserole: A Comforting Favourite
For a comforting and nostalgic touch, try a green bean casserole. It's a classic holiday dish that always goes down well. The creamy sauce and crispy fried onions complement the roast perfectly.
Garlic Bread: A Crispy Complement
Garlic bread is a simple but delicious addition that complements the richness of the roast. The warm, garlicky bread adds a savory flavour and crunchy texture that’s perfect with the roast.
Other Options
Don’t forget about other classic sides that go well with a roast, such as:
Yorkshire Pudding: This light and fluffy pudding is a traditional accompaniment to roast beef in the UK.
Gravy: A rich and flavorful gravy made from the pan drippings will take your roast to the next level.
Red Wine Sauce: A rich red wine sauce adds another layer of flavor to the roast.
Storing Your Leftovers: Making the Most of Your Feast
(Part 6)
You've cooked a delicious rib roast, and now you're left with some leftovers. Don't worry, there are plenty of ways to make the most of them.
Refrigeration
Store your leftover rib roast in an airtight container in the refrigerator for up to 3-4 days. The roast will keep well in the fridge, and it can be reheated for a quick and easy meal.
Freezing
To freeze your leftovers, wrap the roast tightly in plastic wrap and then aluminum foil. It can be stored in the freezer for up to 2-3 months. This is a great way to save leftovers for later use. You can freeze the roast in slices or as a whole piece.
Reheating
When you're ready to reheat your leftovers, you can do so in the oven, microwave, or on the stovetop. Be sure to reheat the roast thoroughly before serving. To reheat in the oven, preheat the oven to 325°F (163°C) and place the roast in a baking dish. Reheat until heated through.
Tips for Enhancing Your Rib Roast: Taking it to the Next Level
(Part 7)
You've mastered the basics, but let's talk about taking your rib roast to the next level. Here are a few extra tips to make your roast even more delicious and impressive:
Make a Herb Butter
Smear your rib roast with a mixture of softened butter, chopped herbs like rosemary and thyme, and garlic. This will add a burst of flavour and create a beautiful, crispy crust. You can also add other herbs like sage or oregano to the butter.
Use a Marinade
Marinate your roast for a few hours or overnight in a marinade of your choice. I love to use a mixture of olive oil, balsamic vinegar, Dijon mustard, and herbs like rosemary, thyme, and oregano. Marination adds another layer of flavor to the roast and helps tenderize the meat.
Use a Thermometer
Don't rely on just the visual cues to determine doneness. Use a meat thermometer to ensure your roast is cooked to your liking.
Other Tips
Add a little sugar: A sprinkle of brown sugar on the roast before cooking will help create a delicious, caramelized crust.
Use a meat tenderizer: If you want to ensure the meat is extra tender, use a meat tenderizer before seasoning the roast.
Add vegetables to the pan: Adding vegetables like carrots, onions, or celery to the bottom of the roasting pan will add flavour to the roast and create a delicious pan sauce.
FAQs: Addressing Your Burning Questions
(Part 8)
I've been cooking rib roasts for years, and I've heard my fair share of questions! Here are some of the most common questions I get, along with my answers:
1. What's the Best Way to Cook a Rib Roast?
The best way to cook a rib roast is to choose a method that suits your time and preference. Both the classic oven roast and the reverse sear methods are great options.
2. How Long Should I Cook a Rib Roast?
The cooking time for a rib roast will vary depending on the weight of the roast and the desired level of doneness. As a general rule, cook the roast for 15-20 minutes per pound for a medium-rare doneness.
3. How Do I Know When a Rib Roast is Done?
Use a meat thermometer to check the internal temperature. The roast is done when it reaches an internal temperature of 135°F (57°C) for medium-rare, 145°F (63°C) for medium, and 160°F (71°C) for medium-well.
4. What's the Best Way to Carve a Rib Roast?
To carve a rib roast, slice against the grain of the meat. If you're working with a standing rib roast, carve between the bones.
5. What Should I Serve with a Rib Roast?
Rib roast goes well with a variety of side dishes, such as mashed potatoes, roasted vegetables, green bean casserole, and garlic bread.
A culinary adventure Awaits: Ready to Take the Plunge?
(Part 9)
There you have it, a comprehensive guide to cooking a delicious bone-in rib roast! From choosing the right cut to carving the succulent masterpiece, this guide has everything you need to feel confident and excited about your culinary adventure. Don't be intimidated by the prospect of cooking a rib roast – with the right tips and techniques, it's easier than you think! So gather your ingredients, preheat your oven, and get ready to impress your guests with a mouthwatering feast. Bon appétit!
Everyone is watching

Prime Rib Roast Cooking Time Chart: Per Pound Guide
Cooking TipsPrime rib roast. Just the name conjures images of lavish dinners, crackling fires, and hearty laughter. It’s ...

How Long to Bake Potatoes in the Oven (Perfect Every Time)
Cooking TipsBaked potatoes are a staple in my kitchen. They're incredibly versatile, delicious, and surprisingly easy to m...

Perfect Rice Every Time: The Ultimate Guide to Cooking Rice
Cooking TipsAs a self-proclaimed foodie, I've always been a bit obsessed with rice. It's the foundation of countless cuisi...

The Ultimate Guide to Cooking Asparagus: Tips, Techniques, and Recipes
Cooking TipsAsparagus. The mere mention of this spring delicacy conjures up images of vibrant green spears, crisp and burs...

Ultimate Guide to Cooking the Perfect Thanksgiving Turkey
Cooking TipsThanksgiving. Just the word conjures up images of overflowing tables laden with delicious food, the scent of r...
