Let's face it, there's something about a perfectly cooked ham that just screams "celebration." The aroma alone is enough to get everyone excited, and then there's the juicy, succulent meat itself, just begging to be devoured. But let's be honest, cooking a raw ham can seem a bit daunting. You might be worried about overcooking it or ending up with a dry, flavourless disappointment. But fear not, my friends! I'm here to guide you through the process, step-by-step, and by the end, you'll be a confident ham-cooking pro.
(Part 1) Understanding Your Ham

Before we even think about turning on the oven, we need to get to know our star ingredient: the ham itself. It's like any relationship; you need to understand what you're working with before you can truly get the best out of it.
The Two Main types of ham
First things first, there are two primary types of ham you'll typically find:
cured ham: Think salty, savory, and packed with flavour. These hams have been dry-cured, meaning they've been salted and left to dry for a good long time. This process concentrates the flavor and creates that irresistible salty tang. You'll often find these hams already cooked, but some require a little more cooking time.
fresh ham: This is the kind you'll likely find at your local butcher. It hasn't been cured, so it has a milder flavour and needs to be cooked thoroughly before eating.
Personally, I love the salty kick of a good cured ham, but if you're after a milder, less intense flavour, fresh ham is your go-to choice.
Reading the Label
Now that you've got your ham, take a moment to read the label. It will often provide important information about the ham, such as:
Type of ham: This might be "fresh ham," "cured ham," or a specific type like "country ham" or "smoked ham."
Cooking instructions: The label might specify the recommended cooking temperature and time, which can be helpful, but I always encourage you to use a meat thermometer for ultimate accuracy.
Weight: This will help you determine cooking time and decide how much ham you're working with.
(Part 2) Getting Ready: Preparing Your Ham

Alright, we're getting down to business now! This is the "prep work" stage, and it's crucial for a successful ham experience.
The Essential Toolkit
Here's what you'll need to make this whole process a breeze:
roasting pan: A large roasting pan is non-negotiable for cooking a whole ham. It needs to be big enough to comfortably hold your ham.
Meat thermometer: This is your trusty sidekick when it comes to ensuring your ham is cooked to perfection. You're aiming for an internal temperature of 145°F (63°C) for safety.
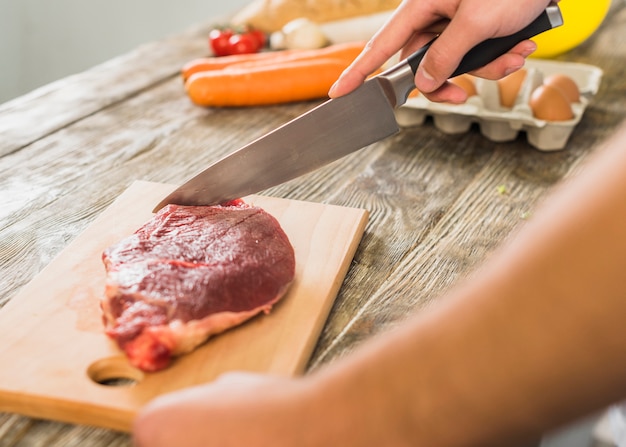
Sharp knife: A sharp knife is your friend for trimming excess fat and carving the ham once it's cooked.
Baking twine: This is used to tie the ham together, helping it cook evenly and maintain a beautiful shape.
Large bowl: This is for soaking the ham in water, which is important for removing some of the salt if you're using a cured ham.
The Prep Process
Now, let's get that ham ready for its starring role in your culinary masterpiece:
1. Rinse the ham: Start by rinsing the ham under cold water. This will wash away any dust or debris.
2. Trim the fat: Using your sharp knife, trim away any excess fat from the ham. A thin layer of fat is fine, but you don't want it to be too thick. The fat will render during cooking, adding flavor, so don't remove it all.
3. Score the ham: If you're feeling fancy, you can score the ham by cutting a diamond pattern into the fat. This helps the fat render more evenly during cooking and creates a beautiful presentation.
4. Soak the ham (if needed): If you're using a cured ham, you'll need to soak it in cold water for a few hours, or even overnight. This helps remove some of the saltiness. I usually soak mine for about 4 hours, and it does the trick for me.
(Part 3) Roasting: The Big Event

We've prepped our ham, gathered our tools, and now it's time for the main event: roasting. This is where the real magic happens, transforming a raw ham into a succulent, golden-brown delight.
Getting Your Oven Ready
1. Preheat the oven: Preheat your oven to 325°F (160°C). A hot oven ensures even cooking and prevents the ham from becoming dry.
2. Place the ham in the roasting pan: Put your ham in the roasting pan and add a cup of water to the bottom of the pan. The water will help create steam, keeping the ham moist as it cooks.
3. Tie the ham: Use baking twine to tie the ham together, making sure the legs are securely bound. This keeps the ham nice and neat and helps it cook evenly.
Cooking Your Ham to Perfection
Now, for the crucial cooking process:
1. Cook until the internal temperature reaches 145°F (63°C): This is where your trusty meat thermometer comes in. Insert it into the thickest part of the ham, ensuring it doesn't touch bone. Keep checking the temperature until it reaches 145°F.
2. Baste regularly: As the ham cooks, it's important to baste it regularly with the pan juices. This keeps it moist and flavourful. I usually baste every 30 minutes or so.
3. Remove the ham from the oven and let it rest: Once the ham is cooked, remove it from the oven and let it rest for 15 minutes before carving. This allows the juices to redistribute throughout the ham, resulting in a more tender and flavorful final product.
(Part 4) The Grand Finale: Serving Your Ham
Your ham is cooked, it's rested, and now it's time to unveil your culinary masterpiece!
Carving Your Ham Like a Pro
Carving a ham might seem daunting, but it's actually quite simple:
1. Use a sharp knife: Make sure your knife is sharp! This will make carving easier and prevent you from tearing the ham.
2. Cut against the grain: Carve the ham by cutting against the grain. This results in tender, juicy slices.
3. Serve the ham: Arrange your beautifully carved ham on a platter and serve it with your favorite sides.
side dishes that Sing
A roast ham deserves a supporting cast of delicious side dishes. Here are some of my favourites:
roast potatoes: Crispy on the outside, fluffy on the inside, these are a classic for a reason.
green beans: Steamed or roasted, green beans offer a fresh, vibrant flavour and beautiful colour contrast.
Carrot and parsnip mash: Sweet and creamy, this mash is a wonderful alternative to traditional mashed potatoes.
Apple sauce: The sweet and tart flavour of apple sauce complements the salty ham beautifully.
Glazed carrots: The sweet and sticky glaze adds another dimension of flavour to your meal.
Storage Tips for Leftovers
Let's be honest, you'll probably have some leftover ham. But fear not! It's easy to store and use in other dishes:
1. Refrigerate the ham within two hours of cooking: Store the leftover ham in an airtight container in the refrigerator for up to 4 days.
2. Reheat the ham in the oven or microwave: You can reheat the ham in a low oven or in the microwave until it's heated through.
(Part 5) Beyond the Basic: Glazing Your Ham
Now, let's elevate our ham game with a delectable glaze. This is where we take our ham from "good" to "wow!"
honey-mustard glaze: A Sweet and Savory Delight
This is my go-to glaze, and it's always a crowd-pleaser. It's sweet, tangy, and oh-so-delicious.
Ingredients
1/2 cup honey
1/4 cup Dijon mustard
2 tablespoons brown sugar
Instructions
1. Combine the ingredients: In a small saucepan, combine the honey, mustard, and brown sugar.
2. Heat until the sugar dissolves: Heat over medium heat, stirring constantly, until the sugar dissolves.
3. Brush the glaze over the ham: Brush the glaze over the ham in the last 30 minutes of cooking.
brown sugar glaze: Simple and Satisfying
This is a classic for a reason: it's easy to make and always delivers a delicious caramelized finish.
Ingredients
1/2 cup brown sugar
1/4 cup water
Instructions
1. Combine the ingredients: In a small saucepan, combine the brown sugar and water.
2. Heat until the sugar dissolves: Heat over medium heat, stirring constantly, until the sugar dissolves.
3. Brush the glaze over the ham: Brush the glaze over the ham in the last 30 minutes of cooking.
(Part 6) Exploring Other Cooking Methods
Roasting isn't the only way to cook a ham, you know! Here are some alternative methods to try:
slow cooker ham: The Hands-Off Approach
If you're looking for a stress-free way to cook your ham, a slow cooker is your best friend. Just place the ham in the slow cooker and let it do its thing!
Instructions
Cook on low for 6-8 hours or on high for 3-4 hours.
Baste with a glaze if you like during the last hour of cooking.
grilled ham: Adding a Smoky Twist
For a delicious smoky flavour, try grilling your ham!
Instructions
Cook over medium heat for about 30 minutes per pound, turning occasionally and basting with a glaze.
Baked Ham: A Space-Saving Option
Baking a ham is similar to roasting, but you can use a baking dish. This method is particularly useful if you have limited oven space.
Instructions
Place the ham in a baking dish, add a cup of water to the bottom of the dish, and bake according to the roasting instructions.
(Part 7) Frequently Asked Questions (FAQs)
Here are some common questions about cooking raw ham.
Q: Can I cook raw ham from frozen?
A: Yes, you can cook raw ham from frozen, but it will take longer. I recommend defrosting it in the refrigerator overnight before cooking. You can also defrost it in cold water, but it's best to avoid defrosting at room temperature.
Q: How long does it take to cook a raw ham?
A: The cooking time will vary depending on the size of the ham. A general rule of thumb is about 15-20 minutes per pound for a bone-in ham and 10-15 minutes per pound for a boneless ham.
Q: Can I use leftover ham in other dishes?
A: Absolutely! Leftover ham is incredibly versatile. It's fantastic in sandwiches, salads, soups, casseroles, and even for breakfast! Try adding it to scrambled eggs or omelets for a delicious flavour boost.
Q: How can I tell if my ham is done?
A: The most reliable way to check if your ham is done is to use a meat thermometer. The internal temperature should reach 145°F (63°C). If you don't have a thermometer, you can check by poking the ham with a fork. If the juices run clear, it's done.
Q: What should I do with the leftover ham bones?
A: Don't toss those bones away! They're perfect for making a delicious ham bone soup. Simply simmer the bones in water with vegetables for a few hours, and you'll have a flavourful and nutritious soup.
(Part 8) Tips and Tricks for Ham Perfection
Here are a few additional tips to help you create a truly unforgettable ham experience:
Don't overcook the ham: Overcooked ham can become dry and tough.
Baste regularly: Basting the ham with pan juices or a glaze keeps it moist and flavourful.
Let the ham rest: Allowing the ham to rest for 15 minutes after cooking allows the juices to redistribute, resulting in a more tender and juicy ham.
Don't be afraid to experiment: There are endless possibilities when it comes to cooking ham. Feel free to try different glazes, seasonings, and accompaniments.
(Part 9) Conclusion: Embark on Your Ham Adventure!
There you have it! A comprehensive guide to cooking raw ham, from choosing the right ham to serving it up with pride. Remember, cooking should be a joy, and I encourage you to embrace the process. Experiment, have fun, and create a culinary masterpiece that will leave your guests wanting more. Now, go forth and conquer the art of ham cooking!
Everyone is watching

Prime Rib Roast Cooking Time Chart: Per Pound Guide
Cooking TipsPrime rib roast. Just the name conjures images of lavish dinners, crackling fires, and hearty laughter. It’s ...

How Long to Bake Potatoes in the Oven (Perfect Every Time)
Cooking TipsBaked potatoes are a staple in my kitchen. They're incredibly versatile, delicious, and surprisingly easy to m...

Perfect Rice Every Time: The Ultimate Guide to Cooking Rice
Cooking TipsAs a self-proclaimed foodie, I've always been a bit obsessed with rice. It's the foundation of countless cuisi...

The Ultimate Guide to Cooking Asparagus: Tips, Techniques, and Recipes
Cooking TipsAsparagus. The mere mention of this spring delicacy conjures up images of vibrant green spears, crisp and burs...

Ultimate Guide to Cooking the Perfect Thanksgiving Turkey
Cooking TipsThanksgiving. Just the word conjures up images of overflowing tables laden with delicious food, the scent of r...
