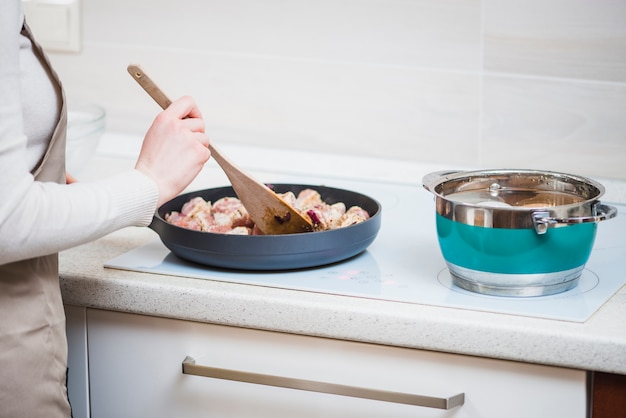
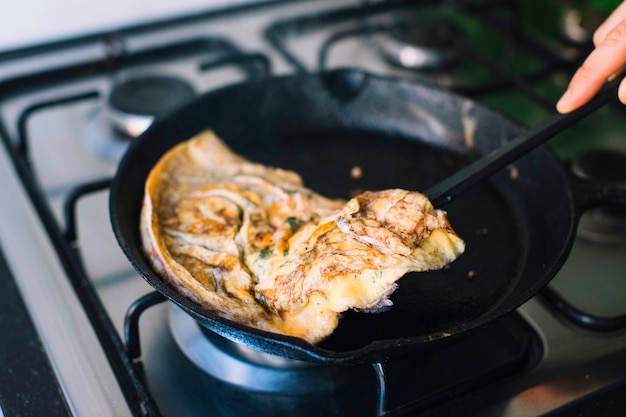
As a seasoned home cook, I’ve spent countless hours in the kitchen, experimenting with different recipes and techniques. And let me tell you, mastering the art of cooking chicken on the stovetop is a game-changer. It's such a versatile protein, perfect for everything from quick weeknight dinners to gourmet meals. But getting it right is crucial. Overcooked chicken is dry and rubbery, while undercooked chicken can be dangerous. So, how do you achieve that perfect golden-brown crust with juicy, tender meat inside? It all boils down to knowing how long to cook chicken on the stovetop. Fear not, my fellow foodies, for I'm here to guide you through this culinary adventure with my tried-and-true timing guide.
(Part 1) The Basics of Stovetop Chicken

Before we dive into the specifics, let's cover some essential ground rules for cooking chicken on the stovetop. This is about more than just timing; it's about setting the stage for success.
Choose the Right Pan
A good quality pan is your first line of defense against uneven cooking and sticking. I personally favour a cast iron skillet for its even heat distribution and ability to achieve that beautiful sear. The heavy weight of a cast iron pan also helps to retain heat, ensuring consistent cooking. But if you're looking for something lighter, a stainless steel pan with a good, thick base will do the trick. You’ll want to choose a pan that’s large enough to accommodate your chicken without overcrowding, and that has a good, flat bottom for even heat distribution. Avoid non-stick pans for searing chicken, as they tend to get too hot and can damage the coating.
Don't Crowd the Pan
Remember, space is key. If you overcrowd the pan, the chicken won't cook evenly and might steam instead of sear. This can lead to a soggy texture and uneven browning. Cook in batches if necessary, leaving enough room for the pieces to sizzle happily.
Pat It Dry
This might seem like a small detail, but patting your chicken pieces dry with paper towels is crucial. It helps achieve that lovely crisp skin we all crave. Damp chicken will steam instead of browning, and we don't want that, do we?
Season Generously
Don't be shy with the seasoning! Chicken is a blank canvas waiting for your flavour magic. Salt, pepper, herbs, spices - go wild! Experiment with different combinations to find your favourites. A good rule of thumb is to season liberally, ensuring that all sides of the chicken are well-coated. This will help to create a flavorful crust and enhance the overall taste of your chicken.
(Part 2) Timing Guide for chicken breasts

Alright, let's get down to business. Chicken breasts are the most common cut for stovetop cooking. Here's a breakdown of how long to cook them for different thicknesses:
Thin Chicken Breasts (1/2-inch Thick)
Thin chicken breasts cook quickly, so keep a close eye on them.
How to Cook:
- Heat a tablespoon of oil in your pan over medium-high heat.
- Season the chicken breasts generously with salt, pepper, and any other spices you fancy.
- Place the breasts in the hot pan, making sure they don't touch each other.
- Cook for 3-4 minutes per side, or until golden brown and cooked through.
- Use a meat thermometer to check for an internal temperature of 165°F (74°C).
For thin chicken breasts, I like to use a high heat to get a nice sear. Remember, the internal temperature should reach 165°F (74°C) for safe consumption.
Medium Chicken Breasts (1-inch Thick)
These require a little more time, but the principle is the same.
How to Cook:
- Follow the same steps as for thin chicken breasts, but increase the cooking time to 4-5 minutes per side.
- Again, use a meat thermometer to ensure an internal temperature of 165°F (74°C).
Thick Chicken Breasts (1.5 inches or More)
For thicker breasts, it's best to use a combination of searing and baking. This method ensures even cooking and prevents the breasts from becoming dry.
How to Cook:
- Sear the chicken breasts in a hot pan for 5-6 minutes per side, until golden brown.
- Transfer the breasts to a baking dish.
- Bake in a preheated oven at 350°F (175°C) for another 15-20 minutes, or until the internal temperature reaches 165°F (74°C).
(Part 3) Timing Guide for chicken thighs

Chicken thighs are my personal favourite. They're naturally juicier than breasts and hold up well to longer cooking times.
bone-in chicken thighs
These take a bit longer to cook, but they're worth the extra effort. Bone-in thighs retain more moisture and develop a deeper flavour as they cook.
How to Cook:
- Heat a tablespoon of oil in a pan over medium-high heat.
- Season the thighs generously with salt, pepper, and any other spices you desire.
- Place the thighs in the hot pan, making sure they don't touch each other.
- Cook for 8-10 minutes per side, or until golden brown and cooked through.
- Use a meat thermometer to check for an internal temperature of 165°F (74°C).
Skinless, boneless chicken thighs
These cook a bit faster than bone-in thighs, as they don't have the extra bone and skin to cook through.
How to Cook:
- Heat a tablespoon of oil in a pan over medium-high heat.
- Season the thighs generously with salt, pepper, and any other spices you desire.
- Place the thighs in the hot pan, making sure they don't touch each other.
- Cook for 6-8 minutes per side, or until golden brown and cooked through.
- Use a meat thermometer to check for an internal temperature of 165°F (74°C).
(Part 4) Timing Guide for chicken drumsticks
Chicken drumsticks, with their crispy skin and tender meat, are a classic comfort food. Here's how to cook them to perfection:
How to Cook:
- Heat a tablespoon of oil in a pan over medium-high heat.
- Season the drumsticks generously with salt, pepper, and any other spices you desire.
- Place the drumsticks in the hot pan, making sure they don't touch each other.
- Cook for 15-20 minutes, or until the skin is golden brown and the internal temperature reaches 165°F (74°C). You can also check for doneness by piercing the thickest part of the drumstick with a fork; if the juices run clear, it's cooked through.
(Part 5) Tips for Achieving Perfect Stovetop Chicken
Now that we've covered the timing, let's explore some extra tips to help you achieve that perfect stovetop chicken:
Don't Overcrowd the Pan
I've already mentioned this, but it's worth repeating. Overcrowding the pan will lead to steaming instead of searing, and we want that beautiful golden crust!
Use a Meat Thermometer
A meat thermometer is your best friend when it comes to cooking chicken. It takes the guesswork out of knowing whether it's cooked through, ensuring that it's safe to eat. Don't rely solely on visual cues; always check the internal temperature.
Rest the Chicken
After cooking, let the chicken rest for 5-10 minutes before slicing or serving. This allows the juices to redistribute, resulting in a more tender and flavorful final product.
Don't Be Afraid to Experiment
Cooking is all about experimentation! Try different seasoning combinations, add different sauces, and get creative with your sides. The possibilities are endless.
(Part 6) Mastering Different cooking techniques
The timing guide above is a good starting point, but sometimes you might want to explore other cooking techniques for different results.
Pan-Frying
This is a classic method for achieving that crispy skin and juicy meat. Simply heat a tablespoon of oil in a pan over medium-high heat, sear the chicken for a few minutes per side, then reduce the heat to medium and continue cooking until cooked through. This method is ideal for creating a beautiful crust and locking in moisture.
Sautéing
Sautéing is a quick and easy method for cooking chicken. Heat a tablespoon of oil in a pan over medium heat, then add the chicken and cook until cooked through, stirring occasionally. This is a great technique for when you need a quick meal and want to incorporate vegetables or other ingredients.
Braising
Braising is a gentle and flavorful way to cook chicken. Brown the chicken in a pan, then transfer it to a dutch oven or pot. Add liquid (stock, wine, or broth), cover, and cook in a low oven until tender. Braising is ideal for tougher cuts of chicken, like thighs, and results in incredibly tender and flavorful meat.
(Part 7) Serving Up delicious chicken
Once your chicken is cooked to perfection, there are endless possibilities for serving it up. Here are a few ideas to get you started:
Simple and Classic
Serve your cooked chicken with a side of mashed potatoes, roasted vegetables, or a green salad. A simple, classic meal that's always satisfying.
Mediterranean Flavors
Top your chicken with a lemon-herb sauce, olives, and feta cheese, and serve with a side of rice or couscous. This is a delicious and refreshing way to enjoy chicken.
Asian-Inspired
Stir-fry your chicken with vegetables and a delicious sauce, and serve over rice noodles. This is a quick and easy meal that's packed with flavour.
Mexican Fiesta
Make a flavorful chicken taco filling with salsa, onions, and cilantro, and serve with tortillas, sour cream, and avocado. A fun and festive meal that's perfect for a crowd.
(Part 8) FAQs
Here are some frequently asked questions about cooking chicken on the stovetop:
1. What temperature should I cook chicken on the stovetop?
For best results, cook chicken on medium-high heat. This will help achieve a crispy skin and prevent the meat from becoming dry. However, it's important to adjust the heat depending on the thickness of the chicken and the pan you're using.
2. How can I tell if my chicken is cooked through?
The best way to tell if your chicken is cooked through is to use a meat thermometer. It should reach an internal temperature of 165°F (74°C). You can also check by piercing the thickest part of the chicken with a fork; if the juices run clear, it's cooked through.
3. What should I do if my chicken is sticking to the pan?
If your chicken is sticking to the pan, try loosening it with a spatula. If that doesn't work, you can add a little bit of water or stock to the pan to help deglaze it and release the chicken. It's important to avoid using excessive force, as this could tear the chicken.
4. How long can I keep cooked chicken in the fridge?
Cooked chicken can be stored in the fridge for up to 3-4 days. Be sure to refrigerate it promptly after cooking.
5. Can I reheat chicken on the stovetop?
Yes, you can reheat chicken on the stovetop. Simply heat a tablespoon of oil in a pan over medium heat, then add the chicken and cook until heated through, stirring occasionally. You can also add a little bit of broth or sauce to keep the chicken moist.
There you have it, folks! A comprehensive guide to cooking chicken on the stovetop. Remember, practice makes perfect, so don't be afraid to experiment and find what works best for you. Happy cooking!
Everyone is watching

Prime Rib Roast Cooking Time Chart: Per Pound Guide
Cooking TipsPrime rib roast. Just the name conjures images of lavish dinners, crackling fires, and hearty laughter. It’s ...

How Long to Bake Potatoes in the Oven (Perfect Every Time)
Cooking TipsBaked potatoes are a staple in my kitchen. They're incredibly versatile, delicious, and surprisingly easy to m...

Perfect Rice Every Time: The Ultimate Guide to Cooking Rice
Cooking TipsAs a self-proclaimed foodie, I've always been a bit obsessed with rice. It's the foundation of countless cuisi...

The Ultimate Guide to Cooking Asparagus: Tips, Techniques, and Recipes
Cooking TipsAsparagus. The mere mention of this spring delicacy conjures up images of vibrant green spears, crisp and burs...

Ultimate Guide to Cooking the Perfect Thanksgiving Turkey
Cooking TipsThanksgiving. Just the word conjures up images of overflowing tables laden with delicious food, the scent of r...
