As a seasoned home cook, there are certain things I take pride in, and baking corn on the cob is definitely one of them. It's a simple dish, but getting it just right can make all the difference. There's nothing quite like sinking your teeth into a perfectly cooked ear of corn, bursting with sweetness and juicy kernels. But let's be honest, it can be a bit of a gamble sometimes. You don't want to end up with a crunchy, dry ear of corn, and you definitely don't want it to be mushy and undercooked. So, over the years, I've learned a few tricks of the trade, and I'm excited to share them with you. Let's dive into the world of baking corn on the cob and discover how to achieve those perfect results every single time.
(Part 1) The Art of Choosing the Right Corn

Choosing the Corn: A Guide to Spotting the Best Ears
The foundation of any good corn dish is, of course, the corn itself. I've always found that fresh corn, picked straight from the farm or a local market, makes all the difference. It's bursting with flavour and has that satisfying snap when you bite into it. If you can't get your hands on fresh corn, then look for corn that's as close to its harvest date as possible. A good rule of thumb is to choose ears that are heavy for their size and have husks that are bright green and slightly moist. This indicates that the corn is plump and well-hydrated, promising sweet and tender kernels.
Testing for Sweetness: A Simple Trick From My Grandma
Now, here's a little trick I learned from my grandma. To test for sweetness, gently peel back a few layers of the husk at the bottom of the ear. Look for the "silk," which is the thread-like stuff attached to the kernels. If the silk is light-coloured, it means the corn is young and sweet. If it's brown or dark, it might be a bit on the mature side, and the flavour might not be as intense. This is because as corn ages, the sugars in the kernels start to convert to starch, resulting in a less sweet and more starchy taste.
Avoiding "Old" Corn: Identifying Signs of Stale Corn
One thing I've learned over the years is that you want to avoid corn that's been sitting around for a while. The kernels might look plump, but they often lose their sweetness and moisture. A telltale sign of old corn is that the husks feel dry and papery. So, always check the date on the packaging, and if you're buying from a farmer's market, ask the vendor about the freshness of the corn. If you're unsure, don't hesitate to ask for a fresh ear to check the silk and the husks. Remember, freshness is key for that perfect, juicy corn experience.
(Part 2) Preparing Your Corn for Baking

Husk or No Husk? A Debate with a Delicious Outcome
Now, here's a question I get asked a lot: "Do I bake the corn with the husk on or off?". I'll be honest, I prefer baking corn with the husk on. It helps to keep the moisture in, resulting in a more tender and flavourful ear of corn. Plus, it's easier to clean up afterwards! But, if you're looking for a quicker method, you can certainly bake the corn without the husk. Just be sure to remove the silk before baking. However, baking with the husk on allows the corn to steam gently, enhancing its natural sweetness and juiciness. It's like creating a little micro-steamer in your oven!
The Silk Removal: A Crucial Step for Flavor
Speaking of silk, it's important to get rid of it before you bake the corn. I've learned the hard way that leaving it on can make the corn taste a bit earthy. There are a few ways to remove the silk. You can peel back the husk and gently pull it out with your fingers, or you can use a sharp knife to cut it off. I personally find using a knife to be the quickest and most efficient method. For those with sensitive hands, a pair of kitchen shears can also be a good option. Whatever method you choose, make sure you get rid of all the silk for the best flavour.
Butter and Seasoning: A Flavorful Upgrade
Before you bake the corn, you can add some flavour by brushing it with butter or oil. I love to use a blend of melted butter and a bit of olive oil, but feel free to get creative with your seasonings. You can use garlic powder, onion powder, chili powder, paprika, or anything else that tickles your fancy. You can even add a sprinkle of salt and pepper for a classic flavour profile. A touch of fresh herbs, like thyme or rosemary, adds another layer of complexity. Don't be afraid to experiment and discover your own favourite flavour combinations.
(Part 3) Baking Your Corn to Perfection

Baking Time and Temperature: The Sweet Spot for delicious corn
Now, here's where the real magic happens. The baking time for corn on the cob depends on the size of the ears and the oven temperature. In general, I find that baking the corn at 350 degrees fahrenheit (175 degrees Celsius) for about 20-30 minutes is a good starting point. You can check if it's done by gently pressing on a kernel with your fingernail. If it gives easily and releases a bit of milky juice, it's ready to go! But don't overcook it; you want the kernels to be tender, not mushy.
The Husk Test: A Visual Cue for Done Corn
One other trick I've learned is to check the husks. If the husks are dry and slightly browned, it's a good indication that the corn is done. If the husks are still green and moist, you might need to bake it a little longer. I usually keep a close eye on my corn during the last 10 minutes of baking to ensure it doesn't get overcooked. The husks act as a natural indicator, letting you know when the corn has reached its peak of perfection.
(Part 4) Bringing Out the Sweetness
The Cooling Trick: Enhancing Flavor Through Patience
Now, here's a little secret I've picked up over the years. If you want to bring out the natural sweetness of the corn, let it cool slightly before serving. I know it's tempting to dig in right away, but trust me, a few minutes of cooling will intensify those delicious flavours. As the corn cools, the starches in the kernels set, allowing the sugars to come through more prominently. It's a simple trick with a big impact on flavour.
(Part 5) Serving Up Your Corn
The Simplicity of It All: A Dish That Needs No Fuss
There's something so satisfying about a simple dish like corn on the cob. I love to serve it alongside grilled chicken, burgers, or just as a tasty side dish with a simple salad. But it's also amazing on its own, especially if you've got a good batch of fresh corn. Simply remove the husks, slather with butter, and enjoy the pure, sweet goodness. Sometimes, the simplest things are the most satisfying.
Adding a Touch of Fancy: A Splash of Flavor to Enhance Your Corn
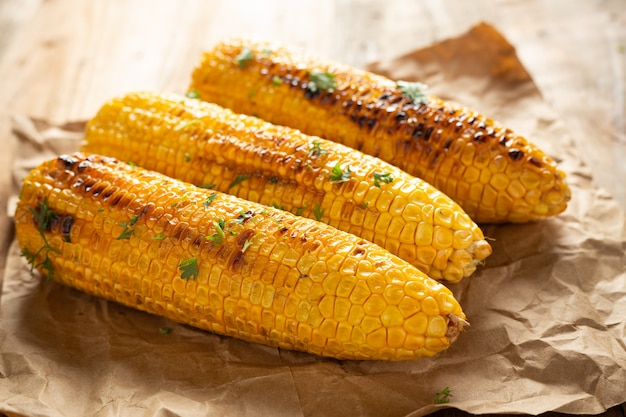
If you want to add a touch of fancy to your corn on the cob, you can sprinkle it with fresh herbs, like chives or parsley. You can also add a squeeze of lemon juice or a dollop of sour cream. The possibilities are endless, really! I love experimenting with different flavour combinations. For a smoky twist, sprinkle a little smoked paprika or chipotle powder. For a tangy kick, try a sprinkle of feta cheese and a drizzle of olive oil. Just remember, the most important thing is to enjoy the process and the delicious results!
(Part 6) Storing Your Corn for Later
Freezing for Freshness: Preserving the Sweetness for Another Time
Let's say you've got a whole bunch of fresh corn, and you're not quite sure how to use it all. Don't worry, you can freeze it for later! First, you want to cook the corn, either by boiling or steaming it. This helps to preserve the kernels and makes them easier to handle for freezing. Once it's cooked, let it cool completely, then shuck it and remove the kernels from the cob. Place the kernels in a freezer-safe bag or container, and freeze for up to 6 months. When you're ready to use the frozen corn, simply thaw it and use it in your favourite recipes. Remember to blanch the kernels for a few minutes before freezing for the best results.
(Part 7) The Many Ways to Enjoy Corn on the Cob
Beyond Baking: Exploring Other Cooking Methods
Now, let's face it, baking isn't the only way to enjoy corn on the cob. I've also got some other favourites. Boiling is a quick and easy method, especially if you're short on time. Just bring a large pot of salted water to a boil, add the corn, and cook for about 5-7 minutes. Another option is to steam the corn. This method helps to preserve the sweetness and moisture of the corn. Simply place the corn in a steamer basket and steam for about 8-10 minutes.
grilled corn on the Cob: A Smoky Delight
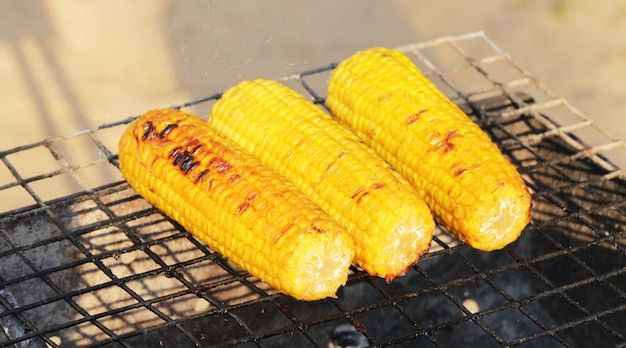
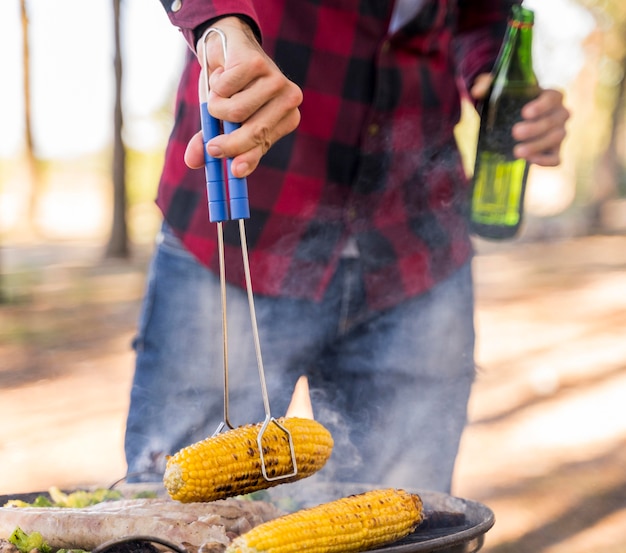
One of my personal favourites is grilled corn on the cob. It adds a smoky flavour that I absolutely love. Simply brush the corn with oil or butter, and grill it over medium heat for about 10-15 minutes, turning occasionally. Make sure the husks are removed before grilling, and be careful not to let the kernels burn. You can add a sprinkle of herbs or spices before grilling for extra flavour.
(Part 8) The Importance of Fresh Corn
Throughout my culinary journey, I've learned that there's nothing quite like fresh, in-season corn. It's packed with flavour and sweetness that you simply can't replicate with frozen or canned corn. The sweetness of fresh corn is truly unmatched, and its vibrant texture is something special. So, if you have the chance to get your hands on some fresh corn, I highly recommend trying it. It's a true summer treat!
(Part 9) FAQs: Your Burning Questions Answered
FAQs:
To make things even easier for you, I've compiled a list of some common questions I get asked about baking corn on the cob. Let's dive in!
1. Can I Bake Corn on the Cob in Foil?
Absolutely! Baking corn on the cob in foil is a great way to keep it moist and tender. Just wrap each ear of corn individually in foil, and bake it at 350 degrees Fahrenheit (175 degrees Celsius) for about 20-30 minutes. You'll get a beautifully cooked corn with a slightly steamed texture. The foil helps to trap the moisture and create a gentle steaming effect, ensuring that the corn cooks evenly and stays tender.
2. How Do I Know When My Corn is Done Baking?
As I mentioned earlier, there are a few ways to check if your corn is done. You can gently press on a kernel with your fingernail, and if it gives easily and releases a bit of milky juice, it's ready to go! You can also check the husks. If they're dry and slightly browned, it's a good indication that the corn is done. If you're still unsure, you can always use a meat thermometer inserted into a kernel to check for an internal temperature of around 170-180 degrees Fahrenheit (77-82 degrees Celsius). This ensures that the corn is cooked through and safe to eat.
3. Can I Bake Corn on the Cob with the Husk On?
Yes, you can bake corn on the cob with the husk on! In fact, I prefer this method. It helps to keep the moisture in and results in a more tender and flavourful ear of corn. Just make sure to remove the silk before baking. The husk acts like a natural steamer, allowing the corn to cook evenly and retain its sweetness and juiciness.
4. What Can I Do with Leftover Cooked Corn on the Cob?
There are lots of things you can do with leftover cooked corn on the cob. You can use the kernels in salads, soups, chilis, or even just eat them plain. You can also freeze leftover cooked corn for later use. Simply remove the kernels from the cob and place them in a freezer-safe bag or container. Frozen corn kernels can be used in a variety of recipes, such as cornbread, corn chowder, or even just as a topping for pasta dishes.
5. What are Some Other Ways to cook corn on the Cob?
Besides baking, you can also cook corn on the cob by boiling, steaming, or grilling. Each method has its own unique flavour and texture, so experiment with different techniques to find your favourite! For example, boiling corn on the cob results in a tender and slightly softer texture, while steaming corn helps to preserve its sweetness and vibrancy. grilling corn adds a smoky flavour that many people enjoy. Experiment with different methods to discover your own preferred way to enjoy corn on the cob.
I hope this comprehensive guide has helped you understand the ins and outs of baking corn on the cob. So, go forth, embrace the simple joys of cooking, and enjoy that perfect, sweet, and juicy ear of corn! Don't be afraid to try new things and experiment in the kitchen. After all, that's how you discover new flavours and techniques that become your own favourites!
Everyone is watching

Perfect Rice Every Time: The Ultimate Guide to Cooking Rice
Cooking TipsAs a self-proclaimed foodie, I've always been a bit obsessed with rice. It's the foundation of countless cuisi...

Ultimate Guide to Cooking the Perfect Thanksgiving Turkey
Cooking TipsThanksgiving. Just the word conjures up images of overflowing tables laden with delicious food, the scent of r...

The Ultimate Guide to Cooking Asparagus: Tips, Techniques, and Recipes
Cooking TipsAsparagus. The mere mention of this spring delicacy conjures up images of vibrant green spears, crisp and burs...

Can You Cook Spaghetti with Gasoline? (The Shocking Truth)
Cooking TipsWe've all seen those crazy internet trends. You know, the ones that make you wonder, "Did someone actually try...

Chorizo and Eggs Recipe: The Ultimate Guide
Cooking TipsRight, let’s talk about chorizo and eggs. You know, that classic Spanish dish that's always a winner. It's th...
