Ah, ham. A culinary classic, a festive staple, and a real crowd-pleaser. I've spent years in the kitchen, and let me tell you, there's nothing quite like a perfectly roasted ham, juicy and tender, with a beautiful golden crust. It's a dish that always makes a statement, especially for those special occasions like Christmas or Easter. But getting that ham just right, well, that's where the real skill comes in. Let's delve into the world of ham roasting and discover the secrets to a delicious and successful outcome.
(Part 1) Navigating the Ham Landscape
Before we dive into the oven, let's get acquainted with the different types of ham you'll encounter. It's important to understand what you're working with to ensure you cook it properly.
1. The Noble bone-in ham
These are the traditional hams, often found at the supermarket, with the bone still proudly intact. They're usually sold pre-cooked or "ready-to-eat," which means they just need a quick warm-up in the oven to reach that perfect temperature. Don't be fooled, though! Bone-in hams are not just about convenience. The bone adds a depth of flavor, and the slow roasting process helps to tenderize the meat even further.
2. The Convenient spiral-sliced ham
Now, this is a modern marvel: the spiral-sliced ham. These are pre-sliced and ready to serve, making them incredibly convenient for busy kitchens. You can find them in various sizes, from compact ones for a family dinner to massive ones that can feed a whole crowd. Like their bone-in counterparts, they're usually pre-cooked, needing only a gentle warming up. But again, a proper roast will take those pre-cooked flavors to the next level.
(Part 2) Temperatures: The Keys to Success
We're not just talking about the oven temperature here; we're talking about the internal temperature of the ham itself. This is the crucial factor in ensuring both safety and deliciousness.
1. Safety First: The Minimum Internal Temperature
food safety should always be a top priority, and that's why the Food Standards Agency recommends an internal temperature of 71°C (160°F) for a safe ham. This temperature ensures that any potentially harmful bacteria are eliminated.
2. Beyond Safety: Achieving Tenderness and Flavor
While 71°C guarantees safety, you want more than just a safe ham. You want a ham that's juicy, tender, and bursting with flavor. That's why I always aim for an internal temperature of 74°C (165°F). It's just a few degrees higher, but it makes a world of difference in the texture and overall deliciousness of the meat.
(Part 3) roasting time: The Ham's Marathon
The amount of time you need to roast your ham depends largely on its size. It's like a marathon – the bigger the ham, the longer the journey. Here's a guide to help you plan your roasting time:
1. The Sprinter: Small Ham (3-4 kg)
A small ham is like a sprinter – quick and efficient. You'll be looking at about 1-1.5 hours of roasting time. This might seem like a lot, but remember, the ham is already pre-cooked, so it's more about warming it up and adding a touch of flavor. You'll be surprised at how quickly this little ham transforms in the oven!
2. The Steady Runner: Medium Ham (5-7 kg)
A medium ham is like a steady runner – it needs time to reach its peak performance. It'll take about 2-2.5 hours to roast it properly. You might want to catch up on a good podcast or prepare a side dish while you wait. It's a good time to relax and let the delicious aromas fill your kitchen.
3. The Endurance Athlete: Large Ham (8-10 kg)
A large ham is like a marathon runner – it takes a serious commitment. You're looking at around 3-3.5 hours to roast it to perfection. It's a long time, but believe me, it's worth it. The result is a showstopper, a majestic centerpiece that'll be the talk of the party. Prepare yourself for a culinary triumph.
(Part 4) Elevating Your Roast: Tips for Perfection
Now that you have the basics down, let's add a few extra touches to ensure your ham reaches ultimate deliciousness. These are my secrets to turning a good roast into an unforgettable experience.
1. The Scoring Ritual: A crispy skin Revelation
Before you even think about putting your ham in the oven, grab a sharp knife and score the fat. This isn't just about aesthetics, although it does make the ham look stunning. Scoring allows the fat to render out, creating a delicious crispy skin that elevates the entire experience.
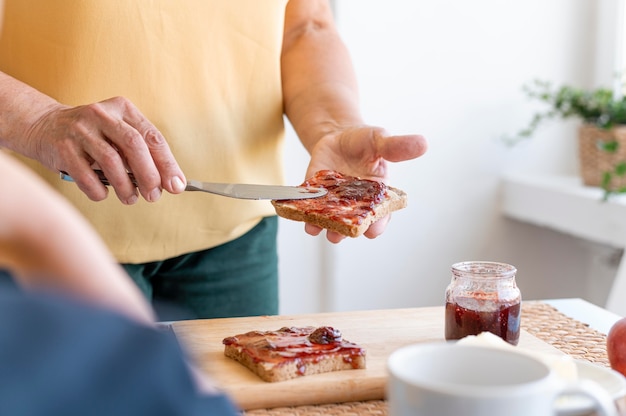
2. The Glaze: A Sweet and Savory Symphony
Here's where you can unleash your creativity. There's a whole world of glazes to explore, from simple honey mustard to elaborate fruit-based blends. I personally have a soft spot for a good apricot glaze - the sweetness balances perfectly with the savory ham. Just brush it on your ham about 30 minutes before it's done, and let it caramelize in the oven. You'll be amazed by the flavors it brings to the table.
3. The Rest: A Moment of Relaxation
Once your ham is cooked, don't rush to carve it! Let it rest for at least 15 minutes before you even think about touching it. This allows the juices to redistribute throughout the meat, ensuring that every slice is incredibly tender and juicy. Patience is key, my friend, and in this case, it truly pays off.
(Part 5) Knowing When It's Ready: Decoding the Ham's Signals
You've got the times and the temperatures, but how do you know for sure if your ham is cooked to perfection? I've been there myself, poking and prodding, wondering if it's ready. But don't worry, I've got you covered. Here's how to decipher the ham's signals:
1. The meat thermometer: The Ultimate Authority
The most reliable way to determine if your ham is cooked is by using a meat thermometer. Just insert it into the thickest part of the ham, making sure it doesn't touch the bone. If the temperature reaches 74°C (165°F), you're ready to celebrate!
2. The Fat Test: A Visual Clue
You can also check the fat. If it's clear and bubbly, then your ham is cooked. If the fat is still cloudy or opaque, it needs a bit more time in the oven.
3. The Touch Test: A Quick and Easy Check
Now, this one is a bit less scientific, but it can be useful in a pinch. Press the ham with your finger. If it springs back, it's cooked. If it leaves an indentation, it needs more time.
(Part 6) The Art of Carving: Unveiling the Culinary Masterpiece
Your ham is cooked, the aromas are intoxicating, and now it's time to reveal the culinary masterpiece. Carving a ham might seem daunting, but trust me, it's simpler than you think. Just follow these steps and you'll be a carving champion in no time.
1. Bone-in Ham: A Symphony of Slices
With a bone-in ham, you'll want to start by carving around the bone. Then, slice the ham into thin, even slices, going with the grain of the meat. You can also cut the ham into portions by cutting across the grain, creating elegant servings for your guests.
2. Spiral-sliced Ham: Effortless Elegance
With a spiral-sliced ham, it's really a case of just slicing off the slices. They're already pre-sliced, so you're practically done. If you want to be fancy, you can cut the ham into smaller portions, but most of the time, people just grab a slice and enjoy.
(Part 7) Storing Your Ham: Preserving the Feast
You've cooked your ham, carved it, and enjoyed it. But what about those leftovers? Don't let them go to waste! Proper storage ensures that you can enjoy your delicious ham for days to come.
1. Refrigerator: Short-Term Storage
The best way to store your ham is in the refrigerator. You can store it in the original packaging or wrap it tightly in plastic wrap or aluminum foil. It'll keep for 3-4 days in the fridge.
2. Freezing: Extending the Feast
You can also freeze your ham for up to 2 months. Just wrap it tightly in plastic wrap and then aluminum foil. When you're ready to use it, thaw it in the refrigerator for a few days. You can also thaw it in the microwave, but be careful not to overcook it.
(Part 8) Serving with Style: A Ham Feast fit for a King
Now, it's time to show off your culinary masterpiece. There are countless ways to serve a roasted ham, so let your imagination run wild! Here are a few ideas to get you started:
1. Classic Comfort: The Mash and Gravy Duo
A classic pairing is with mashed potatoes and gravy. It's a real comfort food combination that everyone loves. The creamy mashed potatoes complement the savory ham, and the rich gravy brings everything together perfectly.
2. Modern Twist: Roasted Vegetables and a Touch of Flair
For a more modern twist, try serving your ham with roasted vegetables like carrots, potatoes, and onions. The roasted vegetables bring a touch of sweetness and earthiness that pairs beautifully with the ham. You can also add a dollop of mustard or horseradish to the side for a little extra flavor.
3. Sandwich Delight: A Simple and Satisfying Treat
Don't forget about the sandwiches! ham sandwiches are a classic for a reason. They're easy to make and perfect for a quick lunch or snack. You can keep it simple with bread, ham, and a little mustard, or get creative with your favorite toppings.
(Part 9) FAQ: Addressing Your Burning Questions
You've got your ham cooking down to a science, but there are always those niggling questions that pop up. You're not alone, I've been there too. Here are some answers to those common queries:
1. Can I use a pre-cooked ham from the supermarket?
Absolutely! You can definitely use a pre-cooked ham. It's actually the easiest way to go. Just remember to check the package for cooking instructions. Most pre-cooked hams only need to be warmed up in the oven, so it's a very convenient option.
2. How do I make a glaze for my ham?
There are so many different glazes you can use. A simple honey mustard glaze is always a good option. You can also get more creative with a fruit glaze, like apricot or peach. Just mix your favorite ingredients together and brush it on your ham.
3. How do I know if my ham is safe to eat?
The best way to tell if your ham is safe to eat is by checking the internal temperature. It should reach 71°C (160°F). You can also check the fat. If it's clear and bubbly, then it's safe. If it's still cloudy, then it needs more time in the oven.
4. Can I eat leftover ham cold?
Yes, you can eat leftover ham cold. In fact, it's often considered a delicious treat. Just make sure to store it properly in the fridge and eat it within 3-4 days.
5. What can I do with leftover ham?
There are so many things you can do with leftover ham! You can make ham sandwiches, add it to a salad, or use it in a soup or stew. You can even chop it up and use it in a quiche or frittata. The possibilities are endless, so get creative and enjoy those delicious leftovers.
So there you have it, my secrets to a perfect roasted ham. It's not rocket science, but it does take a little bit of know-how. With these tips and tricks, you'll be able to impress your friends and family with a delicious, juicy, and tender ham. Happy roasting, and enjoy the feast!
Everyone is watching

Prime Rib Roast Cooking Time Chart: Per Pound Guide
Cooking TipsPrime rib roast. Just the name conjures images of lavish dinners, crackling fires, and hearty laughter. It’s ...

How Long to Bake Potatoes in the Oven (Perfect Every Time)
Cooking TipsBaked potatoes are a staple in my kitchen. They're incredibly versatile, delicious, and surprisingly easy to m...

Perfect Rice Every Time: The Ultimate Guide to Cooking Rice
Cooking TipsAs a self-proclaimed foodie, I've always been a bit obsessed with rice. It's the foundation of countless cuisi...

The Ultimate Guide to Cooking Asparagus: Tips, Techniques, and Recipes
Cooking TipsAsparagus. The mere mention of this spring delicacy conjures up images of vibrant green spears, crisp and burs...

Ultimate Guide to Cooking the Perfect Thanksgiving Turkey
Cooking TipsThanksgiving. Just the word conjures up images of overflowing tables laden with delicious food, the scent of r...