Oh, ham! The glorious, versatile, crowd-pleasing centerpiece of countless meals. I confess, I'm a bit of a ham enthusiast. It's a staple in my kitchen, and I've learned a thing or two about getting it just right. But let's be honest, figuring out how long to cook a ham can be a bit of a puzzle. With all those different types, cuts, and cooking methods, it's easy to feel a little lost.
Don't worry, I'm here to guide you through it! I've tackled the ham-cooking world, and trust me, I've made my fair share of mistakes. There have been times I've ended up with a ham drier than a desert, and others where it was still pink in the middle. But through trial and error, I've picked up some tricks that have saved me from those culinary blunders. I'm sharing my knowledge with you today, so you can avoid the same pitfalls.
So grab your apron, a glass of something refreshing, and get ready to delve into the wonderful world of ham cooking!
(Part 1) Navigating the Ham Aisle: choosing the right cut
The first step to cooking a delicious ham is picking the right one. The ham aisle can feel overwhelming, but I'll break it down for you. Here's a guide to understanding the different types of hams:
Ham Types:
- bone-in hams are the traditional choice. They tend to be larger and generally more flavorful, especially if you enjoy a more robust bite. You'll often find them with the shankbone intact, sometimes even with a portion of the leg bone attached.
- boneless hams offer convenience and ease of slicing. They're often pre-sliced, making them ideal for a quick and hassle-free meal. Think of them as the "convenience champions" of the ham world.
- spiral-sliced hams are boneless hams that have been artfully sliced in a spiral pattern. These are the ultimate convenience kings. They cook significantly faster than other cuts and are super easy to serve, just perfect for busy days.
Curing and Smoking:
- cured ham is the most common type. It's been soaked in a salt brine, which not only preserves it but also imparts a unique, savory flavor.
- smoked ham is cured ham that's been given a smoky treatment over wood chips. This process intensifies the flavor and adds a characteristic smoky aroma that's just heavenly.
- fresh ham is the uncured, unsmoked option. It has a milder flavor profile and is generally more perishable than its cured counterparts.
Now, with all these choices, how do you pick the perfect ham?
Choosing the Right Ham for Your Needs:
It all comes down to personal preference, your budget, and the occasion. Here's how to decide:
- For a quick and easy meal, go for a boneless or spiral-sliced ham. They're generally ready to eat and can be heated up in minutes. Perfect for a weeknight dinner or a casual lunch.
- For a more flavorful ham, choose a bone-in ham. They're often more flavorful because the bone adds depth, and they haven't been pre-sliced, which can sometimes dilute the flavor.
- For a special occasion, a smoked ham is a showstopper. It boasts a rich, smoky flavor that's sure to impress your guests. Perfect for holidays or a fancy gathering.
- For a healthier option, choose a fresh ham. It's lower in sodium and fat than cured hams, making it a healthier alternative.
Personally, I tend to grab a spiral-sliced ham for everyday meals. It's a lifesaver on busy days. But when I'm hosting a family gathering or a special dinner, a bone-in smoked ham is my go-to choice. It just has that extra special "wow" factor.
(Part 2) The Essentials: Understanding Ham cooking basics
Now that you've chosen your ham, it's time to get cooking! But before you fire up the oven, let's delve into some foundational principles that will help you cook the perfect ham every time.
Cooking Times:
The cooking time for a ham depends on its size and weight. Here are some general guidelines to keep in mind:
| Type of Ham | Cooking Time per Pound |
|---|---|
| Bone-in | 15-20 minutes |
| Boneless | 15-20 minutes |
| Spiral-sliced | 10-15 minutes |
These are just guidelines, remember. The actual cooking time will vary based on the ham's type, oven temperature, and size. But don't worry, I'll give you more precise instructions later on!
Oven Temperature:
The standard oven temperature for cooking a ham is 325°F (165°C). You can cook it at a lower temperature, like 300°F (150°C), but it will take longer. If you're baking your ham, I recommend using a lower temperature to ensure it stays moist. If you're roasting it, you can crank up the heat a bit for a crispier crust.
Ham Thermometer: Your Culinary Hero
The most essential tool in your ham-cooking arsenal is a meat thermometer. It's the only way to guarantee your ham is cooked to a safe internal temperature. The USDA recommends cooking ham to an internal temperature of 145°F (63°C). This ensures a safe and delicious result every time.
Now, let's explore the different cooking methods and how to apply these fundamentals in practice.
(Part 3) The Baking Method: A Classic Approach

Baking a ham is the most popular method, and for good reason. It's incredibly easy, and the result is a wonderfully moist and flavorful ham. Here's how to bake a ham like a pro:
1. Oven Preheat:
Preheat your oven to 325°F (165°C) and grab a roasting pan large enough to accommodate your ham. Now, let's talk about the ham itself.
2. Ham Preparation:
If your ham came wrapped in plastic, remove it. If it's already glazed, you can leave it as is. But, if you want to add your own touch, you can create a custom glaze or use a simple one made of honey, mustard, and brown sugar. If your ham feels dry, soaking it in a brine overnight will help keep it juicy.
Personally, I always soak my bone-in ham in a brine. I make a simple mix of water, salt, sugar, and spices. It really adds an extra layer of flavor and keeps the ham incredibly moist.
3. Oven Time:
Place the ham in the roasting pan. If it came with a sauce packet, pour it into the bottom of the pan. This will help keep the ham moist. Add about a cup of water to the bottom of the pan and cover the ham with aluminum foil.
Bake the ham according to the time guidelines I mentioned earlier. If you have a 10-12 pound ham, it'll take about 2-3 hours to cook. But again, the meat thermometer is your best friend. When it hits 145°F, you're good to go!
4. Resting Time:
Once the ham is cooked, let it rest for 10-15 minutes before carving. This allows the juices to redistribute, resulting in a more tender and juicy ham. Now, it's time to slice and serve!
You can serve it warm or cold, and it's delicious on its own or with a variety of side dishes. I love to pair it with roasted vegetables, mashed potatoes, and a green salad. And don't forget the glaze! Drizzle it over the top for an extra burst of flavor.
(Part 4) Roasting for a Crispy Crust
Roasting a ham is a great option if you're craving a crispy crust. It's a simple method, but it requires a little more attention than baking. Here's how to roast a ham to perfection:
1. Oven Preheat and Ham Prep:
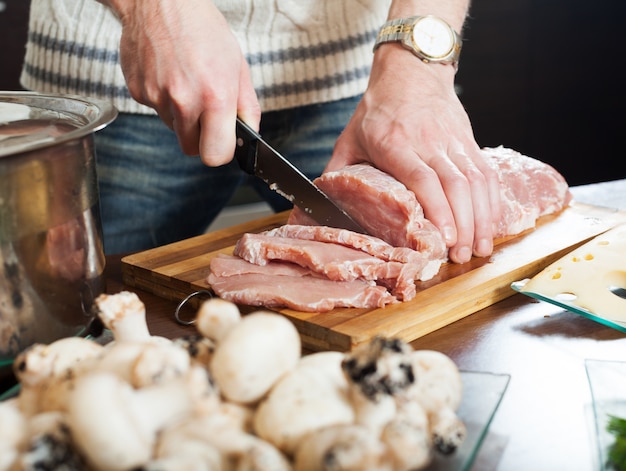
Preheat your oven to 350°F (175°C). If you're using a bone-in ham, you can score the fat with a sharp knife to help it brown better. This allows for a more even browning and a crispy crust.
2. roasting time:
Place the ham in a roasting pan and roast for about 15-20 minutes per pound. Remember, your trusty meat thermometer is always there to ensure the ham reaches the safe internal temperature of 145°F (63°C).
As it roasts, the ham will start to brown and become beautifully crispy. You can also add a glaze during the last 30 minutes of roasting to enhance the flavor and create a glossy, irresistible finish.
3. Rest Time:
Once the ham is cooked, let it rest for 10-15 minutes before carving. This will allow the juices to redistribute. Now you're ready to slice and serve!
One of my favorite ways to roast ham is with a simple glaze made of honey, mustard, and brown sugar. It's so easy to make and gives the ham a delightful sweet and tangy flavor that's always a winner.
(Part 5) Smoking for a Smoky Flavor: A More Advanced Technique
Smoking a ham is a more time-consuming method, but it yields a ham with a distinctive smoky flavor that's truly incredible. It's a bit more involved, but if you have the time and equipment, it's worth the effort.
1. Prepare the Ham and Smoker:
Prepare your ham by soaking it in a brine or dry-rubbing it with spices. This helps enhance the flavor and keeps the ham moist. Then, get your smoker ready. You'll need to add wood chips or chunks to the smoker, and you can experiment with different wood types to create unique flavor profiles. Hickory and apple wood are popular choices for smoking ham.
2. Smoke Time:
Place the ham in the smoker and smoke it at a low temperature of 225°F (107°C) for about 4-6 hours, or until it reaches an internal temperature of 145°F (63°C). The smoking time will vary based on the ham's size and the smoker you're using.
While smoking, maintain a steady temperature and add more wood chips or chunks as needed. You can also add a glaze during the last hour of smoking to add a beautiful finishing touch.
3. Rest Time:
Once the ham is cooked, let it rest for 10-15 minutes before carving. This allows the juices to redistribute. Now you're ready to slice and serve your smoky masterpiece.
I love to smoke ham with a dry rub made of brown sugar, paprika, garlic powder, and onion powder. It creates a sweet and savory flavor that complements the smoky aroma perfectly.
(Part 6) Glazing: A Touch of Sweetness and Shine
Glazing a ham is a simple way to add a delicious and beautiful finish. It also helps keep the ham moist and prevents it from drying out. There are countless glaze options, but here are some of my favorites:
honey-mustard glaze:
This is a classic and simple glaze that's always a crowd-pleaser. Combine equal parts honey and mustard, add a pinch of salt and pepper to taste, and you're ready to go! Brush the glaze over the ham during the last 30 minutes of cooking. This glaze works perfectly for both baking and roasting.
brown sugar glaze:
Another classic glaze, brown sugar is sweet and sticky. Simply combine brown sugar with a little bit of water and bring it to a simmer. Then, brush it over the ham during the last 30 minutes of cooking. You can also add a pinch of cinnamon or ginger for a more complex flavor.
cherry glaze:
For a festive and unique glaze, try a cherry glaze. Combine cherry preserves with a little bit of water and bring it to a simmer. Then, brush the glaze over the ham during the last 30 minutes of cooking. The sweet and tart flavor of the cherries complements the ham beautifully.
I often use a combination of glazes on my ham. For example, I might brush a honey-mustard glaze over the ham during the last 30 minutes of baking and then top it with a sprinkle of brown sugar glaze for a beautiful finish. It's all about getting creative in the kitchen!
(Part 7) Serving Your Ham Masterpiece
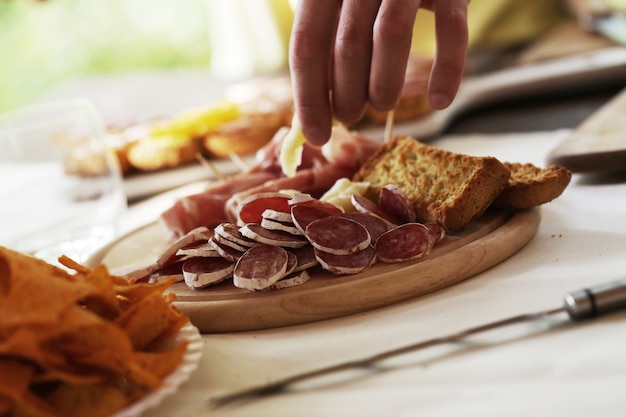
Serving a ham is the fun part. It's the perfect centerpiece for any meal, and it's sure to please everyone at the table. Here are a few tips for making your ham presentation a success:
Carving the Ham:
If you have a bone-in ham, you'll need to carve it. Use a sharp knife and slice the ham against the grain. This will prevent the meat from tearing and make it easier to slice. You can also use a carving fork to hold the ham in place while you carve. If you have a spiral-sliced ham, simply remove it from the packaging and serve it. It's that easy!
Side Dishes: A Feast of Flavor
Ham pairs well with a variety of side dishes, so get creative! Here are some of my favorites:
- Roasted Vegetables: Roasted vegetables like asparagus, carrots, and potatoes are a classic complement to ham.
- Mashed Potatoes: creamy mashed potatoes are a timeless side dish for ham.
- Green Salad: A light and refreshing green salad balances out the richness of the ham.
- Mac and Cheese: This creamy and cheesy dish is a crowd-pleaser that complements ham perfectly.
- fruit salad: A colorful fruit salad is a refreshing and healthy side dish.
I love to serve my ham with a combination of roasted vegetables, mashed potatoes, and a green salad. It's a balanced and delicious meal that everyone is sure to enjoy. Don't forget to offer some bread rolls, too. They're perfect for dipping into the glaze and soaking up all the delicious juices.
(Part 8) leftover ham: Delicious Possibilities
One of the best things about ham is that it's delicious hot or cold, and it's perfect for leftovers. Here are a few ideas to use up leftover ham and turn it into new culinary creations:
ham and cheese sandwiches:
Ham and cheese sandwiches are a classic leftover ham dish. Add other ingredients like lettuce, tomato, and mayonnaise for a more robust sandwich. Make a big batch to enjoy throughout the week.
Ham and bean soup:
Ham and bean soup is a hearty and comforting dish. It's easy to make and a great way to use leftover ham and beans. I love to add some vegetables like carrots and celery to my soup. It's a perfect meal for a cold day.
Ham and Potato Hash:
Ham and potato hash is a delicious and satisfying breakfast or brunch dish. Simply cook some diced potatoes with some chopped ham, onions, and peppers. You can add an egg to top it off. It's a classic dish that's always a hit.
You can also use leftover ham to make a ham and cheese quiche, a ham and pea salad, or a ham and potato frittata. I like to get creative and experiment with different recipes to use up leftover ham. It's a great way to avoid food waste and try new things in the kitchen!
FAQs
Here are some frequently asked questions about ham cooking:
1. How long does a ham need to be cooked?
The cooking time for a ham depends on its size and weight. I provided a table with general guidelines in Part 2. It's always a good idea to use a meat thermometer to ensure the ham is cooked to a safe internal temperature of 145°F (63°C).
2. How do I know if a ham is done?
The best way to know if a ham is done is to use a meat thermometer. It should reach an internal temperature of 145°F (63°C). If you don't have a meat thermometer, you can check the ham for doneness by inserting a fork into the thickest part. If the juices run clear, the ham is done. If the juices are still pink, the ham needs to cook longer.
3. Can I cook a ham in a slow cooker?
Yes, you can cook a ham in a slow cooker. It's a great option for a hands-off meal. Simply place the ham in the slow cooker, add a cup of water to the bottom, and cook on low for 6-8 hours or on high for 3-4 hours. Make sure the ham reaches an internal temperature of 145°F (63°C).
4. How can I make my ham more flavorful?
There are many ways to make your ham more flavorful. You can soak it in a brine, dry-rub it with spices, or glaze it with a sweet or savory sauce. You can also experiment with different types of wood for smoking your ham.
5. What should I do with leftover ham?
There are endless possibilities for leftover ham! You can use it in sandwiches, soups, salads, frittatas, quiches, or hash. Get creative and experiment with different recipes!
I hope this article has given you some helpful tips for cooking and serving ham. It's a delicious and versatile dish that's perfect for any occasion. So next time you're looking for a crowd-pleasing meal, give ham a try. You won't be disappointed!
Everyone is watching

Prime Rib Roast Cooking Time Chart: Per Pound Guide
Cooking TipsPrime rib roast. Just the name conjures images of lavish dinners, crackling fires, and hearty laughter. It’s ...

How Long to Bake Potatoes in the Oven (Perfect Every Time)
Cooking TipsBaked potatoes are a staple in my kitchen. They're incredibly versatile, delicious, and surprisingly easy to m...

Perfect Rice Every Time: The Ultimate Guide to Cooking Rice
Cooking TipsAs a self-proclaimed foodie, I've always been a bit obsessed with rice. It's the foundation of countless cuisi...

The Ultimate Guide to Cooking Asparagus: Tips, Techniques, and Recipes
Cooking TipsAsparagus. The mere mention of this spring delicacy conjures up images of vibrant green spears, crisp and burs...

Ultimate Guide to Cooking the Perfect Thanksgiving Turkey
Cooking TipsThanksgiving. Just the word conjures up images of overflowing tables laden with delicious food, the scent of r...