(Part 1) Turkey Bag Essentials

Before we get into the nitty-gritty of cooking, let's lay out the essential tools you'll need. These are the things that will make your turkey bag cooking experience a breeze.
1. The Turkey Bag Itself
You'll need a turkey bag, obviously. These come in various sizes, so choose one that's appropriate for the size of your turkey. You can find them at most supermarkets, especially during the holiday season, and online. Make sure you get a good quality bag, one that's thick and heat-resistant. You don't want a flimsy bag splitting open in the oven, trust me! I've learned the hard way, and let's just say it's not pretty.
2. A Large roasting pan
You'll need a roasting pan that can comfortably accommodate the turkey bag. It needs to be big enough to allow the bag to sit flat and have some room for the juices to collect. If you're using a smaller roasting pan, the bag might bulge and could even split.
3. A Large Pot or Bowl for Brining
If you're planning to brine your turkey (which I highly recommend), you'll need a large pot or bowl that's big enough to hold your turkey and the brine solution. A good quality food-grade plastic container is a great option for this. You can find them in various sizes at most stores.
4. A Kitchen Thermometer
This is crucial for making sure your turkey is cooked through. A digital thermometer is the best option, as it provides accurate readings quickly. Get one with a long probe that can reach the thickest part of the turkey. Don't rely on the "pop-up" thermometers that come with some turkeys; they're not always reliable.
5. A Sharp Knife
This is for carving your turkey once it's cooked. A good quality carving knife will make the job easier. Invest in a good one, it's worth it! A dull knife can make carving a frustrating experience.
(Part 2) Choosing Your Turkey

Now, let's talk about the star of the show: your turkey. There are a few things to consider when choosing the right bird.
1. Size Matters
First things first, consider the size of your turkey. The general rule of thumb is to allow about 1 pound of turkey per person. However, if you're having a big gathering, you might want to go with a larger bird to ensure there's enough for everyone. Don't be afraid to ask for help at the butcher counter. They are there to help you choose the perfect turkey! You can even ask them to prep the bird for you by removing the giblets and neck, saving you a bit of time.
2. Fresh or Frozen
Next, decide if you want a fresh or frozen turkey. Fresh turkeys will usually have a more intense flavor, but frozen turkeys are often easier to store and can be defrosted slowly in the fridge. Just make sure you defrost it properly, which we'll talk about later.
3. The Big Day
If you're cooking for a special occasion, you might want to consider a heritage breed turkey. These birds are typically smaller, but they have a richer flavor. However, they can be a bit pricier than standard turkeys.
(Part 3) The Art of Brining

Brining is a game-changer for turkey. It involves soaking the turkey in a saltwater solution, which draws moisture into the meat, preventing it from drying out during cooking. This results in a juicy, flavorful turkey, a far cry from the dry, stringy bird you might have encountered before.
1. The Brine Solution
The simplest brine is a mixture of salt, water, and a little bit of sugar. You can add other ingredients for extra flavor, like herbs, spices, or citrus fruits. I like to use a brine with rosemary, thyme, and garlic. Just be sure to adjust the amount of salt depending on the size of your turkey. A good rule of thumb is to use 1 cup of salt per gallon of water. You can find countless brine recipes online, so experiment and find one that suits your taste.
2. Brining Time
The turkey should be soaked in the brine for at least 4 hours, but ideally overnight. If you're brining a fresh turkey, it's best to brine it in the refrigerator. If you're using a frozen turkey, defrost it completely before brining.
3. Dry Brining
If you're short on time or don't want to deal with a big pot of brine, you can always dry brine your turkey. This involves rubbing the turkey with a mixture of salt, sugar, and spices, and then letting it sit uncovered in the refrigerator for 24-48 hours. This method allows the salt to penetrate the meat, without adding any extra moisture. The result is a flavorful, crispy-skinned turkey.
(Part 4) Preparing the Turkey for the Bag
Now that you’ve chosen your turkey and perhaps given it a good brine, it's time to get it ready for its starring role in the bag.
1. Cleaning Up
First, pat the turkey dry with paper towels. Remove any giblets and neck from the cavity. You can use these for making stock, if you wish. If you bought the turkey prepped, you're good to go!
2. Spice It Up
Season your turkey generously inside and out. This is where you can really let your creativity shine. I like to use a simple blend of salt, pepper, and paprika. But you can add anything you like, such as garlic powder, onion powder, herbs, or even a dry rub. The possibilities are endless!
3. Stuffing It In
If you’re planning on stuffing your turkey, stuff it loosely into the cavity. Don't overstuff it, as this can make the turkey cook unevenly. If you're cooking stuffing separately, you can skip this step.
4. Tying It Up
Now it’s time to tie the legs together. You can do this with kitchen twine or rubber bands. Tying the legs ensures the turkey cooks evenly. You can also use a little butter or olive oil to help keep the skin moist. I like to rub a little butter under the skin of the breast to keep it extra moist.
(Part 5) Cooking the Turkey in the Bag
Alright, the moment of truth. It's time to cook that turkey!
1. Bag It Up
Place the turkey into the bag, making sure it's big enough to accommodate the bird without being too crowded. Leave some space for the turkey to expand during cooking. Don't worry, the bag is designed to withstand the heat and expansion.
2. Adding Liquids
Add a cup or two of broth or water to the bag. This will help create steam and keep the turkey moist. You can also add a few tablespoons of butter or olive oil for extra flavor. I like to add a few sprigs of rosemary and thyme to the bag as well. They infuse the turkey with a delicious aroma. If you have any leftover brine, you can use some of that too.
3. Sealing It Up
Close the bag securely, making sure there are no air bubbles trapped inside. Tie the bag tightly at the top, or use a twist tie, to seal it. Make sure the bag is tightly sealed, but not overstuffed.
4. cooking time
Place the sealed bag in a large roasting pan. Then, place it in a preheated oven at 325 degrees Fahrenheit (160 degrees Celsius) for approximately 3-4 hours. The cooking time will vary depending on the size of the turkey. Use a meat thermometer to check the internal temperature. The turkey is done when it reaches an internal temperature of 165 degrees Fahrenheit (74 degrees Celsius) in the thickest part of the thigh.
5. Resting Time
Once the turkey is cooked, remove it from the oven and let it rest for about 30 minutes before carving. This allows the juices to redistribute throughout the meat, resulting in a juicier turkey.
(Part 6) Carving the Turkey
After the turkey has rested, it’s time to carve it. This is a crucial step, as it can make or break the presentation of your bird.
1. The Tools of the Trade
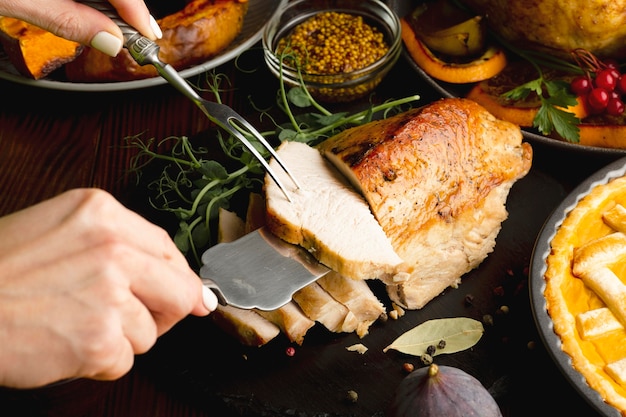
You'll need a carving knife and a carving fork. Make sure your knife is sharp, as this will make carving easier. The carving fork is used to hold the turkey in place while you carve.
2. Removing the Breast
Start by removing the breast meat. Cut along the bone on one side of the breast and then gently lift the breast off the bone. You can then slice the breast into thin pieces.
3. Removing the Legs
Next, remove the legs. Cut along the joint where the leg meets the thigh. Then, cut through the thigh bone. You can then separate the thigh and drumstick.
4. Don't Forget the Wings
Finally, remove the wings. Cut along the joint where the wing meets the body.
(Part 7) Gravy Time!
The gravy is the crowning glory of any roast turkey dinner. And with the bag method, it's super easy to make.
1. The Juices
After you've carved the turkey, you'll have a lot of delicious juices left in the roasting pan. Carefully pour the juices into a saucepan.
2. Deglazing the Pan
Add a tablespoon of butter to the roasting pan and scrape up any remaining browned bits with a wooden spoon. Pour this into the saucepan with the juices.
3. Thickening the Gravy
You can thicken the gravy with flour, cornstarch, or a commercial gravy thickener. Whisk the thickening agent into a small amount of cold water to create a slurry. Gradually whisk the slurry into the hot juices, stirring constantly until the gravy has thickened. Season with salt and pepper to taste.
(Part 8) side dishes
Now, let's talk sides. Of course, a roast turkey needs some delicious accompaniments. Here are a few of my favorites:
1. Roasted Vegetables
Roasted vegetables are a classic side dish for roast turkey. They’re easy to prepare and add a wonderful depth of flavor. Try roasting root vegetables like carrots, potatoes, and parsnips. Or go for something more seasonal, like Brussels sprouts or asparagus. You can even roast the vegetables in the same pan with the turkey, just make sure to remove them before the turkey is completely cooked.
2. Stuffing
Stuffing is another must-have for many thanksgiving dinners. It can be cooked inside the turkey or separately in a baking dish. A classic stuffing is made with bread, herbs, and vegetables. But you can get creative with your stuffing. You can add sausage, cranberries, or even nuts.
3. Cranberry Sauce
Cranberry sauce is a perfect complement to the savory flavors of roast turkey. You can make it from scratch, or use a store-bought version. I like to add a bit of orange zest to my cranberry sauce for an extra burst of flavor.
4. mashed potatoes
Mashed potatoes are another classic side dish. They’re simple to prepare and always a crowd-pleaser. You can make them with butter and milk, or get creative with toppings like cheese, chives, or bacon bits.
5. green bean casserole
Green bean casserole is a Thanksgiving tradition for many families. It’s a creamy and cheesy dish that’s perfect for the holiday. You can use fresh green beans or frozen ones.
(Part 9) Leftovers
Okay, let's be real, you're going to have leftovers. And let’s face it, turkey leftovers are the best! Here are a few ideas for using them up.
1. turkey sandwiches
A classic. Pile your favorite turkey, stuffing, and cranberry sauce onto a crusty roll.
2. turkey salad
Dice up some leftover turkey, add some mayonnaise, celery, and onion, and you have yourself a delicious turkey salad. You can serve it on bread, crackers, or even lettuce leaves.
3. turkey soup
Leftover turkey makes for a fantastic soup. You can add vegetables, noodles, or rice. The possibilities are endless.
4. Turkey Shepherd's Pie
Top a layer of mashed potatoes with a hearty mixture of leftover turkey and vegetables for a delicious Shepherd's Pie.
5. Turkey Quesadillas
Add leftover turkey to your favorite quesadilla filling. It's a delicious way to use up leftover turkey.
FAQs
Here are a few frequently asked questions about turkey bag cooking:
1. Can I Use a Regular Oven Bag Instead of a Turkey Bag?
While you can use a regular oven bag, it's not ideal for cooking a turkey. They are typically thinner and may not be as heat-resistant. A turkey bag is specifically designed for cooking a large bird, so it's more durable and can withstand higher temperatures.
2. What If My Turkey Bag Splits?
The chances of your bag splitting are slim, especially if you use a good quality bag. But if it does happen, don't panic! Just carefully remove the turkey from the bag, place it in a roasting pan, and continue cooking it in the oven until it's done. You'll need to baste the turkey frequently to keep it moist.
3. How Long Should I Defrost a Frozen Turkey?
The best way to defrost a frozen turkey is in the refrigerator. Allow about 24 hours for every 5 pounds of turkey. So, a 12-pound turkey will take about 5 days to defrost. You can also defrost a turkey in cold water. Place the turkey in a leak-proof bag and submerge it in cold water. Change the water every 30 minutes. A 12-pound turkey will take about 6-8 hours to defrost this way. Never defrost a turkey at room temperature, as this can allow bacteria to grow.
4. How Do I Know If My Turkey is Cooked Through?
The best way to tell if your turkey is cooked through is to use a meat thermometer. Insert the thermometer into the thickest part of the thigh, making sure it doesn't touch the bone. The turkey is done when the internal temperature reaches 165 degrees Fahrenheit (74 degrees Celsius).
5. How Do I Keep the Turkey Moist While Carving?
The key to keeping the turkey moist while carving is to let it rest for at least 30 minutes after it's cooked. This allows the juices to redistribute throughout the meat. You can also tent the turkey with aluminum foil to keep it warm and prevent it from drying out.
There you have it, folks, the ultimate guide to easy turkey bag cooking. So go forth, experiment, and enjoy the succulent results! And remember, if you have any questions, don't hesitate to ask!Everyone is watching

Prime Rib Roast Cooking Time Chart: Per Pound Guide
Cooking TipsPrime rib roast. Just the name conjures images of lavish dinners, crackling fires, and hearty laughter. It’s ...

How Long to Bake Potatoes in the Oven (Perfect Every Time)
Cooking TipsBaked potatoes are a staple in my kitchen. They're incredibly versatile, delicious, and surprisingly easy to m...

Perfect Rice Every Time: The Ultimate Guide to Cooking Rice
Cooking TipsAs a self-proclaimed foodie, I've always been a bit obsessed with rice. It's the foundation of countless cuisi...

The Ultimate Guide to Cooking Asparagus: Tips, Techniques, and Recipes
Cooking TipsAsparagus. The mere mention of this spring delicacy conjures up images of vibrant green spears, crisp and burs...

Ultimate Guide to Cooking the Perfect Thanksgiving Turkey
Cooking TipsThanksgiving. Just the word conjures up images of overflowing tables laden with delicious food, the scent of r...
