Let’s talk about ham, but not just any old ham. We're diving into the world of delicious bone-in ham recipes, the kind that’ll make you the star of any gathering. Think mouthwatering flavours, tender meat that melts in your mouth, and recipes that'll have your guests singing your praises.
I’ve been a ham enthusiast for years. It all started with my mum's Easter ham, a glorious, glazed, perfectly cooked masterpiece. See, I’m not just talking about any ham. We're talking bone-in ham, the real deal. The bone adds flavour and the meat itself is juicier, more delicious. But, I’ll admit, getting that perfect ham wasn’t always easy. I’ve had my fair share of dry, overcooked ham disasters. But, through trial and error (and a lot of research!), I've finally cracked the code. And I'm here to share my secrets with you!
(Part 1) Choosing the Right Ham - The Foundation of Your Feast
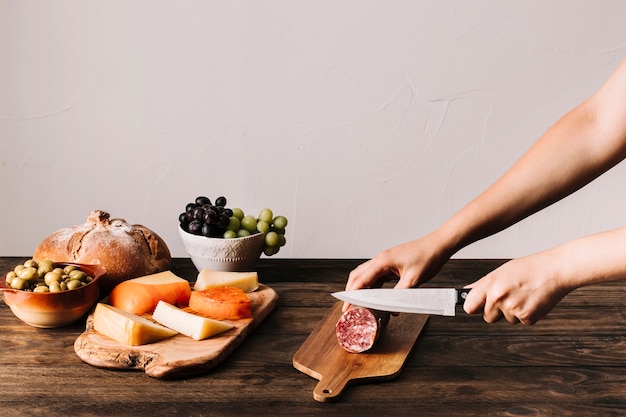
Before we get our hands dirty, we need to pick the right ham, because a good ham is like the foundation of a house – if it’s shaky, the whole thing crumbles.
Types of Bone-In Ham - Understanding Your Options
First, let’s talk about the different types of ham available. You've got two main contenders:
- fresh ham: This is raw ham, typically cured with salt. You'll need to cook it from scratch, which takes more time, but the reward is worth it. The flavour is intense, and the texture is unmatched.
- cured ham: This is already cooked, but it often needs to be reheated. There are a few different types of cured ham:
- smoked ham: This is the classic ham you find at Easter, with a smoky flavour and a nice glaze. It's already cooked, so it's practically ready to go. It's a great choice for a quick and easy meal.
- spiral-sliced ham: This ham is sliced into a spiral shape, making it easy to carve and serve. It's usually pre-cooked, but reheating brings out the best in its flavour and tenderness.
The best choice depends on your cooking style and the occasion. If you're looking for a more traditional ham experience, fresh ham is the way to go. If you're looking for something quick and easy, cured ham is the perfect choice.
Choosing the Right Size - Feeding Your Crowd
Now, let’s talk about size. How many people are you feeding? Do you want leftovers? I usually go for a ham that’s about 1-1.5 pounds per person, just to be on the safe side. Remember, those bones take up a fair amount of space, so keep that in mind when calculating the weight.
For a smaller gathering, a smaller ham is a great option. It's easier to manage, and it’s less likely to leave you with a mountain of leftovers. But for a larger party, go for a bigger ham. It's impressive, it's sure to be enough to feed everyone, and it'll give you plenty of leftovers for delicious sandwiches and other dishes.
Quality Matters: The Key to a delicious ham
It's tempting to go for the cheapest option, but trust me, quality matters. A good ham, from a reputable butcher or grocery store, will taste so much better. It’s an investment in flavour, and you won't regret it. I personally prefer a ham with a good fat content, as it adds flavour and keeps the meat moist.
You can often find high-quality hams on sale, especially during holidays. Just be sure to check the label for the date of packaging and the origin of the ham. A good ham will have a clear, even colour and a firm texture. If it smells off or looks discoloured, it’s best to avoid it.
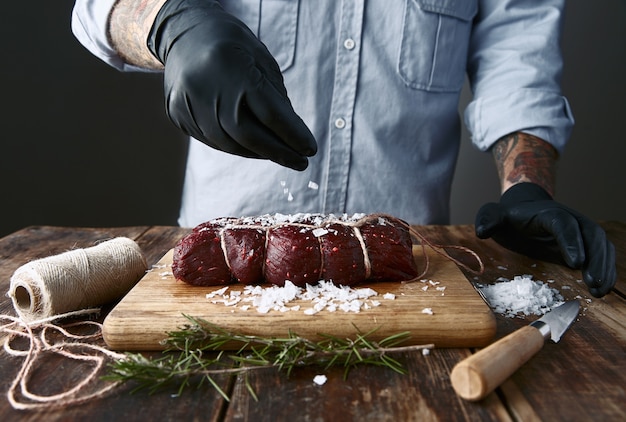
(Part 2) The Prep Work: Getting Ready for a Delicious Adventure
Now that you’ve got your ham sorted, it’s time to get down to business. This is the prep work that sets the stage for an amazing ham.
1. The Skin: To Score or Not to Score?
The first thing you need to decide is whether to score the skin. Scoring means cutting small, diagonal lines into the skin. Why do it? It allows the fat to render during cooking, giving you a crispy, delicious skin. But, be warned, it can be a bit fiddly. If you’re not a pro, you might end up with some uneven cuts. But hey, it’s all part of the adventure!
If you’re feeling adventurous, go for it! Scoring the skin takes a bit of time and effort, but it's worth it. If you’re not feeling confident, don’t worry! You can skip this step and still have a delicious ham.
2. The Glaze: Where the Magic Happens
Now, the glaze is where you really get to be creative. A good glaze adds sweetness and shine to your ham, taking the flavour to a whole new level. There are endless possibilities, but here are a few of my favourites:
- Classic brown sugar glaze: This is a simple but effective glaze. Just mix brown sugar, honey, mustard, and a bit of water. It’s sweet, tangy, and absolutely perfect. You can also add a pinch of cinnamon or nutmeg for extra warmth.
- pineapple glaze: If you’re looking for a tropical twist, try this one. Mix pineapple juice, brown sugar, and a little bit of orange zest. It’s a perfect match for the rich flavour of ham. You can also add a splash of rum for a boozy kick.
- Bourbon Glaze: For a sophisticated and boozy touch, try a bourbon glaze. Combine bourbon, brown sugar, honey, and a pinch of cinnamon. It’s surprisingly delicious!
You can always get creative with your own glaze combinations. Don’t be afraid to experiment! You can use fruit jams, maple syrup, or even beer in your glaze. Just remember to adjust the sweetness based on the type of ham you’re using. A more intensely flavoured ham might require a less sugary glaze.
3. The Final Touches: A Little Extra Love
Okay, so we’ve got our ham, we’ve scored it (if we’re brave!), and we’ve got a delicious glaze. What else can we do to give our ham some extra love? Here’s a few ideas:
- Stuffed Ham: Add some extra flavour by stuffing the ham. You can stuff the cavity with fruits, vegetables, herbs, or even a mix of all three. Get creative! A popular combination is apple and apricot, but you can also use plums, pears, or figs. For a savory stuffing, try a mixture of onions, carrots, celery, and herbs.
- Add Some Spice: Give your ham a bit of a kick with some spices. A sprinkle of black pepper, paprika, or even a bit of chili powder can add some depth of flavour. You can also add a pinch of garlic powder or onion powder for extra umami.
Remember, the prep work is where you can really make your ham your own.
(Part 3) Cooking the Perfect Bone-In Ham - Techniques for Tenderness
Now, it’s time for the main event – cooking your ham. The key is to cook it low and slow, so you get tender, juicy meat that falls apart.
1. The oven method: Easy and Reliable
The oven is a classic choice for cooking ham. It's simple, reliable, and allows you to create a beautiful, even glaze. Here's what you need to do:
- Preheat your oven to 325°F (160°C). This is the perfect temperature for cooking a bone-in ham, as it’s low enough to prevent drying out the meat.
- Place the ham in a roasting pan. Make sure the pan is large enough to accommodate the ham, with a little extra space around it. You'll also want to add about a cup of water to the bottom of the pan to help keep the ham moist. This creates steam, which helps keep the meat juicy.
- Bake the ham for about 15-20 minutes per pound. This is a general rule, but you might need to adjust the time based on the size of your ham and the type of ham you’re using. For example, a cured ham will need less cooking time than a fresh ham.
- Baste the ham with your glaze every 30 minutes. This will help the glaze set and add a beautiful colour to your ham. You can also add more water to the pan if it starts to dry out.
- Check the internal temperature of the ham. It should reach an internal temperature of 145°F (63°C) for a bone-in ham. You can use a meat thermometer to ensure it’s cooked through.
- Let the ham rest for 15-20 minutes before slicing and serving. This will allow the juices to redistribute, resulting in a more tender and flavorful ham.
It seems like a lot of steps, but it’s really not that complicated. Trust me, even a beginner can pull off a perfect oven-cooked ham. And remember, the key is patience. Don’t rush the process!
2. The slow cooker method: Effortless Cooking
Here's a secret weapon: the slow cooker. It’s a bit more hands-off than the oven, and it produces deliciously tender ham every time. It’s the perfect method for those times when you just want to set it and forget it.
- Place the ham in the slow cooker. Make sure the ham fits comfortably in the slow cooker, leaving a little bit of space around it.
- Pour about a cup of water or broth into the bottom of the slow cooker. This will help keep the ham moist during cooking.
- Cook the ham on low for 6-8 hours, or on high for 3-4 hours. The cooking time will vary depending on the size of the ham. Make sure the ham reaches an internal temperature of 145°F (63°C).
- Baste the ham with your glaze during the last hour of cooking. This will add a beautiful glaze and a delicious flavour to the ham.
- Let the ham rest for 15-20 minutes before slicing and serving. This will ensure the meat stays moist.
See, I told you it was easy! The slow cooker does all the hard work for you. You just have to set it and forget it. Now, you can relax and enjoy your day!
3. The instant pot Method: Speedy and Convenient
Short on time? No problem! The Instant Pot is a lifesaver when you need a quick and easy meal. It can cook a bone-in ham in a fraction of the time, with minimal effort. Here’s how to do it:
- Place the ham in the Instant Pot. Make sure the ham fits comfortably in the pot, leaving a little bit of space around it.
- Add about a cup of water or broth to the bottom of the Instant Pot. This will help keep the ham moist during cooking.
- Cook the ham on high pressure for 45-60 minutes, depending on the size of the ham. Once the cooking time is up, let the pressure release naturally for 15 minutes. Then, manually release the remaining pressure.
- Remove the ham from the Instant Pot and place it on a cutting board. Let the ham rest for 15-20 minutes before slicing and serving.
The Instant Pot is perfect for busy weeknights, when you need a delicious meal without a lot of fuss. It’s so easy, even the kids can do it!
(Part 4) Serving Up Your Masterpiece - Impressing Your Guests
You’ve cooked a stunning ham and it’s ready to be served. Now, it’s time to make your guests feel like royalty. Let's show them just how much care and effort went into this delicious creation.
1. The Art of Carving: A Visual Feast
First impressions matter, and when it comes to ham, carving makes a big difference. A well-carved ham looks more impressive and makes the meat easier to serve. Here's how to do it:
- Start by removing the ham from the bone. You can use a sharp carving knife to cut around the bone, or if you’re feeling fancy, use a ham carving knife.
- Cut the ham into slices. You can make thin slices for sandwiches, or thicker slices for serving with sides.
If you're feeling intimidated, there are plenty of helpful videos online that show you the proper techniques. Remember, practice makes perfect, and even if it doesn’t go perfectly, your guests will be impressed by your effort.
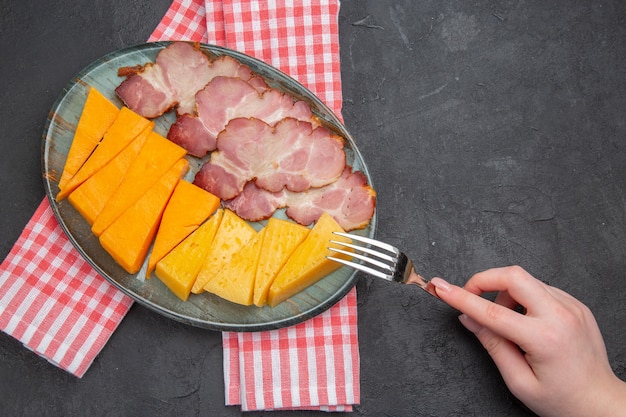
2. Delicious Accompaniments: Putting Together a Feast
A delicious ham deserves equally delicious sides. Here are some of my favourite ways to elevate your ham feast:
- Classic potato salad: This is a timeless classic that pairs perfectly with ham. You can make it from scratch, or grab a good quality pre-made option from the grocery store. Adding some chopped ham to the potato salad is a great way to make it even more flavorful.
- green bean casserole: This creamy and cheesy casserole is a crowd-pleaser and adds a comforting touch to your meal. You can also add some chopped ham to the casserole for a more substantial dish.
- Mac and Cheese: There's nothing like a big bowl of mac and cheese to satisfy the whole family. I like to make mine from scratch with a creamy sauce and a blend of sharp and mild cheeses. You can also add some chopped ham to the mac and cheese for a heartier and more flavorful dish.
- fruit salad: A colourful fruit salad balances out the richness of the ham and provides a refreshing contrast. You can also add some chopped ham to the fruit salad for a sweet and savory side dish.
Remember, you can always adjust the sides based on your preferences and what’s in season. The key is to create a balanced and delicious meal that everyone will enjoy.
3. Presentation: The Finishing Touches
Now, let's talk about presentation. You've spent all this time creating a masterpiece, so let's make sure it looks as good as it tastes. Here are a few ideas to elevate your serving style:
- Use a beautiful serving platter. A large platter will showcase the ham perfectly, and it will make your meal feel more special. You can also use a carving board, or even a large chopping board.
- Add some garnishes. A few sprigs of fresh rosemary, a sprinkle of chopped parsley, or a scattering of pomegranate seeds can add a touch of elegance to your ham.
- Arrange the sides artfully. Place the sides around the ham in a visually appealing way. You can create a circular arrangement, or a more linear layout.
It doesn’t have to be fancy. Even a simple presentation, with a touch of colour and a few garnishes, can make a big difference.
(Part 5) leftover ham: Don't Waste a Delicious Bite
Let’s face it, you probably cooked a little too much ham. But don’t worry, leftovers are a wonderful thing. There are so many delicious ways to use leftover ham, so don’t even think about tossing it out!
1. Sandwich Heaven: Quick and Easy
ham sandwiches are a classic for a reason. They’re quick, easy, and incredibly satisfying. Here’s how to make them extra special:
- Use fresh, crusty bread. A good quality bread will make all the difference in the taste and texture of your sandwich.
- Add some mustard. I like to use a good Dijon mustard, but you can use any kind you like.
- Layer on the ham. You can use thin slices of ham for a more traditional sandwich, or thicker slices for a heartier option.
- Add some toppings. Cheese, lettuce, tomato, onion, pickles – the options are endless!
Don’t forget to add a little extra flavour with a dash of mayonnaise or some extra mustard. The sky is the limit when it comes to ham sandwiches. You can also add other ingredients like avocado, spinach, or even a fried egg for a more decadent sandwich.
2. Soup Sensations: Hearty and Comforting
A ham and bean soup is a classic comfort food. The ham adds a rich and savory flavour that’s absolutely perfect for a cold winter’s day. Here’s what you need to do:
- Dice the leftover ham. You can use a knife or a food processor to make small pieces.
- Sauté some vegetables. Onions, carrots, and celery are classic additions to ham and bean soup, but you can also add other vegetables like potatoes, leeks, or even kale.
- Add the ham and broth. Use a good quality broth, like chicken or vegetable broth, to make your soup extra flavourful.
- Add the beans. You can use any kind of beans you like, but I prefer to use a combination of white beans, kidney beans, and pinto beans.
- Simmer the soup. Let the soup simmer for at least 30 minutes, or until the vegetables are tender.
A hearty ham and bean soup is a perfect way to use up leftover ham, and it’s a meal that’s sure to please the whole family. You can also add some pasta or rice to the soup for a more substantial meal.
3. Delicious Dinners: Going Beyond the Basics
You can use leftover ham in so many other delicious dishes. Here are a few ideas to get your creative juices flowing:
- ham and cheese quiche: A quiche is a perfect way to use up leftover ham and vegetables. You can use a pre-made crust, or make your own from scratch. You can add other vegetables like broccoli, spinach, or mushrooms to the quiche for a more flavorful and colorful dish.
- Ham and broccoli stir-fry: This is a quick and easy dinner that’s perfect for busy weeknights. Combine leftover ham, broccoli florets, and your favourite stir-fry sauce. You can also add other vegetables like carrots, peppers, or onions to the stir-fry.
- Ham and Potato Hash: This hearty hash is a great way to use up leftover ham and potatoes. You can add other vegetables like onions, peppers, or mushrooms. You can also add some spices like paprika, cumin, or chili powder to the hash for a more flavorful dish.
- Ham and Pea Risotto: This creamy risotto is a sophisticated dish that’s perfect for a special occasion. Combine leftover ham, peas, and a rich risotto base. You can also add other vegetables like asparagus or mushrooms to the risotto.
Don’t be afraid to experiment with different recipes. You can use leftover ham in almost any dish that calls for meat.
(Part 6) Top Tips for Delicious Ham: Ensuring Success
Now, I’ve shared a lot of information, but let’s recap with some key takeaways that will help you cook the perfect ham every time.
1. The Temperature is Key: Getting It Right
Remember, you want to cook the ham to an internal temperature of 145°F (63°C) for bone-in ham. This is the only way to ensure it’s cooked safely and that the meat is tender and juicy. Using a meat thermometer is the best way to ensure that the ham is cooked through.
2. Moistness is the Name of the Game: Preventing Dryness
A dry ham is a sad ham. To prevent your ham from drying out, make sure you cook it low and slow. You can also use a moist cooking method, like slow cooking or braising. And remember to add a little water to the pan during cooking to keep the ham moist. This creates steam, which helps keep the meat juicy.
3. Glaze Like a Pro: A Delicious Finish
Don’t forget to glaze your ham! A good glaze adds a delicious flavour and a beautiful sheen to the ham. You can use a pre-made glaze, or make your own from scratch. Just make sure you baste the ham with glaze throughout the cooking process to create a gorgeous finish. A good glaze will help to lock in the moisture and create a beautiful caramelized crust.
4. Rest is Essential: Maximizing Tenderness
After cooking, let the ham rest for at least 15-20 minutes before carving. This allows the juices to redistribute, resulting in a more tender and flavorful ham. This is a crucial step that is often overlooked.
(Part 7) Ham Hacks and Secrets: Making Cooking Easier
Okay, let’s be honest, cooking a ham can feel a little intimidating. But I’ve got a few secrets and tricks up my sleeve to make the process a lot easier.
1. The Frozen Ham Hack: A Time Saver
Sometimes, you don’t have time to thaw your ham before you want to cook it. But there’s a way to cheat! You can cook your ham frozen. Just increase the cooking time by about 50%. Make sure to use a meat thermometer to check the internal temperature. This is a great hack for when you’re in a hurry, but it’s important to make sure the ham is cooked thoroughly.
2. The Leftover Glaze Secret: A Multipurpose Marvel
You know that delicious glaze you made for your ham? Well, don’t throw it away! You can use it to glaze other dishes, like chicken, pork chops, or even vegetables. It’s a great way to add a touch of sweetness and flavour to your meals. This is a great way to use up leftover glaze and add some extra flavor to your other dishes.
3. The Ham Bone Magic: A Treasure Trove of Flavor
Don’t throw away that ham bone! It’s packed with flavour. You can use it to make a delicious stock, or even add it to a pot of soup or stew for extra flavour. This is a great way to get the most out of your ham and add a depth of flavor to other dishes.
(Part 8) FAQs - Answering Your Burning Questions
I've covered a lot of ground here, but you might still have some questions. Let's get to those burning questions you might have about ham:
1. Can I Cook a Bone-In Ham in a Crockpot?
Absolutely! Slow cookers are great for cooking bone-in ham. Just place the ham in the crockpot, add a cup of water or broth, and cook on low for 6-8 hours, or on high for 3-4 hours. Baste the ham with your glaze during the last hour of cooking.
2. How Can I Tell If My Ham is Done?
The best way to tell if your ham is done is to use a meat thermometer. The internal temperature should reach 145°F (63°C) for bone-in ham. You can also check if the juices run clear when you pierce the thickest part of the ham with a fork.
3. What Can I Do With Leftover Ham?
Leftover ham is a versatile ingredient. You can use it in sandwiches, salads, soups, stir-fries, or even in breakfast dishes. Get creative and try different recipes.
4. How Long Can I Keep Leftover Ham in the Fridge?
Leftover ham can be stored in the refrigerator for 3-4 days. Make sure to wrap it tightly in plastic wrap or aluminum foil to prevent it from drying out.
5. What Kind of Ham Is Best for a Family Dinner?
For a family dinner, I recommend a bone-in ham that's about 1-1.5 pounds per person. This will provide plenty of ham for everyone, and you’ll have plenty of leftovers to enjoy.
There you have it! Now you're armed with all the knowledge you need to cook a delicious and impressive bone-in ham. Go forth, my friends, and conquer the world of ham! Just remember, have fun, experiment, and most importantly, enjoy the delicious results.
Everyone is watching

Perfect Rice Every Time: The Ultimate Guide to Cooking Rice
Cooking TipsAs a self-proclaimed foodie, I've always been a bit obsessed with rice. It's the foundation of countless cuisi...

Prime Rib Roast Cooking Time Chart: Per Pound Guide
Cooking TipsPrime rib roast. Just the name conjures images of lavish dinners, crackling fires, and hearty laughter. It’s ...

The Ultimate Guide to Cooking Asparagus: Tips, Techniques, and Recipes
Cooking TipsAsparagus. The mere mention of this spring delicacy conjures up images of vibrant green spears, crisp and burs...

Ultimate Guide to Cooking the Perfect Thanksgiving Turkey
Cooking TipsThanksgiving. Just the word conjures up images of overflowing tables laden with delicious food, the scent of r...

How Long to Bake Potatoes in the Oven (Perfect Every Time)
Cooking TipsBaked potatoes are a staple in my kitchen. They're incredibly versatile, delicious, and surprisingly easy to m...