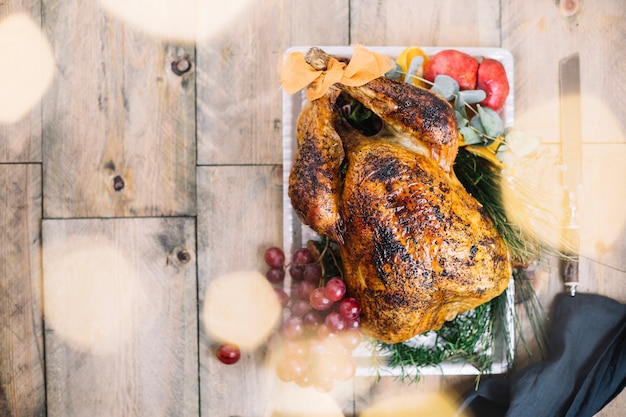
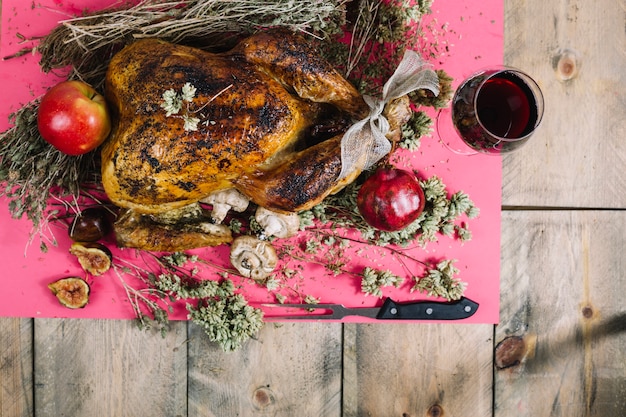
Thanksgiving – the mere mention of the word conjures up images of warmth, family, and of course, the centerpiece of the feast: the turkey. But let’s face it, a dry, tough turkey can turn a celebratory meal into a culinary disappointment. For years, I struggled with this turkey conundrum. I tried every trick in the book – basting, stuffing, even those fancy turkey roasters – but nothing seemed to achieve the level of juicy, flavorful bird I dreamt of. Then, I discovered the magic of brining. Now, every Thanksgiving, my turkey is a revelation, leaving everyone asking for seconds and whispering compliments about my "secret ingredient."
Brining? You might think it’s a culinary term best left to seasoned chefs. But trust me, it’s simpler than you think, and the results are astounding. Think of it as a culinary transformation for your turkey – a way to bring out its inherent deliciousness and guarantee a mouthwatering masterpiece.
(Part 1) Unveiling the Magic of Brining

Brining, in its simplest form, is the process of soaking your turkey in a salt-water solution. It seems counterintuitive, right? Adding salt to your turkey? But it’s the genius of brining that it works in harmony with the meat, transforming its texture and flavor.
The Science Behind the Transformation
Think of it like this: salt is a bit like a culinary magician. It pulls moisture from the turkey and then, in a delightful twist, draws it back in, leaving the meat beautifully plump and juicy. This effect is especially beneficial for the turkey breast, which tends to be drier than the legs and thighs.
Beyond Moisture: The Flavor Revolution
Salt isn't just about juiciness. It also works like a flavor conduit, opening up the turkey's pores and allowing the other ingredients in your brine – like herbs, spices, citrus, and even fruits – to infuse deep into the meat, creating a symphony of taste that permeates every bite.
Tenderness Unleashed
Another magic trick up salt's sleeve is its ability to tenderize meat. It breaks down the tough proteins in the turkey, making it unbelievably tender, like a culinary hug that transforms a slightly tough bird into a melt-in-your-mouth delight.
(Part 2) Mastering the Brine: Your Toolkit for Success
Now that we understand the magic of brining, let's dive into the practicalities, ensuring you have the tools and knowledge to create your own brining masterpiece.
Your Brining Essentials
Before you embark on this culinary adventure, make sure you have the following essentials:
- A large stockpot or cooler: You'll need something big enough to hold your turkey comfortably submerged in the brine.
- A turkey (fresh or frozen): Choose a turkey that fits your guest list and culinary ambitions. A standard-sized turkey (12-14 lbs) is usually a safe bet.
- Salt (kosher or sea salt): Kosher salt or sea salt are preferred for their larger grain size, which dissolves more evenly, ensuring a consistent brine.
- Water: The key ingredient in any brine.
- Optional ingredients: This is where your creativity comes in. We'll explore some flavor combinations later.
The Art of Brine Ratio
A general rule of thumb for the brine ratio is 1 cup of salt per gallon of water. This creates a balanced brine that imparts the perfect amount of flavor and moisture. However, don't be afraid to experiment with the ratio, adjusting it based on your personal preference.
Timing is Everything: The Brining Timeframe
Brining time depends on the size of your turkey. A standard-sized turkey (12-14 lbs) typically benefits from a 12-24 hour brine. For larger turkeys, you might extend the brining time to up to 36 hours.
Brining Tips: Maximizing Your Success
Here are a few extra tips to help you achieve brining brilliance:
- Use a food-grade cooler: This provides a more controlled environment, ensuring the turkey stays submerged and the brine stays cold, which is crucial for preventing bacteria growth.
- Chill the brine: Keep the brine chilled in the refrigerator or use ice to maintain a cool temperature. A cold brine helps prevent bacteria from spoiling your culinary masterpiece.
- Submerge the turkey completely: Make sure your turkey is fully submerged in the brine. If necessary, you can use a plate or heavy object to keep it under the surface.
(Part 3) Flavors Unleashed: Creating Your Brine Signature
Now comes the fun part – infusing your brine with flavor! This is where your culinary creativity can shine. You can experiment with various herbs, spices, citrus fruits, even fruits themselves, to create a unique flavor profile that complements your thanksgiving feast. Here are a few of my favorite flavor combinations to inspire your own creations:
Classic Herb Brine: A Time-Honored Tradition
This brine is the foundation for a truly delicious turkey, offering a simple yet incredibly flavorful base. It's a great starting point for beginners and can be customized with different herbs to suit your taste.
- 1/2 cup kosher salt
- 1/2 cup brown sugar
- 2 cups fresh herbs (thyme, rosemary, sage, parsley)
- 1 gallon water
Citrus Burst Brine: A Refreshing Twist
This brine adds a vibrant citrus twist to your turkey, adding a touch of brightness and zest to your Thanksgiving table.
- 1/2 cup kosher salt
- 1/4 cup brown sugar
- 1 cup orange juice
- 1 cup lemon juice
- 1/4 cup fresh rosemary sprigs
- 1 gallon water
Apple Cider Brine: A Cozy Fall Embrace
This brine is the essence of autumn, evoking warmth and comfort with its rich apple cider flavors.
- 1/2 cup kosher salt
- 1/4 cup brown sugar
- 1 cup apple cider
- 1/4 cup fresh thyme
- 1 gallon water
(Part 4) The Brining Process: A Step-by-Step Guide
Now that you have your brine recipe, it's time to start the brining process. Let's break it down into simple steps:
- Prepare the brine: Dissolve the salt and sugar in the water, ensuring they're completely dissolved before adding the herbs and spices. This ensures a consistent flavor distribution throughout the brine.
- Submerge the turkey: Place your turkey in the stockpot or cooler. Pour the brine over the turkey, making sure it's completely submerged. You might need to add extra water to cover the turkey fully.
- Refrigerate for the recommended time: Cover the container and refrigerate for the designated brining time. Remember, a good rule of thumb is 12-24 hours for a standard-sized turkey.
- Remove and pat dry: After the brining time is complete, carefully remove the turkey from the brine and pat it dry thoroughly with paper towels. This helps to remove excess moisture and creates a crispy skin during roasting.
- Dispose of the brine: Never pour the brine down the drain, as it could clog your pipes. Dispose of it properly, like pouring it into a garbage can or down the toilet.
(Part 5) Cooking Your Brined Masterpiece: A Symphony of Flavor
Your turkey has been transformed by the brining process, now it's time to cook it to perfection. We'll explore the traditional roasting method, as well as some tips to ensure a beautifully golden-brown bird.
The Art of Roasting: A Culinary Classic
Roasting is the most common and traditional method for cooking a turkey. It allows the turkey to cook evenly, resulting in a juicy and flavorful bird with a beautifully browned skin.
- Preheat the oven: Start by preheating your oven to 325°F (160°C). This ensures the turkey cooks efficiently and achieves that golden-brown crust.
- Place on a roasting rack: Position the turkey on a roasting rack inside a large roasting pan. This allows air to circulate around the turkey, ensuring even cooking and preventing the bottom from becoming soggy.
- Roast to perfection: Roast the turkey for about 15 minutes per pound or until a meat thermometer inserted into the thickest part of the thigh registers 165°F (74°C). This is the safest way to ensure the turkey is cooked through.
The Art of Stuffing: A Culinary Delight
If you're planning on stuffing your turkey, make sure to do it right before putting it in the oven. This helps to prevent the growth of bacteria that can develop in stuffing if it's left at room temperature for too long.
Basting: A Touch of Moisture and Flavor
Basting your turkey during the roasting process helps to keep it moist and flavorful. You can use a combination of butter, broth, or even wine to create a delicious and aromatic glaze.
Resting: Allowing the Flavors to Mingle
Once the turkey is cooked, let it rest for at least 30 minutes before carving. This allows the juices to redistribute throughout the meat, resulting in a more succulent and flavorful turkey. The resting time also allows the turkey to cool slightly, making it easier to carve.
(Part 6) Brining Myths Debunked: Separating Fact from Fiction
You might have heard some myths about brining, like it makes the turkey too salty or that it's a lot of work. Let's dispel these myths and set the record straight.
Myth: Brining makes the turkey too salty
This is a common misconception. The salt in the brine does draw moisture out of the turkey, but it also draws it back in, redistributing the salt throughout the meat. So, when you cook the turkey, the saltiness is balanced out, leaving you with a perfectly seasoned bird, not an overly salty one.
Myth: Brining is a lot of work
Brining is remarkably simple. It's just a matter of mixing the ingredients and letting the turkey sit in the brine. The only effort involved is lifting the turkey into the brine, which is often easier than maneuvering a large raw turkey onto a baking sheet!
(Part 7) Beyond the Feast: Expanding Your Brining Horizons
Brining isn't just for thanksgiving turkeys. You can use this transformative technique to elevate the taste and texture of other poultry, as well as pork roasts, unlocking a world of culinary possibilities.
Chicken: A Brined Transformation
Brined chicken is a revelation, resulting in a juicy and tender bird that's perfect for roasts, grilled chicken, or even simple chicken breasts. The brine infuses the meat with incredible flavor, making it irresistible.
Pork Roast: A Culinary Triumph
Brining a pork roast creates a succulent and flavorful meat, perfect for a holiday meal or a family dinner. The brine helps to keep the pork moist and tender, resulting in a culinary masterpiece that will impress even the most discerning palates.
(Part 8) Alternatives to Brining: Exploring Other Options
While I'm a staunch advocate for brining, I understand that it's not for everyone. If you're looking for alternatives, here are a few options that can achieve similar results:
Dry Brining: A Salt-Based Transformation
Dry brining involves rubbing the turkey with salt and letting it sit in the refrigerator uncovered for several hours or overnight. This method works by drawing moisture out of the meat and then redistributing it, resulting in a flavorful and juicy turkey. It's a great option for those who prefer a simpler method.
Butterflying: Unlocking Even Cooking
Butterflying your turkey involves flattening the breast by cutting it horizontally, which helps to distribute the heat more evenly. This technique is particularly helpful for ensuring the breast cooks through without drying out, resulting in a more tender and flavorful turkey.
(Part 9) Tips for a Brined Turkey Triumph: Mastering the Details
Here are some final tips to help you achieve a perfectly cooked and flavorful brined turkey:
- Use a food thermometer: A food thermometer is essential for accurate temperature readings. Insert the thermometer into the thickest part of the thigh to ensure the turkey is cooked through to a safe internal temperature of 165°F (74°C).
- Don't overcook: A slightly undercooked turkey is better than a dry one. Overcooking can result in a tough and flavorless turkey.
- Let it rest: Allow your turkey to rest for at least 30 minutes before carving. This allows the juices to redistribute throughout the meat, resulting in a juicier and more flavorful turkey.
- Experiment with flavors: Don't be afraid to experiment with different brine recipes. This is your chance to create a culinary masterpiece that reflects your personal taste and culinary creativity.
(Part 10) FAQs: Addressing Common Brining Concerns
You might have a few questions about brining. Here are some answers to common concerns:
Q: How long can I brine my turkey?
For a standard-sized turkey, a 12-24 hour brine is ideal. However, you can safely brine for up to 36 hours. Just make sure to keep the brine cold and the turkey fully submerged.
Q: Can I use table salt for brining?
While table salt will work, kosher or sea salt are preferred because they have a larger grain size, which helps them dissolve more evenly, resulting in a more consistent brine.
Q: What if I don't have a cooler?
You can use a large stockpot, but make sure the turkey is fully submerged and that the brine stays cold. You may need to use ice to keep the brine cold and prevent bacteria growth.
Q: Can I freeze a brined turkey?
It's best to cook your turkey right after brining. If you need to freeze it, do so after it's been patted dry. When ready to cook, thaw the turkey in the refrigerator for at least 24 hours before roasting.
Q: What do I do with the brine after I'm done?
Never pour the brine down the drain, as it could clog your pipes. Dispose of it properly, either by pouring it into a garbage can or down the toilet.
(Part 11) Conclusion: The Key to an Unforgettable Thanksgiving
This Thanksgiving, say goodbye to dry, disappointing turkeys and embrace the magic of brining. It's the culinary secret to a juicy, flavorful bird that will be the star of your table. Brining transforms your turkey from ordinary to extraordinary, making it a culinary masterpiece that will delight your guests. So, gather your ingredients, get your brining on, and let's create a Thanksgiving feast to remember!
Everyone is watching

Perfect Rice Every Time: The Ultimate Guide to Cooking Rice
Cooking TipsAs a self-proclaimed foodie, I've always been a bit obsessed with rice. It's the foundation of countless cuisi...

Prime Rib Roast Cooking Time Chart: Per Pound Guide
Cooking TipsPrime rib roast. Just the name conjures images of lavish dinners, crackling fires, and hearty laughter. It’s ...

The Ultimate Guide to Cooking Asparagus: Tips, Techniques, and Recipes
Cooking TipsAsparagus. The mere mention of this spring delicacy conjures up images of vibrant green spears, crisp and burs...

Ultimate Guide to Cooking the Perfect Thanksgiving Turkey
Cooking TipsThanksgiving. Just the word conjures up images of overflowing tables laden with delicious food, the scent of r...

How Long to Bake Potatoes in the Oven (Perfect Every Time)
Cooking TipsBaked potatoes are a staple in my kitchen. They're incredibly versatile, delicious, and surprisingly easy to m...