(Part 1) The World of Cured Ham: A Quick Primer

Essentially, cured ham is a cut of pork that's been preserved using a blend of salt, sugar, and sometimes additional flavourings like spices or nitrates. The curing process can be dry or wet. Dry curing involves hanging the ham to dry and air-cure for weeks, sometimes even months. Wet curing, on the other hand, submerges the ham in a liquid brine solution.
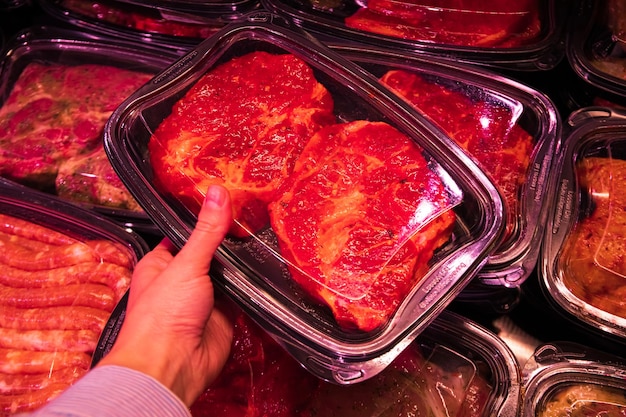
There's an incredible range of cured hams out there, from the legendary Spanish Jamón Ibérico to the more familiar British ham you find at your local supermarket. But regardless of origin, they all share one thing in common: they're already cooked. That means you don't need to worry about cooking them to a specific temperature to kill bacteria - they're ready to eat!
However, while cured ham is already cooked, it needs to be heated through to be safe and truly delectable. That's where oven cooking comes in. Now, I know what you might be thinking: "Oven cooking? Sounds like a lot of fuss!" Believe me, it's not. It's incredibly straightforward, and the rewards are absolutely worth the effort.
Why Oven Cooking Reigns Supreme
Forget those elaborate water baths or lengthy slow simmering techniques. Oven cooking is the simplest way to warm up your cured ham and unlock its full flavour potential. It allows for precise temperature control, you can add some fantastic flavourings, and it's simply a more relaxed cooking experience.
Cured Ham Choices: Which One Will You Pick?
This is where things get interesting! You can use any type of cured ham for oven cooking, but some choices truly excel in the oven.
- whole ham: The classic choice for a grand holiday meal. It's impressive, delicious, and perfect for feeding a crowd.
- half ham: If you're cooking for a smaller group, a half ham is a fantastic option. You get plenty of meat, but it's easier to manage.
- Spiral-cut ham: These hams come pre-sliced with a spiral cut, making carving a breeze. They're great for a quick and easy meal.
- Bone-in or boneless: Both work wonderfully in the oven. bone-in hams tend to have more depth of flavour, while boneless hams are easier to slice.
(Part 2) Your Essential Equipment: Gather Your Tools
Okay, let's assemble our toolkit before we tackle the oven. You don't need a lot, but having the right tools makes all the difference.
1. A Spacious roasting pan
This is where the magic happens. You need a pan that's large enough to accommodate your ham comfortably. It doesn't need to be fancy, just big enough to hold the ham snugly.
2. A meat thermometer: Your Reliable Guide
Now, some people swear by the "poke it with a fork" method, but a meat thermometer is a must-have for any serious ham enthusiast. It eliminates the guesswork and ensures your ham is cooked to perfection.
3. A Trivet (Optional): Extra Even Cooking
A trivet is a handy little tool that sits in the bottom of your roasting pan and elevates the ham. This allows heat to circulate evenly around the ham, preventing it from sitting in its own juices.
(Part 3) Oven Cooking Time: Decoding the Recipe
Now, let's get to the heart of the matter: how long do you cook a cured ham in the oven? Well, the answer isn't always straightforward, as it depends on a few factors.
- The size of the ham: A larger ham will take longer to cook than a smaller one.
- The type of ham: Some hams are denser than others, which can influence cooking time.
- Your oven's temperature: A hotter oven will cook the ham more quickly than a cooler oven.
General Guidelines for Oven Cooking Time: A Starting Point
Here's a general guide to get you going. Remember, these are just starting points, and you'll need to adjust the cooking time based on your specific ham.
For a bone-in ham:
- Small ham (5-8 lbs): 15-20 minutes per pound at 325°F (160°C)
- Medium ham (8-12 lbs): 12-15 minutes per pound at 325°F (160°C)
- Large ham (12-16 lbs): 10-12 minutes per pound at 325°F (160°C)
For a boneless ham:
- Small ham (4-6 lbs): 15-20 minutes per pound at 325°F (160°C)
- Medium ham (6-10 lbs): 12-15 minutes per pound at 325°F (160°C)
- Large ham (10-14 lbs): 10-12 minutes per pound at 325°F (160°C)
Remember, It Needs to Be Hot!
The most crucial thing to keep in mind is that you want your ham to be heated through to at least 140°F (60°C) for safety. I always use a meat thermometer to ensure the temperature is correct in the thickest part of the ham.
(Part 4) The Oven Cooking Process: A Step-by-Step Guide
Now, let's get down to the practicalities of oven cooking your ham. It's really quite straightforward, and once you've done it once, you'll be a seasoned pro!
1. Preheat Your Oven: Setting the Stage
Start by preheating your oven to 325°F (160°C). This ensures the ham cooks evenly and reaches the desired temperature efficiently.
2. Prepare the Ham: Getting Ready
If your ham is packaged in plastic wrap, remove it. If there's a glaze packet included, you can either use it later or add it to your roasting pan.
3. Add Liquid to the Roasting Pan: Enhancing Flavor and Moisture
Now, this is where things get fun! To add moisture and flavour to your ham, add some liquid to the bottom of your roasting pan. You can use water, apple juice, pineapple juice, or even a combination of these. I personally love using a mixture of apple juice and ginger ale - it gives the ham a lovely sweetness.
4. Place the Ham in the Roasting Pan: Getting Comfy
Carefully place your ham in the roasting pan. If you're using a trivet, place it on top of the liquid. If not, just ensure the ham is sitting on the bottom of the pan.
5. Cover the Ham: Keeping It Moist
To maintain the ham's moisture and prevent it from drying out, cover it with foil. You can use a single piece of foil, or two smaller pieces, depending on the size of your ham.
6. Roast the Ham: Time for the Oven to Work its Magic
Place the ham in the preheated oven and roast for the time determined by your ham's size. Be sure to check the internal temperature of the ham using a meat thermometer, especially towards the end of the cooking time.
7. Add a Glaze (Optional): The Finishing Touch
About 30 minutes before the ham is done, you can remove the foil and add a glaze. This helps to add a delicious layer of flavor and a beautiful finish.
8. Rest the Ham: A Moment of Relaxation
Once the ham has reached the desired internal temperature, take it out of the oven and let it rest for at least 15 minutes before slicing. This allows the juices to redistribute throughout the ham, resulting in a juicier and more flavorful slice.
(Part 5) Tips for Cured Ham Perfection: Elevate Your Game
Okay, so we've got the basics down pat. Now, let's delve into some extra tips to help you transform your cured ham from good to exceptional.
1. Avoid Overcooking: A Key to Success
Remember, cured ham is already cooked. Overcooking will dry it out and make it tough. So, check the temperature regularly and take it out of the oven as soon as it reaches 140°F (60°C).
2. Embrace Flavour Exploration: Get Creative
Don't be afraid to experiment with flavourings. There's a world of possibilities when it comes to cured ham. You can add cloves, cinnamon sticks, allspice berries, or even a splash of maple syrup. Experiment and discover what you love best!
3. Craft a Glaze: Adding a Touch of Magic
A glaze can truly transform your cured ham. You can use a store-bought glaze, or you can make your own using honey, brown sugar, mustard, or whatever tickles your fancy.
4. Serve it Up: A Culinary Masterpiece
Cured ham is a versatile dish that can be enjoyed in numerous ways. Serve it hot, cold, or at room temperature. It's delicious on its own, but you can also pair it with other dishes like mashed potatoes, green beans, or cornbread.
5. Don't Waste Leftovers: A Culinary Treasure Trove
If you have leftovers, don't discard them! Cured ham is a fantastic addition to salads, sandwiches, or even as a topping for pizzas. You can also use it to create a delicious ham and bean soup.
(Part 6) FAQs about Cured Ham Oven Cooking: Answers to Common Questions
You know, I get a lot of questions about cured ham. So, here are some common ones that might be on your mind too.
1. What Happens if I Overcook the Ham?
If you overcook the ham, it'll become dry and tough. The meat will lose its moisture and become rubbery. To avoid overcooking, use a meat thermometer and take the ham out of the oven when it reaches 140°F (60°C).
2. How Do I Know if the Ham is Done?
The most reliable way to know if the ham is done is to use a meat thermometer. It should reach an internal temperature of 140°F (60°C) in the thickest part of the ham. You can also check for doneness by inserting a fork into the ham. If the juices run clear, it's cooked through.
3. Can I Cook a Ham from Frozen?
It's not advisable to cook a ham from frozen. Frozen ham will take much longer to cook and may not cook evenly. It's best to defrost the ham in the refrigerator for 24 hours before cooking.
4. How Do I Store leftover ham?
Store leftover ham in an airtight container in the refrigerator for up to 4 days. You can also freeze it for up to 2 months.
5. How Long Does Cured Ham Last?
A whole cured ham can last in the refrigerator for up to 2 weeks. A pre-sliced ham will last for up to 7 days in the refrigerator. You can also freeze cured ham for up to 6 months.
(Part 7) My Personal Experience: A Culinary Triumph
Now, let me tell you about a time when I truly nailed oven cooking a cured ham. It was for a big family gathering, and I wanted to impress everyone with my culinary skills. I chose a beautiful whole ham, bone-in, with a lovely golden glaze. I followed my usual routine, preheating the oven, adding a mix of apple juice and ginger ale to the roasting pan, and covering the ham with foil.
I let it roast for a good couple of hours, making sure to check the temperature every now and then. When it was close to being done, I removed the foil and slathered on a homemade glaze of honey, brown sugar, and mustard. Oh, it smelled divine!
The ham came out perfectly cooked, with a beautiful golden brown crust and a juicy, flavorful interior. Everyone raved about it, and I felt like a real culinary hero. I even managed to save some for myself!
But you know, the best part? I wasn't stressed out at all. The oven did all the work, and all I had to do was keep an eye on it. It's really that simple!
(Part 8) Cured Ham: Beyond Festive Feasts
Now, we all know cured ham is a classic for special occasions. But let's be honest, it's too good to save just for holidays. I love to whip up a delicious ham sandwich for lunch or a simple salad with leftover ham for dinner. It's a versatile ingredient that can be used in so many different ways.
You know, sometimes I even slice up some ham and add it to my pasta dishes for an extra layer of flavour. Or I'll throw some ham cubes into a pan with some vegetables and create a simple but delicious stir-fry. The possibilities are endless!
(Part 9) My Final Thoughts: A culinary adventure Awaits
Okay, so there you have it: your complete guide to oven cooking a cured ham. It's really not as daunting as it might seem, and the results are truly worth it. Remember, just follow the steps, use a meat thermometer, and don't be afraid to experiment with flavours.
I can't wait to hear about your next cured ham masterpiece!
Additional Details to Enhance the Article:
Include a table: Create a table summarizing the cooking times for different ham sizes and types. This will make the information more accessible and easier to digest. Expand on flavour combinations: Provide specific recipes or ideas for glaze combinations and other flavouring options. Add images: Include relevant images of the equipment, different types of ham, and the finished cooked ham. Link to additional resources: If possible, link to recipes or articles about making your own glazes or exploring different cured ham varieties. By adding these details, you can further enhance the readability and depth of the article, making it a truly comprehensive guide for anyone wanting to master the art of oven-cooked cured ham.Everyone is watching

Perfect Rice Every Time: The Ultimate Guide to Cooking Rice
Cooking TipsAs a self-proclaimed foodie, I've always been a bit obsessed with rice. It's the foundation of countless cuisi...

Ultimate Guide to Cooking the Perfect Thanksgiving Turkey
Cooking TipsThanksgiving. Just the word conjures up images of overflowing tables laden with delicious food, the scent of r...

The Ultimate Guide to Cooking Asparagus: Tips, Techniques, and Recipes
Cooking TipsAsparagus. The mere mention of this spring delicacy conjures up images of vibrant green spears, crisp and burs...

Can You Cook Spaghetti with Gasoline? (The Shocking Truth)
Cooking TipsWe've all seen those crazy internet trends. You know, the ones that make you wonder, "Did someone actually try...

Chorizo and Eggs Recipe: The Ultimate Guide
Cooking TipsRight, let’s talk about chorizo and eggs. You know, that classic Spanish dish that's always a winner. It's th...