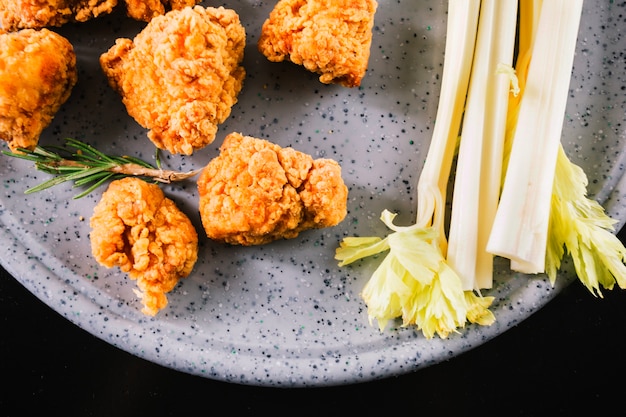
chicken tenders! They're a household favourite, a quick weeknight dinner solution, or a satisfying snack. I've cooked them in countless ways, from oven-baked to deep-fried, and trust me, finding the perfect chicken tender has been a journey. But now, I’m sharing all my wisdom and hopefully saving you some of the trial and error I went through. Grab a cuppa, settle in, and let's dive into the world of delicious chicken tenders!
Part 1: The Chicken Tender Basics
The foundation of a great chicken tender is high-quality chicken. It's like building a house - you can't expect a beautiful home from substandard materials. So, choose your chicken with care! Opt for plump, firm chicken breasts with a consistent, healthy colour. Avoid any that look discoloured or smell off. If you're feeling fancy, splurge on organic or free-range – your taste buds will be happy you did!
Cutting for Consistency
Now, the cutting part! You can go the classic route and slice chicken breasts into long, thin strips, or get a bit more adventurous and cut them into bite-sized pieces. I find the smaller pieces easier to manage, especially when serving kids. But, whatever you choose, ensure your chicken tenders are all roughly the same size for even cooking. Nobody wants a soggy, undercooked tender lurking amidst their crispy counterparts!
The Marinating Magic
Here's where the fun really begins! Marinating your chicken tenders isn't just about flavour; it’s about tenderizing the meat and making it extra juicy. You can keep it simple with a quick marinade of olive oil, salt, and pepper, or get creative with your own blend of herbs and spices. I'm partial to a citrus marinade with a hint of ginger, but I'm always open to experimenting with new flavour combos!
Part 2: Cooking Methods: A Deep Dive
With our chicken prepped and ready, let's explore the cooking methods. There are a few tried-and-true ways to get those perfect golden-brown chicken tenders, and I'm breaking them down for you.
The Oven-Baked Method: Simple and Reliable
This is my go-to when I'm looking for a healthier option. Preheat your oven to 400°F (200°C), toss your marinated chicken tenders in a bit of olive oil, and spread them out on a baking sheet lined with parchment paper. Bake for 15-20 minutes, flipping them halfway through, until they're cooked through and golden brown. It's truly that easy!
Pro tip: For an extra crispy finish, pop your chicken tenders under the broiler for a couple of minutes at the end. Just watch them carefully, as they can burn quickly!
The Pan-Fried Method: Quick and Crispy
For a quick and easy weeknight dinner, pan-frying is your best friend. Heat some olive oil in a skillet over medium heat, then add your chicken tenders and cook for about 5-7 minutes per side, or until they're cooked through and golden brown.
This method gives you that crispy exterior while keeping the inside juicy. And, a little bit of butter added to the pan at the end adds an extra layer of flavour. It's a win-win!
The Deep-Fried Method: The Ultimate Indulgence
Now, we're talking pure indulgence. Deep-frying chicken tenders is a classic for a reason: it delivers the ultimate crispy, golden-brown texture that is simply irresistible. But, it's important to get it right, so listen closely!
First, choose a good quality oil with a high smoke point, like vegetable or canola oil. Heat the oil to 350°F (175°C) in a deep fryer or a large, heavy-bottomed pot. Make sure your chicken tenders are completely dry before dipping them in batter or breading, then gently lower them into the hot oil. Fry them for about 4-5 minutes, or until they're golden brown and cooked through. Avoid overcrowding the pan, and use a slotted spoon to remove them to a wire rack to drain off any excess oil.
The Air Fryer Method: A Healthier Option
The air fryer has become a kitchen hero, and for good reason. It's a fantastic way to achieve crispy chicken tenders without all the extra oil. Preheat your air fryer to 400°F (200°C), toss your chicken tenders in a bit of olive oil and your favourite seasonings, and then air fry for about 10-12 minutes, shaking the basket halfway through, until they're cooked through and golden brown. It's as simple as that!
Part 3: The Essential Breadings and Batters
The breading or batter you choose will significantly impact the flavour and texture of your chicken tenders. So, let's explore some popular options to help you find your perfect match.
The Classic Breading: Simple and Reliable
You can't go wrong with a good, old-fashioned breading. This usually involves dredging your chicken tenders in flour, then dipping them in a mixture of beaten eggs and milk, and finally coating them in breadcrumbs. It's a simple but effective technique that delivers a crispy, golden-brown crust. I like to add some herbs and spices to the breadcrumbs for an extra burst of flavour. Think about it: you can't have a classic chicken tender without a classic breading!
The Panko Breading: For Extra Crunch
panko breadcrumbs are a superstar choice for those who crave extra crunch. Panko, a Japanese breadcrumb made from white bread, has a larger, flakier texture, which creates a lighter, crispier breading. It's perfect for folks who want that extra satisfying crunch with every bite!
The Cornmeal Breading: A Southern Delight
Cornmeal breading is a Southern classic that brings a delightful flavour and texture. It's also a great way to add a bit of colour to your chicken tenders. You can use plain cornmeal or add some spices like paprika or cayenne pepper for a touch of heat. It's a perfect way to add a touch of the South to your meal!
The Batter Options: Light and Crispy
If you prefer a lighter, crispier coating, a batter is your go-to. A classic batter is made with flour, milk, and eggs, but you can experiment with additions like beer, buttermilk, or spices to make it your own. Use a whisk or a blender to achieve a smooth, lump-free batter. Remember, the key is to not overload the chicken tenders with batter; a light coating is all you need for a crispy result!
Part 4: Cooking Time: A Breakdown
Now, let's get to the heart of the matter – the cooking time. Remember that cooking times can vary based on the size and thickness of your chicken tenders, as well as your chosen cooking method. Here's a general guide to get you started:
Oven-Baked
Preheat oven to 400°F (200°C). Bake for 15-20 minutes, flipping them halfway through.
Pan-Fried
Cook over medium heat for 5-7 minutes per side, or until cooked through.
Deep-Fried
Heat oil to 350°F (175°C). Fry for 4-5 minutes, or until golden brown and cooked through.
Air Fryer
Preheat air fryer to 400°F (200°C). Air fry for 10-12 minutes, shaking the basket halfway through.
Part 5: internal temperature: The Key to food safety
Alright, let's talk safety. It's crucial to cook chicken tenders to the proper internal temperature to ensure they are safe to eat. The USDA recommends an internal temperature of 165°F (74°C) for poultry.
Use a meat thermometer to check the internal temperature of your chicken tenders. If you're not sure how to use one, there are many helpful tutorials online. Don't take chances with food safety!
Part 6: Tips for perfect chicken tenders
Now, for some of my personal tips and tricks for achieving those perfect chicken tenders:
1. Don't overcrowd the pan. This will lead to uneven cooking and soggy results. Give your chicken tenders some space to breathe!
2. Make sure the oil is hot enough. This will ensure that your chicken tenders are crispy and cooked through. If the oil is too cool, the chicken will absorb more oil and become greasy.
3. Don't overcook the chicken tenders. Overcooked chicken tenders will be dry and tough. Aim for that perfect balance of crispy exterior and juicy interior.
4. Let the chicken tenders rest for a few minutes after cooking. This will allow the juices to redistribute and prevent the meat from being dry. Just like resting a steak, letting your chicken tenders rest for a few minutes will make them even more tender and flavourful!
Part 7: Serving Suggestions: The Possibilities are Endless
Now that you've got those perfect chicken tenders, let's talk about how to serve them up. The options are endless! Here are a few ideas to get you started:
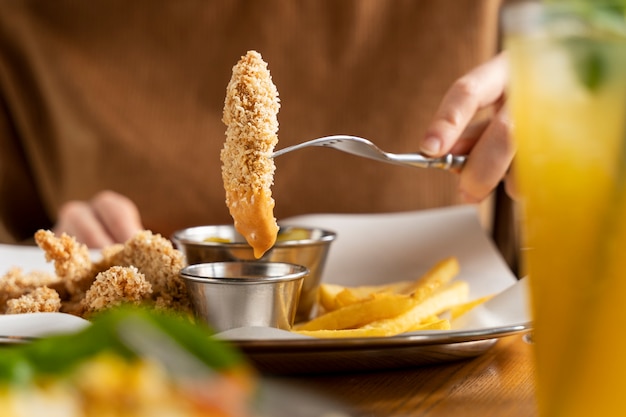
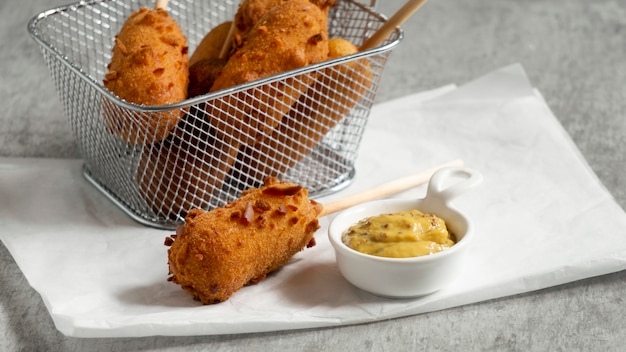
1. Dipping sauces. What's a chicken tender without a delicious dipping sauce? Try honey mustard, bbq sauce, ranch dressing, or even a spicy sriracha mayo. The flavour combinations are endless!
2. Sides. Serve your chicken tenders with a variety of sides, like fries, potato wedges, coleslaw, salad, or rice. The possibilities are endless!
3. Sandwiches. Put your chicken tenders between two slices of bread with your favourite toppings. You can't go wrong with a classic chicken tender sandwich with lettuce, tomato, and mayo.
4. Salads. Add some protein to your salad with chicken tenders. You can toss them in a vinaigrette dressing or serve them on the side.
Part 8: Storage and Reheating: Keeping Those Tenders Fresh
Let's talk about storage and reheating. You've got these delicious chicken tenders, and you want to make sure they stay fresh and tasty.
1. Storage. To keep your cooked chicken tenders fresh, store them in an airtight container in the refrigerator for up to 3-4 days.
2. Reheating. You can reheat your chicken tenders in the oven, microwave, or air fryer. If you're using the oven, bake them at 350°F (175°C) for about 10-15 minutes, or until heated through. If you're using the microwave, heat them on high for about 1-2 minutes, or until heated through. If you're using the air fryer, heat them at 350°F (175°C) for about 5-7 minutes, or until heated through.
Part 9: chicken tender variations: Get Creative
Let's add some fun to the mix! You can get creative with your chicken tenders and try different flavour combinations. Here are a few ideas to inspire your culinary adventures:
1. Spicy Chicken Tenders: Add some cayenne pepper, chili powder, or hot sauce to your marinade or breading for a spicy kick. For those who like it hot!
2. Garlic Parmesan Chicken Tenders: Add some garlic powder, parmesan cheese, and herbs like oregano and basil to your breading. A classic combination with an irresistible flavour!
3. Honey Garlic Chicken Tenders: Marinade your chicken tenders in a mixture of honey, soy sauce, and garlic. A sweet and savory blend that's perfect for any occasion.
4. Buffalo Chicken Tenders: Dip your cooked chicken tenders in buffalo sauce and serve with blue cheese dressing. A classic crowd-pleaser that's always a hit!
Part 10: FAQs: Common Questions Answered
Now, let's tackle some of the most common questions I get about cooking chicken tenders.
1. What temperature should I cook chicken tenders to?
The USDA recommends an internal temperature of 165°F (74°C) for poultry. It's crucial to ensure that your chicken is cooked through to avoid any foodborne illness.
2. How long can I store cooked chicken tenders in the refrigerator?
You can store cooked chicken tenders in an airtight container in the refrigerator for up to 3-4 days. Make sure they're properly stored to maintain their freshness and quality.
3. Can I freeze chicken tenders?
Yes, you can freeze chicken tenders. To freeze, place them in an airtight container or freezer bag and freeze for up to 3 months. To reheat from frozen, thaw in the refrigerator overnight and then bake or air fry until heated through.
4. How do I make sure my chicken tenders are crispy?
For crispy chicken tenders, make sure the oil is hot enough (350°F/175°C) and don't overcrowd the pan. You can also try using panko breadcrumbs or a batter for a crispier coating.
5. How do I prevent chicken tenders from drying out?
Marinate your chicken tenders before cooking, don't overcook them, and let them rest for a few minutes after cooking to allow the juices to redistribute.
Part 11: A Final Word
Well, there you have it, my comprehensive guide to cooking chicken tenders. From choosing the right chicken to picking the perfect breading, I've tried to cover everything you need to know to create those perfect, golden-brown, juicy chicken tenders. Remember, practice makes perfect, so don't be afraid to experiment and find what works best for you. So, what are you waiting for? Get cooking and enjoy those delicious chicken tenders!
Everyone is watching

Prime Rib Roast Cooking Time Chart: Per Pound Guide
Cooking TipsPrime rib roast. Just the name conjures images of lavish dinners, crackling fires, and hearty laughter. It’s ...

How Long to Bake Potatoes in the Oven (Perfect Every Time)
Cooking TipsBaked potatoes are a staple in my kitchen. They're incredibly versatile, delicious, and surprisingly easy to m...

Perfect Rice Every Time: The Ultimate Guide to Cooking Rice
Cooking TipsAs a self-proclaimed foodie, I've always been a bit obsessed with rice. It's the foundation of countless cuisi...

The Ultimate Guide to Cooking Asparagus: Tips, Techniques, and Recipes
Cooking TipsAsparagus. The mere mention of this spring delicacy conjures up images of vibrant green spears, crisp and burs...

Ultimate Guide to Cooking the Perfect Thanksgiving Turkey
Cooking TipsThanksgiving. Just the word conjures up images of overflowing tables laden with delicious food, the scent of r...