Let's talk about beef ribs – those gloriously meaty, bone-in cuts of beef that, when cooked right, melt in your mouth and leave you craving more. But let's be honest, they can be a bit intimidating, especially for those who are new to the world of slow cooking. I've been there, staring at a rack of ribs, wondering how to transform them into a masterpiece. Over the years, I've experimented, learned from my mistakes, and developed a foolproof method for achieving consistently tender, flavorful beef ribs, cooked to perfection in your own oven.
This is not about rushing things. It's about the slow, gentle process of transforming tough cuts of meat into tender, succulent feasts. And the good news is, you don't need a fancy smoker or a backyard barbecue to achieve this culinary magic. You can create truly spectacular ribs right in your own kitchen, using just your trusty oven. Ready to embark on this rib-tastic journey? Let's get started!
(Part 1) Choosing the Right Ribs: Setting the Stage for Flavor
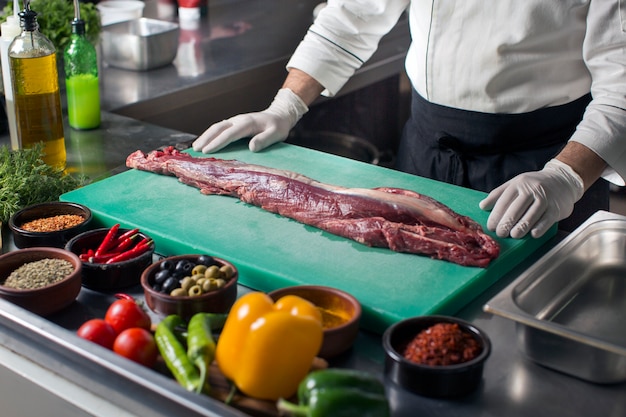
The first step is choosing the right ribs. This is like laying the foundation for a magnificent building; if you start with the wrong materials, you'll never achieve the desired outcome. Two main contenders emerge: short ribs and back ribs.
Short Ribs: The Ultimate Indulgence
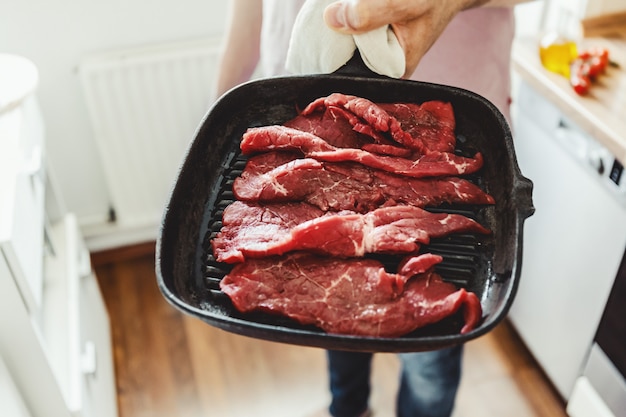
Short ribs, those thick, meaty cuts, are my personal favorite. They're incredibly flavorful, packed with marbling, and when cooked properly, they literally fall apart, revealing tender, juicy meat that practically melts in your mouth. They're a bit more time-consuming to cook, but the extra effort is oh-so-worth it.
Back Ribs: A More Accessible Option
Back ribs are a good alternative, and often a bit more budget-friendly. They're a bit leaner than short ribs, but still delicious, with a slightly more pronounced bone-to-meat ratio. The key with back ribs is to ensure they don't get overcooked, as they can dry out easily.
The Marbling Factor: Key to juicy ribs
No matter which type you choose, look for ribs with a good amount of marbling, those streaks of fat that run through the meat. This fat renders during cooking, adding richness, juiciness, and a depth of flavor that you won't find in leaner cuts. Don't be afraid to choose ribs with a visible layer of fat; it's your secret weapon for achieving melt-in-your-mouth tenderness.
(Part 2) Preparing the Ribs: A Foundation for Flavor
Now that you've got your ribs, it's time to prepare them for their oven adventure. This is where you add those layers of flavor that will transform them from plain beef to a culinary masterpiece.
Seasoning is Key: My Go-to rib rub
While I love experimenting with different rubs and marinades, there's a basic recipe that consistently delivers fantastic results. Think of it as your rib-rubbing toolbox, containing all the essentials to create an irresistible flavor profile:
- Salt: Salt is the foundation, drawing out the natural flavors of the meat. I always use kosher salt, but any good-quality salt will do.
- Black Pepper: A classic pairing for beef, adding a bit of spice and depth.
- Paprika: Paprika brings a touch of sweetness and warmth, adding a delightful complexity.
- Garlic Powder: Garlic powder amplifies the savory notes, creating a rich and satisfying flavor.
- Onion Powder: Onion powder adds another layer of sweetness and complexity, perfectly complementing the other ingredients.
Combine these ingredients in a bowl, mix them well, and then generously rub the mixture all over your ribs, making sure to cover every inch. Don't be shy with the seasoning; the more, the merrier, as far as ribs are concerned!
The Secret Sauce: A Quick and Easy Technique
Here's where I add my little magic touch: a simple, yet impactful, glaze before those ribs go into the oven. I create a quick mixture of Worcestershire sauce and apple cider vinegar. This combination adds a depth of flavor and helps keep the meat moist. Trust me, this is a game-changer!
(Part 3) oven-baked ribs: Timing, Temperature, and Technique
This is the moment we've all been waiting for: cooking those ribs to perfection. The key is low and slow cooking – a gentle, patient approach that allows the meat to break down and become incredibly tender. It's a culinary dance, with time and temperature as your partners.
The Low and Slow Approach: A Symphony of Tenderness
Set your oven to a temperature between 250°F and 300°F (120°C to 150°C). This low temperature allows the collagen in the meat to break down, resulting in melt-in-your-mouth tenderness. It's like a slow, gentle massage for the meat, releasing all its natural flavors and creating a symphony of deliciousness.
Cooking Time: A General Guide
Now, here's where things get a bit more fluid. Cooking times can vary based on the size of your ribs, their thickness, and the level of tenderness you're after. But, here's a general guideline to give you a starting point:
| Rib Type | Approximate Cooking Time |
|---|---|
| Short Ribs | 3-4 hours |
| Back Ribs | 2-3 hours |
Remember, this is just a guideline. The real test comes when you start checking for tenderness. Those ribs are ready when they reach that coveted "falling-off-the-bone" stage, where the meat practically separates from the bone with a gentle touch.
The Basting Ritual: Maintaining Moisture and Enhancing Flavor
Now, here's where you get to show those ribs some love. Don't just leave them alone in the oven! Every 30-60 minutes, use a basting brush to coat them with a delicious mixture. You can use bbq sauce, apple cider vinegar, or even just plain water. This keeps the meat moist and helps develop a beautiful, flavorful crust. Think of it as a mini spa treatment for your ribs, leaving them radiant and full of flavor.
(Part 4) The "Falling-Off-the-Bone" Test: Knowing When Your Ribs are Ready
Okay, so your ribs have been in the oven for a while, and that delicious aroma is filling your kitchen. It's time for the ultimate test: the "falling-off-the-bone" test. This is the moment of truth, the test that tells you whether your ribs are ready to become the star of the show.
The Probe Test: A Quick and Easy Check
Take a fork, or even a wooden skewer, and gently prod a rib. If the meat gives way easily and separates from the bone, you're good to go! If it's still a bit resistant, give it a bit more time in the oven, those ribs will thank you for it!
The "Tug" Test: For a More Hands-On Approach
For a more tactile approach, try the "tug" test. Gently pull on a piece of meat. If it comes away from the bone with minimal effort, your ribs are ready. If it's still stuck, give it a bit more time to reach peak tenderness.
(Part 5) Resting is Essential: Unlocking Ultimate Tenderness
You've got your ribs out of the oven, they're looking glorious, and you're probably ready to dig in. But hold your horses! Before you grab your fork, remember that a little rest is key to achieving that ultimate melt-in-your-mouth tenderness. It might seem like a small step, but it's a crucial one, like allowing a fine wine to breathe before you savor its flavors.
The Science of Resting: Retaining Moisture and Enhancing Flavor
When you take the ribs out of the oven, they're full of heat, trapping all those precious juices inside. By letting them rest, you allow those juices to redistribute throughout the meat, making them even juicier and more flavorful. It's like unlocking the full potential of those ribs, revealing their true culinary magic.
How Long to Rest: A General Guideline
Wrap the ribs loosely in aluminum foil and let them rest in a warm place, away from drafts. Aim for at least 30 minutes of rest, but if you have the time, an hour of rest will work wonders. Think of it as a timeout for those ribs, allowing them to relax and become even more delicious.
(Part 6) The Finishing Touches: Adding Flavor and Depth
Okay, your ribs have had their rest, and they're ready for their big moment. This is where you add those finishing touches that will turn your ribs from good to absolutely spectacular. Think of it as adding the final flourishes to a masterpiece, ensuring that every detail is perfect.
BBQ Sauce: A Classic Finish
I'm a huge fan of a good barbecue sauce. It adds that sweet, smoky, tangy flavor that perfectly complements the richness of the beef. I like to use a thick, rich sauce, applying it liberally to my ribs right before serving. But if you prefer a lighter sauce, you can apply it during the last 30 minutes of cooking.
The Power of Butter: A Simple but Effective Technique
Here's a little secret I learned from my grandmother: use a bit of melted butter to baste your ribs. It adds a rich, buttery flavor and creates a beautiful crust. Just brush it on generously and let it soak in for a few minutes. It's a simple touch that elevates the flavor to a whole new level.
(Part 7) Serving Your Ribs: A Celebration of Flavor
The big moment has arrived! Your ribs are ready, and it's time to share your culinary triumph with your loved ones. This is a celebration of flavor, a gathering of friends and family, all united by the love of good food.
Sides that Complement: Completing the Feast
Now, when it comes to sides, there are countless delicious options to choose from. I prefer to keep things simple and let the ribs take center stage. Here are a few of my favorite pairings:
- Coleslaw: A classic side that cuts through the richness of the ribs, providing a refreshing contrast.
- Mac and Cheese: comfort food at its finest, with its creamy richness perfectly complementing the savory flavors of the ribs.
- Baked Beans: A sweet and smoky side, bringing a touch of Southern charm to the table and harmonizing beautifully with the ribs.
The "Rib" Experience: Sharing the Joy
There's something special about sharing a plate of ribs with loved ones. It's about coming together, enjoying delicious food, and savoring every moment. The laughter, the stories, the joy of sharing a meal - these are the elements that make the "rib" experience truly unforgettable.
(Part 8) FAQs: Answering Your Burning Questions
You've got questions, I've got answers! Here are a few common questions I get about cooking beef ribs, and my expert advice to help you master the art of rib-cooking:
1. Can I Cook Beef Ribs in the Oven Without a Smoker?
Absolutely! You don't need a smoker to get amazing results. Just follow the tips and techniques I've outlined, and you'll be rewarded with juicy, tender ribs that are bursting with flavor. Your oven can be your personal smokehouse, creating culinary magic with a touch of patience and love.
2. How Can I Prevent My Ribs From Drying Out?
The key is to cook them low and slow, and to baste them regularly. This helps keep the meat moist and prevents it from drying out. You can also use a little bit of liquid in the bottom of your roasting pan to create steam, which helps trap moisture and keeps those ribs succulent.
3. What Happens If I Overcook My Ribs?
Overcooked ribs will be dry and tough, a far cry from the melt-in-your-mouth experience we're aiming for. If you think you might have overcooked them, try wrapping them in foil and letting them rest for a few minutes. This helps redistribute the juices and makes the meat a bit more tender.
4. Can I Freeze Ribs?
Yes, you can freeze ribs, but it's best to freeze them before they're cooked. Wrap them tightly in plastic wrap and aluminum foil, and freeze them for up to 3 months. To thaw them, place them in the refrigerator overnight.
5. What's the Best Way to Reheat Ribs?
The best way to reheat ribs is in a low oven. Preheat your oven to 250°F (120°C) and bake the ribs for 30-45 minutes, or until they're heated through. You can also reheat them in a slow cooker on low for a couple of hours, allowing them to slowly regain their tenderness and flavor.
There you have it! My guide to achieving perfect, oven-baked beef ribs, from choosing the right cut to mastering the art of resting and finishing. Remember, it's all about patience, a touch of love, and a whole lot of deliciousness. Happy cooking!
Everyone is watching

Prime Rib Roast Cooking Time Chart: Per Pound Guide
Cooking TipsPrime rib roast. Just the name conjures images of lavish dinners, crackling fires, and hearty laughter. It’s ...

How Long to Bake Potatoes in the Oven (Perfect Every Time)
Cooking TipsBaked potatoes are a staple in my kitchen. They're incredibly versatile, delicious, and surprisingly easy to m...

Perfect Rice Every Time: The Ultimate Guide to Cooking Rice
Cooking TipsAs a self-proclaimed foodie, I've always been a bit obsessed with rice. It's the foundation of countless cuisi...

The Ultimate Guide to Cooking Asparagus: Tips, Techniques, and Recipes
Cooking TipsAsparagus. The mere mention of this spring delicacy conjures up images of vibrant green spears, crisp and burs...

Ultimate Guide to Cooking the Perfect Thanksgiving Turkey
Cooking TipsThanksgiving. Just the word conjures up images of overflowing tables laden with delicious food, the scent of r...