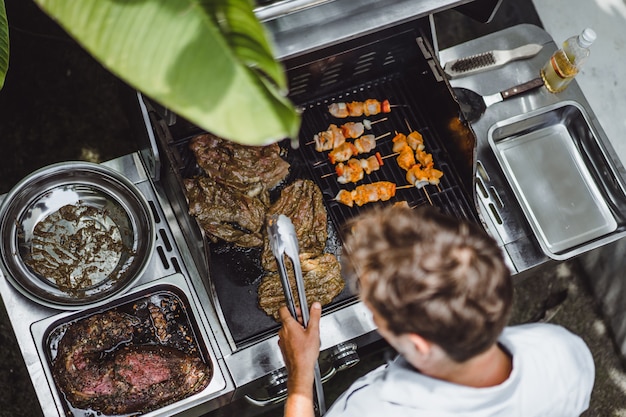
Let's be honest, brisket isn't just a piece of meat; it's a culinary adventure. It's the kind of dish that makes you feel like a real chef, even if you're a bit of a kitchen novice. And the best part? You can achieve that incredible melt-in-your-mouth texture right in your own oven.
Over the years, I've become obsessed with brisket, trying countless recipes and techniques. I've had my fair share of dry, tough disasters, but I've also had moments of culinary triumph that left me feeling like a brisket master. This guide is my way of sharing the knowledge I've gained, so you can avoid the pitfalls and conquer the art of perfect brisket every time.
We'll cover everything from selecting the perfect cut to mastering that irresistible bark. We'll dive into the world of rubs and sauces, and I'll even reveal my secret weapon for achieving that divine, fall-apart texture.
So, grab a cuppa, get comfy, and let's embark on this brisket journey together!
(Part 1) The Brisket Basics

choosing the right cut: Point vs. Flat
First things first, you need the right piece of meat. We're talking brisket, and there are two primary cuts:
- Point: This is the fattier, more flavorful cut, known for its rich marbling. Think of it as the "party animal" of the brisket world, full of deep, complex flavors.
- Flat: This is the leaner cut, with less marbling and a more even texture. It's a bit more delicate and tends to dry out quicker. It's the "health nut" of the brisket family, providing a more refined flavor profile.
For most people, the point is the way to go. It's more forgiving and will deliver that melt-in-your-mouth experience you're craving. But, if you're a bit more adventurous and enjoy leaner cuts, the flat might be your perfect match.
Spotting the Perfect Brisket: Marbling Matters
Now, the key is to choose a brisket that's fresh and boasts good marbling. Marbling is the key to juicy, flavorful results. It's those beautiful streaks of fat that render down during cooking, infusing the meat with incredible flavor. Don't be put off by a brisket with a bit of fat on the outside; that fat is going to work its magic in the oven.
Think of the marbling as the secret ingredient to that melt-in-your-mouth texture. The more marbling, the better!
Size Matters: Feed the Crowd or Enjoy a Cozy Dinner
Size matters, folks! If you're hosting a crowd, go for a larger brisket. If it's just for you and a few friends, a smaller one will do the trick. You can always adjust the cooking time accordingly.
Trimming and Preparing the Brisket: The Art of the Trim
You've got your perfect brisket, now it's time for a bit of trimming. Don't be too aggressive here; you want to keep a decent layer of fat on top. But, you need to remove any thick chunks or bits of fat that will just render down and create a mess. I usually trim it to about 1/4 inch. You can also trim off any tough, sinewy bits you find on the underside.
Seasoning Your Brisket: The Magic of the Rub
Next up, it's time to season that brisket with a good rub! A good rub is essential for building flavor, creating that delicious crust. I'll share some of my favourite rub recipes later on, but here are the essential elements:
- Salt: Salt is a crucial player, drawing out moisture and amplifying the flavour of the brisket.
- Pepper: Black pepper adds a touch of spice. Feel free to experiment with other pepper varieties or even a hint of cayenne pepper for a touch of heat.
- Sweet and Savoury: Brown sugar, garlic powder, onion powder, paprika, and cumin all add layers of depth and complexity to the flavour.
Don't be afraid to get creative! I love adding smoked paprika, chili powder, or even a touch of mustard powder to my rubs. It's all about finding the perfect blend for your taste buds.
Once you've rubbed that brisket, you're ready to move on to the next step: the oven.
(Part 2) Mastering the Low and Slow: The oven method

The Low and Slow Philosophy: Patience Is Key
Brisket is all about low and slow cooking. It's a slow-burning love affair, where time and patience are your best allies. You won't get that tender, juicy, melt-in-your-mouth texture by blasting it in the oven. It needs time to break down, develop those rich flavors, and become impossibly tender.
Investing in an Oven Thermometer: Maintaining Consistent Low Heat
Most ovens aren't built for consistent low temperatures, so it's a good idea to invest in an oven thermometer. You can find them at your local supermarket or kitchen supply store. This little gadget will ensure you're hitting that perfect low temperature, allowing your brisket to cook evenly.
Getting Started: Preheat and Fat Side Up
Preheat your oven to 275°F (135°C). This low temperature is key for gentle cooking and preventing the brisket from drying out.
Now for a crucial step: place your brisket in the oven fat side up. This allows the fat to render down and create a delicious, flavorful crust, adding another layer of flavor and texture to your masterpiece.
Steam for Tenderness: Adding Moisture to the Oven
Here's a little trick I've learned: I like to add a cup of water to the bottom of the oven dish. It creates a bit of steam, helping to keep the brisket moist throughout the long cook.
The Waiting Game: Patience Pays Off
Now comes the exciting part: it's time to wait! This is the part where you can sit back, relax, and let your oven do its magic. It's a testament to the fact that sometimes, the best things in life take time.
Monitoring Your Brisket: Temperature and Texture
If you have a meat thermometer, check the internal temperature of the brisket after the first couple of hours. You want to aim for an internal temperature of 190°F (88°C). However, don't stress too much about the exact temperature; it's more about the texture. You want it to be so tender it practically falls apart.
Keep a watchful eye on the brisket throughout the cooking process. If the top starts to look a bit dry, you can add a bit more water to the oven dish. But don't worry if it dries out a little; it'll still be delicious.
(Part 3) The Art of the Bark: Creating a Crispy Crust

The Bark: A Textural and Flavorful Delight
You'll know the brisket is done when it hits that magical 190°F (88°C), but you can also tell by the appearance. It should have a nice, crispy bark on the top.
The bark is like the crown jewel of the brisket. It's the crispy, caramelized layer that forms on the outside during cooking. It adds beautiful textural contrast to the tender, juicy meat beneath.
Enhancing the Bark: Techniques for a Perfect Crust
To encourage a truly magnificent bark, you can use a combination of techniques:
- High Heat Start: Begin with a slightly higher oven temperature (around 300°F or 150°C) for the first hour or so. This helps the brisket develop a nice crust on the outside.
- dry rub Power: A good rub with salt, pepper, and other spices will create a flavorful bark. Experiment with different spice combinations to find your favorite.
- Moisture Matters: A little bit of moisture during cooking (like the water in the oven dish) helps the bark develop a nice, glossy sheen.
Don't be afraid to experiment with these techniques. Find what works best for you and your oven.
(Part 4) The Rest and Wrap: Unlocking Tenderness
Resting: The Brisket's Time to Relax
Once your brisket reaches 190°F (88°C) and you're happy with the bark, it's time for the most crucial step: resting. It's like giving your brisket a culinary timeout. It allows the juices to redistribute throughout the meat, creating an incredibly tender and juicy result.
The Resting Routine: Wrapping and Patience
Here's how to rest your brisket like a pro:
- Wrap it Up: Take your brisket out of the oven and wrap it tightly in heavy-duty foil.
- Let it Cool: Leave it to rest for at least 2 hours, and ideally 3-4 hours. Wrapping it in a towel will help keep it warm.
While the brisket is resting, get started on your favorite sides or prepare your signature sauce.
The Wrap and Hold: Taking Resting to the Next Level
Here's a little secret: I love to take the brisket resting game to the next level. After the initial rest in foil, I take the brisket out and wrap it tightly in butcher paper. Then, I put it back in the oven, set to the lowest temperature (usually around 170°F or 77°C), and let it hold for another 1-2 hours.
This is called the "wrap and hold" method, and it's my go-to for extra-tender, juicy brisket. It basically steams the brisket in its own juices, allowing it to break down even further and become impossibly tender.
Don't worry about the bark getting soggy. It's a bit of a trade-off, but the extra tenderness is worth it.
(Part 5) Slicing and Serving: The Grand Finale
Slicing for Success: Against the Grain
Now, here's the moment of truth. You've waited patiently, let the brisket rest, and now it's time to slice it.
First, unwrap the brisket and let it cool for a few minutes before you start slicing.
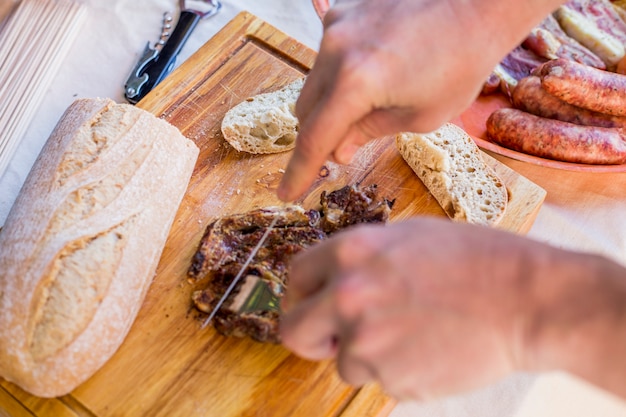
Here's a little trick for slicing brisket like a pro: use a sharp knife and cut against the grain. This will make the brisket easier to slice and give it a lovely, delicate texture.
Don't be afraid to leave a bit of fat on the slices. It'll melt in your mouth and add a delicious flavor.
The Perfect Sides: Complementary flavor combinations
Now, let's talk about the sides. Brisket is a hearty dish, so you'll want to choose sides that complement it. Here are a few of my favourites:
- Mac and Cheese: A classic pairing that always goes down a treat.
- Cornbread: A Southern staple that adds a touch of sweetness and texture.
- Coleslaw: A refreshing side that cuts through the richness of the brisket.
- Baked Beans: A slow-cooked, soulful side that complements the brisket perfectly.
Feel free to get creative and choose sides that you enjoy.
(Part 6) The Sauce Symphony: Adding Flavor and Texture
Choosing the Right Sauce: A Matter of Taste
Of course, no brisket is complete without a delicious sauce. But choosing the right sauce can be a bit of a challenge. There are so many different options out there!
I prefer a simple, tangy sauce that doesn't overpower the flavour of the brisket. I use a mix of ketchup, brown sugar, apple cider vinegar, and Worcestershire sauce. But you can add all sorts of other flavourings like mustard, garlic, or even a hint of heat with a splash of hot sauce.
For something a bit more complex, you can try a barbecue sauce based on vinegar, molasses, or even bourbon. It all depends on your personal preferences.
One of the most important things to remember is not to drown the brisket in sauce. A little bit goes a long way. You want to taste the delicious meat and let the sauce enhance, not overwhelm.
Making Your Own Sauce: Tailoring Flavors to Your Preferences
One of the joys of cooking brisket is the opportunity to experiment with different sauces. If you're feeling adventurous, try making your own. It's not as difficult as you might think.
Here's a simple recipe for a tangy barbecue sauce:
| Ingredient | Quantity |
|---|---|
| Ketchup | 1 cup |
| Brown sugar | 1/2 cup |
| Apple cider vinegar | 1/4 cup |
| Worcestershire sauce | 2 tablespoons |
| Garlic powder | 1 teaspoon |
| Onion powder | 1 teaspoon |
| Black pepper | 1/2 teaspoon |
Simply whisk all of the ingredients together in a saucepan over medium heat. Bring to a simmer and cook for about 10 minutes, stirring occasionally, until the sauce thickens.
You can adjust the recipe to your liking. If you want a sweeter sauce, add more brown sugar. If you want a tangier sauce, add more vinegar. The beauty of making your own sauce is that you can tailor it to your taste.
(Part 7) My Go-To brisket rub: A Flavorful Foundation
Now, I've got to share one of my favourite brisket rubs with you. It's a simple recipe, but it packs a punch of flavor.
Here's what you need:
- 1 tablespoon kosher salt
- 1 tablespoon black pepper
- 1 tablespoon paprika
- 1 tablespoon brown sugar
- 1 teaspoon garlic powder
- 1 teaspoon onion powder
Mix all of the ingredients together in a small bowl. Then, rub the mixture all over the brisket, making sure to get into all the nooks and crannies.
You can use this rub for both point and flat cuts. I like to add a bit of smoked paprika to give it an extra smoky flavour.
This rub is versatile and can be used for other cuts of meat, like pork shoulder or ribs.
(Part 8) Brisket Beyond the Oven: Expanding Your Culinary Horizons
While oven-cooked brisket is a classic, there are other methods out there that can elevate your brisket game.
The Smoky Embrace: Brisket on a Smoker
For a truly smoky flavour, try cooking your brisket on a smoker. The slow, even heat and the smoky aroma create a unique depth of flavour that's hard to replicate in an oven.
pressure cooker Power: Fast and Tender
If you're looking for a faster cooking method, consider using a pressure cooker. You'll achieve a tender, juicy result in a fraction of the time. But remember, while the cooking time is shorter, the principles of low and slow cooking still apply.
Remember, no matter what method you choose, the principles of low and slow cooking are key to achieving that perfect brisket.
(Part 9) FAQs: Addressing Common Brisket Questions
Q: How do I know if my brisket is done?
The best way to know if your brisket is done is to check the internal temperature. Use a meat thermometer and aim for an internal temperature of 190°F (88°C). You can also tell by the appearance. The brisket should have a nice, crispy bark on the top, and it should be tender enough to shred easily with a fork.
Q: Can I cook brisket in advance?
Yes, you can absolutely cook brisket in advance. Once it's cooked and rested, you can wrap it tightly in foil and store it in the refrigerator for up to 3 days. To reheat, simply wrap the brisket in foil and place it in a preheated oven at 250°F (121°C) for about an hour. You can also reheat it in a slow cooker on low for a few hours.
Q: What can I do with leftover brisket?
Leftover brisket is a culinary gold mine. You can use it to make all sorts of delicious dishes. Here are a few ideas:
- Brisket Sandwiches: Shred the brisket and serve it on toasted rolls with your favourite barbecue sauce.
- Brisket Tacos: Shred the brisket and fill tortillas with your favourite toppings.
- Brisket Chili: Chop the brisket and add it to your favourite chili recipe.
- Brisket Hash: Dice the brisket and fry it with potatoes, onions, and peppers.
Q: How do I prevent my brisket from drying out?
There are a few things you can do to prevent your brisket from drying out:
- Choose a well-marbled brisket: The marbling will render down and keep the meat moist.
- Cook it low and slow: Don't rush the cooking process. Give it plenty of time to break down and become tender.
- Add moisture to the oven: Add a cup of water to the bottom of the oven dish to create a bit of steam.
- Wrap it in foil during the rest: This will help keep the brisket moist and tender.
Q: What are some tips for making a delicious brisket?
Here are a few tips for making a delicious brisket:
- Don't over-trim the fat: You want to keep a decent layer of fat on top to help keep the meat moist.
- Use a good rub: A well-seasoned rub is essential for building flavour.
- Cook it low and slow: Patience is key when it comes to cooking brisket.
- Rest it properly: Let the brisket rest for at least 2 hours to allow the juices to redistribute.
- Slice it against the grain: This will make the brisket easier to slice and give it a lovely, delicate texture.
And remember, the best way to learn is to experiment and find what you enjoy!
Everyone is watching

How to Cook Frozen Lobster Tails Perfectly: A Step-by-Step Guide
RecipesLobster. Just the word conjures up images of lavish meals, special occasions, and a taste of luxury. But let's...

Pork Fillet Cooking Time: How Long to Cook It Perfectly
RecipesPork fillet, or tenderloin as it's sometimes called, is a real favourite in our house. It's so versatile, and...

Pigs in a Blanket Cooking Time: How Long to Bake for Perfect Results
RecipesAh, pigs in a blanket. Just the name conjures up images of those delightful little parcels of crispy pastry en...

The Ultimate Guide to Cooking Delicious Frankfurters
RecipesLet's face it, we all love a good frankfurter. It's a classic, simple, and always satisfying. But let's be rea...

Wolf Meat Recipes: A Guide to Cooking Wild Game
RecipesLet's be honest, you don't see wolf meat at your local butcher shop every day. It's a bit of a wild card, but ...
