Let’s be honest, there’s nothing quite like a perfectly cooked bone-in rib roast. It's the king of roasts, the star of any dinner party, the centerpiece that makes everyone drool. But let’s face it, cooking a rib roast can be a little daunting. You want to make sure it's perfectly cooked, juicy, and flavorful, but you also don't want to spend all day in the kitchen.
Well, fear not, my friends! I'm here to guide you through every step of the way, from choosing the right cut to carving it like a pro. I've learned a thing or two over the years, and I’m ready to share my secrets with you.
Part 1: Choosing Your Rib Roast - It All Starts with the Right Cut
You can’t have a masterpiece without the right ingredients, and that's especially true for a rib roast. This is where a good relationship with your butcher is key! It's like having a culinary confidante.
Picking the Right Cut – prime rib vs. standing rib roast
First things first, you need to decide what kind of rib roast you want. There's the classic prime rib, which is a cut from the primal rib section of the beef. It’s typically a larger, more expensive roast that boasts a beautiful marbling, giving it a richness you just can't beat. Then there’s the standing rib roast, which is basically a section of prime rib that includes the rib bones. It’s a bit more rustic, but just as delicious!
I love the look and feel of a standing rib roast, and I find it has a more pronounced beefy flavour. It also gives you those gorgeous bones to gnaw on! But honestly, both cuts are fantastic and will make for a truly impressive centerpiece. It all comes down to personal preference and your budget.
Don’t Forget the Fat!
One important tip: don't be afraid of the fat! It’s not just about taste, it’s also about keeping the meat juicy during the cooking process. Look for a roast with a good layer of fat – it will render down during cooking and baste the meat, ensuring a tender, flavorful outcome. Plus, fat is flavour, isn't it?
Getting Expert Advice from Your Butcher
Now, this is where your butcher comes in. Tell them what kind of roast you want and how many people you're feeding. They can help you pick the right cut, trim it for you, and even tie it up for you so it cooks evenly. I always love chatting with my butcher and picking their brains – they’re the experts, and they’re passionate about their craft!
Understanding the Weights and Measures
A good rule of thumb for calculating how much roast to buy is about 1 pound per person, but that’s just a starting point. Consider your guests’ appetites and whether you want leftovers.
A standing rib roast is often sold in weights that are multiples of 3 or 4 pounds, while prime rib can be more customizable. For example, a 3-pound standing rib roast will easily feed 3 to 4 people.
Part 2: Seasoning Your Rib Roast – A Simple Approach for Maximum Flavor
Now, you've got your beautiful cut of meat. What's next? Time to season it!
The Power of Salt – The Key to Bringing Out the Best in Your Roast
I'm a firm believer in keeping it simple. Salt is your best friend when it comes to seasoning a rib roast. You can’t go wrong with kosher salt – it's coarse and doesn’t have any additives that might interfere with the flavor. It's like a magic ingredient that draws out the moisture and deepens the flavor. Don’t be afraid to be generous with the salt – you’ll need to use around a tablespoon per pound of meat. Rub it all over the roast, getting it in all those nooks and crannies, including those yummy bones!
Adding a Little Pepper – A Classic Combination
Freshly ground black pepper is always a good addition to a rib roast. It adds a touch of bite that complements the richness of the beef.
When to Avoid Other Seasonings
Here’s my personal take on other seasonings: I don’t usually add anything else. Garlic powder, onion powder, paprika, rosemary, and other spices can be delicious, but I find they can sometimes overpower the natural flavour of the beef. Plus, I’m all about simplicity.
Now, if you're a seasoned pro in the kitchen and you have a favourite spice blend, go ahead and use it! It's all about exploring your creativity and finding what works best for you. Just remember, the goal is to enhance the flavour of the meat, not mask it!
Part 3: The Big Rest – Patience is Key
Here’s a secret to tender, flavorful meat: resting the roast before you cook it. It's like giving it a pre-cooking spa treatment! It's an often-overlooked step but trust me, it makes all the difference.
Why Resting Works – It's All About Salt and Moisture
The salt we rubbed on the roast will penetrate the meat and draw out some of the moisture. This might sound counterintuitive, but it's actually a good thing! This process creates a brine within the meat, which makes it more tender and flavorful. The longer you rest it, the more moisture is drawn out and the more flavour is developed. It’s like a delicious symphony of flavor unfolding.
How Long to Rest? – The Longer the Better
Cover the seasoned roast tightly with plastic wrap and pop it in the fridge for at least 24 hours, but ideally 48 hours. Yes, it takes time, but trust me, it’s worth it. The patience you show will be rewarded with a roast that melts in your mouth.
Part 4: The Roast Day – Preparing for Your Culinary Triumph
So, the day has finally arrived! It's time to cook that beautiful roast and turn it into a culinary masterpiece. Let’s get started!
Bringing the Roast to Room Temperature – Avoiding Cold Spots
The first step is to bring the roast to room temperature. Take it out of the fridge and let it sit on the counter for at least an hour, and up to two hours, depending on the size of the roast. This helps the roast cook evenly and prevents cold spots, which can lead to uneven cooking.
Preheating the Oven – The Importance of a Hot Start
While the roast is coming to room temperature, preheat your oven to 450°F (230°C). You want that oven nice and hot to get a beautiful, crispy crust on the outside. It's like giving your roast a good sear, locking in all the juices and flavour.
Part 5: Cooking the Rib Roast – Mastering the High-and-Low Technique
Now comes the crucial part – cooking the roast. This is where your patience and attention to detail will really shine.
The Initial Sear – Creating that Perfect Crust
Place the roast in your preheated oven and cook it for 15 minutes per pound. This high-heat sear is all about creating that beautiful, crispy crust. Don’t be tempted to open the oven door during this time – you want to keep the heat trapped inside to ensure even cooking.
Reducing the Heat – Slow and Steady Wins the Race
After that initial sear, reduce the oven temperature to 325°F (160°C). This is where patience comes in. You want to cook the roast slowly and steadily until it reaches the desired internal temperature.
Using a meat thermometer – The Key to Getting It Right
To ensure your roast is cooked to perfection, use a meat thermometer. For a medium-rare rib roast, aim for an internal temperature of 135°F (57°C). The probe thermometer is your best friend, especially for something like a rib roast.
Understanding Doneness – Visual Cues and the Meat Thermometer
You can also get an idea of doneness by pressing on the roast. A firm feel indicates a well-done roast, while a slight springiness suggests a medium-rare roast. However, the meat thermometer is the most reliable way to ensure accuracy.
Remember, the roast will continue to cook slightly even after you remove it from the oven. So, if you prefer a slightly more well-done roast, pull it out when it reaches 130°F (54°C).
The Final Rest – Let the Juices Redistribute
Once the roast has reached the desired internal temperature, remove it from the oven and cover it tightly with aluminum foil. Let it rest for at least 30 minutes before carving. This allows the juices to redistribute throughout the meat, making it even more tender and succulent.
I know, it’s hard to wait, but trust me, this resting period is crucial for that melt-in-your-mouth texture. It's like giving the roast a chance to relax and savor its flavours before we all dig in.
Part 6: The perfect roast – Signs of Success
You’ve followed all the steps, and now you’re ready to see the fruits of your labour. Let’s look at those signs that indicate your rib roast is perfect.
The doneness test – Pressing for Clues
Even with a meat thermometer, it's good to know how to test for doneness using the touch test. Press on the center of the roast. A firm feel means it’s well-done, while a slight springiness indicates a medium-rare roast. It’s a good way to double-check that the temperature readings are accurate.
The Colour Test – A Visual Indication of Doneness
Another way to gauge doneness is by the colour. As the roast cooks, the outside will turn a beautiful, rich brown. The deeper the brown, the more likely it is that the roast is well-cooked. It’s like a visual cue that the roast is ready to be enjoyed.
However, colour alone isn’t always a reliable indicator, especially if your oven is running a bit hot or cold. That’s why using a meat thermometer is essential to ensure you get it right.
Part 7: The Carving – It’s a Performance
Alright, the moment of truth has arrived. It’s time to carve that beautiful roast and reveal the juicy, tender meat inside.
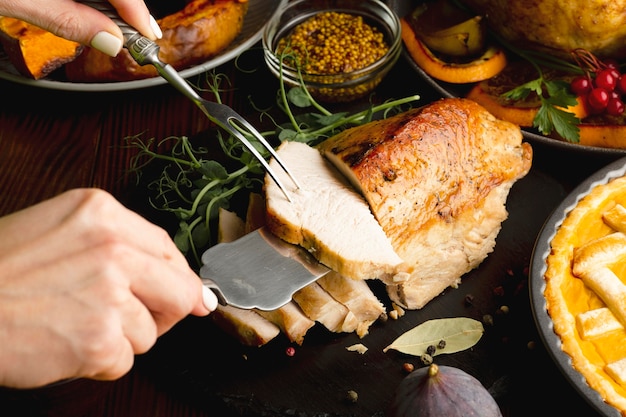
Cutting Against the Grain – A Key to Tenderness
Carving is an art, and it's essential to cut against the grain. This means slicing across the muscle fibers, not along them. It's a simple technique, but it makes a huge difference in the texture of the meat. Cutting against the grain ensures the meat is tender and easy to chew, making each bite a delight.
Creating Even Slices – An Artful Presentation
Aim for thin, even slices, which are not only more visually appealing, but also help prevent the roast from becoming dry. Think of it as showcasing the deliciousness of the meat. I always like to arrange the slices artfully on a platter, like a beautiful centerpiece for the table. It’s a way of presenting the culmination of your hard work.
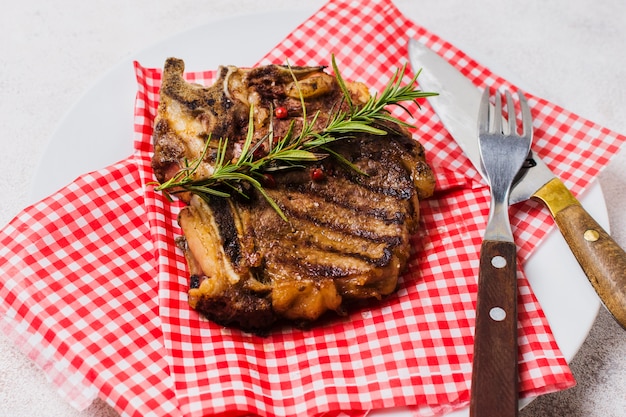
Garnishing the Platter – Adding a Touch of Elegance
To elevate the presentation even further, I like to garnish the platter with some fresh herbs. A sprig of rosemary or a sprinkle of parsley adds a touch of colour and freshness that complements the roast. It’s a small detail that makes a big difference.
Serving Tableside – Adding a Touch of Drama
For a truly impressive experience, carve the roast tableside. It’s a theatrical presentation that adds a touch of elegance and drama to your dinner party. It's a way of engaging your guests in the final act of your culinary performance.
Part 8: Serving the Roast – A Feast for the Senses
It's time to enjoy the fruits of your labour! The roast is carved, the sides are ready, and the table is set. Let’s create a truly memorable meal.
Classic side dishes – A Time-Honored Pairing
No rib roast is complete without some sides. It’s like creating a symphony of flavour! You can’t go wrong with classic pairings like roasted potatoes, Yorkshire pudding, and gravy. It's a combination that brings back happy memories and warms the soul.
Roasted Vegetables – A Vibrant Complement
I also love pairing a roast with roasted vegetables. Carrots, parsnips, Brussels sprouts, and other root vegetables add a vibrant pop of colour and flavour that complements the richness of the roast. It’s a delicious way to balance the meal.
Other Side Dish Options – Explore Your Creativity
Of course, don’t be afraid to experiment with other side dishes. mashed potatoes, creamy polenta, or a fresh salad are all delicious options that will complement the roast beautifully.
The Grand Finale – A Feast for the Eyes and the Palate
When presenting your rib roast, I prefer a simple yet elegant approach. Arrange the carved slices on a platter, with the sides arranged around it. Add a small bowl of gravy for everyone to enjoy. It's like creating a culinary tableau that celebrates the deliciousness of the meal.
Part 9: Variations on the Theme – Adding Your Personal Touch
So, you've mastered the basics of cooking a rib roast, but maybe you're looking to add a little something extra. Here are a few variations on the classic recipe that will take your roast to the next level.
The Herb-Crusted Roast – A Flavorful Touch
A simple yet elegant way to add more flavour is to create a herb crust. Mix together your favourite herbs like rosemary, thyme, and oregano, and sprinkle them over the roast before cooking. The herbs will infuse the meat with their aroma and create a delightful crust.
The Garlic-Infused Roast – A Bold and Savory Option
For a more intense flavour, infuse the roast with garlic. Make a few shallow slits in the roast and insert cloves of garlic. You can also rub the roast with garlic paste. The garlic will meld with the beef, creating a symphony of savoury flavours. It’s a classic pairing for a reason!
The Wine-Glazed Roast – A Gourmet Touch
For a truly gourmet touch, try a wine glaze. Mix together red wine, balsamic vinegar, and a little bit of sugar. Pour the glaze over the roast and cook as usual. The glaze will caramelize during cooking, creating a delicious, glossy finish that adds a layer of sweetness and depth to the roast. It’s perfect for a special occasion!
Part 10: Storage – Making the Most of Leftovers
You’ve cooked a perfect roast, enjoyed a delicious meal, and now you’re left with some delicious leftovers. Don’t worry, you’re not stuck with just a boring sandwich!
Storing the Roast – Keeping It Fresh and Flavorful
Wrap the leftover roast tightly in plastic wrap or aluminum foil. Store it in the refrigerator for up to 3 days. If you're planning to keep it for longer, freeze it.
Leftover Inspiration – Creative Uses for roast beef
roast beef leftovers are a culinary treasure trove, waiting to be transformed into new dishes! Here are a few ideas to get you started:
- roast beef sandwiches: A classic for a reason! Make them with your favourite toppings, like lettuce, tomato, and mayonnaise.
- Roast Beef Salad: A lighter option. Toss the leftover roast beef with your favourite salad greens, vegetables, and a creamy dressing.
- Beef Stew: Transform the leftover roast beef into a hearty, comforting stew. Add vegetables, potatoes, and your favourite seasonings.
- Shepherd's Pie: Use the leftover roast beef to make a delicious Shepherd's pie.
- Roast Beef Hash: Dice the leftover roast beef and cook it with potatoes, onions, and your favorite spices.
FAQs – Your Burning Questions Answered
1. Can I cook a rib roast in a slow cooker?
While a slow cooker can be a great tool for many dishes, I wouldn’t recommend cooking a rib roast in one. The roast needs that initial searing to create a beautiful crust, which you won’t achieve in a slow cooker. Plus, the slow cooking process can make the meat dry and less flavorful. Stick to the oven method for the best results.
2. What is the best way to carve a rib roast?
The best way to carve a rib roast is to cut against the grain, ensuring tenderness and easy chewing. Slice the meat thinly for a more elegant presentation.
3. What are some good side dishes to serve with a rib roast?
Some classic side dishes to serve with a rib roast include roasted potatoes, Yorkshire pudding, gravy, roasted vegetables, and mashed potatoes. However, you can get creative and explore other options! The beauty of cooking is the freedom to experiment and find what you love.
4. How can I tell if my rib roast is cooked to the right temperature?
The most reliable way to determine the doneness of your rib roast is to use a meat thermometer. For medium-rare, aim for an internal temperature of 135°F (57°C). You can also check for doneness by pressing on the roast – a firm feel indicates well-done, while a slight springiness suggests medium-rare. The colour of the roast can also be a good indicator of doneness, but it’s not always reliable. Look for a deep brown colour, which suggests well-cooked meat.
5. What are some tips for getting a crispy crust on my rib roast?
To get a crispy crust, preheat your oven to a high temperature, and cook the roast for 15 minutes per pound at this high heat. This initial searing is crucial for creating a beautiful, crispy crust. Keep the oven door closed during this time to maintain the heat.
Remember, cooking a rib roast to perfection is a journey, not a race. Take your time, follow the steps, and enjoy the process. You'll be rewarded with a truly delicious and impressive meal that will delight your guests and leave them wanting more.
Everyone is watching

How to Cook Frozen Lobster Tails Perfectly: A Step-by-Step Guide
RecipesLobster. Just the word conjures up images of lavish meals, special occasions, and a taste of luxury. But let's...

Pigs in a Blanket Cooking Time: How Long to Bake for Perfect Results
RecipesAh, pigs in a blanket. Just the name conjures up images of those delightful little parcels of crispy pastry en...

Pork Fillet Cooking Time: How Long to Cook It Perfectly
RecipesPork fillet, or tenderloin as it's sometimes called, is a real favourite in our house. It's so versatile, and...

The Ultimate Guide to Cooking Delicious Frankfurters
RecipesLet's face it, we all love a good frankfurter. It's a classic, simple, and always satisfying. But let's be rea...

Wolf Meat Recipes: A Guide to Cooking Wild Game
RecipesLet's be honest, you don't see wolf meat at your local butcher shop every day. It's a bit of a wild card, but ...