(Part 1) Choosing Your Turkey
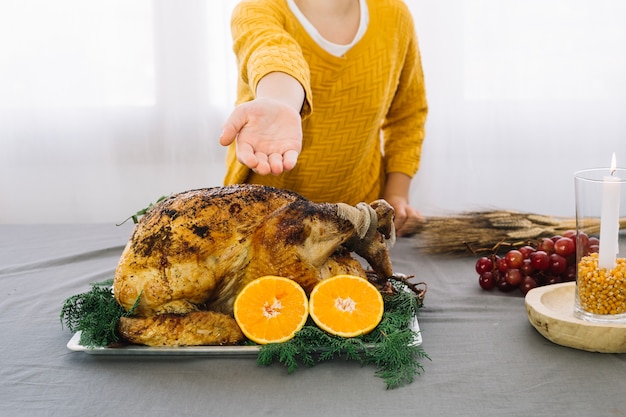
The Perfect Bird: Finding Your Feast's Star
The first step in baking a magnificent turkey is choosing the perfect bird. Think of it like choosing a partner for your holiday dinner – you want a turkey that will be the centre of attention, impress your guests, and leave them wanting more.Here's what you need to consider: Size: You want a turkey big enough to feed everyone comfortably but not so large that it becomes a monstrous beast on your table. A good rule of thumb is to allow about 1 pound of turkey per person. If you're expecting 10 guests, you'll want a turkey that's at least 10 pounds. Fresh or Frozen: I personally prefer fresh turkeys, as they seem to have a more vibrant flavour. However, frozen turkeys are a perfectly good option, especially if you're short on time. Just make sure you give it enough time to thaw properly – we don't want a half-thawed turkey causing chaos in your kitchen! Free-Range or Organic: This is a matter of personal preference and ethical considerations. Free-range or organic turkeys often have a more robust flavour and are raised in more humane conditions.The Turkey Check-Up: Ensuring a Healthy Bird
Once you've chosen your turkey, it's time to give it a thorough inspection. Ensure the skin is intact, free of any discoloration, and doesn't have an unpleasant smell. Remember that time I bought a turkey that had a slightly off aroma? Let's just say it was a "fowl" experience. Luckily, I discovered it before putting it in the oven and was able to exchange it for a perfectly good bird. A little sniff test goes a long way!Prepping the Turkey: Getting Ready for the Oven
Now, let's get the turkey prepped for its big moment in the oven.1. Remove the Giblets: Those little packets of innards tucked inside the turkey's cavity are best left for another day (or perhaps a delicious gravy). You can save them for making a flavorful stock later.2. Pat the Turkey Dry: This is crucial for achieving a crisp skin. Use paper towels to get rid of any excess moisture. A dry turkey will brown beautifully in the oven.3. Season Liberally: This is where your personal touch comes in. I like to use a simple blend of salt, pepper, and herbs like rosemary, sage, and thyme. But feel free to get creative! Paprika, garlic powder, or even a citrus zest can add a wonderful depth of flavour.(Part 2) The Brine: A Game Changer
Why Brine?
Imagine a turkey as a sponge – it absorbs all the goodness around it. By brining, you're essentially making sure that sponge is full to the brim with flavour. Think of it as giving your turkey a spa treatment before it hits the oven!DIY Brine: Crafting a Flavourful Bath
Here's a simple brine recipe you can try: Ingredients: 1 gallon of water 1 cup of kosher salt (the larger crystals dissolve more evenly) ?? cup of brown sugar (adds a touch of sweetness) 1/4 cup of fresh herbs (like rosemary, thyme, and bay leaves) 1 lemon, sliced 1 orange, sliced Instructions: 1. Combine all the ingredients in a large pot and bring to a boil. 2. Let the brine cool completely before using. 3. Submerge the turkey in the brine, ensuring it's completely covered. 4. Refrigerate for at least 8 hours, or up to 24 hours.Alternative Brine Options: Expanding Your Flavour Horizons
Don't worry if you don't want to make your own brine. You can always find pre-made brine solutions at most supermarkets. Or, if you're feeling adventurous, there are tons of creative brine recipes out there, from citrus-based brines to herb-infused wonders.Brine Alternatives: For When Time is Short
If you're pressed for time or not a fan of brining, there are other ways to ensure a juicy turkey. Try rubbing the turkey with butter or olive oil and a generous amount of seasoning. It won't be as dramatic as brining, but it will still add flavour and moisture.(Part 3) The Oven's Calling

Prepare for Take-Off: Setting the Stage
So, your turkey is prepped and ready to go. Let's get that oven fired up! Preheat the Oven to 325 Degrees F (160 Degrees C). This is the magic temperature for roasting a turkey, allowing it to cook evenly and retain moisture. Choose Your roasting pan: You'll need a pan large enough to accommodate the turkey comfortably. I prefer a roasting pan with a rack so the turkey can sit elevated, allowing heat to circulate around it for even cooking. Grease the Pan: This will prevent your turkey from sticking to the pan and make clean-up a breeze. A light coating of butter or cooking spray will do the trick.The Big Moment: Introducing the Turkey to the Oven
Alright, the moment has arrived. It's time to slide that beautiful bird into the oven. Place the Turkey in the Roasting Pan: Make sure it's sitting on the rack, if you're using one. Add a Cup of Water to the Bottom of the Pan: This will create steam, helping to keep the turkey moist and prevent it from drying out. Roast for About 15 Minutes per Pound: For example, a 12-pound turkey will take about 3 hours to roast. Cover the Turkey with Foil for the First Hour: This helps the turkey cook evenly and prevents it from drying out. The foil traps the steam, creating a moist environment for the turkey.The Basting Ritual: A Touch of TLC for the Bird
Basting is like giving your turkey a little TLC while it's in the oven. It helps create a crispy skin and keeps the meat juicy. Use a Basting Spoon or Brush: Dip it into the turkey drippings in the pan and generously baste the turkey every 30 minutes. Be Careful Not to Over-Baste: Too much basting can make the skin soggy. A light and even basting is all you need.(Part 4) The Turkey's Time to Shine
The Doneness Check: Ensuring a Perfectly Cooked Bird
One of the most crucial parts of baking a turkey is ensuring it's cooked through. Use a meat thermometer: This is the most reliable way to check for doneness. Insert the thermometer into the thickest part of the thigh, making sure it doesn't touch any bone. The Turkey is Ready When the internal temperature Reaches 165 Degrees F (74 Degrees C). This ensures that the turkey is cooked safely and thoroughly.Resting is Key: A Moment of Relaxation for the Turkey
Once the turkey is cooked, resist the urge to carve it right away. It's important to let it rest for at least 15 minutes before carving. This allows the juices to redistribute throughout the meat, resulting in a tender and juicy turkey.Carving with Confidence: Unleashing Your Inner Chef
Now, for the moment of truth – carving the turkey. Don't be intimidated! It's easier than you think. 1. Transfer the Turkey to a Cutting Board: Be careful, it's going to be hot! Use oven mitts to protect your hands.2. Start by Removing the Legs: Use a carving knife to cut along the bone on either side of the leg and lift it off the turkey.3. Remove the Breasts: Cut down the breastbone, separating the breast into two halves.4. Cut the Breasts into Slices: Slice the breasts into thin, even pieces. You can use the bones from the legs and wings to make a flavorful stock.Don't Forget the Drippings: A Treasure Trove of Flavour
The pan drippings are pure gold, folks! They're packed with flavour and can be used to make the most delicious gravy. Strain the Drippings: Use a sieve or cheesecloth to remove any solid bits. You can discard the solids or save them for making a stock. Make Your Gravy: Whisk the drippings into a pot with some flour, broth, and seasonings. Simmer until thickened. The drippings add a rich depth of flavour to your gravy.(Part 5) Serving Up the Feast
The Presentation: Creating a Festive Centerpiece
Now it's time to unleash your inner artist and create a stunning centerpiece for your table. Place the Turkey on a Serving Platter: Arrange the turkey beautifully, showcasing its golden-brown skin and succulent meat. You can carve the turkey at the table or carve it beforehand and arrange the slices on the platter. Add Your Favourite side dishes: Surround the turkey with an array of sides like stuffing, mashed potatoes, cranberry sauce, and roasted vegetables. Choose sides that complement the turkey's flavour and create a beautiful balance of colours and textures. Garnish with Fresh Herbs: A sprig of rosemary or thyme adds a touch of elegance and aroma. Fresh herbs not only look beautiful but also enhance the overall flavour of the dish.The Grand Reveal: Unveiling Your Culinary Masterpiece
The moment has arrived, it's time to unveil your masterpiece! Announce the Arrival of the Turkey with a Flourish: Let everyone know the feast is ready. A little fanfare never hurts, especially when you've worked so hard! Encourage Everyone to Dig In: Share the joy of your culinary creation with your loved ones. Enjoy the moment and savor the delicious meal you've created.(Part 6) Leftover Love: Transforming Leftovers into New Delights
Let's face it, there's always leftover turkey. And that's a good thing! turkey sandwiches: Slice some leftover turkey and pile it high on toasted bread with your favourite fillings. Classic turkey sandwiches with mayo and lettuce are always a winner. turkey soup: Use the leftover bones and meat to make a hearty and comforting turkey soup. This is a great way to use up all the scraps. turkey salad: Combine leftover turkey with mayonnaise, celery, onion, and your favourite herbs. This is a great lunch or dinner option, and you can add a bit of crunch with chopped walnuts or pecans.(Part 7) Troubleshooting: Addressing Common Baking Challenges
Sometimes, even the best-laid plans go awry. Here are some common baking problems and how to fix them: Dry Turkey: If your turkey is dry, try brining it next time. If you didn't brine, add more moisture to the roasting pan during cooking, perhaps by adding a cup of chicken broth or apple cider. Burnt Turkey: If the skin is getting too dark, cover the turkey with foil for the remaining cooking time. The foil will trap the heat and prevent the skin from burning. Undercooked Turkey: If the internal temperature isn't reaching 165 degrees F, continue to roast the turkey until it's done. Always check the temperature with a meat thermometer.(Part 8) Beyond the Basics: Exploring New Culinary Horizons
Turkey Alternatives: Expanding Your Feast Options
Not a turkey fan? No problem! There are plenty of other delicious options for your holiday table. roast chicken: A classic choice, roast chicken is easy to cook and always a crowd-pleaser. It's a versatile dish that can be seasoned and served in many different ways. Ham: A salty and savory option, ham can be roasted, baked, or even grilled. It's often served with a glaze or sauce to enhance its flavour. Vegetarian Main Courses: There are many delicious vegetarian options available, such as lentil loaf, stuffed mushrooms, or a beautiful roasted vegetable platter. These options are perfect for catering to those who follow a plant-based diet.Tips for the Ultimate Feast: Creating a Memorable Experience
Plan Ahead: Nothing throws a wrench into the holiday spirit more than last-minute scrambling. Start preparing your meal a few days in advance. This will reduce stress and ensure everything is ready for your festive gathering. Delegate Tasks: Don't try to do everything yourself! Ask friends and family to bring a dish or offer help with preparation. Sharing the workload makes the process more enjoyable and allows everyone to contribute. Enjoy the Process: Baking a turkey is a labor of love, so relax, have fun, and enjoy the process of creating a delicious meal for your loved ones. The joy of cooking is about the shared experience and the satisfaction of creating something special.(Part 9) FAQs: Addressing Common Queries
1. How long does it take to thaw a turkey?
Thaw a frozen turkey in the refrigerator for 24 hours for every 5 pounds of weight. For example, a 12-pound turkey will take about 2 days to thaw. You can also thaw a turkey in a cold-water bath, changing the water every 30 minutes. This method is faster, taking about 30 minutes per pound.
2. Can I stuff the turkey?
You can stuff the turkey, but it's not recommended for food safety reasons. The stuffing needs to reach an internal temperature of 165 degrees F to be safe, and it's difficult to ensure that happens when it's inside the turkey. It's safer to cook the stuffing separately in a baking dish.
3. What should I serve with turkey?
The possibilities are endless! Here are some classic sides that pair well with turkey:
| Sides | Tips |
|---|---|
| Stuffing | Classic bread stuffing, sausage stuffing, or cornbread stuffing. You can use a variety of herbs and spices to add flavour. |
| Mashed Potatoes | Creamy, buttery, and perfectly mashed. You can add herbs, cheese, or even a touch of garlic for extra flavour. |
| Cranberry Sauce | Sweet and tangy, a perfect complement to the savory turkey. You can make your own cranberry sauce with fresh cranberries, orange zest, and a touch of sugar. |
| Gravy | Made from the turkey drippings, gravy adds rich flavour and moisture. You can thicken it with flour or cornstarch. |
| Roasted Vegetables | A colourful and healthy addition to your feast. Try roasting Brussels sprouts, carrots, potatoes, or asparagus. |
4. How do I store leftover turkey?
Store leftover turkey in an airtight container in the refrigerator for 3-4 days. You can also freeze leftover turkey for up to 2 months. Freezing helps preserve the flavour and texture of the turkey.
5. What's the best way to reheat leftover turkey?
Reheat leftover turkey in the oven, on the stovetop, or in the microwave. Make sure it's heated through to an internal temperature of 165 degrees F. Avoid reheating turkey more than once, as this can affect its texture and flavour.
Now, go forth and conquer the art of baking a delicious turkey. With these tips and tricks, you'll be a holiday baking champion in no time! Remember to enjoy the process and the company of your loved ones as you create a memorable feast that will leave everyone wanting more.Everyone is watching

How to Cook Frozen Lobster Tails Perfectly: A Step-by-Step Guide
RecipesLobster. Just the word conjures up images of lavish meals, special occasions, and a taste of luxury. But let's...

Pigs in a Blanket Cooking Time: How Long to Bake for Perfect Results
RecipesAh, pigs in a blanket. Just the name conjures up images of those delightful little parcels of crispy pastry en...

Pork Fillet Cooking Time: How Long to Cook It Perfectly
RecipesPork fillet, or tenderloin as it's sometimes called, is a real favourite in our house. It's so versatile, and...

The Ultimate Guide to Tender, Juicy Pulled Pork
RecipesRight, let's talk pulled pork. It's one of those dishes that just screams "comfort food," doesn't it? I mean...

The Ultimate Guide to Cooking Sweet Potatoes: From Roasting to Mashing
RecipesSweet potatoes. Just the name conjures up images of warm, comforting dishes, bursts of vibrant color, and a to...