Let's talk turkey, shall we? I've been roasting turkeys for years, and trust me, there's more to it than just chucking a bird in the oven and hoping for the best. You see, a perfectly cooked turkey is all about timing – and with a 325 degree oven, you're in for a real treat.
Now, I know what you might be thinking: "325 degrees? Everyone says 350!" But listen up, this lower temperature is the key to a much more even cook, especially for those larger birds. The meat stays succulent, the skin gets beautifully crispy, and the whole thing just tastes better. I've been using this method for years, and it's never let me down.
So, grab a cuppa, settle in, and let's dive into the ultimate guide for cooking a turkey at 325 degrees. I'm going to share all my tips, tricks, and secrets for achieving a truly delicious, succulent bird that'll have everyone at your table singing your praises.
Part 1: Choosing Your Bird

1. Fresh vs. Frozen: A Tale of Two Turkeys
First things first, you've got to decide what kind of turkey you're after – fresh or frozen. Personally, I'm a big fan of fresh turkeys, especially when I can get one from a local butcher. They tend to have a richer flavour and a better texture. But let's be honest, sometimes you just haven't got the time for all that fuss. That's where frozen turkeys come in handy. Just be sure to give it enough time to thaw properly. Don't even think about shoving a frozen turkey straight into the oven – it's a recipe for disaster!
2. Size Matters: Feeding the Flock
Now, when it comes to turkeys, size does matter. You'll want to choose a turkey that's big enough to feed everyone, but not so big that it takes forever to cook. A general rule of thumb is about 1 pound of turkey per person. So, for 10 people, you'd want a turkey that's around 10 pounds. But, you know, it depends on how hungry your crew is. If you've got a bunch of hearty eaters, you might want to go for a bigger bird.
3. Don't Be Shy About Asking Questions: Seek Expert Advice
Honestly, the best way to make sure you get the right turkey is to simply ask! Head down to your local butcher or supermarket and chat with the folks there. They're experts, and they'll be happy to answer any questions you might have. Ask about the turkeys' weight, their breed, whether they're brined or not, and how long they'd recommend cooking them for. You'll be amazed at how much information you can pick up from a quick chat.
Part 2: Preparing Your Bird

1. Thaw It Right: The Gentle Art of Defrosting
If you've got a frozen turkey, you need to give it enough time to thaw properly. The best way is to thaw it in the refrigerator. It takes about 24 hours for every 5 pounds of turkey. So, if you've got a 10-pound turkey, it'll need around 48 hours to thaw completely. You can also thaw it in a sink full of cold water, but make sure you change the water every 30 minutes to keep it cold.
2. Pat It Dry: The Importance of a Dry Bird
Once your turkey is thawed, pat it dry inside and out with paper towels. This helps to ensure that the skin gets nice and crispy when you roast it. You don't want a soggy turkey, do you?
3. Brine It Up (Optional): A Secret Weapon for Juicy Meat
Now, here's a little trick that can make a big difference – brining. Brining is basically soaking the turkey in a salt water solution for a few hours. This helps to season the meat and keep it juicy while it cooks. You can use a simple brine made of salt, water, and a few aromatics like peppercorns and bay leaves. If you're short on time, there are also pre-made brine solutions available in stores. But trust me, it's worth the extra effort. A brined turkey is a game changer!
Part 3: Prepping Your Oven and Bird

1. Preheat to 325 Degrees: Setting the Stage for Success
Like I said, we're sticking with 325 degrees. Now, I know some folks swear by 350 or even 375 degrees, but trust me on this one. 325 degrees is the sweet spot for a juicy, evenly cooked turkey. Make sure your oven is preheated to 325 degrees for at least 30 minutes before you put the turkey in. It's important to give the oven time to really heat up. You'll be doing your turkey a favour!
2. The Stuffing Story: A Balancing Act of Flavour and Safety
Now, we've got to talk about stuffing. Stuffing is a classic Thanksgiving side dish, but it can also be a bit of a pain in the neck. Firstly, it's important to know that you should never stuff the turkey before roasting. This is because the stuffing won't cook properly in the middle of the turkey, and it could even make you sick. The safest option is to cook the stuffing separately in a baking dish. If you're going to stuff your turkey, do it just before it goes into the oven, and make sure the stuffing is cooked through when the turkey is done.
3. Get Ready for Roasting: Choosing the Right Vessel
Right, your turkey's all prepped and ready to go. Now, you need to get it ready for the oven. There are a few ways you can do this.
- The Classic roasting pan: A trusty roasting pan is perfect for a basic roast. Make sure it's big enough to hold your turkey comfortably, and place a rack in the bottom of the pan to allow air to circulate. This helps the turkey cook evenly and prevents the bottom from getting soggy.
- The Roasting Bag: A roasting bag is a great option for a moist, flavorful turkey. It helps to trap the juices and creates a self-basting effect. Just make sure to prick a few holes in the bag to allow steam to escape. This is a good option for smaller turkeys, especially if you're looking for a quicker roast. It's also a great way to keep the oven clean, which is always a bonus.
4. Time to Elevate Your Bird: Ensuring Even Cooking
Now, we've got to give our turkey a little lift. Place the turkey in your chosen roasting pan, making sure it's sitting on a rack or on a bed of vegetables like carrots and onions. This helps the air to circulate around the turkey, ensuring it cooks evenly. This is a little trick that makes a big difference. The vegetables also add flavour to the turkey, and you'll have some delicious roasted veggies to serve alongside it. It's a win-win!
Part 4: Time to Roast!
1. Calculate the Cooking Time: A Matter of Weight and Time
Okay, it's time to get down to the nitty-gritty. Now, we've got to figure out how long to cook that turkey. The cooking time depends on the weight of the turkey, but as a general rule, you'll need about 15 minutes per pound at 325 degrees. For example, a 10-pound turkey will take about 2 hours and 30 minutes to cook. But it's always a good idea to check the turkey's internal temperature to make sure it's cooked through.
2. Keep an Eye on the Temperature: A Thermometer is Your Friend
Now, this is where it gets really important. You need to keep an eye on the temperature of the turkey. The best way to do this is with a meat thermometer. Insert the thermometer into the thickest part of the thigh, making sure it doesn't touch the bone. The turkey is done when the internal temperature reaches 165 degrees Fahrenheit. Make sure you're checking the temperature in different parts of the turkey to ensure it's cooked through.
3. Basting Is Key: The Art of Golden-Brown Perfection
Right, this is a crucial step in getting that gorgeous golden-brown skin. Basting your turkey during the cooking process helps to keep it moist and add flavour. You can use turkey drippings, broth, or even melted butter. Every 30-45 minutes, use a spoon to baste the turkey with the liquid. It's a bit of a chore, but it's well worth the effort. Just watch those drippings, they can be a bit hot!
Part 5: Resting Time: A Crucial Step for Juicy Results
Okay, so the turkey's cooked through, but don't rush to carve it up just yet. Give it a good rest for 15-20 minutes before you slice it. This allows the juices to redistribute throughout the meat, resulting in a much juicier and more flavorful turkey. While it's resting, you can get all your other Thanksgiving dishes ready. That way, you've got everything ready to go when it's time to eat!
Part 6: Carving Time: A Guide to Graceful Disassembly
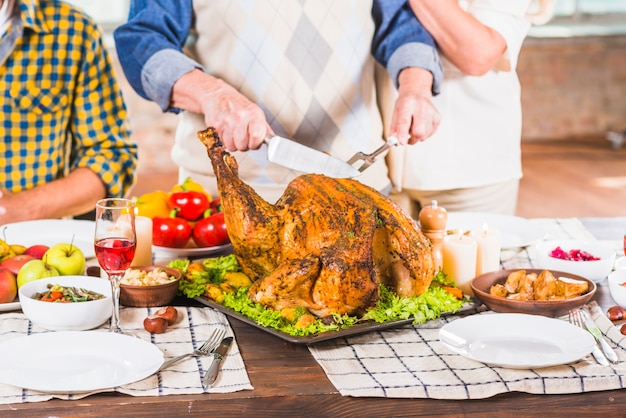
Right, after all that waiting, it's finally time to carve your turkey! Now, carving a turkey can seem a little daunting at first, but it's really not that hard.
- Find the Wishbone: First, you'll want to find the wishbone. The wishbone is located at the top of the breast, between the two legs. Carefully pull it out, and make a wish!
- Remove the Legs and Thighs: Next, you'll want to remove the legs and thighs. This is done by cutting through the joint between the leg and the body.
- Slice the Breast: Now, it's time to tackle the breast. You can either slice it straight across the grain, or you can remove the skin and slice it along the grain for a more tender piece.
- Serve It Up: And there you have it! Your perfectly carved turkey is ready to be served.
Part 7: Leftovers! The Delicious Aftermath
Now, let's be honest, most of us end up with some leftovers after a thanksgiving feast. But don't despair, turkey leftovers are delicious! You can use them in a variety of dishes, like sandwiches, salads, soups, and even casseroles.
1. turkey sandwiches: A Classic Comfort
A classic! Just slice up some turkey, add some mayonnaise, mustard, lettuce, and tomato on a toasted roll. It's a quick and easy way to use up leftovers.
2. turkey salad: A Lighter Option
For a lighter option, try a turkey salad. Chop up the turkey, mix it with mayonnaise, celery, onion, and herbs. You can also add some chopped cranberries or nuts for a little sweetness and crunch.
3. turkey soup: A Warm and Hearty Embrace
A great way to warm up on a cold day. You can make a simple turkey noodle soup by simmering leftover turkey, broth, noodles, and vegetables.
4. Turkey Casserole: A Comforting Combination
For a hearty and comforting meal, try a turkey casserole. Combine the leftover turkey with your favorite vegetables, sauce, and cheese. Bake it in the oven until it's bubbly and golden brown.
Part 8: FAQs: Answers to Your Burning Questions
1. How do I know if my turkey is cooked through?
The best way to tell if your turkey is cooked through is to use a meat thermometer. Insert the thermometer into the thickest part of the thigh, making sure it doesn't touch the bone. The turkey is done when the internal temperature reaches 165 degrees Fahrenheit. If you're using a roasting bag, be sure to pierce a few holes in the bag to allow the heat to reach the thermometer.
2. What if my turkey is too dry?
If you find that your turkey is too dry, don't worry! There are a few things you can do. First, try basting it with more broth or pan juices. Second, you can add a little bit of butter or olive oil to the turkey before serving. Third, you can try covering the turkey with foil for the last hour of cooking to help it stay moist.
3. How long can I keep leftover turkey in the fridge?
You can keep leftover turkey in the fridge for up to 4 days. Be sure to store it in an airtight container.
4. Can I freeze leftover turkey?
Yes, you can freeze leftover turkey for up to 2 months. It's best to freeze the turkey in a freezer-safe bag. Make sure to label the bag with the date and the contents.
5. What are some tips for getting crispy turkey skin?
Here are a few tips for getting crispy turkey skin:
- Pat the turkey dry with paper towels before roasting.
- Roast the turkey uncovered.
- Baste the turkey with butter or oil during the cooking process.
- Increase the oven temperature to 400 degrees for the last 15 minutes of cooking to crisp up the skin.
Part 9: Conclusion: A Turkey Triumph!
Well, there you have it! My ultimate guide to cooking a turkey at 325 degrees. Now, I know you might be thinking, "That's a lot of information!" But trust me, it's all worth it. Following these tips and tricks will help you create a truly delicious and impressive turkey that everyone will love. So go forth, my fellow cooks, and conquer that Thanksgiving bird! Happy cooking!
Everyone is watching

How to Cook Frozen Lobster Tails Perfectly: A Step-by-Step Guide
RecipesLobster. Just the word conjures up images of lavish meals, special occasions, and a taste of luxury. But let's...

Pigs in a Blanket Cooking Time: How Long to Bake for Perfect Results
RecipesAh, pigs in a blanket. Just the name conjures up images of those delightful little parcels of crispy pastry en...

Pork Fillet Cooking Time: How Long to Cook It Perfectly
RecipesPork fillet, or tenderloin as it's sometimes called, is a real favourite in our house. It's so versatile, and...

The Ultimate Guide to Cooking Delicious Frankfurters
RecipesLet's face it, we all love a good frankfurter. It's a classic, simple, and always satisfying. But let's be rea...

Wolf Meat Recipes: A Guide to Cooking Wild Game
RecipesLet's be honest, you don't see wolf meat at your local butcher shop every day. It's a bit of a wild card, but ...
