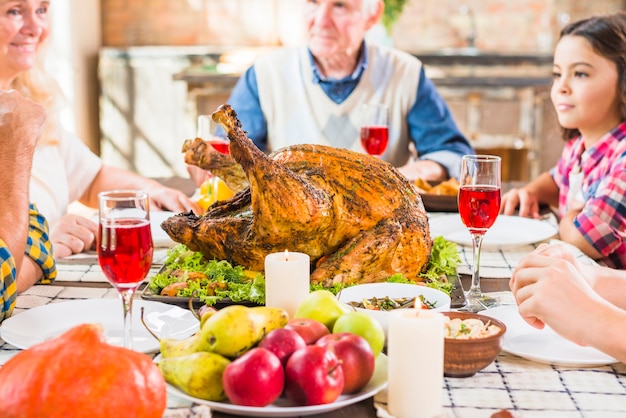
Let’s talk turkey. No, not about the political kind, but the magnificent bird that graces our tables during special occasions. You know, the one that demands a bit more attention than just throwing it in the oven and hoping for the best. I’ve been roasting turkeys for years, and believe me, I’ve seen it all – from dry, overcooked disasters to juicy, succulent triumphs. It's a journey I've learned from, and today, I'm sharing all my hard-won knowledge with you.
This guide isn’t just about timing, though that's crucial. It's about understanding the turkey, knowing its quirks, and mastering the art of roasting it to perfection. It’s about creating a bird that’s so good, it’ll have everyone asking for seconds (and maybe thirds).
Ready to dive in? Grab your apron, a sharp knife, and a sense of adventure, because we're about to embark on a culinary journey that'll leave you saying, "I can do this!"
(Part 1) Choosing the Right Turkey: Setting the Stage for Success
The first step in roasting a perfect turkey is selecting the right bird. Don't settle for those tiny supermarket turkeys; we're aiming for a proper, full-bodied bird, ideally free-range. You want a plump turkey with a good layer of fat under the skin. This fat is your secret weapon for a juicy, flavorful bird, so don't be afraid of it – it'll render down beautifully during cooking.
Size Matters: How Big a Turkey Do You Need?
The size of your turkey depends on how many mouths you need to feed. A good rule of thumb is to allow around 1 pound of turkey per person. So, if you’re having a small gathering of 6 people, a 10-12 pound bird is perfect. For a larger group, a 15-20 pounder will do the trick.
The Art of Choosing a Fresh Turkey
When you're at the butcher counter, take a moment to select a turkey that looks and smells good. Look for a turkey with a pale, cream-colored skin, not grey or greenish. The skin should be firm, not flabby. A fresh turkey won't have a strong, unpleasant smell. If you’re unsure, ask the butcher for help. They’ll be able to tell you if the bird’s fresh and give you tips on selecting the perfect bird.
frozen turkey? No Problem!
Life happens, and sometimes you need to grab a frozen turkey. If that's the case, no worries! Just make sure you defrost it properly. For every 5 pounds of turkey, allow 24 hours for defrosting in the refrigerator. Never defrost a turkey at room temperature – it can create a breeding ground for bacteria.
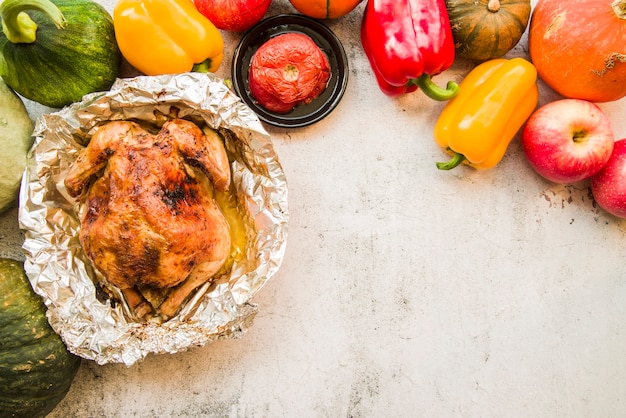
(Part 2) Prepping the Bird: Getting Ready for the Oven
You’ve got your chosen turkey, now it’s time to get your hands dirty.
Washing and Drying
First, give the bird a good wash inside and out with cold water. Then pat it dry with kitchen paper, making sure to get into all the nooks and crannies. A dry bird cooks more evenly, leading to a delicious, crispy skin.
Seasoning: The Flavor Profile
Now, for the seasoning. A simple salt and pepper rub is all you really need, but if you're feeling adventurous, there's a whole world of flavor waiting to be explored. I love using a mix of rosemary, thyme, and garlic - it adds a beautiful, savory depth to the turkey. Experiment with your favorite herbs and spices, adding them generously to the turkey's cavity and rubbing them generously under the skin.
Remember, you can season the turkey a day or two ahead of time. This allows the flavors to penetrate the meat, resulting in a more intensely flavored bird.
Stuffing: To Stuff or Not to Stuff?
Ah, the age-old question. Some swear by stuffing, others prefer to keep it separate. There's no right or wrong answer, it all depends on your personal preference.
If you choose to stuff your turkey, stick to a bread-based stuffing, and cook it in a separate dish alongside the turkey. Never stuff a turkey directly – it's a safety hazard, as the stuffing may not cook through properly, potentially leading to foodborne illness.
Brining: The Secret to a Moist Turkey
This is where we elevate our roasting game. Brining involves soaking the turkey in a salt solution for several hours, which helps to retain moisture and ensures a tender, juicy bird. It's not essential, but it definitely makes a difference.
For a simple brine, dissolve 1 cup of salt in 4 cups of cold water. You can add other flavourings, like herbs or lemon juice, if you want to. Submerge the turkey in the brine for 4-8 hours (or overnight). Make sure to rinse it well before roasting.
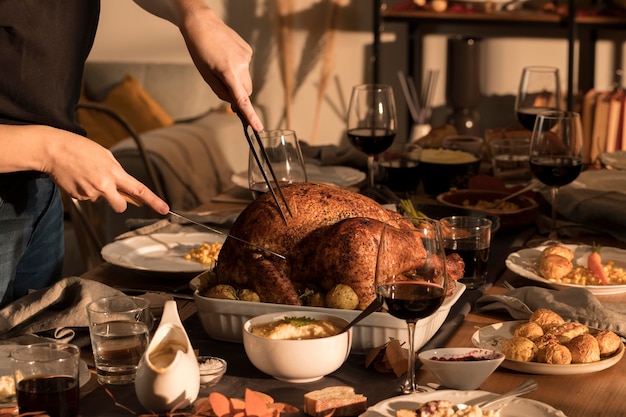
(Part 3) Roasting the Turkey: Time to Get Cooking!
With your turkey prepped and ready, it’s time to get cooking!
Choosing Your Roast: Pan or Rack?
You’ve got two main options: a roasting pan or a roasting rack. I prefer a roasting rack because it allows air to circulate around the turkey, helping it to cook more evenly. Plus, it gives you lovely crispy skin. If you’re using a rack, put it on top of a roasting pan so that any juices can drip down.
Pre-heating the Oven: The Foundation for Success
Right, turn your oven up to 450 degrees Fahrenheit (or 230 degrees Celsius) and get it good and hot. This high temperature helps to seal in the juices and brown the skin beautifully.
The First 30 Minutes: Sealing in Flavor
Once the oven is hot, put your turkey in and roast for 30 minutes. This will give the skin a good head start on browning. After 30 minutes, reduce the oven temperature to 325 degrees Fahrenheit (or 165 degrees Celsius).
Calculating Cooking Time: A General Guideline
Now, here’s where the timing really matters. You need to calculate the cooking time based on the weight of your turkey. For every pound of turkey, allow 15-20 minutes of cooking time.
For example, a 10-pound turkey will take around 2.5 hours to cook. But this is just a guide; you'll need to check the turkey is cooked through.
Checking for Doneness: The Importance of a meat thermometer
The best way to check if your turkey is cooked is to use a meat thermometer. Insert it into the thickest part of the thigh, making sure it doesn’t touch any bone. The turkey is cooked when the internal temperature reaches 165 degrees Fahrenheit (or 74 degrees Celsius).
Resting Time: Letting the Juices Redistribute
Once your turkey is cooked, remove it from the oven and let it rest for at least 30 minutes before carving. This will allow the juices to redistribute, resulting in a more succulent bird. Cover the turkey loosely with aluminum foil to keep it warm while it rests.
(Part 4) turkey cooking time chart: A Quick Reference Guide
Here’s a handy chart to help you calculate the approximate cooking time for different weight turkeys. Remember, these are just guidelines. Always use a meat thermometer to check for doneness.
| Weight (lbs) | Cooking Time (mins) |
|---|---|
| 10-12 | 150-180 |
| 12-14 | 180-210 |
| 14-16 | 210-240 |
| 16-18 | 240-270 |
| 18-20 | 270-300 |
(Part 5) Mastering the Art of Crispy Skin: Achieving a Golden-Brown Perfection
We all love that crispy, golden-brown turkey skin, don't we? Here are a few tips to help you achieve it:
Pat it Dry: Moisture is the Enemy
Before you roast your turkey, make sure it’s completely dry. Pat it down with kitchen paper - the drier the skin, the crispier it will be.
Don't Overcrowd: Give It Breathing Room
Make sure there's enough space in your roasting pan for the turkey to cook evenly. If it's crowded, the skin won't get crispy.
High Heat: The Key to Browning
The initial high temperature of the oven (450 degrees Fahrenheit) is key. This will help to brown the skin quickly.
Basting: Adding Moisture and Flavor
You can baste your turkey with pan juices to keep it moist and promote crispy skin. Use a basting spoon or a turkey baster. Just be careful not to let the basting liquid drip onto the heating element of your oven.
(Part 6) turkey gravy: The Perfect Finishing Touch
No roast turkey is complete without gravy! Here’s how to make the best gravy:
Making Gravy: Turning Pan Drippings into Flavor
Once you’ve taken the turkey out of the oven, let the pan juices settle for a few minutes. Then, carefully pour off the excess fat, leaving the brown bits stuck to the bottom of the pan. These are called “fond,” and they’re packed with flavor.
Add some flour to the pan and cook it over a medium heat for a few minutes, stirring constantly. This is called a roux, and it will help to thicken the gravy. Gradually whisk in some hot chicken or turkey stock (or even water) until the gravy is the desired consistency. Season with salt and pepper to taste.
(Part 7) Leftovers: Don’t Waste a Bite!
You’ve cooked a delicious turkey, now what to do with those leftovers? Don’t throw them away! Here are some ideas for using up your leftover turkey:
- turkey sandwiches: A classic for a reason! Just slice up the turkey, add some cranberry sauce, and a bit of mayonnaise, and you’ve got yourself a delicious sandwich.
- turkey soup: Make a comforting bowl of soup with leftover turkey, vegetables, and broth.
- turkey salad: Combine leftover turkey with mayonnaise, celery, onion, and your favorite seasonings for a tasty salad.
- turkey pot pie: Use leftover turkey to make a hearty pot pie.
- Turkey enchiladas: Mix leftover turkey with salsa, cheese, and tortillas for a tasty Mexican dish.
- Turkey Shepherd's Pie: A hearty and comforting twist on the classic, using leftover turkey as the main ingredient.
- Turkey and Cranberry Pizza: A fun and festive way to use up leftovers, featuring leftover turkey, cranberry sauce, and your favorite pizza toppings.
(Part 8) FAQs: Your Turkey Questions Answered
So, you’ve got your turkey cooking, but there are still a few questions swirling in your mind. Don’t worry, I’ve got you covered.
1. How Long Should I Cook a Turkey?
That depends on the weight of your turkey. As a general rule, allow 15-20 minutes per pound of turkey. Always use a meat thermometer to check for doneness.
2. Can I Stuff a Turkey?
It’s not recommended. Stuffing cooked inside the turkey might not reach a safe internal temperature. It’s best to cook stuffing separately in a baking dish.
3. What Happens if My Turkey Is Overcooked?
An overcooked turkey will be dry and tough. It’s important to cook your turkey to the correct internal temperature. To prevent overcooking, you can always tent the turkey with foil in the last 30 minutes of cooking time.
4. Can I Roast a Turkey the Day Before?
Yes, but it’s best to carve it and reheat it on the day you serve it. You can reheat the turkey in a low oven (around 325 degrees Fahrenheit) or in a slow cooker.
5. What Should I Serve With My Roasted Turkey?
The possibilities are endless! Some classic sides include mashed potatoes, gravy, stuffing, cranberry sauce, and roasted vegetables. For a more festive touch, consider adding sweet potato casserole, green bean casserole, and dinner rolls.
6. How Do I Avoid a Dry Turkey?
As we've discussed, using a roasting rack and basting with pan juices are helpful techniques. Another trick is to cover the breast of the turkey with foil during the last hour of cooking, which will prevent it from drying out.
That’s it! You're now ready to tackle your next turkey roast with confidence. Just remember, it’s all about the preparation, the timing, and a little bit of love. So, get those ovens preheating and have a wonderful Thanksgiving or Christmas. And remember, even if it doesn’t turn out perfect, it’ll be a delicious memory. Happy roasting!
Everyone is watching

How to Cook Frozen Lobster Tails Perfectly: A Step-by-Step Guide
RecipesLobster. Just the word conjures up images of lavish meals, special occasions, and a taste of luxury. But let's...

Pigs in a Blanket Cooking Time: How Long to Bake for Perfect Results
RecipesAh, pigs in a blanket. Just the name conjures up images of those delightful little parcels of crispy pastry en...

Pork Fillet Cooking Time: How Long to Cook It Perfectly
RecipesPork fillet, or tenderloin as it's sometimes called, is a real favourite in our house. It's so versatile, and...

The Ultimate Guide to Cooking Delicious Frankfurters
RecipesLet's face it, we all love a good frankfurter. It's a classic, simple, and always satisfying. But let's be rea...

Wolf Meat Recipes: A Guide to Cooking Wild Game
RecipesLet's be honest, you don't see wolf meat at your local butcher shop every day. It's a bit of a wild card, but ...