Thanksgiving is right around the corner, and the aroma of roasted turkey is already filling my kitchen with anticipation. I’ve been roasting turkeys for years, and I’ve perfected my methods to create a dish that’s both succulent and impressive. A 13 lb turkey is a great size for a large gathering, but cooking one can feel a bit overwhelming, especially for those new to the game. That’s where I come in! I’m here to demystify the process, sharing my secrets and guiding you step-by-step, from selecting the perfect bird to carving the final masterpiece.
Forget about throwing a turkey in the oven and hoping for the best. We're diving deep into the details – the right temperature, the optimal roasting pan, the secret to juicy meat, and how to tell when it's truly cooked through. Consider this a turkey roasting masterclass, designed for both seasoned cooks and beginners alike. I'll even sprinkle in some handy tips and tricks I've picked up over the years, so you can confidently impress your guests with a turkey they'll remember for all the right reasons.
(Part 1) The Turkey: Choosing Your Bird
The journey to a delicious thanksgiving turkey begins with selecting the right bird. It's not just about grabbing the first one you see at the supermarket. We're talking about finding the perfect candidate, one that will be the star of your feast.
1. Fresh vs. Frozen: A Matter of Taste
I personally prefer fresh turkeys. They have a richer flavor and tend to be more tender. Plus, you can skip the thawing process and pop them straight into the oven! However, frozen turkeys are readily available and just as good if you defrost them properly. A 13 lb turkey needs 3-4 days in the refrigerator to defrost completely, so plan accordingly.
2. Size Matters: A Feast for a Crowd
A 13 lb turkey is a hefty bird, perfect for a larger gathering. Consider the number of people you’re feeding and whether you want leftovers. A 13 lb turkey typically serves 10-12 people. If you have a smaller group, consider a smaller turkey, but hey, who doesn’t love delicious leftovers, right?
3. The Look and Feel: Finding the Right Bird
At the butcher counter or in the supermarket, take a close look at your potential turkey. The skin should be smooth and free of any blemishes. You want a bird that feels firm and well-fleshed, not loose or floppy. And for goodness sake, don’t forget to check the expiration date! You don’t want to end up with a turkey that’s past its prime.
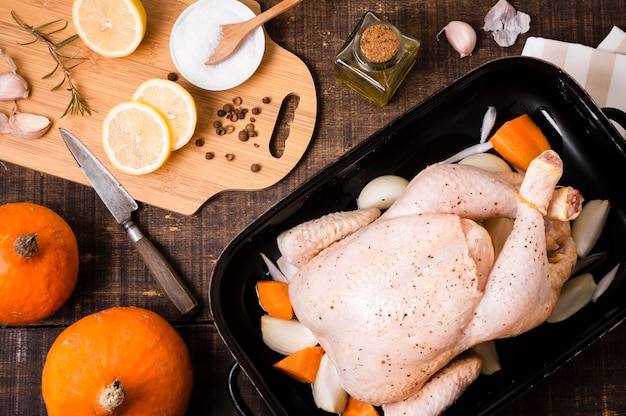
(Part 2) The Prepping Process: Getting Ready to Roast
Alright, you’ve got your turkey. Now it’s time to get your hands dirty and prep it for the oven. This crucial step ensures your bird comes out juicy and flavorful. Don't worry, it’s not as complicated as it sounds.
1. The Brine Bath: A Secret to Juiciness
Brining is a magic trick that infuses the turkey with moisture. It's all about immersing the bird in a salty solution, which enhances the flavor and prevents dryness. For a 13 lb turkey, you'll need a large container – I use a big plastic tub – filled with a brine solution. This typically includes water, salt, sugar, and sometimes aromatics like herbs and spices. Brining takes a few hours, even up to a day, so plan ahead. I find a simple brine of water, salt, and sugar does the trick, but feel free to experiment with your favorite herbs and spices!
2. The Pat-Down: A Dry Start for crispy skin
After brining, or even if you choose not to brine, give your turkey a good pat-down with paper towels. This removes excess moisture, allowing the skin to crisp up beautifully during roasting. A crispy skin is a game-changer, folks, trust me!
3. The Seasoning Ritual: Unleashing Flavor
This is where you get to unleash your culinary creativity! Season your turkey generously with salt and pepper. Don’t be shy – the turkey will lose some moisture during cooking. You can also add other herbs and spices like rosemary, thyme, garlic powder, and paprika. I like to use a mix of herbs and spices that complement my side dishes. For example, if I'm serving sage stuffing, I might use rosemary and thyme for the turkey.
4. The Stuffing Debate: A Matter of Preference
Here’s a bit of a controversial topic: stuffing. Some people swear by it, while others prefer to cook it separately. I'm in the camp of cooking it separately. This ensures the stuffing is cooked through and safe to eat. You can use a stuffing mix or get creative with your own combination of bread, herbs, vegetables, and sausage. Whatever your preference, make sure the stuffing is cooked to a safe internal temperature of 165°F.
(Part 3) The Roasting Equipment: Choosing the Right Tools
You’ve got your prepped turkey, now you need the right tools to ensure it cooks to perfection. It's like having the right equipment for any other task – you can’t build a house without a hammer, right?
1. The Roasting Pan: The Stage for Transformation
The roasting pan is the stage for your turkey's transformation. For a 13 lb turkey, you'll need a large roasting pan, preferably one that’s oven-safe and has a rack. This allows the fat to drain away, preventing the turkey from being soggy, and ensures even cooking. I find a dark-colored roasting pan helps create a beautiful golden-brown crust.
2. The meat thermometer: Your Turkey’s Best Friend
Don’t underestimate the power of a meat thermometer! This little gadget is your best friend when it comes to ensuring your turkey is cooked through to a safe internal temperature. You’ll want to insert it into the thickest part of the thigh, avoiding any bone, and make sure it reads 165°F. I always recommend using a digital meat thermometer – they’re more accurate and quicker than traditional ones.
3. The Basting Brush: The Key to Juicy Meat
Basting is a crucial step in roasting, as it helps keep the turkey moist and develops a beautiful golden-brown crust. A basting brush is your tool for applying butter, oil, or pan juices to the turkey during cooking. I like to baste with a mixture of butter, oil, and herbs – it adds a delicious flavor to the skin.
(Part 4) The Roasting Process: Timing and Temperature
We’ve reached the moment of truth – the actual roasting process. This is where your patience and attention to detail will be tested. Don’t worry, it’s not as intimidating as it sounds.
1. The Temperature Zone: The Oven's Sweet Spot
Your oven is going to be your turkey’s personal sauna, so set the temperature to 325°F. This is the sweet spot for roasting a turkey. Too high, and it will dry out, too low, and it will take forever.
2. The Time Factor: A Matter of Patience
For a 13 lb turkey, you’re looking at around 3-4 hours of roasting time. But here’s the thing, every oven is different, so it’s always best to check the internal temperature with your trusty meat thermometer. It’s better to err on the side of caution, and it’s never too late to add a few more minutes if needed.
3. The Basting Ritual: A Touch of Magic
Basting is your secret weapon for keeping the turkey juicy and achieving that perfect golden-brown crust. You can baste with melted butter, oil, or the pan juices. I find that basting every 30-45 minutes during the first two hours of roasting works well. Don’t overdo it, though – too much basting can make the skin soggy.
4. The Rest is Key: Letting the Juices Redistribute
Once the turkey hits that 165°F internal temperature, you’re almost there. But don’t rush the process! Let the turkey rest for at least 30 minutes before carving. This allows the juices to redistribute, resulting in a more tender and flavorful bird. I like to cover the turkey loosely with aluminum foil during this resting period to keep it warm.
(Part 5) The Carving Ceremony: Unleashing the Turkey’s Flavors
The moment you’ve all been waiting for – carving time! This is where your culinary prowess will be showcased. Just remember to be patient and take your time.
1. The Tools of the Trade: Sharpen Your Skills
You’ll need a sharp carving knife and a sturdy carving board. It’s worth investing in a good quality carving knife – it makes all the difference. I love my trusty carving set with a sharp blade and a comfortable handle.
2. The Carving Technique: A Precise Approach
Start by carving the breast. Use your knife to slice thinly against the grain, ensuring each slice is even. Then, move on to the legs and thighs, carving along the bone. If you’re feeling ambitious, you can even remove the wings. I like to carve the legs and thighs into smaller pieces, so they’re easier to serve.
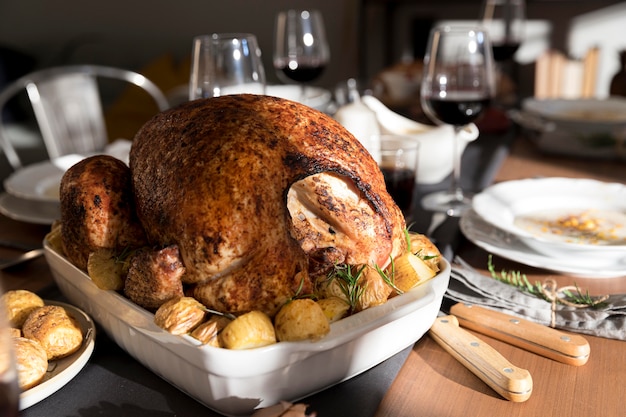
3. The Presentation Matters: A Feast for the Eyes
Once you’ve carved the turkey, arrange the slices beautifully on a platter. Don’t forget to garnish with fresh herbs, like parsley or rosemary. A sprinkle of cranberries or a sprig of sage adds a touch of elegance. I always try to make my presentation as visually appealing as possible, as it adds to the overall experience.
(Part 6) The Sidekicks: Accompanying the Turkey
Let’s face it, a thanksgiving feast is about more than just the turkey. It’s about the whole shebang – the side dishes that complement the main event.
1. The Classic Choices: Timeless Favorites
I’m a sucker for traditional sides, like mashed potatoes, gravy, cranberry sauce, and stuffing. These are the staples that make Thanksgiving feel complete. I always try to make my gravy from scratch, using the turkey pan drippings for a richer flavor.
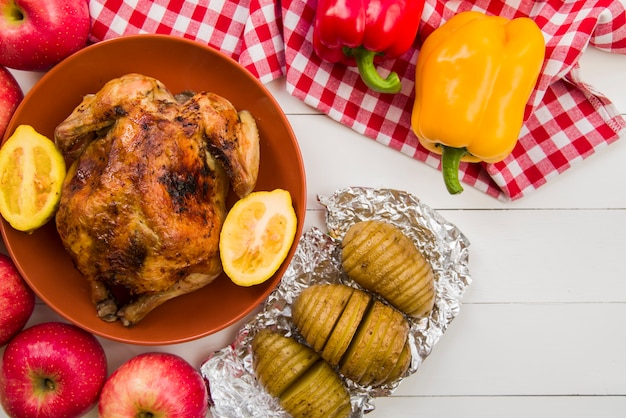
2. The Creative Touches: Adding a Twist of Flavor
If you’re feeling adventurous, don’t be afraid to experiment with other side dishes. Roasted vegetables, like Brussels sprouts or sweet potatoes, add a burst of color and flavor. A salad with a tangy dressing can cut through the richness of the meal. I love to roast butternut squash with maple syrup and cinnamon – it’s a delicious and festive side dish.
3. The Leftovers: A Thanksgiving Blessing
Speaking of side dishes, let’s not forget the beauty of leftovers. They’re a Thanksgiving blessing! You can repurpose them into delicious dishes, like turkey sandwiches, turkey soup, or even turkey pot pie. I always save some of the turkey for a delicious turkey salad the next day. It's perfect for lunch or a light dinner.
(Part 7) Tips and Tricks: Mastering the Turkey Roast
Now, I’ve thrown a lot of information at you, but I wouldn’t be a good turkey guru if I didn’t share a few of my secret tips and tricks. These are the little details that can make all the difference in creating a truly unforgettable turkey.
- Don’t overcrowd the pan: If you’re roasting multiple turkeys, give them some space in the oven. Cramming them together will prevent them from cooking evenly.
- Use a meat thermometer: I’ve said it before, and I’ll say it again, a meat thermometer is your best friend. Don’t rely on the time alone, check the internal temperature to ensure the turkey is cooked through.
- Don’t be afraid to add a little extra: If you feel like the turkey needs a little extra oomph, add a few tablespoons of chicken broth to the bottom of the pan during the last hour of roasting. This will help to create a delicious sauce.
- Let the turkey rest: This is not a time to rush! Let the turkey rest for at least 30 minutes before carving. This will allow the juices to redistribute, resulting in a more tender and flavorful bird.
- Save the bones for stock: Once you’ve carved the turkey, don’t throw away the bones! Save them for making a delicious turkey stock. This is a great way to use up the leftovers and add flavor to future soups or stews. I like to add carrots, celery, and onions to my turkey stock for a richer flavor.
(Part 8) FAQs: Answering Your Turkey Questions
You’ve got your turkey, your roasting pan, and your meat thermometer – you’re almost ready to conquer Thanksgiving! But let’s be honest, there’s always a question or two that pops up. That’s why I’ve compiled a list of frequently asked questions and answers to make your turkey journey a little smoother.
1. How do I know if my turkey is cooked through?
The only sure way to know if your turkey is cooked through is by using a meat thermometer. Insert it into the thickest part of the thigh, avoiding any bone, and make sure it reads 165°F. If you don’t have a meat thermometer, you can also check the turkey by inserting a fork into the thickest part of the thigh. The juices should run clear, not pink.
2. What if my turkey is too small or too big?
If your turkey is smaller than 13 lb, you’ll need to adjust the roasting time accordingly. Refer to the guidelines on the turkey packaging or check a reliable online source for roasting times based on weight. If your turkey is larger than 13 lb, you may need to increase the roasting time slightly and check the internal temperature frequently.
3. Can I cook a turkey in a slow cooker?
Yes, you can cook a turkey in a slow cooker! It’s a great option if you want a hands-off approach. However, it may take longer than roasting in an oven. Make sure to follow the manufacturer’s instructions for your specific slow cooker model.
4. How do I store leftover turkey?
Refrigerate leftover turkey in an airtight container for up to 3-4 days. You can also freeze leftover turkey for up to 2-3 months. To reheat, bake it in the oven until heated through or use it in other dishes like soups, stews, or sandwiches.
5. What are some creative ways to use leftover turkey?
The possibilities are endless! You can make turkey sandwiches, turkey soup, turkey pot pie, turkey salad, turkey enchiladas, or even turkey pizza. Get creative and experiment with different flavors and combinations. I love using leftover turkey in a creamy turkey noodle soup – it's a comforting and delicious way to use up the leftovers.
So there you have it, folks – your ultimate guide to cooking a perfect 13 lb turkey! I know it can seem daunting, but follow these steps, and you’ll be rewarded with a delicious, juicy turkey that will make everyone at your Thanksgiving table happy.
Happy cooking, and Happy Thanksgiving!
Everyone is watching

How to Cook Frozen Lobster Tails Perfectly: A Step-by-Step Guide
RecipesLobster. Just the word conjures up images of lavish meals, special occasions, and a taste of luxury. But let's...

Pigs in a Blanket Cooking Time: How Long to Bake for Perfect Results
RecipesAh, pigs in a blanket. Just the name conjures up images of those delightful little parcels of crispy pastry en...

Pork Fillet Cooking Time: How Long to Cook It Perfectly
RecipesPork fillet, or tenderloin as it's sometimes called, is a real favourite in our house. It's so versatile, and...

The Ultimate Guide to Tender, Juicy Pulled Pork
RecipesRight, let's talk pulled pork. It's one of those dishes that just screams "comfort food," doesn't it? I mean...

The Ultimate Guide to Cooking Delicious Frankfurters
RecipesLet's face it, we all love a good frankfurter. It's a classic, simple, and always satisfying. But let's be rea...