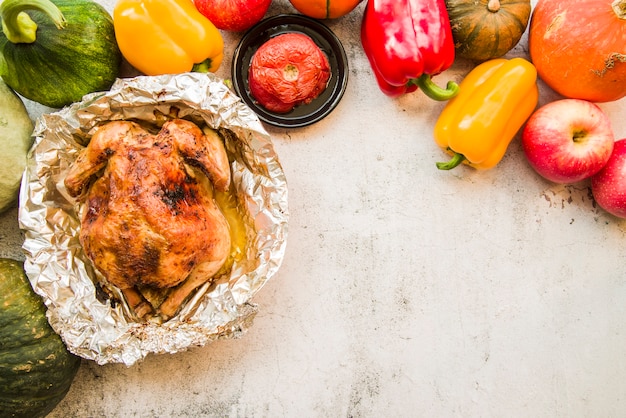
Ah, the thanksgiving turkey, a centerpiece of tradition and a symbol of the festive season. But let’s face it, cooking a turkey can be a bit daunting. You want that golden brown bird, bursting with flavor and juicy enough to make everyone sigh with contentment. But how do you achieve that perfect roast? It all comes down to one key element: knowing exactly how long to cook your turkey. I've been a turkey-roasting enthusiast for years, and I've learned a thing or two about achieving those delicious, drool-worthy results. Get ready, because we're diving into a comprehensive guide to turkey cooking, from pre-roasting prep to checking for doneness, and everything in between. We'll even cover some insider tips to ensure a juicy, flavorful bird every time. So, grab your apron, and let's get cooking!
Part 1: The Essential Turkey cooking time Guide

Before you even think about preheating the oven, the first question is always: how long does it take to cook a turkey? You need a good baseline, a guide that takes the guesswork out of roasting. That's where this handy-dandy guide comes in. Keep in mind, we'll be focusing on unstuffed turkeys here, as stuffed turkeys require a bit more attention and longer cooking times.
Turkey Cooking Time: unstuffed turkey
Here’s a general guideline for unstuffed turkeys, based on weight:
| turkey weight (lbs) | Cooking Time (Hours) |
|---|---|
| 8-12 | 3-3.5 |
| 12-16 | 3.5-4 |
| 16-20 | 4-4.5 |
| 20-24 | 4.5-5 |
Remember, these are just rough estimations. Every oven is a bit different, and you need to factor in things like the turkey's shape and how well it’s stuffed. So, always check the internal temperature to ensure your bird is cooked to perfection.
Part 2: Preparing for the Roast: The Pre-Game

Now, before we even think about the oven, let’s prep our star player. A little pre-roasting TLC makes all the difference.
1. Thawing Time: Don't Rush the Process
The first rule of turkey prep? Patience! Your turkey needs to be completely thawed before you even think about roasting it. My go-to method is thawing in the refrigerator – it's slow and steady, guaranteeing a safe thaw. For a 12-16lb turkey, allow 2-3 days in the fridge. You can also thaw in a cold water bath, changing the water every 30 minutes. But NEVER thaw at room temperature! That's a recipe for disaster.
2. Pat It Dry: The Secret to crispy skin
Once your turkey is thawed, grab some paper towels and give it a good pat down. A dry surface is crucial for that crispy, golden skin we all crave. Drying the skin helps it to brown beautifully in the oven, adding a satisfying crunch to every bite.
3. Brine It Up: A Juicy Bonus
This step is optional, but I highly recommend it. Brining your turkey is like giving it a spa treatment, adding moisture and enhancing its natural flavors. It's a simple technique – combine salt and water, toss in some herbs and spices, and let your turkey soak for a few hours, or even overnight. The result? A tender, juicy turkey that's sure to impress.
4. Season It Up: Let's Get Flavorful
Now, it’s time to get creative with those seasonings! I love to rub my turkey with butter, then sprinkle it generously with salt, pepper, and my favorite herbs. Don’t be afraid to experiment! Paprika, garlic powder, onion powder – the possibilities are endless. Let your culinary imagination run wild.
Part 3: The Big Roast: Time to Shine

Okay, the oven is preheated, the turkey is prepped, and we’re ready to roll! I always preheat my oven to 325°F (163°C). This consistent heat ensures the turkey cooks evenly and achieves that perfect golden brown hue.
1. roasting time: Follow the Guide
Now, consult your trusty cooking time guide. Remember, those are just starting points. Keep a close eye on your turkey throughout the cooking process, and remember to adjust the cooking time based on your turkey's size, oven, and stuffing situation.
2. Basting: The Juicy Trick
For a truly moist and flavorful turkey, basting is key. Every 30 minutes or so, use a spoon to ladle the delicious pan drippings over the turkey. This keeps the meat succulent and adds that extra oomph of flavor.
3. Rest Time: Patience is Key
Once your turkey is cooked through, don't rush to carve it. Let it rest, covered loosely with foil, for at least 30 minutes. This allows the juices to redistribute, resulting in a tender and juicy bird. This is where patience truly pays off – those few minutes of waiting will be worth it.
Part 4: Checking for Doneness: A Matter of Safety
The most important thing, besides deliciousness, is safety. You need to make sure your turkey is cooked through and through. And that's where the meat thermometer comes in – your trusty sidekick for safe and delicious turkey.
1. The Right Tools: Your Meat Thermometer
A meat thermometer is a must-have for any turkey cook. It's the only way to be absolutely certain your bird is cooked to a safe internal temperature.
2. The Temperature Zone: 165°F (74°C)
The USDA recommends a safe internal temperature of 165°F (74°C) for the thickest part of the thigh. Don't rely on the pop-up timer in your turkey – it's not a reliable indicator of doneness.
3. Checking for Doneness: The Right Spots
Insert your meat thermometer into the thickest part of the thigh, avoiding bone. The thermometer should read 165°F (74°C) – a sign that your turkey is safe and ready to enjoy.
Part 5: Troubleshooting: Common Turkey Dilemmas
We’ve all been there – you're cooking your turkey, everything seems perfect, then BAM! A little hiccup. Don't panic! Here are some common turkey dilemmas and how to fix them:
1. Dry Turkey: How to Avoid the Horror
We all hate a dry turkey! It's the cardinal sin of Thanksgiving. Here are a few tips to prevent this culinary catastrophe:
- Baste frequently: Remember those delicious pan drippings? Keep basting throughout the cooking process. It’s the ultimate secret weapon for a juicy turkey.
- Don't overcook: Overcooking is a major culprit for dry turkey. Use that trusty meat thermometer to ensure your turkey reaches the right temperature, then take it out of the oven.
- Rest before carving: Let the turkey rest for those crucial 30 minutes before carving. This allows the juices to redistribute, making it more tender and succulent.
2. Uneven Browning: Achieving a Golden Glow
If your turkey isn't browning evenly, try these tricks:
- Flip it: Flip the turkey halfway through cooking to ensure even browning. This gives all sides a chance to soak up those beautiful golden tones.
- Tents of Foil: Cover the turkey with foil for the last 30 minutes or so of cooking. This will help prevent over-browning and keep the breast moist.
3. Burnt Skin: A Case of Over-Browning
If your turkey skin is getting too dark, try these fixes:
- Lower the heat: Reduce the oven temperature by 25 degrees.
- Tent with foil: Cover the turkey with a loose tent of foil to prevent further browning.
Part 6: Top Tips for a perfect turkey
Here are a few more insider tips for a truly remarkable turkey:
1. Don't Stuff the Bird: Separate for Safety
I'm a firm believer in cooking stuffing separately. It’s safer and ensures that both the turkey and stuffing reach a safe internal temperature. Plus, it lets you focus on getting that turkey perfectly golden and juicy.
2. Use a Roasting Rack: For Crispy Skin
A roasting rack is a game-changer for turkey roasting. It elevates the turkey, allowing air to circulate all around. This leads to crispy skin and prevents the turkey from sitting in its own juices.
3. Don't Overcrowd the Oven: Give It Space
Make sure your turkey has enough space in the oven to cook evenly. If you're cooking other dishes, make sure they have ample room. A cramped oven can lead to uneven cooking and less than perfect results.
4. Be Patient: It Takes Time
Cooking a turkey takes time, so be patient! It’s important to allow enough time for it to cook thoroughly. Don't rush the process – patience is key to a truly impressive turkey.
Part 7: Delicious turkey leftovers: Beyond the Feast
You've roasted a masterpiece, but now you're facing the inevitable – leftovers! But don’t despair, those leftovers can be just as delicious as the original roast.
1. turkey sandwiches: A Classic
Simple, satisfying, and oh-so-good. Add some cranberry sauce, mayonnaise, and a slice of cheese, and you've got a classic.
2. turkey soup: Warm and Comforting
A hearty and flavorful soup is perfect for a chilly evening. Add some vegetables, broth, and your leftover turkey.
3. turkey salad: Light and Refreshing
Chop up your leftover turkey, add some mayo, celery, onions, and your favorite spices. Serve it on bread, crackers, or even lettuce wraps.
Part 8: FAQs: Your Turkey Cooking Questions Answered
Let's tackle some of those burning turkey questions:
1. Can I Cook My Turkey in a slow cooker?
You can cook a turkey in a slow cooker, but it's not ideal for a traditional roast. The turkey might not brown as well, and the skin won't get that satisfyingly crispy. But, if you want a moist and tender turkey, a slow cooker can be a good option.
2. What Happens if My Turkey is Overcooked?
An overcooked turkey will be dry and tough. While it’s safe to eat, it won’t be as enjoyable. Use a meat thermometer to ensure your turkey is cooked to the right temperature.
3. What's the Best Way to Store Leftover Turkey?
Store leftover turkey in the refrigerator in an airtight container. It will last for 3-4 days. You can also freeze leftover turkey for up to 2 months.
4. Can I Freeze a Stuffed Turkey?
It's not recommended to freeze a stuffed turkey. The stuffing may become mushy when thawed. It’s best to cook your stuffing separately and freeze it separately.
5. Should I Remove the Turkey from the Oven to Check the Temperature?
No, it’s not necessary to remove the turkey from the oven to check the temperature. Simply insert your meat thermometer into the thickest part of the thigh, avoiding bone.
That's it, your comprehensive guide to roasting a perfect turkey. Remember, it's all about planning ahead, following the cooking time guidelines, and using a meat thermometer. And most importantly, have fun! Enjoy the process, and the delicious results will follow.
Everyone is watching

How to Cook Frozen Lobster Tails Perfectly: A Step-by-Step Guide
RecipesLobster. Just the word conjures up images of lavish meals, special occasions, and a taste of luxury. But let's...

Pigs in a Blanket Cooking Time: How Long to Bake for Perfect Results
RecipesAh, pigs in a blanket. Just the name conjures up images of those delightful little parcels of crispy pastry en...

Pork Fillet Cooking Time: How Long to Cook It Perfectly
RecipesPork fillet, or tenderloin as it's sometimes called, is a real favourite in our house. It's so versatile, and...

The Ultimate Guide to Tender, Juicy Pulled Pork
RecipesRight, let's talk pulled pork. It's one of those dishes that just screams "comfort food," doesn't it? I mean...

The Ultimate Guide to Cooking Delicious Frankfurters
RecipesLet's face it, we all love a good frankfurter. It's a classic, simple, and always satisfying. But let's be rea...
