Ah, the turkey. The majestic centerpiece of a festive feast, the star of a Thanksgiving table, the king of the Christmas dinner. But as much as we all love the juicy, flavorful result, the prospect of cooking a turkey can sometimes be a little daunting. "How long do I cook it?" "How do I make sure it's done?" "What if it's dry?" Fear not, dear cooks! I'm here to guide you through the process, sharing my years of experience and tips for achieving a perfectly roasted turkey, every single time. We'll cover everything from choosing the right bird to carving the masterpiece and making the most of your delicious leftovers. So, let's get cooking!
(Part 1) Finding the perfect turkey
First, you need a turkey. A good one! And that means choosing the right size for your gathering. It's not just about making sure there's enough for everyone to eat, it's also about ensuring you have enough for those delectable leftovers. Because let's face it, the turkey sandwiches the next day are almost as good as the original feast.
Size Matters
If you're feeding a small group (around 4-6 people), a 4-6lb turkey will do the trick. For a slightly larger crowd (8-10 people), a 10-12lb turkey will be your best bet. And for a truly grand celebration with a dozen or more guests, you'll want a turkey weighing in at 14lbs or more. Just remember, turkeys aren't all created equal - they come in all shapes and sizes. So, before you buy, check the weight label and choose accordingly.
Fresh or Frozen?
Now, the age-old question: Fresh or frozen? Personally, I'm a big fan of fresh turkeys. They tend to have a more vibrant, robust flavor. But, if you're working with a frozen turkey, it's essential to defrost it properly before roasting. This can take several days, so plan ahead! You don't want to be in a panicked rush with a half-frozen turkey on the big day.
(Part 2) Preparing the Turkey for the Big Roast
Once you've got your turkey, it's time to get it ready for its grand entrance into the oven. This is a crucial step, ensuring the bird cooks evenly and results in succulent, tender meat. It's all about taking the time for the right preparation.
A Good Wash
First, give the turkey a good rinse, both inside and out, with cold water. This washes away any packaging remnants or debris. Then, pat it dry with paper towels. This will help to achieve a crispy skin and prevent the turkey from steaming rather than roasting. It's all about maximizing those delicious flavors.
The Art of Seasoning
Now, let's spice things up! Seasoning a turkey is almost like an art form in itself. The classic approach is a simple rub of salt, pepper, and a medley of herbs like thyme, rosemary, and sage. But don't be afraid to experiment! Garlic powder, paprika, onion powder, a dash of citrus zest – these can all add interesting nuances to the flavor profile. I've even tried a pinch of smoked paprika for a hint of smokiness that always impresses my guests.
However, there are a few things to keep in mind when seasoning. Don't overdo it – too much salt can make the turkey taste dry and salty. And remember to season the inside as well as the outside. This ensures the flavor infuses the whole bird, creating a more delicious, aromatic result.
(Part 3) The Stuffing Dilemma
Ah, stuffing. A beloved part of a traditional turkey dinner for some, a source of debate for others. Do you stuff the turkey or cook it separately? I fall somewhere in the middle. I love a good stuffing, but I find it much easier to cook it separately. This prevents the turkey from taking too long to cook because the stuffing is holding in moisture. It also ensures the stuffing cooks through perfectly.
Stuffing Tips
If you decide to stuff your turkey, remember to cook the stuffing to a safe internal temperature of 165°F (74°C). Use a meat thermometer to check. And don't overstuff the bird! This will make it difficult to cook evenly. I usually fill the cavity about halfway, leaving room for the stuffing to expand during cooking.
Personally, I'm a fan of separate stuffing. This way, I can cook it to my desired texture and don't have to worry about the turkey taking longer. I simply place the stuffing in a baking dish alongside the turkey, and it cooks beautifully while the turkey is roasting.
(Part 4) Roasting the Turkey: Oven Settings and Timing
Alright, let's get down to business! Roasting the turkey is the grand finale, the moment of truth. It's a little bit of trial and error, but the tips and time chart below will help you create a masterpiece.
The Right Oven Temperature
Preheat your oven to 325°F (165°C). This is the magic number for a perfect roast. It allows for even cooking and ensures the skin gets beautifully crispy without drying out the meat.
A Guide to Turkey roasting times
The time it takes to roast a turkey depends on its weight. Here's a handy guide to help you estimate the cooking time:
| Weight (lbs) | Cooking Time (hours) |
|---|---|
| 4-6 | 2-2.5 |
| 8-10 | 3-3.5 |
| 12-14 | 4-4.5 |
| 16-18 | 5-5.5 |
| 20 | 6 |
Keep in mind that these are just estimates. The actual cooking time can vary depending on your oven and the shape of the turkey. It's always a good idea to check the internal temperature of the turkey to make sure it's fully cooked through.
Temperature Checks are Key
Use a meat thermometer to check the internal temperature. Insert it into the thickest part of the thigh, avoiding the bone. The turkey is cooked through when the internal temperature reaches 165°F (74°C) for the thigh and 180°F (82°C) for the breast.
(Part 5) The Art of Basting: Keeping it Moist and Flavorful
Basting is a technique that involves pouring pan juices over the turkey during roasting. This keeps the meat moist and the skin crispy while adding extra flavor. I usually baste my turkey every 30-45 minutes with the pan juices or a mixture of butter, broth, and herbs. It's a simple step that makes a big difference.
Basting Tips
Use a basting brush or spoon to evenly distribute the juices over the turkey. You can use a combination of turkey drippings, broth, butter, or even a little wine for basting. For a truly flavorful, golden-brown skin, I like to add a bit of melted butter to the basting mixture. It creates that irresistible crispness and sheen.
Towards the end of the roasting time, tent the turkey with foil for the last hour to prevent the skin from over browning. This helps maintain a moist, juicy turkey, even when the skin is beautifully golden brown.
(Part 6) Letting the Turkey Rest: A Crucial Step
Once the turkey is cooked through, it's important to let it rest for at least 15-20 minutes before carving. This allows the juices to redistribute throughout the meat, resulting in a juicier, more flavorful turkey. I usually cover the turkey with a tent of foil to keep it warm while it rests.
Resting Time
This is also a great time to work on the rest of your meal. While the turkey is resting, the juices have time to settle, and the turkey cools down enough so you won't burn your fingers while carving.
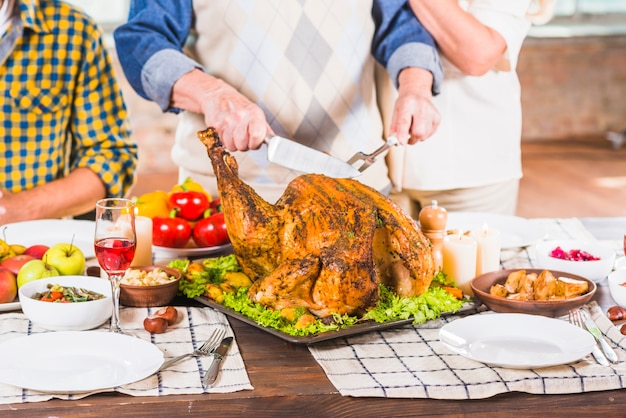
(Part 7) Carving Time: A Culinary Triumph
carving a turkey can seem intimidating, but it's actually quite simple. Just take your time and be careful. Start by cutting off the wings. Then, carve the breast into thin slices.
Carving Tips
Use a sharp carving knife to make clean, even slices. If you used a roasting pan with a rack, the turkey should be relatively easy to carve. If you used a baking dish, transfer the turkey to a cutting board for easier carving. And don't forget to save those turkey bones! They're perfect for making stock or soup - a great way to use up leftovers and add extra flavor to your next meal.
(Part 8) turkey leftovers: A Culinary Treasure
Finally, let's talk about the best part: the leftovers! I always have a plan for my turkey leftovers. They're so versatile and delicious. Here are a few of my favorite leftover turkey recipes:
Turkey Recipes
- Turkey Sandwiches: A classic for a reason. A simple turkey sandwich on toasted bread with some mayonnaise, lettuce, and tomato is always a winner.
- turkey soup: Use those turkey bones and leftover meat to make a hearty, flavorful soup. Add vegetables like carrots, celery, and onions, and a little bit of pasta or rice. It's a comforting and satisfying way to use up those leftovers.
- turkey salad: Combine leftover turkey with mayonnaise, celery, onions, and cranberries for a light and refreshing salad. Serve it on bread, crackers, or lettuce leaves for a tasty lunch or dinner.
- turkey pot pie: Combine leftover turkey with vegetables and gravy in a flaky crust for a delicious and satisfying pot pie. It's a great way to use up those leftovers and create a comforting, hearty meal.
- Turkey Shepherd's Pie: Layer mashed potatoes over a mixture of leftover turkey, vegetables, and gravy for a hearty and comforting meal. It's a classic comfort food that's perfect for using up those turkey leftovers.
FAQs:
Here are some frequently asked questions about turkey roasting:
1. How do I know if the turkey is cooked through?
The best way to check if the turkey is cooked through is to use a meat thermometer. Insert the thermometer into the thickest part of the thigh, avoiding the bone. The turkey is cooked through when the internal temperature reaches 165°F (74°C) for the thigh and 180°F (82°C) for the breast. It's a simple but crucial step in ensuring a safe and delicious meal.
2. Can I roast the turkey with the stuffing inside?
It's not recommended to roast the turkey with the stuffing inside. The stuffing can act as a barrier, preventing the turkey from cooking evenly. It also creates a risk of undercooked stuffing, which can be unsafe to eat. It's always best to cook the stuffing separately to ensure it's cooked through and safe for everyone to enjoy.
3. How long should I let the turkey rest before carving?
It's important to let the turkey rest for at least 15-20 minutes before carving. This allows the juices to redistribute throughout the meat, resulting in a juicier, more flavorful turkey. It's a simple step that makes a big difference in the final flavor and texture.
4. How do I make the turkey skin crispy?
To achieve a crispy turkey skin, try these tips: Pat the turkey dry with paper towels before roasting, roast the turkey uncovered, and baste the turkey with melted butter or a mixture of butter and herbs during the roasting process. These little tricks can make a big difference in the final result.
5. What should I do if the turkey is overcooked?
Unfortunately, overcooked turkey can be dry and tough. If your turkey is overcooked, there's not much you can do to remedy it. However, you can try to salvage it by using it in a soup or stew. The moist cooking environment will help to make the turkey more tender.
There you have it, my fellow turkey lovers! With a bit of planning, some patience, and this handy guide, you'll be on your way to creating a delicious, impressive, and memorable turkey roast that will have everyone singing your praises. Now, go forth and conquer the turkey!
Everyone is watching

How to Cook Frozen Lobster Tails Perfectly: A Step-by-Step Guide
RecipesLobster. Just the word conjures up images of lavish meals, special occasions, and a taste of luxury. But let's...

Pork Fillet Cooking Time: How Long to Cook It Perfectly
RecipesPork fillet, or tenderloin as it's sometimes called, is a real favourite in our house. It's so versatile, and...

Pigs in a Blanket Cooking Time: How Long to Bake for Perfect Results
RecipesAh, pigs in a blanket. Just the name conjures up images of those delightful little parcels of crispy pastry en...

The Ultimate Guide to Cooking Delicious Frankfurters
RecipesLet's face it, we all love a good frankfurter. It's a classic, simple, and always satisfying. But let's be rea...

Wolf Meat Recipes: A Guide to Cooking Wild Game
RecipesLet's be honest, you don't see wolf meat at your local butcher shop every day. It's a bit of a wild card, but ...