Ah, turkey. The centerpiece of many festive feasts, the bird that brings families together (and sometimes, a little bit of stress). For years, I’ve tackled the turkey with varying degrees of success, sometimes with a beautiful, golden-brown masterpiece, and other times with a slightly dry, pale bird. But over the years, I’ve learned a thing or two about mastering the art of roasting a turkey, and I'm happy to share my knowledge.
(Part 1) This guide focuses on roasting a 10lb turkey, a size that's perfect for a family gathering. We'll delve into everything from prepping the bird to achieving that glorious crispy skin and juicy meat. Get ready to turn your next turkey roast into a culinary triumph!
The Pre-Roast Prep: Setting the Stage for Success
(Part 2) Let's be honest, the day before the big roast is where the real magic happens. It’s not just about throwing a frozen turkey in the oven and hoping for the best. It’s about setting the stage for a perfect roast.
Thawing and Tempering: Patience is Key
(Part 3) First things first: thawing. Your frozen turkey needs to thaw properly for even cooking. The best way to do this is in the refrigerator, allowing plenty of time (about 24 hours for a 10lb turkey).
(Part 4) Once thawed, bring the turkey to room temperature. This is a crucial step that many people overlook. A cold turkey will take longer to cook and might result in uneven cooking. A good rule of thumb is to let it sit on the counter for at least 2 hours before roasting.
Prepping the Bird: Seasoning and Stuffing
(Part 5) Now it’s time to get those hands dirty and prep the turkey.
Seasoning for Flavor
(Part 6) Start by patting the turkey dry with paper towels. This helps the skin to crisp up nicely during roasting.
(Part 7) Next, comes the seasoning. Salt and pepper are the essential starting point, but I like to add a few more spices. I often go for a simple blend of dried rosemary, thyme, and sage, rubbed generously all over the turkey. You can experiment with other spice combinations based on your preferences. The key is to be generous with the seasoning, but not overpower the natural flavour of the turkey.
The Art of Stuffing
(Part 8) Now, stuffing. This is a personal choice, but I prefer to roast my stuffing separately. It allows for more even cooking and prevents the stuffing from absorbing the juices from the turkey.
(Part 9) If you choose to stuff the turkey, make sure to stuff it just before you place it in the oven. Overstuffing can hinder the cooking process, so be careful not to pack it too tightly.
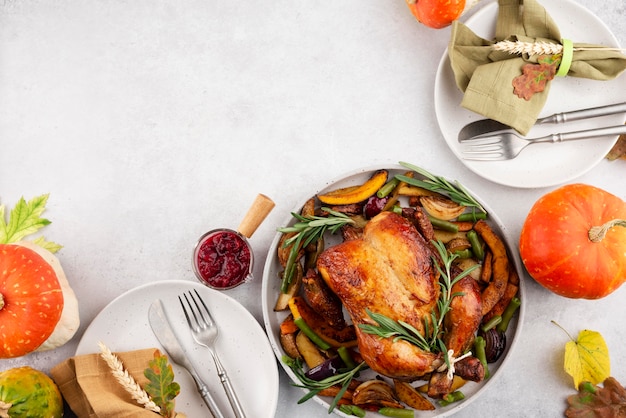
(Part 10) Whether you stuff or not, you can add aromatics like lemons, oranges, onions, and herbs into the cavity. I like to place slices of lemon and onion, along with a few sprigs of rosemary and thyme, inside the cavity. It adds a wonderful depth of flavour to the turkey.
Roasting the Turkey: Time to Shine
(Part 11) The moment of truth has arrived! Get that oven preheated to 350°F (175°C). This is a good starting point, but you might need to adjust it slightly depending on your oven.
roasting pan and Rack: The Essentials
(Part 12) You'll need a roasting pan with a rack. The rack elevates the turkey, allowing the hot air to circulate around it for even cooking. It also prevents the bird from sitting in its own juices, helping to prevent soggy skin.
The First 30 Minutes: Basting and Timing
(Part 13) Place the turkey in the roasting pan and into the preheated oven. For the first 30 minutes, I recommend not opening the oven door to avoid losing heat. This allows the turkey to brown and develop a nice crust on the skin.
(Part 14) After 30 minutes, baste the turkey with its own juices. This keeps the meat moist and helps to achieve that beautiful golden-brown color.
The Remaining Time: Patience and Precision
(Part 15) Now, for the remaining cooking time, continue basting every 30 minutes.
(Part 16) The cooking time for a 10lb turkey is about 2 hours and 30 minutes, but this can vary slightly depending on your oven and the turkey itself.
(Part 17) To ensure your turkey is perfectly cooked, use a meat thermometer. Insert it into the thickest part of the thigh, making sure to avoid hitting any bones. The turkey is fully cooked when the internal temperature reaches 165°F (74°C).
Resting: A Crucial Step
(Part 18) Once the turkey is cooked, remove it from the oven and let it rest for at least 30 minutes before carving. This allows the juices to redistribute throughout the meat, resulting in a more succulent and flavorful turkey.
Carving: A Final Touch
(Part 19) The final step is carving the turkey. This is an art form in itself! Use a sharp carving knife and make sure to cut against the grain of the meat for tender, neat slices.
(Part 20) First, remove the legs and thighs. Then, carve the breast meat in thin slices.
Making the Most of the Turkey
(Part 21) After carving, you can save the turkey bones for making a delicious turkey stock.
Tips and Tricks: Elevating Your Roast
(Part 22) Here are a few more tips to make your turkey roast even more impressive:
Basting: A Key to Moisture and Flavor
(Part 23) Don't forget to baste the turkey regularly. You can use a mixture of butter, olive oil, and herbs for a richer flavor.
Skin-On vs. Skin-Off: A Personal Choice
(Part 24) You can cook the turkey with or without the skin. If you prefer crispy skin, keep it on. If you want to reduce the fat content, remove the skin before roasting.
Temperature Monitoring: A Must-Have
(Part 25) Invest in a good meat thermometer. This is essential for ensuring your turkey is cooked to perfection.
FAQs: Answering Your Turkey Questions
(Part 26) Now, let's address some frequently asked questions about turkey roasting.
1. What if I overcook the turkey?
(Part 27) Overcooking a turkey can result in dry meat. If this happens, don't worry! You can try adding some gravy or pan sauce to the turkey to rehydrate it. You can also try carving the turkey into thin slices, which helps distribute the moisture more evenly.
2. Can I freeze a cooked turkey?
(Part 28) You can freeze a cooked turkey, but it's best to do it as soon as it has cooled down. Wrap it tightly in cling film and aluminium foil. A cooked turkey can be frozen for up to 2 months.
3. How do I reheat a cooked turkey?
(Part 29) The best way to reheat a cooked turkey is in the oven. Preheat the oven to 325°F (160°C) and place the turkey in a roasting pan. Reheat until it reaches an internal temperature of 165°F (74°C). You can also reheat the turkey in a slow cooker, but this will take longer.
4. How do I make gravy from the turkey drippings?
(Part 30) To make gravy, collect the turkey drippings. You can use a fat separator to remove any excess fat. Then, whisk the drippings with flour and water until smooth. Bring the mixture to a simmer and cook for about 5 minutes, or until the gravy thickens.
5. What can I do with leftover turkey?
(Part 31) There are endless possibilities with leftover turkey! You can make sandwiches, salads, soup, or even turkey pot pie. Get creative and have fun with it!
Conclusion: Your Turkey Roast Awaits
(Part 32) There you have it: my comprehensive guide to roasting a 10lb turkey. From prep to carving, this guide provides you with all the information you need for a delicious and impressive turkey roast. Remember, practice makes perfect. Don't be afraid to experiment and find what works best for you! Happy roasting!
| Weight (lbs) | Cooking Time (mins) | Resting Time (mins) |
|---|---|---|
| 10 | 150 | 30 |
Everyone is watching

How to Cook Frozen Lobster Tails Perfectly: A Step-by-Step Guide
RecipesLobster. Just the word conjures up images of lavish meals, special occasions, and a taste of luxury. But let's...

Pigs in a Blanket Cooking Time: How Long to Bake for Perfect Results
RecipesAh, pigs in a blanket. Just the name conjures up images of those delightful little parcels of crispy pastry en...

Pork Fillet Cooking Time: How Long to Cook It Perfectly
RecipesPork fillet, or tenderloin as it's sometimes called, is a real favourite in our house. It's so versatile, and...

The Ultimate Guide to Cooking Delicious Frankfurters
RecipesLet's face it, we all love a good frankfurter. It's a classic, simple, and always satisfying. But let's be rea...

Wolf Meat Recipes: A Guide to Cooking Wild Game
RecipesLet's be honest, you don't see wolf meat at your local butcher shop every day. It's a bit of a wild card, but ...