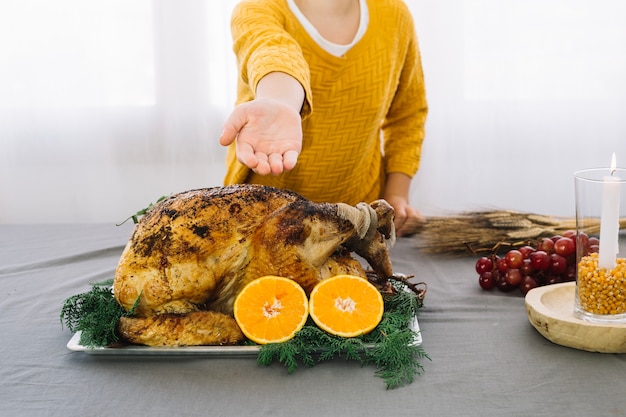
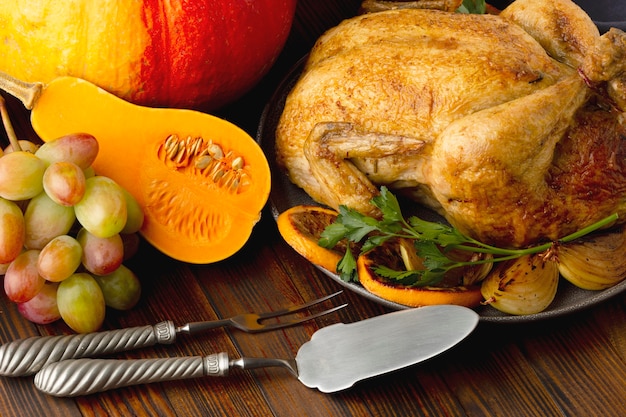
Thanksgiving is a time for gathering, for sharing, and for indulging in a feast that brings everyone together. And at the heart of that feast sits a magnificent centerpiece, a symbol of abundance: the turkey. As a home cook who's spent countless Thanksgivings perfecting my turkey, I'm excited to share my secrets, my tips, and my passion for creating a turkey that is not just delicious, but truly unforgettable. This guide is my roadmap to a thanksgiving turkey that sings with flavor, melts in your mouth, and leaves everyone wanting seconds (and maybe thirds!).
(Part 1) The Turkey Selection: Choosing Your Perfect Bird

The first step in creating a Thanksgiving masterpiece is choosing the right bird. Don't get swayed by the largest turkey in the market. While they might seem impressive, they often end up dry and tough. For a gathering of 8-10 people, a turkey weighing between 12-14 pounds is a good size. Look for a plump, firm turkey with a nice sheen to the skin and no off-putting smells.
The Heritage Turkey: A Flavorful Adventure
If you're feeling adventurous, consider a heritage breed turkey. These turkeys are raised more traditionally, often on pasture, and they offer a richer flavor and a more pronounced texture compared to commercially raised birds. However, they can be trickier to find, and they might need a bit longer cooking time. If you're willing to put in the effort, the unique flavor and texture are well worth it.
The Frozen vs. Fresh Debate: A Matter of Preference
Now, the age-old dilemma: fresh or frozen? Honestly, I prefer fresh turkeys whenever possible. The flavor seems to have more depth, and there's just something satisfying about a fresh bird. But, let's face it, sometimes life throws a curveball, and frozen it is. If you're going the frozen route, make sure to thaw the turkey properly in the refrigerator. Allow at least 24 hours for every 5 pounds of turkey. And please, please, please avoid thawing it in the sink or at room temperature! That's a quick ticket to a foodborne illness, and we don't want that.
(Part 2) The Brining: Unlocking the Secrets of Moisture

Here's where the magic really starts to happen: brining. This technique is an absolute game-changer for your turkey. Think of it as a flavor and moisture infusion, transforming a dry bird into a juicy, flavorful masterpiece. Don't let the word "brine" scare you; it's incredibly simple. Just combine salt, sugar, and water, and submerge your turkey in this magical elixir.
The Art of Brining: A Recipe for Success
I typically use a simple brine with a ratio of 1 cup of salt and 1 cup of sugar per gallon of water. But the world is your oyster! Experiment with different brines and herbs. A few bay leaves add a subtle, earthy aroma. Rosemary and thyme bring a comforting herbal touch. Let your imagination run wild! Just make sure to use a large enough container for the turkey to float freely in the brine.
Brining Time: Letting the Flavors Sizzle
How long should you brine? The answer depends on the size of your turkey and the type of brine you're using. For a standard wet brine, I recommend a minimum of 6 hours, but overnight is even better. The longer the turkey soaks in the brine, the more flavorful and juicy it will become. If you're using a dry brine, which involves rubbing the turkey with a salt and spice mixture, allow a good 12-24 hours for the magic to work.
(Part 3) The Roasting: A Dance of Heat and Timing

Now, the big moment: roasting. Preheat your oven to a roaring 450 degrees Fahrenheit. It's important to pat the turkey dry before placing it in the roasting pan. Then, get ready to give that skin some love! Coat it generously with a mixture of olive oil, salt, pepper, and a sprinkle of herbs. This simple step creates an incredible flavor explosion, giving the skin that irresistible golden-brown crisp we all crave.
The reverse sear: crispy skin and Juicy Meat
Here's a little trick I've learned over the years that truly elevates the roasting experience: the reverse sear. Instead of roasting the turkey at a high temperature the entire time, we're going to play a little temperature game. Start by roasting your turkey at a lower temperature, around 325 degrees Fahrenheit, for about 2 hours. This allows the meat to cook evenly. Then, crank up the heat to 450 degrees Fahrenheit for the final 30-45 minutes. This intense heat creates a beautifully crispy skin while ensuring the meat stays moist and flavorful.
A Little Tip: Elevating the Turkey
Using a roasting rack is a game-changer for achieving even cooking. Elevating the turkey above the pan allows air to circulate around it, resulting in a more evenly cooked bird. Just make sure the rack is sturdy enough to support the weight of the turkey.
The Moment of Truth: Knowing When Your Turkey is Done
Now, the question on everyone's mind: how do you know when your turkey is perfectly cooked? The trusty meat thermometer is your best friend. You're aiming for a minimum internal temperature of 165 degrees Fahrenheit in the thickest part of the thigh. But don't just rely on the thermometer. Your senses will guide you, too. The skin should be a stunning golden brown, and the juices running out should be clear, not pink. Remember, it's better to err on the side of overcooking than undercooking.
(Part 4) The Resting: A Crucial Pause for Flavor
Your turkey is glistening, golden-brown, and perfectly roasted. But don't rush into carving! Allow the turkey to rest for at least 30 minutes before carving. This crucial step allows the juices to redistribute throughout the meat, resulting in a more succulent and flavorful turkey. Use a carving board or a large platter to catch any drippings.
(Part 5) The Gravy: A Symphony of Flavor
No Thanksgiving turkey is complete without a rich, luscious gravy, and the best gravy comes from the pan drippings of your roasted turkey. Here's the magic: de-glazing the pan! This involves scraping up all those delicious bits stuck to the bottom of the pan and using them to create a gravy that bursts with flavor.
homemade gravy: A Labor of Love
Making gravy from scratch is easier than you might think, and the results are infinitely better than store-bought. Simply whisk together flour and cold water to create a roux. Then, slowly whisk it into the hot pan drippings over low heat. Season with salt and pepper, and add a touch of herbs like thyme or rosemary for an extra layer of flavor. If you're feeling fancy, a splash of wine adds a sophisticated touch. The result is a silky, smooth gravy that perfectly complements the turkey and elevates your thanksgiving feast.
(Part 6) side dishes: A Celebration of Flavors
We've got the turkey and the gravy, but Thanksgiving wouldn't be Thanksgiving without a delightful array of side dishes. The options are endless, but I always include a few classics. mashed potatoes are a must, and I'm a huge fan of adding a touch of butter and cream for a luxurious texture. A classic green bean casserole is another staple, but I prefer to make mine with fresh green beans and a homemade cream sauce. And for a touch of sweetness, cranberry sauce is essential.
(Part 7) The Carving: A Culinary Art Form
After the turkey has had its well-deserved rest, it's time for the grand finale: carving. Gather your sharp carving knife, a carving fork, and a sense of anticipation. Start by carefully removing the legs and thighs. Then, carve the breast into thin slices, going against the grain for the most tender slices. Use a spoon to scoop out the flavorful stuffing, if you've chosen to stuff your bird.
Stuffing: A Matter of Choice
I'm a big believer in stuffing the turkey. It adds a warm, comforting element and a burst of flavor to the bird. But always remember to cook your stuffing separately, as it can trap moisture and prevent the turkey from cooking evenly.
(Part 8) Leftovers: A Thanksgiving Treasure
The turkey is carved, the side dishes are devoured, and the Thanksgiving feast comes to an end. But don't be sad! The best part is yet to come: leftovers! The next day, embrace the joy of turkey sandwiches, turkey soup, or even a hearty turkey hash. The possibilities are endless.
Freezing for Future Delights
If you have more leftovers than you can handle, freezing is a great way to preserve them. Wrap the leftover turkey and side dishes in airtight containers, label them with the date, and pop them in the freezer. They'll last for several months, ready to bring back the Thanksgiving magic whenever you need a little comfort food.
(Part 9) The Ultimate Thanksgiving Turkey Checklist: Your Guide to Success
To ensure your Thanksgiving turkey preparation is as smooth as a perfectly roasted bird, here's a helpful checklist to keep you on track:
- Choose a turkey that's the right size for your crowd.
- Thaw the frozen turkey properly in the fridge.
- Brine the turkey for at least 6 hours, or overnight for best results.
- Pat the turkey dry and season it with olive oil, salt, pepper, and herbs.
- Roast the turkey at a high temperature for the first 30 minutes, then lower the heat for even cooking.
- Use a meat thermometer to ensure the turkey is cooked through.
- Let the turkey rest for at least 30 minutes before carving.
- Make a delicious gravy using the pan drippings.
- Gather your favorite side dishes and enjoy a Thanksgiving feast!
(Part 10) The Thanksgiving Table: A Place of Gathering
The Thanksgiving turkey isn't just about the food, folks. It's about coming together, sharing stories, expressing gratitude, and creating memories that last a lifetime. As you gather around the table, surrounded by family and friends, take a moment to appreciate the simple pleasures in life. And remember, even if your turkey isn't perfect, the love and laughter you share will make it a Thanksgiving to remember.
(Part 11) FAQs: Your Thanksgiving Turkey Questions Answered
1. What's the best way to stuff a turkey?
I prefer to stuff the turkey with a bread-based stuffing and cook it separately. This ensures that the stuffing is cooked thoroughly and that the turkey cooks evenly. To stuff the turkey, simply spoon the stuffing into the cavity, making sure not to overpack it. You can also use a turkey roasting bag, which helps to keep the stuffing moist and prevents the turkey from drying out.
2. Can I use a turkey roasting bag?
Absolutely! Turkey roasting bags are a great way to achieve a juicy and flavorful bird. They help to retain moisture and prevent the turkey from drying out. Simply place the turkey in the bag, along with a few tablespoons of butter or oil. Then, seal the bag tightly and roast according to the manufacturer's instructions.
3. What if my turkey is too big for my roasting pan?
If your turkey is too big for your roasting pan, you can use a roasting rack or elevate it on a bed of vegetables. The roasting rack allows for better air circulation, ensuring that the turkey cooks evenly.
4. How do I know when my turkey is done?
Use a meat thermometer to check for an internal temperature of 165 degrees Fahrenheit in the thickest part of the thigh. The skin should also be a beautiful golden brown, and the juices running out should be clear, not pink.
5. What should I do with the leftover turkey?
The possibilities are endless! You can use the leftover turkey to make sandwiches, soup, salad, or even turkey hash. You can also freeze the leftover turkey for later use.
Everyone is watching

How to Cook Frozen Lobster Tails Perfectly: A Step-by-Step Guide
RecipesLobster. Just the word conjures up images of lavish meals, special occasions, and a taste of luxury. But let's...

Pigs in a Blanket Cooking Time: How Long to Bake for Perfect Results
RecipesAh, pigs in a blanket. Just the name conjures up images of those delightful little parcels of crispy pastry en...

Pork Fillet Cooking Time: How Long to Cook It Perfectly
RecipesPork fillet, or tenderloin as it's sometimes called, is a real favourite in our house. It's so versatile, and...

The Ultimate Guide to Tender, Juicy Pulled Pork
RecipesRight, let's talk pulled pork. It's one of those dishes that just screams "comfort food," doesn't it? I mean...

The Ultimate Guide to Cooking Sweet Potatoes: From Roasting to Mashing
RecipesSweet potatoes. Just the name conjures up images of warm, comforting dishes, bursts of vibrant color, and a to...
