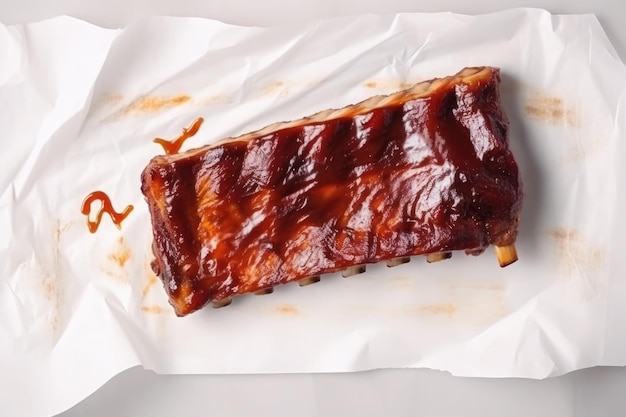
Ah, ribs. Those succulent, fall-off-the-bone beauties that make your mouth water just thinking about them. Whether you're a seasoned grill master or a kitchen novice, I'm here to spill the beans on how to achieve the ultimate rib experience. We'll explore different cooking methods, from the classic BBQ to the convenient oven, and even a few unexpected twists to elevate your rib game. So grab your apron, gather your ingredients, and let's embark on this flavour-filled journey together!
(Part 1) The Rib Rundown: Getting to Know Your Meat

First things first, you need to choose your weapon – or rather, your cut of meat. Ribs come in two main varieties: baby back ribs and spare ribs. Now, you might be thinking, "They both sound delicious, which one do I pick?" Well, it all comes down to personal preference and what you're after.
baby back ribs: Tender and Delicate
Baby back ribs, as the name suggests, are smaller and come from the upper portion of the pig's rib cage. They're known for their tender, succulent meat and a slightly more delicate flavour. They tend to be a bit more expensive, but their tenderness and flavour make them a popular choice for many.
Spare Ribs: Robust and Flavourful
Spare ribs, on the other hand, are larger and come from the lower portion of the rib cage. They have a slightly tougher texture but offer a richer, more robust flavour thanks to the marbling of fat. They're often a more budget-friendly option and can be a real treat when cooked properly.
Choosing the Perfect Rib: What to Look For
Now, you've got your rib type sorted, but how do you choose the best ones? Here's what to look for:
- Marbling: Look for ribs that are well-marbled with fat. This fat is what keeps them moist and flavourful during cooking.
- Color: The meat should be a nice, even pink colour, and there shouldn't be any signs of discoloration.
- Bones: Avoid ribs that are overly dry or have a lot of loose bones.
Remember, the key is to choose ribs that look fresh and have a good amount of fat. You want that juicy, tender texture that makes ribs so irresistible!
(Part 2) Preparing the Rib Squad: It's All About the Rub

Right, now we're getting to the fun part – the rub! This is where you get to personalize your ribs and really make them your own. A good rib rub should have a balance of sweet, salty, and smoky flavours, with a bit of spice to kick things up. You can find pre-made rubs in most supermarkets, but I highly recommend making your own. It's easier than you think, and you can tailor it to your taste buds.
Creating the Perfect Rib Rub: My Favourite Recipe
Here's my go-to rib rub recipe that always delivers a punch of flavour:
- 1 cup brown sugar
- 1/2 cup smoked paprika
- 1/4 cup kosher salt
- 1/4 cup garlic powder
- 1/4 cup onion powder
- 2 tablespoons black pepper
- 1 tablespoon chili powder
- 1 tablespoon cayenne pepper (optional)
Simply combine all the ingredients in a bowl and mix well. Then, generously rub it all over the ribs, making sure to get it into all the cracks and crevices. Don't be shy with the rub – you want it to coat the ribs evenly.
Tips for Applying the Rub
Here are a few tips for applying your rib rub:
- Pat the ribs dry: Before applying the rub, pat the ribs dry with paper towels. This will help the rub adhere better and prevent it from becoming clumpy.
- Rub it in: Use your hands to rub the mixture into the ribs, ensuring the entire surface is covered.
- Let it sit: Once the ribs are coated, let them sit in the fridge for at least 30 minutes, or up to overnight. This allows the flavours to penetrate the meat.
(Part 3) The BBQ Method: A Classic for a Reason

Now, onto the main event – cooking those ribs! The BBQ method is a classic for a reason, and it truly delivers the best flavour. You're basically slow-cooking those ribs over low heat, allowing them to become incredibly tender and develop a beautiful smoky flavour. It's a bit of a slow burn, but the results are worth the wait!
Setting Up Your BBQ: The Perfect Setup
First, you'll need to prep your BBQ.
Using a charcoal grill
If you're using a charcoal grill, light it and let the coals burn down until they're covered in a layer of white ash. This ensures even heat and a nice smoky flavour. You want a medium-high heat for the initial searing, followed by low and slow for the rest of the cook.
Using a Gas Grill
If you're using a gas grill, set it to low heat (around 225-250 degrees Fahrenheit). You'll need to use a smoker box with wood chips to give your ribs that smoky aroma. Applewood, hickory, or mesquite chips are all good choices.
Cooking the Ribs: The Art of Slow and Low
Once your BBQ is ready, place the ribs on the grill and cook them for 2-3 hours, flipping them halfway through. The key is to cook them slowly and low, around 225-250 degrees Fahrenheit. This allows the meat to become incredibly tender and the fat to render out, creating a juicy, flavourful result.
The Importance of Wrapping: Locking in the Moisture
After a few hours, your ribs should be starting to look tender. It's time for the wrapping stage. This is a crucial step that helps lock in the moisture and prevent the meat from drying out. Simply wrap the ribs tightly in aluminum foil, making sure to seal the edges well. Add a tablespoon or two of butter and a splash of apple cider vinegar to the foil for extra flavour and moisture.
Return the ribs to the grill and cook for another hour, or until they reach an internal temperature of 190 degrees Fahrenheit.
Finishing Touches: Glaze It Up!
After about another hour, remove the ribs from the foil and brush them with your favourite bbq sauce. This adds a beautiful glaze and enhances the flavour. Let them cook for another 30 minutes, basting them with more sauce every 15 minutes. This gives them that irresistible sticky glaze that makes bbq ribs so addictive.
Checking for Doneness
You can tell if your ribs are done by using the "pull-back" method. Gently pull back on a piece of meat. If it pulls back easily and the bone is exposed, they're done. You can also use a meat thermometer to ensure they reach an internal temperature of 190 degrees Fahrenheit.
(Part 4) The oven method: A Convenient Alternative
Let's face it, sometimes you don't have the time or the space for a full-blown BBQ. That's where the oven comes in. It's a fantastic alternative for achieving delicious, tender ribs right in your own kitchen. This method is a bit more hands-off, but it still delivers impressive results.
Preparing the Ribs: A Quick and Easy Prep
The prep for oven-cooked ribs is pretty similar to the BBQ method. You'll still want to rub them generously with your favourite rub and let them sit for at least 30 minutes to allow the flavours to penetrate. This step is essential for creating a flavorful crust on the ribs.
Cooking the Ribs: Slow and Steady Wins the Race
Preheat your oven to 275 degrees Fahrenheit. Place the ribs in a roasting pan and cook them for 2-3 hours, flipping them halfway through. You can add some liquid to the bottom of the pan to prevent the ribs from drying out. A mixture of water, apple cider vinegar, and your favourite beer is a great option. This helps to create a steamy environment that keeps the ribs moist and flavorful.
Wrapping the Ribs: The Final Touch
After 2-3 hours, your ribs should be starting to get tender. It's time to wrap them in aluminum foil, just like we did with the BBQ method. This helps lock in the moisture and creates even more tender meat. Cook them for another 30 minutes to an hour, depending on how tender you want them to be. The wrapping process helps to break down the connective tissues in the meat, resulting in incredibly tender ribs.
Glazing for a Shine: The Finishing Touch
Once your ribs are done, remove them from the oven and brush them with your favourite BBQ sauce. You can put them back in the oven for a few minutes to help the glaze set. This adds a beautiful sheen and intensifies the flavour of the sauce.
(Part 5) Beyond the Basics: Adding Flavour and Texture
Okay, we've covered the fundamentals, but what about taking those ribs to the next level? Let's talk about adding flavour and texture that'll have everyone begging for seconds!
Spice It Up: Experimenting with Flavours
Don't be afraid to experiment with different rubs and sauces. You can add smoky notes with chipotle powder, a hint of sweetness with brown sugar, or a burst of citrus with orange zest. Remember, the key is to find what you enjoy most! You can also create your own unique rub by combining different spices and herbs. Get creative and have fun with it!
Creating Depth: Introducing Marinades
Marination can add a whole new dimension of flavour to your ribs. You can use a simple marinade of soy sauce, garlic, and ginger, or get creative with citrus marinades or even a dry rub marinade. A marinade is a great way to infuse the ribs with flavor and keep them moist during cooking. Just remember to marinate the ribs for at least 2 hours, or preferably overnight, for the best results.
The Art of Smoking: Wood Chips for a Smoky Aroma
If you're using a BBQ, experimenting with different wood chips can enhance the smoky flavour of your ribs. Applewood chips offer a sweet, delicate smoke, while hickory chips add a more robust, bacon-like flavour. Experimenting with different wood chips allows you to fine-tune the smoky flavour of your ribs. For instance, cherry wood chips will impart a slightly fruity flavour, while pecan chips will create a nutty, earthy aroma.
Texture Play: Crispy Edges and Tender Meat
For a satisfying textural contrast, consider grilling the ribs over high heat for a few minutes at the end of cooking. This creates crispy edges while keeping the meat incredibly tender inside. This is a great technique for adding a bit of char to the ribs and enhancing their flavour.
(Part 6) side dishes: The Perfect Rib Companions
No rib feast is complete without a selection of delicious side dishes. These will complement the rich flavours of the ribs and create a truly satisfying meal.
Classic BBQ Sides: The Go-To Options
Here are some classic barbecue sides that pair perfectly with ribs:
- Mac and Cheese: A creamy, cheesy classic that's always a crowd-pleaser.
- Coleslaw: A refreshing and tangy side that cuts through the richness of the ribs.
- Baked Beans: Sweet, smoky, and packed with flavour.
- potato salad: A classic American side that's perfect for a barbecue.
- corn on the cob: A sweet and juicy side that's perfect for grilling.
Beyond the Classics: Get Creative with Sides
Don't be afraid to think outside the box when it comes to side dishes. Here are a few more unconventional but delicious options:
- Grilled Pineapple Salsa: A tangy and refreshing salsa that adds a touch of sweetness to the meal.
- Roasted Vegetables: Roasted vegetables, like broccoli, carrots, or peppers, provide a colourful and healthy addition to your plate.
- Watermelon Salad: A light and refreshing salad that contrasts the richness of the ribs.
(Part 7) Serving Up the Feast: Presentation Matters
Let's face it, food always looks better when it's beautifully presented. So, how do you serve up your rib masterpiece in style?
Plating Perfection: Creating a Visual Appeal
When plating your ribs, consider the visual appeal. You can use a large platter and arrange the ribs in a fan shape, or place them individually on smaller plates. A drizzle of BBQ sauce and a sprinkle of fresh herbs can add a touch of elegance. You can also garnish with sliced onions, pickled peppers, or a few sprigs of rosemary for a more rustic look.
Table Decor: Setting the Mood
Set the mood for your rib feast with a charming table setting. Use checkered tablecloths, rustic wooden trays, and mason jars for a casual barbecue vibe. You can also add some rustic touches like burlap table runners or wooden serving bowls. Don't forget to include napkins and silverware, and maybe even a few candles for ambiance.
(Part 8) Ribs on the Go: Making it a Takeaway Treat
What if you're craving ribs but don't want to cook? No worries, you can still enjoy those tender, juicy beauties as a takeaway treat.
Finding the Best Rib Joints: Local Gems and Chains
Many restaurants specialize in ribs, so you'll have plenty of options. Check online reviews and recommendations to find the best rib joints in your area. You can also ask friends and family for their recommendations.
Ordering Tips: Getting the Most Out of Your Takeaway
When ordering ribs to go, it's important to ask about the cooking method and the sauce options. If you have any dietary restrictions, be sure to let them know. You can also ask for the ribs to be wrapped in foil to keep them warm and moist.
Enjoying Your Takeaway: Keeping It Warm and Delicious
Once you've got your ribs, make sure to transport them carefully. Use a thermal bag or container to keep them warm and prevent them from drying out. You can also ask the restaurant for a heating pack to keep the ribs warm during transport.
FAQs
I know you're probably full of questions about those delicious ribs, so here are a few FAQs to help you out:
1. How Long Should I Cook Ribs for?
The cooking time for ribs varies depending on the cooking method and the size of the ribs. For BBQ ribs, you can expect to cook them for 3-4 hours, while oven-baked ribs can take 2-3 hours. It's always a good idea to check the ribs for doneness using the "pull-back" method or a meat thermometer to ensure they are cooked through.
2. How Do I Know When My Ribs Are Done?
The best way to check if your ribs are done is to use the "pull-back" method. Gently pull back on a piece of meat. If it pulls back easily and the bone is exposed, they're done. You can also use a meat thermometer to ensure they reach an internal temperature of 190 degrees Fahrenheit.
3. Can I Cook Ribs in a slow cooker?
Absolutely! You can cook ribs in a slow cooker for 6-8 hours on low. Just be sure to add some liquid to the bottom of the slow cooker to prevent the ribs from drying out. A mixture of apple cider vinegar, water, and your favorite BBQ sauce is a great option. This method is great for hands-off cooking and results in incredibly tender ribs.
4. Can I Freeze Ribs?
Yes, you can freeze ribs for up to 3 months. However, it's best to freeze them raw and unseasoned. Once thawed, they can be seasoned and cooked as usual. This is a great way to save time and have ribs on hand for a quick meal.
5. What Happens If My Ribs Are Overcooked?
If your ribs are overcooked, they will become dry and tough. It's best to avoid overcooking them by using a meat thermometer to ensure they reach an internal temperature of 190 degrees Fahrenheit. Overcooked ribs can be salvaged by braising them in a flavorful liquid, which will help to rehydrate and tenderize the meat.
There you have it, folks! Your ultimate guide to tender, juicy ribs. Whether you're grilling, baking, or even slow-cooking, I hope this comprehensive guide has given you the confidence and inspiration to create your own rib masterpiece. Remember, the key is to experiment, have fun, and most importantly, enjoy those delicious ribs!
Everyone is watching

How to Cook Frozen Lobster Tails Perfectly: A Step-by-Step Guide
RecipesLobster. Just the word conjures up images of lavish meals, special occasions, and a taste of luxury. But let's...

Pigs in a Blanket Cooking Time: How Long to Bake for Perfect Results
RecipesAh, pigs in a blanket. Just the name conjures up images of those delightful little parcels of crispy pastry en...

Pork Fillet Cooking Time: How Long to Cook It Perfectly
RecipesPork fillet, or tenderloin as it's sometimes called, is a real favourite in our house. It's so versatile, and...

The Ultimate Guide to Cooking Delicious Frankfurters
RecipesLet's face it, we all love a good frankfurter. It's a classic, simple, and always satisfying. But let's be rea...

The Ultimate Guide to Tender, Juicy Pulled Pork
RecipesRight, let's talk pulled pork. It's one of those dishes that just screams "comfort food," doesn't it? I mean...
