(Part 1) Understanding St. Louis Ribs: A Cut Above the Rest

The Cut That Makes All the Difference
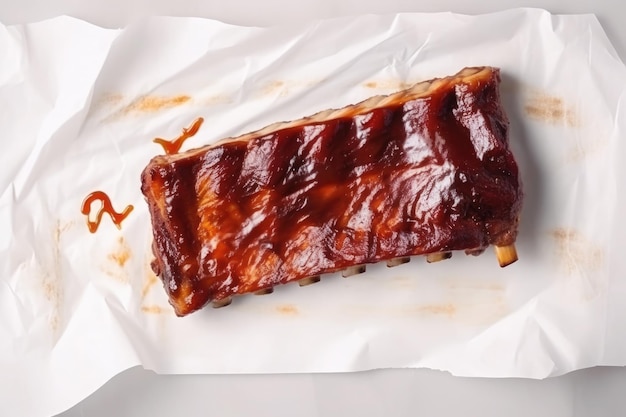
St. Louis ribs, also known as "spare ribs," are a unique cut of pork. They come from the lower section of the rib cage, offering a combination of meat and bone that creates a distinctive taste and texture. Unlike baby back ribs, which are shorter and more tender, St. Louis ribs are known for their substantial size and their meaty, succulent texture. But the St. Louis style isn't just about the cut. It's about the trimming. The butcher meticulously removes the thin membrane from the back of the ribs, a process that's crucial for even cooking and tender results. They also trim away the cartilage and excess fat, ensuring a consistent shape and a beautiful, even cook.I've seen folks try to use "baby back" ribs, but for me, St. Louis ribs are the real deal. They just offer a different level of flavor and texture that you can't get from other cuts. There's something about that full-bodied flavor and the satisfying chew of the meat that you just can't beat.
St. Louis Ribs: A Brief History
Now, you might be wondering, how did these glorious ribs come to be? Well, it all started in St. Louis, Missouri, back in the early 20th century. Imagine a bustling city with a strong German influence. You've got butchers, brewers, and bakers all working their magic, and guess what? They were creating some pretty phenomenal ribs. Those early butcher shops were the pioneers, developing the characteristic trimming and cutting techniques that are still used today. Over time, St. Louis ribs became a local delicacy, a source of pride for the city, and eventually, a national treasure.(Part 2) The Art of Preparation: Setting the Stage for a Rib Masterpiece

1. Selecting the perfect ribs
Look, I know it's tempting to just grab the first rack of ribs you see, but trust me, taking a moment to choose the right ones will make a huge difference in the final result. You want ribs that are a nice, even colour, with a good amount of marbling, indicating they'll be juicy and flavorful. Avoid ribs that are overly dry or have a strange odour.And don't be afraid to ask the butcher for their recommendations. They'll usually know what they're talking about, and they might even have a few insider tips for finding the best cuts.2. The Membrane Mystery: Unmasking the Rib's Secret
Here's a little secret that most cooks don't even know: that thin membrane on the back of the ribs can be a real pain! It holds in moisture during cooking, which can lead to chewy, dry ribs. Believe me, you want to get rid of it. There are two ways to do it:- The Knife Method: Take a sharp knife and carefully slide it under the membrane. Once you’ve loosened it, pull it off with a firm grip. It might take some effort, but it’s worth it. Just be careful not to cut the meat!
- The Paper Towel Trick: This one’s a bit gentler. Take a paper towel, lay it over the membrane, and then rub it with your hand. The friction will help to loosen the membrane, making it easier to pull off.
3. Seasoning: A Symphony of Flavours
Now that your ribs are prepped and ready to go, it’s time to get creative with the seasonings. This is where your personal touch comes in, and don’t be afraid to experiment. Remember, the goal is to create a flavour profile that excites your taste buds. Here are a few things to keep in mind:- Salt and Pepper: This is the foundation, the backbone of any good rib rub. A generous dose of both is essential for bringing out the natural flavour of the meat. Don't skimp on the salt; it's crucial for drawing out moisture and flavor.
- Sweet and Smoky: This is the classic St. Louis flavour profile. Think brown sugar, paprika, garlic powder, onion powder, and a touch of chili powder. This combination creates a well-rounded flavor that's both sweet and savory.
- Spicy Kick: For those who like it hot, add some cayenne pepper, red pepper flakes, or even a touch of chipotle powder. Be careful with the spice, though, you don't want to overpower the other flavors.
(Part 3) The Smoking Ceremony: Unlocking the Essence of Flavor

1. Choosing Your Smoker: A Guide for Every Grill Master
Alright, let's talk about the heart of the matter: the smoker. Now, there are tons of different smokers out there, from the classic offset smoker to the modern pellet grill. The key is to choose one that suits your needs and preferences.Here's a quick overview of some popular choices:
I've personally used all of them, and each has its own charm. For me, nothing beats the flavour and experience of a classic offset smoker, but a pellet grill is a great option for beginners or those who want a more hands-off approach.Smoker Type Pros Cons Offset Smoker Produces authentic smoky flavour, great for large cooks Requires more attention, can be messy Pellet Grill Convenient, precise temperature control Can be more expensive, less flavorful than offset Gas Smoker Easy to use, consistent heat Can be less flavorful than wood-fired smokers 2. Fueling the Fire: Wood for Flavor
The type of wood you use will make a huge difference in the flavour of your ribs. Think of it as adding a subtle spice to your dish.- Hickory: This is the classic choice, delivering a rich, smoky flavor with a hint of nuttiness. It's a versatile wood that works well with a variety of meats.
- Oak: A more robust flavour with a hint of sweetness. Oak is known for its bold, smoky flavor and its ability to stand up to strong meats like beef.
- Mesquite: A strong, earthy flavour with a touch of bitterness. Mesquite wood is perfect for those who love a bold, intense smoky flavor.
- Apple: A delicate, fruity flavour that works well with pork. Applewood provides a gentle, sweet smoke that complements pork beautifully.
3. Setting the Temperature: Low and Slow is the Key
Here’s the golden rule of rib smoking: low and slow. This means cooking your ribs at a temperature between 225°F and 250°F. This allows the meat to break down and become tender, while also absorbing all that wonderful smoky flavour.A meat thermometer is your best friend here. Make sure your smoker is maintaining the right temperature. Don't be tempted to rush the process; low and slow is the only way to achieve truly melt-in-your-mouth ribs.4. Smoke and Time: Patience is a Virtue
Now, this is where the real artistry comes in. You’re going to be spending some quality time with your ribs. For St. Louis ribs, expect to smoke them for around 4 to 6 hours. But don’t worry, the time flies by when you’re creating something truly special. Just remember to check the ribs every hour or so and add more wood as needed to keep that smoke rolling. The constant flow of smoke is what creates the incredible flavour you're aiming for.(Part 4) The Mop and the Sauce: Elevating Flavor to New Heights
1. The Mop: A Gentle Kiss of Flavor
This is the part where you really get to show off your creativity. A mop is essentially a thin sauce that you brush onto the ribs while they’re smoking. It adds moisture, flavour, and a beautiful glaze.Here’s a simple recipe:
- 1 cup apple cider vinegar
- 1/2 cup brown sugar
- 1/4 cup apple juice
- 1 tablespoon Worcestershire sauce
2. The Sauce: The Final Touch
I'll be honest with you, I love a good rib sauce, but it’s not essential. You can go with a simple salt and pepper rub, and you’ll still have delicious ribs. But if you want to take things to the next level, a sauce is the way to go. Here are a few things to keep in mind when choosing a sauce:- Sweet and Smoky: This is the classic St. Louis style. Look for sauces with a good balance of brown sugar, molasses, and smoky flavour. The sweetness should complement the savory and smoky flavors of the ribs.
- Spicy: If you like a little heat, try a sauce with cayenne pepper, chipotle peppers, or other hot spices. A touch of heat can really wake up your taste buds.
- Tangy: A bit of vinegar or lemon juice can add a refreshing, tangy note to your sauce. The acidity cuts through the richness of the meat and sauce, adding a nice balance.
(Part 5) The Wrap and the Rest: Bringing the Ribs to Perfection
1. The Wrap: A Final Boost of Tenderness
After your ribs have smoked for a few hours, you can take them off the smoker and give them a little extra TLC. This is called the “wrap,” and it’s all about achieving that melt-in-your-mouth tenderness.Here’s how it works:- Wrap each rack of ribs tightly in aluminum foil. Make sure to seal the foil tightly to trap in the heat and moisture.
- Add a tablespoon or two of butter, apple juice, or even a little bit of your favourite sauce to the foil packet. The butter will add moisture and richness, while the apple juice will provide additional sweetness.
- Return the ribs to the smoker and let them cook for another hour or two.
2. The Rest: Patience Wins Again
After you’ve wrapped the ribs, it’s important to let them rest for at least 30 minutes before you dig in. This allows the juices to redistribute throughout the meat, resulting in even more tender and flavorful ribs. Resist the temptation to eat them right away; letting them rest will make all the difference.(Part 6) The Finish: Bringing the Ribs Home
1. The Final Glaze: A Touch of Shine
Now, this is the moment of truth. You’ve smoked your ribs, you’ve wrapped them, you’ve let them rest. It’s time to add the finishing touch.This is where a good glaze comes in. A glaze is essentially a sauce that you brush onto the ribs in the final stages of cooking. It adds a beautiful sheen and enhances the flavour.Here’s a simple glaze recipe:
- 1/2 cup brown sugar
- 1/4 cup apple cider vinegar
- 1/4 cup Worcestershire sauce
- 1 tablespoon Dijon mustard
2. The Presentation: Making Your Ribs Shine
Now, it’s time to show off your masterpiece. You’ve put a lot of time and effort into these ribs, and they deserve to be presented with pride.- Serve the ribs on a platter lined with parchment paper.
- Place a small bowl of your favourite sauce on the side.
- Garnish the ribs with fresh parsley or chives.
(Part 7) The Sidekicks: Completing the Rib Feast
1. Mac and Cheese: A Comforting Classic
When you’re talking about rib feast, you’ve got to have mac and cheese. This creamy, cheesy side dish is a perfect complement to the smoky, savory flavors of the ribs.You can go with a classic recipe or get creative with different cheeses, spices, and even add-ins like bacon or broccoli. A little bit of spice in the mac and cheese can really complement the smoky flavor of the ribs.
2. Coleslaw: A Refreshing Counterpoint
Coleslaw provides a refreshing contrast to the richness of the ribs. The crisp, cool vegetables and tangy dressing help to balance out the flavours.You can make your own coleslaw or pick up a pre-made one at the grocery store. There are endless variations, but I like to stick with a simple, classic recipe. I also like to add a touch of sweetness to my coleslaw, using a little bit of brown sugar or honey in the dressing.
3. Baked Beans: A Smoky, Sweet Side
Baked beans are another classic side dish for ribs. The sweet and smoky flavours complement the ribs perfectly.You can make your own baked beans from scratch, but there are plenty of great canned options available as well. I like to add a little bit of brown sugar and molasses to my baked beans for extra sweetness. I also like to add a little bit of bacon to my baked beans for extra flavor and texture.
(Part 8) Beyond the Basics: Taking Your Rib Game to the Next Level
1. Rib Rubs: Elevating the Flavor
I've already talked about basic seasoning, but you can really take your ribs to the next level by using a specialized rib rub. There are tons of different rubs available, each with its own unique flavour profile.You can also make your own rubs by combining different spices, herbs, and seasonings. Be creative, experiment, and find a rub that you love. Some popular rib rub ingredients include paprika, garlic powder, onion powder, chili powder, brown sugar, black pepper, and cayenne pepper.
2. Smoking Woods: A Symphony of Flavour
I’ve already touched on the different smoking woods, but there’s a whole world of flavour to explore. You can use different woods, blend woods, or even add fruit wood to your smoker for a unique flavour.For example, try using applewood for a delicate, fruity flavour, or pecan wood for a rich, nutty flavour. You can also use a combination of woods, such as hickory and applewood, for a complex and delicious smoky flavor.
3. Glazes and Sauces: Finding Your Signature Style
There are endless possibilities when it comes to glazes and sauces. Don't be afraid to experiment and find a style that you love.I’ve even tried using bbq sauces from different regions of the United States. There’s a whole world of flavour out there, waiting to be discovered. You can also try making your own glazes and sauces. There are countless recipes online and in cookbooks.
FAQs: Answering Your Rib Questions
1. Can I Cook Ribs in the Oven?
Yes, you can absolutely cook ribs in the oven. It won’t give you the same smoky flavour as a smoker, but it’s a good option if you don’t have a smoker or if you want to cook your ribs indoors.Preheat your oven to 300°F. Place the ribs on a baking sheet lined with foil. Cover the ribs with foil and bake for 2-3 hours, or until the meat is tender. You can also use a meat thermometer to check the internal temperature of the ribs. They should reach 190°F.
2. How Do I Tell When Ribs Are Done?
The best way to tell if your ribs are done is to use a meat thermometer. The internal temperature should reach 190°F.You can also check the tenderness of the ribs by using the “bone test”. If the meat pulls back from the bone easily, then your ribs are ready.
3. What Should I Do with Leftover Ribs?
Leftover ribs are a delicious treat. You can reheat them in the oven, on the stovetop, or in a slow cooker.You can also use leftover ribs to make other dishes, such as sandwiches, salads, or even tacos.
4. Can I Freeze Ribs?
Yes, you can freeze ribs. Wrap them tightly in plastic wrap and then in aluminum foil. Freeze them for up to 3 months.To thaw frozen ribs, place them in the refrigerator overnight.
5. What Are Some Creative Ways to Use Ribs?
Ribs are a versatile ingredient that can be used in many different dishes.Here are a few ideas:
- Rib sandwiches: Use leftover ribs to make delicious sandwiches with coleslaw, pickles, and your favourite sauce.
- Rib salad: Combine leftover ribs with your favourite salad greens, vegetables, and a tangy dressing.
- Rib tacos: Use leftover ribs to make tasty tacos. You can also add other toppings, such as salsa, guacamole, and sour cream.
Everyone is watching

How to Cook Frozen Lobster Tails Perfectly: A Step-by-Step Guide
RecipesLobster. Just the word conjures up images of lavish meals, special occasions, and a taste of luxury. But let's...

Pigs in a Blanket Cooking Time: How Long to Bake for Perfect Results
RecipesAh, pigs in a blanket. Just the name conjures up images of those delightful little parcels of crispy pastry en...

Pork Fillet Cooking Time: How Long to Cook It Perfectly
RecipesPork fillet, or tenderloin as it's sometimes called, is a real favourite in our house. It's so versatile, and...

The Ultimate Guide to Cooking Delicious Frankfurters
RecipesLet's face it, we all love a good frankfurter. It's a classic, simple, and always satisfying. But let's be rea...

Wolf Meat Recipes: A Guide to Cooking Wild Game
RecipesLet's be honest, you don't see wolf meat at your local butcher shop every day. It's a bit of a wild card, but ...
