The Cut Makes All the Difference
Before we dive into the nitty-gritty of the recipe, let's talk about the most important element: the ribs themselves. There are two main types of ribs you'll find at your local butcher: baby back ribs and spare ribs. Choosing the right cut depends on your taste and the occasion.
baby back ribs
Imagine a smaller, more delicate cut, known for its tender, lean meat and subtle flavor. That's baby back ribs for you. They're often considered the "premium" cut, favored for their refined taste and quicker cooking time. Perfect for smaller gatherings or when you want a more elegant presentation.
Spare Ribs
Now, if you're after a meatier, more substantial rib with a richer, more robust flavor, then spare ribs are your go-to. They're larger, a bit more budget-friendly, and ideal for feeding a crowd. Think hearty, satisfying, and perfect for a casual BBQ bash.
The Secret to Selecting the perfect ribs
Now that you've chosen your cut, it's time to pick the perfect rack. Here's what to look for when you're at the butcher counter:
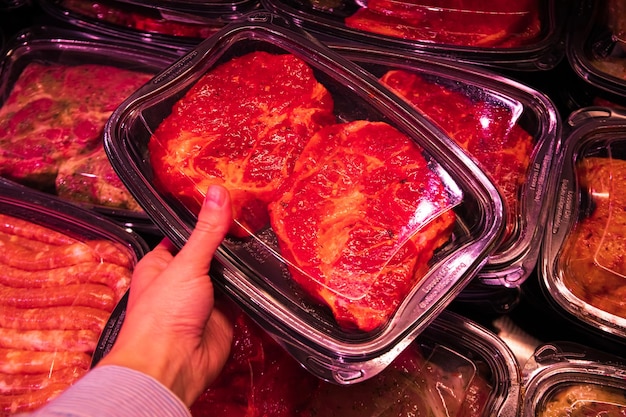
- Color: Aim for ribs with a vibrant, reddish-pink color. Avoid any that appear pale or have a grayish hue – that could mean they've been frozen for too long or haven't been handled properly.
- Marbling: You want ribs with good marbling, those white streaks of fat running throughout the meat. That fat will render during cooking, adding flavor and juiciness.
- Bone: The bones should be a clean white color, without any discoloration or bruising.
- Feel: The ribs should feel firm and springy to the touch. Avoid any that feel soft or mushy, as this might indicate they're not fresh.
The Essential Trim
Before you can start working your oven magic, you'll need to prep those ribs. This begins with a good trim. Now, I'm not saying to remove all the fat; a little bit is essential for flavor and moisture. But you need to get rid of the tough, rubbery membrane that runs along the back of the ribs. This membrane will prevent the ribs from becoming truly tender, creating that satisfying fall-off-the-bone texture we're aiming for.
Here's how to tackle that membrane:
- Use a sharp knife to make a small cut in the membrane near the bone end of the ribs.
- Grab a paper towel and get a firm grip on the membrane. Pull it back towards the bone end of the ribs.
- Once the membrane is loose, you can use a knife to finish removing it.
The Art of the Dry Rub
Now, here's where the fun begins: the dry rub. This is your chance to unleash your creativity. There's a whole world of dry rub possibilities, but the key is to create a balance of flavors that complement the ribs without overpowering them. You can always use store-bought rubs, but I find that making your own is a rewarding experience.
My Go-To Dry Rub
Over the years, I've developed a tried and true recipe, a blend of sweet, smoky, and savory flavors that perfectly complements the ribs:
| Ingredient | Amount |
|---|---|
| Brown Sugar | 2 tablespoons |
| Paprika | 1 tablespoon |
| Chili Powder | 1 tablespoon |
| Garlic Powder | 1 teaspoon |
| Onion Powder | 1 teaspoon |
| Salt | 1 teaspoon |
| Black Pepper | 1 teaspoon |
To apply the dry rub, simply rub it all over the ribs, making sure to cover all surfaces. You can also try using a wet rub, which is basically a dry rub mixed with a small amount of oil. This helps the rub adhere to the ribs better and can create a more flavorful crust.
(Part 3) Oven-Slowed PerfectionThe Perfect Oven Setup
Now comes the fun part: setting up the oven for your ribs. The trick is to create a low and slow environment that allows the ribs to cook slowly and evenly, breaking down the collagen and yielding melt-in-your-mouth tenderness. It's about patience and letting the oven work its magic.
Preheating the Oven
Preheat your oven to 300°F (150°C). I like to preheat for about 30 minutes to ensure the oven is nice and toasty, ready to embrace your ribs. Remember, rushing the process will only result in dry, tough ribs. Patience is key.
The Magic of Wrapping
Once the oven is preheated, you'll want to wrap your ribs. This step is crucial for achieving that fall-off-the-bone tenderness. Wrapping the ribs helps to trap the moisture and heat, allowing the meat to cook evenly and break down the collagen. It's like creating a little steam bath for your ribs.
The Wrap: Foil or Parchment?
There are two popular methods for wrapping: aluminum foil and parchment paper. I prefer parchment paper because it doesn't react with the food as aluminum foil can. Plus, it makes for easier cleanup. Either way, make sure you use a good quality, heavy-duty material to prevent tearing.
Wrapping Technique
Here's how to wrap your ribs:
- Place the ribs in a large baking dish.
- Pour about ?? cup of liquid, like apple cider, beef broth, or even beer, into the bottom of the dish. This will help create steam and keep the ribs moist.
- Wrap the ribs tightly in foil or parchment paper, sealing the edges well to prevent any steam from escaping.
Time for slow cooking
Now, it's time to let the oven work its magic. This is where you kick back, relax, and enjoy the aroma of slow-cooked ribs filling your kitchen. Depending on the size and thickness of your ribs, they'll need to cook for around 3-4 hours. Remember, the key is to cook the ribs until they're incredibly tender and the meat easily pulls away from the bones. You'll know they're ready when you can practically pick the meat off with a fork.
Check for Tenderness
You can check the ribs for tenderness after about 3 hours. You can use a meat thermometer or just try to pull a bone away from the meat. If the bone comes out easily with a slight tug, your ribs are done. If not, give them another 30-60 minutes. It's worth the extra wait for perfectly tender ribs.
(Part 4) The Finishing TouchUnwrap and Glaze
Once the ribs are tender, remove them from the oven and carefully unwrap them. You'll likely see a pool of delicious, flavorful liquid in the baking dish. This is the essence of your ribs, a symphony of flavors you'll want to preserve. It's the result of all that slow cooking and steam.
Now, it's time to add that extra touch of flavor: the glaze. A good glaze will give your ribs a beautiful sheen, a burst of flavor, and a satisfyingly sticky texture. You can use store-bought glaze, but making your own is a breeze. I love the control it gives me over the flavors.
Homemade Glaze Recipe
| Ingredient | Amount |
|---|---|
| Ketchup | ?? cup |
| Brown Sugar | ?? cup |
| Apple Cider Vinegar | 2 tablespoons |
| Worcestershire Sauce | 1 tablespoon |
| Dijon Mustard | 1 teaspoon |
| Garlic Powder | ?? teaspoon |
| Onion Powder | ?? teaspoon |
| Black Pepper | ?? teaspoon |
Combine all ingredients in a saucepan over medium heat, stirring constantly until the glaze thickens. Once the glaze is ready, brush it generously over the ribs. You can also use a basting brush or a spoon to spread the glaze evenly.
Back to the Oven
Now, it's time to give the ribs a final kiss of heat. Place the ribs back into the oven, uncovered, for about 15-20 minutes, or until the glaze is set and slightly caramelized. Keep a close eye on the ribs, as they can burn quickly. You'll know the ribs are ready when the glaze is glossy and slightly sticky. It's that final step that takes the ribs to another level.
(Part 5) Serving Time!The Big Reveal
Take those magnificent ribs out of the oven and let them rest for a few minutes before serving. This will allow the juices to redistribute and make the ribs even more tender. Now, take a deep breath, admire your creation, and prepare for a symphony of flavors that will make your taste buds dance with joy.
side dishes: The Perfect Complement
No rib feast is complete without a selection of side dishes. Here are some of my favorites that perfectly complement those tender, smoky ribs:
- Creamy Coleslaw: A classic pairing that provides a cool and refreshing counterpoint to the rich and smoky ribs.
- Baked Beans: Sweet and savory, baked beans are a perfect side dish for ribs. You can use store-bought beans or make your own. I like to add a touch of molasses for extra sweetness.
- potato salad: A hearty and comforting side dish that pairs well with ribs.
- Mac and Cheese: A cheesy and indulgent side dish that's always a crowd-pleaser.
- Cornbread: A sweet and crumbly bread that's a perfect accompaniment to ribs.
The Ultimate Rib Experience
Now, gather your loved ones, grab a plate, and savor the fruits of your labor. The tender, fall-off-the-bone ribs, the flavorful glaze, the creamy side dishes - it's a culinary experience you'll never forget. And remember, the best part is that you can customize the experience to your liking. You can experiment with different dry rubs, sauces, and side dishes to create your own unique rib masterpiece. It's about making those ribs your own.
(Part 6) FAQsWhat If My Ribs Are Too Dry?
If your ribs are a little dry, don't despair! You can always add a bit of moisture back in. Here are a few tips:
- Add More Liquid: If the ribs are still dry after the initial cooking time, add another ?? cup of liquid to the baking dish and continue cooking for another 30 minutes. This will help steam the ribs and add moisture.
- Baste More Often: If you're using a glaze, baste the ribs more frequently to keep them moist. You can also use a combination of glaze and liquid for extra moisture.
- Wrap Them Tight: Make sure the ribs are tightly wrapped in foil or parchment paper to trap the moisture and steam.
How Long Do I Need to Cook the Ribs?
The cooking time for ribs will vary depending on the size and thickness of the ribs, as well as the temperature of your oven. As a general rule, baby back ribs will cook for about 3-4 hours, while spare ribs will take about 4-5 hours. The ribs are done when they are incredibly tender and the meat easily pulls away from the bones. Don't be afraid to check them early and adjust the cooking time as needed.
Can I Cook Ribs in Advance?
Absolutely! You can cook ribs in advance and reheat them later. Simply cook the ribs as directed and store them in an airtight container in the refrigerator for up to 3 days. To reheat, simply place the ribs in a preheated oven at 300°F (150°C) for about 30 minutes, or until heated through. You can also reheat them in a slow cooker on low for a few hours, or even in the microwave. Just make sure they are heated through before serving.
What's the Best Way to Store Leftover Ribs?
Leftover ribs can be stored in the refrigerator for up to 3 days. To store them, place them in an airtight container. You can also wrap them tightly in plastic wrap or aluminum foil. When you're ready to reheat them, you can follow the tips mentioned above. Just remember, ribs are best served warm. If you're planning on freezing your ribs, wrap them tightly in plastic wrap and aluminum foil and store them in the freezer for up to 3 months. Just remember to thaw them in the refrigerator overnight before reheating.
What If My Ribs Are Still Tough After Cooking?
Sometimes, even with the best intentions and cooking methods, ribs can still be a little tough. If you've followed all the steps and your ribs are still tough, don't despair. There are a few things you can try to make them more tender.
- Shred Them: Shredding the ribs will help break down the tough fibers and make them easier to eat. You can then use the shredded ribs in sandwiches, tacos, or salads.
- Simmer Them: If you have a bit of time, you can simmer the ribs in a flavorful liquid, such as broth or sauce, to make them more tender. Just simmer the ribs over low heat for about 30 minutes, or until they are tender enough to your liking.
Experiment with Flavor
Now that you've mastered the basics of oven-slowed ribs, it's time to get creative. There are countless ways to add your own personal touch to this classic dish, making it your own.
Spice Up Your Rub
Start by experimenting with different dry rubs. You can add spices like cumin, coriander, cayenne pepper, or smoked paprika for a more robust flavor profile. You can also add herbs like rosemary, thyme, or oregano for a more aromatic and earthy flavor. The possibilities are endless!
Mix Up the Glaze
Don't be afraid to experiment with different glazes. You can add a touch of honey or maple syrup for extra sweetness, or try adding a bit of hot sauce or chili powder for a kick of heat. You can even use a fruit-based glaze, like a cherry or blackberry glaze, for a unique and flavorful twist.
Try Different Marinades
Marinating the ribs before cooking can add an extra layer of flavor and tenderness. You can use a simple marinade of soy sauce, honey, and garlic, or try a more elaborate marinade with citrus fruits, herbs, and spices. Marinating the ribs for several hours or even overnight will allow the flavors to penetrate the meat and create a delicious and tender final product.
Beyond the Oven
While oven-slowed ribs are a classic, you can also experiment with different cooking methods. You can try smoking the ribs for a rich smoky flavor, or grill them for a crispy crust and smoky aroma.
(Part 8) Ribs for Every OccasionOven-slowed ribs are a versatile dish that can be enjoyed for any occasion. From casual gatherings to special events, ribs are always a crowd-pleaser.
Casual Weekend BBQ
For a relaxed weekend barbecue, serve the ribs with classic sides like coleslaw, potato salad, and cornbread. You can even set up a self-serve rib station with a selection of sauces and toppings for guests to customize their ribs. Keep it casual, fun, and let everyone enjoy those delicious ribs.
Formal Dinner Party
For a more formal dinner party, you can present the ribs in a more elegant way. Serve them with a side of mashed potatoes, roasted vegetables, and a light salad. You can also add a touch of sophistication with a homemade glaze or sauce. Make it a memorable meal, one that everyone will be talking about.
Family Feast
For a family feast, go all out with a big pot of chili or mac and cheese. You can even try a fun twist on the classic recipe by adding a unique dry rub or sauce to your ribs. It's a great way to bring everyone together for a fun and memorable meal. Make it a celebration of family and good food.
So there you have it, my ultimate guide to tender, fall-off-the-bone oven-slowed ribs. Now, go forth and create your own rib masterpiece! Remember, it's all about experimentation and having fun in the kitchen. Who knows, you might even discover your new signature rib recipe!
Everyone is watching

How to Cook Frozen Lobster Tails Perfectly: A Step-by-Step Guide
RecipesLobster. Just the word conjures up images of lavish meals, special occasions, and a taste of luxury. But let's...

Pigs in a Blanket Cooking Time: How Long to Bake for Perfect Results
RecipesAh, pigs in a blanket. Just the name conjures up images of those delightful little parcels of crispy pastry en...

Pork Fillet Cooking Time: How Long to Cook It Perfectly
RecipesPork fillet, or tenderloin as it's sometimes called, is a real favourite in our house. It's so versatile, and...

The Ultimate Guide to Tender, Juicy Pulled Pork
RecipesRight, let's talk pulled pork. It's one of those dishes that just screams "comfort food," doesn't it? I mean...

The Ultimate Guide to Cooking Sweet Potatoes: From Roasting to Mashing
RecipesSweet potatoes. Just the name conjures up images of warm, comforting dishes, bursts of vibrant color, and a to...