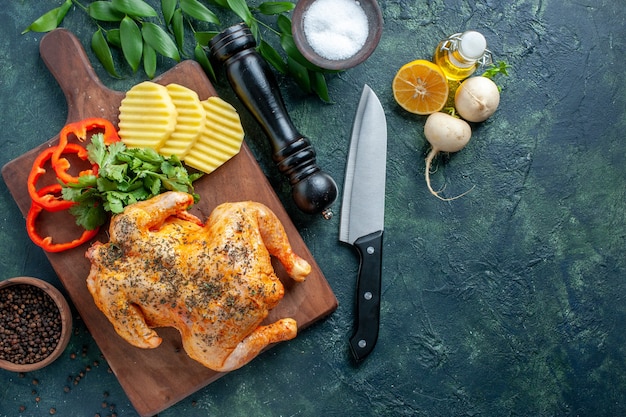
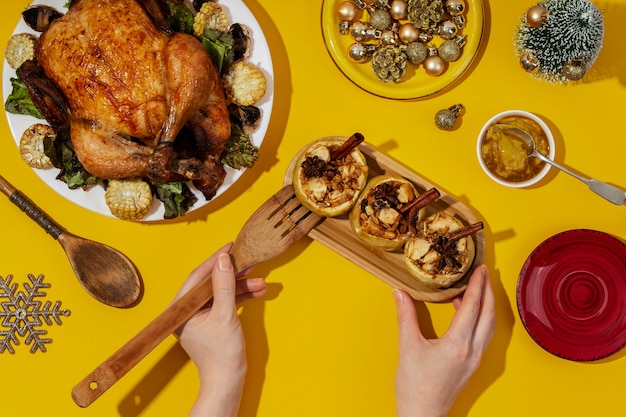
Ah, rotisserie chicken. It's a culinary staple, a weeknight hero, a party crowd-pleaser, and a champion of the leftover game. But let’s be honest, sometimes even the most straightforward dishes can feel a bit daunting, especially when you want to go beyond just "okay" and reach "oh my, that's good!" I've been making rotisserie chicken for years, and I've learned a few tricks along the way to turn this humble dish into something truly exceptional. We’re talking crispy skin, juicy meat, and a symphony of flavour that will have everyone begging for seconds – and maybe even a taste of your secret recipe.
So, gather your apron, grab a glass of something refreshing, and let's dive in! We'll cover everything from choosing the perfect chicken to mastering the art of gravy, plus some leftover magic that will make you wonder how you ever lived without it. This isn't just any rotisserie chicken guide, this is the ultimate guide, packed with tips, tricks, personal stories, and, of course, a dash of humour along the way.
Part 1: Choosing Your Weapon

The Chicken: The Star of the Show
Let's talk about the star of the show, the hero of our culinary adventure: the chicken. Now, you might think any chicken will do. But trust me, choosing the right bird is like picking the perfect lead actor for your play – it can make or break your whole performance.
First, we’re going for a whole chicken, not a cut-up one. This way, all the juices stay locked in, and it cooks more evenly. Look for a chicken that’s plump and firm, with a nice golden colour. No bruises, no cuts, and definitely no funky smells. I usually opt for a free-range bird, not only for ethical reasons but also for a more flavourful experience. It's just a little extra TLC for your meal.
Size Matters: Finding the Right Fit
Now, the size of the chicken is important. It’s all about finding the perfect balance between enough food and the potential for amazing leftovers. A smaller chicken might be perfect for a couple or a smaller family, as it will cook faster, but it won’t leave much for those delicious chicken salad sandwiches you’re craving later. A larger chicken will take longer to cook, but it'll give you enough leftovers for sandwiches, salads, soups, and maybe even some frozen chicken stock for another day.
If you’re unsure, don't be shy! Chat with the butcher at the counter. They’re experts and usually happy to offer advice based on your needs. I’ve found that a 3-4 pound chicken is the sweet spot for my family of four. It gives us enough leftovers without being overwhelming.
Beyond the Bird: Choosing Your Package
Remember, you're not just choosing the chicken, you're choosing the whole package. Take a good look at what’s inside the packaging. Does it look fresh? Is it sealed properly? Check the expiry date, too. It’s a good habit to get into, especially if you’re buying a chicken from a supermarket. You want to make sure you’re getting a quality product, not one that’s seen better days.
I've had a couple of near misses with past-their-prime chickens. Let’s just say, it wasn’t pleasant. Trust me, the extra five minutes spent checking can make a world of difference. You want to enjoy your meal, not spend it feeling a little…uncertain about what you're eating.
Part 2: The Prep Game: Gettin’ Ready to Roast

The Great Rinse: A Fresh Start
Alright, you’ve got your perfect chicken home and ready to go. The first step in our prep game is a good rinse. This washes away any impurities and gives the chicken a fresh start. I usually rinse it under cold water, making sure to get into all the nooks and crannies. It’s like a little spa treatment for your chicken before it takes centre stage!
Now, here’s the key: pat the chicken dry. You want to make sure there’s no excess water left on the skin. This is crucial for getting that beautiful crispy skin we all crave. I use paper towels, dabbing gently but firmly to make sure it’s really dry. Think of it as the finishing touch, giving your chicken a polished look before it goes on display.
The Seasoning Symphony: Adding a Touch of Magic
Now, let’s add some flavour! I like to start with a simple mix of salt and pepper, rubbed all over the chicken, including the inside cavity. This enhances the natural flavour and creates a lovely base for other seasonings. And don’t be shy with the salt! People are always afraid of salt, but it’s essential for flavour. Just be sure to season evenly and with a light touch.
Now, this is where you get creative! I love to add a few herbs like rosemary, thyme, or oregano. I’ll often toss in some garlic cloves, too. You can also use a pre-made rub or seasoning blend – just make sure to check the ingredients list and choose one you like.
I've experimented with all sorts of things over the years. One of my favourites is a lemon and herb rub, but I’ve also been known to use a spicy paprika blend, and even a smoky barbecue rub. The beauty of rotisserie chicken is its versatility – you can really experiment and find your own flavour profile!
The Inside Scoop: Secrets of the Cavity
Remember, seasoning isn’t just about the outside. The inside cavity is like a secret weapon. I always stuff the cavity with a few herbs and aromatics, like lemon wedges, onions, and celery stalks. This helps to infuse the chicken with a more intense flavour and creates a delicious aroma as it cooks. It’s a little touch that elevates the entire experience.
I even have a little trick I learned from my grandma: I’ll sometimes add a couple of tablespoons of butter to the cavity. It melts during cooking and adds a beautiful richness to the meat. Just be sure not to overdo it, or your chicken will be swimming in grease. A little goes a long way in this case!
Part 3: The Rotisserie Rules: Getting Cookin’

The Rotisserie: Your New Best Friend
Alright, now we’re getting to the fun part: the rotisserie! You probably have one nestled in your oven, just waiting to be used. Mine’s a trusty old thing, and it’s seen many a chicken come and go! It’s a simple contraption, but it’s incredibly effective. It’s all about even heat distribution and keeping the chicken rotating, which ensures that every bit of it cooks perfectly.
Setting the Stage: Oven Temperature and Timing
Before you get started, preheat your oven according to the manufacturer’s instructions. For most ovens, it's around 350 degrees fahrenheit (175 degrees Celsius). You want the oven hot enough to cook the chicken through but not so hot that it burns the outside before the inside is cooked.
Now, the cooking time depends on the size of the chicken. A 3-4 pound chicken usually takes about 1 hour and 15 minutes to 1 hour and 30 minutes. But, here’s the golden rule: always check the internal temperature with a meat thermometer to be sure it’s cooked through. The USDA recommends a minimum internal temperature of 165 degrees Fahrenheit (74 degrees Celsius). You want to make sure it’s safe to eat, but also cooked to perfection.
The Chicken’s Place: Securing Your Bird
Now, carefully slide the chicken onto the rotisserie forks. Make sure the forks are securely in place, piercing through the thickest part of the chicken’s legs and breasts. This will ensure it stays put during cooking. Remember, safety first! Always wear oven mitts when handling the hot rotisserie and chicken. And be careful not to let the chicken fall – it can be tricky to get it back on once it’s off!
The Golden Rule: Keeping an Eye on Your Bird
While your chicken is roasting, it’s important to keep an eye on it. You want to make sure the skin is getting nice and crispy, and the meat is cooking evenly. I usually check on it every 30 minutes or so, rotating it halfway through the cooking time. This ensures that all sides get exposed to the heat evenly. You can also add more seasoning or butter during this time if you’re feeling fancy!
Part 4: The Chicken’s Final Act: Rest and Carve
The Rest is Golden: Letting the Juices Redistribute
Once the chicken is cooked through, it’s important to let it rest for about 10-15 minutes before carving. This lets the juices redistribute throughout the meat, resulting in a more tender and flavorful chicken. It's like letting the chicken take a little breather after its big performance!
I usually cover the chicken loosely with some foil to keep it warm and prevent it from drying out. While it’s resting, I’ll get everything else ready, like mashed potatoes, gravy, or roasted vegetables. It’s also the perfect time to prep your cutting board and carving knife.
Carving: A Beautiful Display: The Art of the Cut
After the chicken has had its little nap, it’s time to carve it up! I like to use a sharp carving knife to make nice, clean cuts. First, I remove the legs and thighs, working my way around the bone to release the meat. Then, I’ll slice the breasts into thin pieces. You can also carve the chicken in any way you prefer, as long as it’s to your liking!
The best part of carving is the aroma! It’s like a symphony of deliciousness, with the scent of herbs, spices, and roasted chicken filling the air. It’s enough to make anyone’s mouth water! And trust me, the taste is just as good as the smell!
Part 5: The Chicken’s Sidekicks: Adding the Flavorful Touches
Gravy: The Glue That Holds It All Together
No rotisserie chicken meal is complete without gravy! It’s the perfect way to bring everything together and add a touch of richness and flavour. I usually make my gravy using the pan drippings from the chicken. Just make sure to strain them through a fine-mesh sieve to remove any bits and pieces.
My go-to gravy recipe is a simple one, using flour, butter, and chicken broth. I sauté the flour in butter to create a roux, then slowly whisk in the chicken broth until it thickens. I’ll often add a few tablespoons of pan drippings to the gravy for extra flavour. It’s just like magic – the drippings transform the gravy into something truly special!
Sides Galore: The Ultimate Rotisserie Chicken Experience
Of course, rotisserie chicken is great on its own, but it also pairs perfectly with all sorts of sides. I’m a big fan of roasted vegetables, like potatoes, carrots, and asparagus. They soak up the juices from the chicken and become extra flavorful.
Mashed potatoes are another classic side dish for rotisserie chicken. They’re comforting, creamy, and the perfect accompaniment for the juicy chicken. You can also serve a simple salad, like a green salad or a coleslaw.
And don’t forget about rice! It’s a versatile side dish that goes well with any kind of chicken. I love to make a simple pilaf with onions, garlic, and herbs. Or, you can get fancy and serve a saffron rice.
The Ultimate Rotisserie Chicken Spread: A Feast for the Senses
For a real feast, you can put together a full spread featuring all of your favorite rotisserie chicken sides. Imagine a table laden with roasted vegetables, mashed potatoes, gravy, bread rolls, and, of course, a beautiful rotisserie chicken! It’s a meal that’s sure to impress your guests, and it’s perfect for a family gathering, a potluck, or even just a casual dinner for two.
Part 6: The Art of the Leftover: Making the Most of Your Bounty
Leftover Love: A Culinary Treasure
Oh, the joy of leftovers! Rotisserie chicken leftovers are practically a gift from the culinary gods. They’re so versatile and can be used in so many different ways. It’s like a blank canvas for your culinary creativity!
The Classic Chicken Sandwich: A Timeless Treat
A classic for a reason, the chicken sandwich is a simple and delicious way to use up leftover rotisserie chicken. Just pile some shredded chicken on a toasted bun, add some mayonnaise, lettuce, and tomato, and you’ve got yourself a perfect lunch or dinner. I love to add some roasted vegetables to mine for an extra flavour boost. And don’t forget the pickles – they’re a must-have!
chicken salad: A Cool and Creamy Delight
Chicken salad is another excellent way to use up leftover chicken. Just mix shredded chicken with mayonnaise, celery, onion, and your favourite seasonings. It’s a great choice for sandwiches, wraps, or even a light salad. You can also add some chopped nuts or dried fruit for extra flavour and texture. I’ve even been known to add a dollop of Dijon mustard for a bit of a kick!
Chicken Soup: A Warm and Comforting Cure-All
When the weather turns chilly, there’s nothing more comforting than a bowl of homemade chicken soup. And with leftover rotisserie chicken, it’s easier than ever to whip up a delicious batch. I simply add the shredded chicken to a pot of broth, along with chopped vegetables like carrots, celery, and onions. Then, I simmer it for about 30 minutes until the vegetables are tender. You can even add some noodles or rice for a more substantial meal.
Beyond the Basics: Get Creative with Your Leftovers
But don’t stop there! You can use leftover rotisserie chicken in countless other ways. It’s a great addition to tacos, burritos, salads, pasta dishes, and even stir-fries. The possibilities are endless! Just get creative and experiment with different flavours and combinations. You might be surprised at what you come up with!
Part 7: FAQs: Solving the Rotisserie Chicken Mysteries
1. How long can I store leftover rotisserie chicken in the fridge?
Leftover rotisserie chicken can be stored in the refrigerator for up to 3-4 days. Make sure to store it in an airtight container to prevent it from drying out.
2. Can I freeze leftover rotisserie chicken?
Yes, you can freeze leftover rotisserie chicken for up to 2-3 months. Wrap it tightly in plastic wrap or aluminum foil and store it in a freezer-safe container or bag. When you’re ready to use it, thaw it in the refrigerator overnight before reheating.
3. How do I reheat leftover rotisserie chicken?
You can reheat leftover rotisserie chicken in the oven, microwave, or on the stovetop. If you’re reheating it in the oven, preheat the oven to 350 degrees Fahrenheit (175 degrees Celsius) and bake for about 15 minutes. For the microwave, place the chicken on a microwave-safe dish and heat on high for about 1-2 minutes. To reheat on the stovetop, place the chicken in a skillet with a little bit of broth or water and simmer for about 5 minutes.
4. What are some tips for getting crispy skin on my rotisserie chicken?
Here are a few tips for getting that perfect crispy skin:
- Pat the chicken dry with paper towels before seasoning.
- Roast the chicken at a high temperature, around 350 degrees Fahrenheit (175 degrees Celsius).
- Avoid overcrowding the rotisserie by cooking one chicken at a time.
- Don’t baste the chicken with liquid, as this will prevent the skin from crisping up.
5. What can I do if the chicken is not cooked through?
If the chicken is not cooked through, you can continue roasting it until it reaches the desired internal temperature. However, if it’s already overcooked, there’s not much you can do. Just be sure to check the internal temperature of the chicken with a meat thermometer before you serve it to make sure it’s cooked through.
Part 8: A Final Word: The End of Our Journey (For Now)
And there you have it, folks! My ultimate guide to rotisserie chicken, from choosing the perfect bird to making the most of those delicious leftovers. It’s a dish that’s both simple and satisfying, and it’s always a crowd-pleaser. So, next time you’re looking for a tasty and easy meal, give rotisserie chicken a try. You won’t be disappointed!
And remember, there’s no right or wrong way to make rotisserie chicken. It’s all about experimentation and finding what works best for you. So, go ahead, get creative, and have fun with it! Happy cooking!
But wait, there's more! Want to make your rotisserie chicken even more impressive? Here's a bonus tip: try making a simple pan sauce by deglazing the roasting pan with some wine or broth. It's a quick and easy way to add another layer of flavour to your meal.
Everyone is watching

How to Cook Frozen Lobster Tails Perfectly: A Step-by-Step Guide
RecipesLobster. Just the word conjures up images of lavish meals, special occasions, and a taste of luxury. But let's...

Pigs in a Blanket Cooking Time: How Long to Bake for Perfect Results
RecipesAh, pigs in a blanket. Just the name conjures up images of those delightful little parcels of crispy pastry en...

Pork Fillet Cooking Time: How Long to Cook It Perfectly
RecipesPork fillet, or tenderloin as it's sometimes called, is a real favourite in our house. It's so versatile, and...

The Ultimate Guide to Cooking Delicious Frankfurters
RecipesLet's face it, we all love a good frankfurter. It's a classic, simple, and always satisfying. But let's be rea...

Wolf Meat Recipes: A Guide to Cooking Wild Game
RecipesLet's be honest, you don't see wolf meat at your local butcher shop every day. It's a bit of a wild card, but ...
