You know that feeling – you see those mouthwatering pictures of golden-brown mushrooms glistening in a pan, and you think, "I can do that." And you're right, you absolutely can. But like anything worth doing, it takes a little knowledge and a bit of practice to get those perfect results. I've been there – I've steamed them into a soggy mess, fried them to a crispy oblivion, and even managed to burn them to a charcoal crisp. But, trust me, through trial and error (and a lot of taste testing, of course!), I've finally cracked the code to achieving perfectly sauteed mushrooms. And let me tell you, once you’ve tasted them, you’ll never go back.
This isn't just about getting them cooked, folks. This is about unlocking the full potential of these little fungal wonders. This is about transforming them from simple side dish to culinary star, a flavor-bomb that can elevate any meal. So, buckle up and let’s dive in!
(Part 1) Mushroom Selection: Choosing Your Stars
The first step in your mushroom journey is choosing the right ingredients. Think of it like casting a film – you need to select the perfect actors for your role. In this case, the actors are your mushrooms, and the role is "deliciously sauteed."
The Big Players:
- Button Mushrooms: These are the classic choice, readily available and perfect for beginners. They’re sturdy and hold their shape well when sauteed. Plus, they have a mild, earthy flavor that works with almost anything. Think of them as the versatile, reliable actors who can play a variety of roles.
- cremini mushrooms: These guys are a step up in flavor from button mushrooms. They're darker, meatier, and boast a more robust, earthy taste that holds its own against bold flavors. Imagine them as the character actors, bringing a depth of flavor and a hint of drama to your culinary stage.
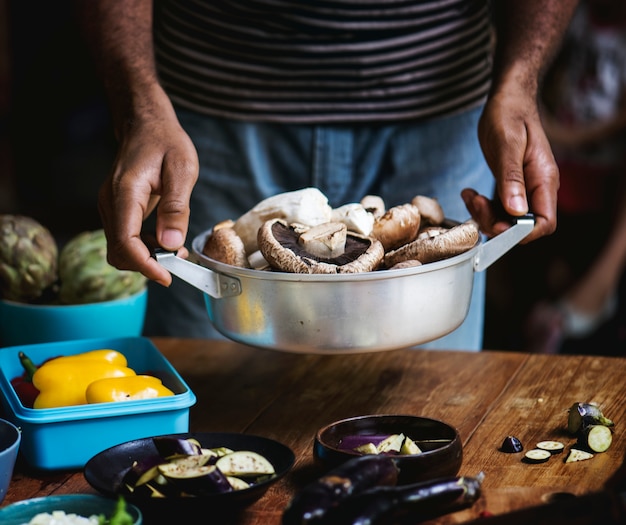
- Portobello Mushrooms: These are the heavyweights of the mushroom world. They're massive, with thick, meaty caps and a deep, savory flavor. They’re great for grilling or stuffing, and their rich flavor works wonderfully in a saute. Consider them the leading actors, commanding the stage with their presence and delivering a powerful performance.
The Supporting Cast:
Don’t be afraid to experiment with other varieties!
- Shiitake Mushrooms: With their distinctive woodsy aroma and chewy texture, shiitake mushrooms add a unique dimension to your saute. They're like the quirky, eccentric characters that bring a touch of whimsy and intrigue to the story.
- Oyster Mushrooms: These delicate, fan-shaped mushrooms have a subtle, sweet flavor and a tender texture. They’re a good choice for adding a touch of elegance to your dish. Picture them as the refined, sophisticated actors, adding a touch of grace and elegance to the ensemble.
- Enoki Mushrooms: These long, thin, white mushrooms are a fun addition to your saute. They have a mild flavor and a satisfyingly crunchy texture. Think of them as the comedic relief, adding a touch of lightness and whimsy to the performance.
Fresh is Best:
No matter which mushrooms you choose, always opt for fresh ones. Look for mushrooms that are firm, have no signs of mold, and smell earthy and fresh. Avoid mushrooms that are soft, shriveled, or have dark spots. And remember, just like with any other ingredient, the quality of your mushrooms will have a direct impact on the final flavor. So, invest in good quality mushrooms for the best results. Think of them as the "costumes" of your culinary masterpiece – they'll set the tone and impact the overall look and feel of your dish.
(Part 2) Preparing Your Stage: Cleaning and Prepping
Now that you’ve chosen your actors, it’s time to prepare the stage. In this case, the stage is your pan and your mushrooms need to be ready to shine.
Cleaning Up:
Mushrooms are a bit like little sponges, soaking up moisture from their environment. So, it’s essential to clean them properly before cooking. Don’t worry, this doesn’t have to be a complicated process.
- A Gentle Touch: Mushrooms are delicate, so avoid soaking them in water. Instead, use a damp paper towel or a mushroom brush to gently remove any dirt or debris.
- The Paper Towel Trick: If your mushrooms are particularly dirty, you can wipe them clean with a damp paper towel and then dry them with a clean paper towel.
Setting the Stage:
Once your mushrooms are clean, you need to prep them for cooking. Again, it’s all about getting them ready to shine.
- Slicing and Dicing: How you slice and dice your mushrooms will affect their cooking time and texture. For thin slices, I recommend using a sharp knife and making slices about ?? inch thick. If you want them to hold their shape, slice them into thicker pieces, about ?? inch thick.
- Keeping it Together: Some mushrooms, like portobellos, are best cooked whole or in large chunks. This helps retain their juicy, flavorful center.
- Smaller is Better: For a more even cook, consider separating large mushrooms into smaller pieces.
You can also experiment with different shapes and sizes for visual appeal. Just remember, the key is to cut your mushrooms consistently, so they cook evenly. It’s like the “set design” of your dish - a consistent approach to prep ensures a more visually appealing and harmonious result.
(Part 3) Choosing Your Tools: The Pan and the Heat
Now, let’s talk about the tools of the trade. The right pan and the right heat are essential for achieving perfectly sauteed mushrooms. Think of them as the director and the lighting crew for your culinary masterpiece.
The Perfect Pan:
I find a cast iron skillet is a great choice for sauteing mushrooms. The heavy bottom helps distribute heat evenly, and the cast iron’s natural non-stick properties prevent the mushrooms from sticking. Plus, it adds a touch of rustic charm to your kitchen. However, any sturdy, oven-safe skillet will do the trick. Just make sure it’s large enough to accommodate your mushrooms without overcrowding them. Overcrowding will steam them instead of sauteing them, and nobody wants that!
The Heat is On:
When it comes to heat, medium-high is the sweet spot for sauteing mushrooms. It’s hot enough to create a nice sear on the outside while allowing the mushrooms to cook through without burning. I always use my trusty kitchen thermometer to make sure the pan is heated to the right temperature, which is around 350°F (175°C). But if you don’t have a thermometer, just let the pan heat up for a few minutes until it’s hot to the touch. You’ll be able to tell it’s ready when a drop of water sizzles and evaporates quickly when placed in the pan. The perfect heat is like the “lighting” for your culinary masterpiece – it sets the stage for the transformation to happen.
(Part 4) The Sauteing Technique: A Step-by-Step Guide
You've chosen your mushrooms, you’ve prepped them, and you’ve got your pan and heat ready to go. Now it's time for the main event: sauteing! This is where the magic happens, where your mushrooms transform from humble ingredients to flavor bombs.
Step 1: The Oil of Choice:
Start by adding a generous tablespoon or two of your chosen oil to the hot pan. I usually opt for olive oil, but avocado oil or grapeseed oil are good choices too. Choose an oil with a high smoke point, which means it can handle high heat without burning. Think of the oil as the “makeup” for your mushrooms – it helps to create a beautiful golden-brown hue and adds to the overall flavor.
Step 2: The Big Reveal:
Once the oil is shimmering, gently add your prepped mushrooms to the pan in a single layer. Don’t overcrowd the pan, or the mushrooms will steam instead of saute. If you need to, work in batches. This step is like the “opening scene” of your dish – introducing the main character (the mushrooms) to the stage, allowing them to shine in their own space.
Step 3: The Sear:
Let the mushrooms cook undisturbed for about 3-4 minutes, or until they develop a golden-brown crust on the bottom. Resist the urge to stir them too early, as this will prevent them from browning properly. This is like the “build-up” to the climax, creating anticipation and allowing the mushrooms to develop their flavor and texture.
Step 4: The Toss:
After a few minutes, gently toss the mushrooms with a spatula to cook the other sides. Don’t overcook them at this stage, you want them to have a nice bite. You’ll be able to tell they’re ready when they’ve released most of their moisture and are starting to brown. This is like the “turning point” of the story, revealing the full depth of the mushrooms and creating a satisfying crunch.
Step 5: Salt and Pepper:
Season the mushrooms generously with salt and freshly ground black pepper. Taste them and adjust the seasoning to your liking. Remember, salt is your friend when it comes to cooking mushrooms, so don’t be afraid to add a pinch or two. Seasoning is like the “dialogue” of your dish – it adds depth and dimension to the overall flavor profile.
Step 6: The Finishing Touches:
Once your mushrooms are cooked through, you can add any other ingredients you like to your saute. Think garlic, onions, herbs, spices, or a splash of wine or broth. Let them cook for a minute or two until everything is heated through and the flavors have melded together. These are like the “supporting characters” – they add complexity and nuance to the overall story.
(Part 5) Cooking Time: Knowing When They're Ready
How long you cook your mushrooms will depend on the type and size you've chosen. Here's a general guide:
Mushroom Cook Times:
| Mushroom Type | Cook Time |
|---|---|
| Button Mushrooms (sliced) | 5-7 minutes |
| Cremini Mushrooms (sliced) | 7-9 minutes |
| Portobello Mushrooms (sliced) | 10-12 minutes |
| Shiitake Mushrooms (sliced) | 5-7 minutes |
| Oyster Mushrooms (sliced) | 4-6 minutes |
| Enoki Mushrooms (whole) | 2-3 minutes |
It's important to note that these are just guidelines. The best way to know if your mushrooms are done is to taste them. They should be tender, but still have a slight bite. And they should have a beautiful golden-brown color. Think of this as the "post-production" process – checking for quality and making sure your dish is ready for the big reveal.
(Part 6) The Art of the Saute: Tips and Tricks
So, you’re ready to dive into the world of sauteing mushrooms? Here are a few of my go-to tips and tricks to help you achieve perfection:
Don't Overcrowd the Pan:
Overcrowding the pan will steam the mushrooms instead of sauteing them. This will result in soggy, flavorless mushrooms. Work in batches if necessary. Think of this as the “set design” – too many actors on stage at once can make it feel cluttered and chaotic.
Flip Those Mushrooms:
Don't be afraid to flip the mushrooms while they’re cooking. This will ensure they cook evenly on all sides. But don't flip them too often, as this can prevent them from browning properly. This is like the “camera work” – moving the focus around to capture all the different aspects of the performance.
Don't Be Afraid of the Salt:
Salt helps to draw out the moisture from the mushrooms, resulting in a more flavorful saute. Don’t be afraid to season generously. Salt is like the “soundtrack” of your dish – it enhances the flavor and brings everything together.
A Splash of Wine or Broth:
Adding a splash of wine or broth to your saute can add a depth of flavor and help deglaze the pan. Just make sure to let it reduce a bit before adding your mushrooms. This is like a “special effects” moment – it adds a touch of magic and complexity to the overall flavor profile.
The Power of Herbs and Spices:
Mushrooms love herbs and spices! Think thyme, rosemary, garlic, parsley, or chili flakes. Experiment and see what you like best. These are like the “costumes” of your dish – they add a touch of personality and flair to the overall performance.
Save the Moisture:
The liquid that mushrooms release during cooking is packed with flavor. Don't throw it away! You can use it to make a delicious sauce or gravy. This is like the “outtakes” – there's often a lot of hidden treasure in the extras that can be used to create something truly special.
(Part 7) Mushroom Saute Variations: From Simple to Spectacular
Once you’ve mastered the basic technique, you can start experimenting with different flavor combinations. The world of mushroom saute is your oyster (pun intended!), so go wild and explore your culinary creativity.
Simple Saute:
This is a classic for a reason. Simply saute your mushrooms with butter, salt, and pepper. You can add a squeeze of lemon juice at the end for a touch of brightness. It’s like the “one-act play” – simple, elegant, and always satisfying.
Garlic and Herb Saute:
This is a flavor-packed combination. Saute your mushrooms with olive oil, garlic, fresh thyme, and rosemary. Season with salt and pepper. It’s like a “romantic comedy” – full of warmth, flavor, and a touch of intrigue.
Creamy Mushroom Saute:
Add a touch of luxury to your saute with a touch of cream. Saute your mushrooms with butter, garlic, and heavy cream. Season with salt, pepper, and a pinch of nutmeg. This is like a “period drama” – rich, luxurious, and full of depth.
Mushroom and Onion Saute:
This is a classic pairing. Saute your mushrooms with onions, olive oil, salt, and pepper. You can add a splash of balsamic vinegar for a tangy twist. It’s like a “buddy cop movie” – a dynamic duo that works together perfectly.
Spicy Mushroom Saute:
For a kick of heat, add some chili flakes to your saute. Saute your mushrooms with olive oil, garlic, chili flakes, and fresh cilantro. Season with salt and pepper. This is like an “action thriller” – full of excitement, heat, and a hint of danger.
Mushroom and Spinach Saute:
This is a healthy and delicious combination. Saute your mushrooms with spinach, garlic, olive oil, salt, and pepper. Add a squeeze of lemon juice at the end. It’s like a “feel-good movie” – light, refreshing, and satisfying.
(Part 8) Serving Your Saute: The Final Act
Your mushrooms are cooked to perfection, and now it’s time to present them to the world. You’ve worked hard to create this culinary masterpiece, so let’s give it the presentation it deserves.
A Delicious Accompaniment:
Perfectly sauteed mushrooms make a fantastic side dish for any meal. They're great with steak, chicken, fish, or pasta. You can also add them to soups, stews, and casseroles. This is like the “supporting role” – a versatile and delicious addition to any meal.
A Star of the Show:
Don't be afraid to let your sauteed mushrooms take center stage. They’re delicious enough to be enjoyed on their own. Serve them as a topping for salads, sandwiches, or pizzas. This is the “leading role” – a star in their own right, ready to steal the show with their flavor and texture.
A Touch of Creativity:
Get creative with your presentation! You can serve your mushrooms on a bed of polenta, mashed potatoes, or rice. Or, try them in a baguette with a dollop of crème fraiche. This is the “director’s cut” – a chance to showcase your creativity and add a personal touch.
A Final Note:
Remember, the key to perfectly sauteed mushrooms is to keep it simple and let the mushrooms shine. Don't overcook them, and don't be afraid to experiment with different flavors and ingredients. And most importantly, have fun and enjoy the process! This is the “after-party” – a celebration of your culinary achievement, a chance to relax and savor the fruits of your labor.
FAQs
You've got questions? I've got answers!
- What's the best way to store mushrooms? Mushrooms should be stored in a paper bag or a perforated plastic bag in the refrigerator. Avoid storing them in airtight containers, as this can cause them to spoil. Think of this like a "dressing room" for your mushrooms – a cool, dark, and breathable space where they can stay fresh and ready for their performance.
- Can I freeze mushrooms? Yes, you can freeze mushrooms. Wash and dry them, then slice or dice them. Spread them out on a baking sheet and freeze them until they are solid. Then, transfer them to a freezer-safe bag. This is like “preserving” your mushrooms for a future performance – a way to enjoy their deliciousness even when they're not in season.
- Why are my mushrooms turning brown? Mushrooms naturally oxidize when they are exposed to air. This can make them turn brown. To prevent this, you can toss them in a little lemon juice or vinegar. Think of this as a “costume change” – a quick trick to keep them looking their best.
- What should I do if my mushrooms are too watery? If your mushrooms are releasing too much moisture, you can add a tablespoon or two of cornstarch to your pan. The cornstarch will absorb the excess moisture and help the mushrooms cook faster. This is like the “stagehand” – a quick fix to ensure a smooth and efficient performance.
- What can I do with leftover mushrooms? Leftover mushrooms can be used in a variety of dishes. Add them to soups, stews, casseroles, or even omelets. You can also freeze them for later use. This is like the “encore” – a chance to repurpose and reimagine your culinary creation, extending the life of your performance.
Everyone is watching

How to Cook Frozen Lobster Tails Perfectly: A Step-by-Step Guide
RecipesLobster. Just the word conjures up images of lavish meals, special occasions, and a taste of luxury. But let's...

Pigs in a Blanket Cooking Time: How Long to Bake for Perfect Results
RecipesAh, pigs in a blanket. Just the name conjures up images of those delightful little parcels of crispy pastry en...

Pork Fillet Cooking Time: How Long to Cook It Perfectly
RecipesPork fillet, or tenderloin as it's sometimes called, is a real favourite in our house. It's so versatile, and...

The Ultimate Guide to Tender, Juicy Pulled Pork
RecipesRight, let's talk pulled pork. It's one of those dishes that just screams "comfort food," doesn't it? I mean...

The Ultimate Guide to Cooking Delicious Frankfurters
RecipesLet's face it, we all love a good frankfurter. It's a classic, simple, and always satisfying. But let's be rea...