You know that feeling when you're craving a comforting, delicious meal, but you don't want to spend hours in the kitchen? That's where cornish hens come in. These petite, flavorful birds are perfect for a cozy dinner for two or a charming weeknight meal for a small group. They cook quickly, leaving you with more time to relax and enjoy the company. But let's be honest, achieving that perfect crispy skin and juicy meat can feel like a culinary gamble. I've been there - a few too many dry, rubbery Cornish hens have crossed my path.
But fear not, my fellow foodies! After countless experiments and a few burnt offerings, I've finally cracked the code. This guide is your ultimate resource for mastering the art of oven-roasted cornish hen, from choosing the perfect bird to creating a mouthwatering sauce. I'll share all my secrets, ensuring you impress your guests (and yourself) with a truly delicious, melt-in-your-mouth Cornish hen. Ready to embark on this culinary journey? Let's get started!
(Part 1) Selecting the perfect cornish hen

Finding the Right Bird: Local and Fresh
First things first, you need to pick the right Cornish hen. I'm a strong advocate for supporting local farmers whenever possible. Seek them out at farmers markets or your local butcher. They often have the freshest, most flavorful poultry, and you might even find them already trussed, saving you a step! But if you're at the supermarket, look for hens that are plump, have smooth skin, and are free of any odd discoloration. A hen that feels heavy for its size is a good sign. Trust me, weight matters!
Size Matters: Just Right for Any Occasion
The average Cornish hen weighs around 1.5 pounds, making it perfect for a single serving or a meal for two. If you're feeding a larger crowd, you can always grab a couple. Remember to adjust the cooking time accordingly. Don't be afraid to ask your butcher for advice. They're usually happy to help you choose the right size and even truss it for you, especially if you're not a pro at it.
(Part 2) Preparing the Hen: A Step-by-Step Guide

1. The Pat Down: Ensuring Crispy Skin
The first step is to rinse the hen thoroughly under cold water. Pat it dry using paper towels, ensuring you remove any excess moisture. This is crucial for achieving that coveted crispy skin.
2. The Trussing Technique: Even Cooking and Aesthetic Appeal
Here's where things can get a little tricky, but I assure you, it's well worth the effort. Trussing, which involves tying the legs and wings of the hen, helps it cook evenly. It also prevents the bird from splaying out in the roasting pan, leading to uneven browning and a less appealing presentation. If you're a seasoned cook and comfortable with trussing, go for it! But if you're a beginner like me, don't stress. Numerous online resources and videos can walk you through the process step by step.
3. The Seasoning Savvy: Flavorful and Simple
Now comes the fun part – seasoning! I love using a simple combination of salt, pepper, and herbs like thyme, rosemary, or sage. You can also experiment with garlic powder, paprika, or even a touch of citrus zest. But remember, less is more when it comes to seasoning. You don't want to overshadow the natural flavor of the chicken. For an extra layer of texture and flavor, use a mix of coarse salt and fine salt. The coarse salt adds a pleasant crunch, while the fine salt penetrates the meat better.
4. The Butter Bliss: Richness and Moisture
To elevate your Cornish hen to the next level, melt some butter and brush it generously all over the bird. This keeps the skin moist and tender while it roasts, adding a rich, buttery flavor. For an extra flavor boost, I like to add a few cloves of garlic to the butter before brushing.
(Part 3) The Roasting Ritual: Bringing Your Hen to Perfection

1. Preheating Perfection: Achieving Crispy Skin
Preheat your oven to 400°F (200°C). You want it nice and hot to ensure that the skin gets that perfect crispy texture.
2. The Roasting Pan Ready: Ensuring Even Cooking
Place the Cornish hen in a roasting pan. You can line it with foil for easier cleanup, but I prefer roasting it directly on the pan. It allows the chicken to brown beautifully and develop a nice crispy crust. Don't forget to add a little bit of water or chicken broth to the bottom of the pan. This creates steam, helping to keep the hen moist during roasting.
3. Time to Roast: A Watchful Eye on Doneness
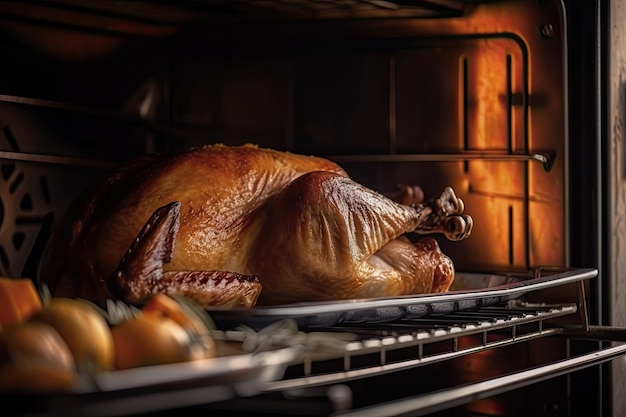
Now comes the crucial part – cooking time. It depends on the size of the hen, but typically, you'll need about 40-50 minutes. Keep a close eye on it and ensure it reaches an internal temperature of 165°F (74°C) in the thickest part of the thigh. You can use a meat thermometer to check the temperature. You can also judge the doneness by the skin's browning. If it's nicely browned and has a crispy texture, you're good to go.
4. Rest, Relax, and Enjoy: Allowing Juices to Redistribute
Once the hen is cooked, let it rest for about 10 minutes before carving. This allows the juices to redistribute throughout the meat, resulting in a much juicier and tastier bird. While it's resting, you can make a simple pan sauce from the drippings in the roasting pan. Just add a little bit of butter and flour, whisking until smooth. Then, add a splash of chicken broth or white wine and simmer until it thickens. This sauce is absolutely divine with the Cornish hen.
(Part 4) Mastering the Crispy Skin: Tips and Tricks
1. The Dry-Brine Boost: Enhancing Flavor and Crispness
For extra crispy skin, try a dry brine. It's basically a salt rub that you apply to the hen a few hours (or even overnight) before roasting. The salt draws moisture out of the meat, then re-absorbs it, making the hen more flavorful and the skin crispier. To dry brine, simply rub the hen with a mixture of salt and herbs, then refrigerate it uncovered for a few hours.
2. The High-Heat Hack: Quick Browning for Crispy Skin
Roast your Cornish hen at a high temperature (around 400°F) for the first 20 minutes or so. This gives the skin a head start on browning. You can then lower the temperature to 350°F and continue roasting until it's cooked through.
3. The Roasting Rack Revelation: Air Circulation for Crispy Skin
Use a roasting rack to lift the hen off the bottom of the pan. This allows air to circulate around the bird, helping to create a crispy skin. It also ensures that the bottom of the hen doesn't get soggy.
4. The Skin-Side Up Strategy: Even Browning and Crispness
Roast the hen skin-side up for the majority of the cooking time. This helps ensure that the skin gets a nice and even browning. But, in the last 10-15 minutes of cooking, you can flip it over to brown the other side, if you like.
(Part 5) Adding Flavor: The Sauce Situation
1. The Pan Sauce Power: Elevating Your Dish
As I mentioned earlier, making a pan sauce is a must! It's incredibly simple yet elevates the dish to a whole new level. It takes advantage of all those delicious drippings in the roasting pan. To create a pan sauce, deglaze the pan with a splash of wine or broth, then whisk in some butter and flour until smooth. Simmer until the sauce thickens, and you've got a flavor-packed companion for your Cornish hen.
2. The Herb Infusions: Adding Aromatic Depth
Fresh herbs are a fantastic way to add flavor to your Cornish hen. I love to stuff a sprig of rosemary or thyme under the skin. You can also add a few sprigs to the roasting pan for extra aroma and flavor.
3. The Citrus Zest Zing: Brightening Your Dish
A little bit of citrus zest can really brighten up the flavors of your Cornish hen. I like to use lemon zest, but orange or grapefruit zest can also be delicious. Just be sure to use it sparingly, as you don't want to overpower the chicken.
(Part 6) side dish Symphony: Completing the Meal
1. The Classic Combo: Roasted Vegetables for a Hearty Meal
A classic side dish pairing for Cornish hen is roasted vegetables. I love to roast potatoes, carrots, and onions together. They get nice and soft on the inside and crispy on the outside, and they soak up all the delicious flavors from the pan drippings.
2. The Green Delights: A Lighter Side for Balance
For a lighter side, try a green salad. A simple salad with mixed greens, a vinaigrette dressing, and maybe some crumbled cheese is a perfect complement to the rich flavor of the Cornish hen.
3. The Carb Comfort: Rice or Pasta for Added Texture
You can also serve your Cornish hen with a side of rice or pasta. I like to use a simple wild rice blend or a bed of angel hair pasta tossed with a little olive oil and Parmesan cheese.
(Part 7) Serving Up Success: A Presentation That Impresses
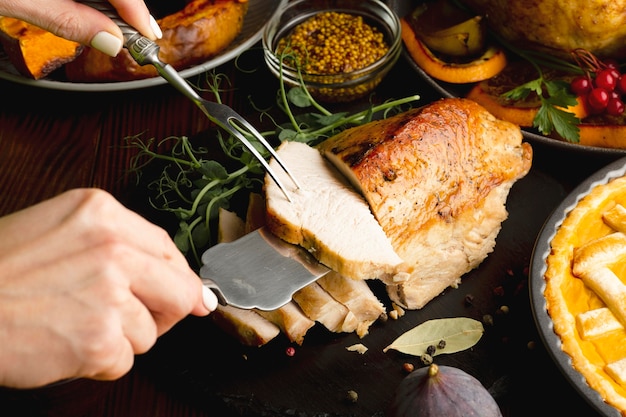
Now, here's how I like to serve my Cornish hen: I carve it up and arrange the pieces on a platter, then add a generous amount of that luscious pan sauce. It's a real showstopper, trust me. Serve it with your chosen side dishes, and let your guests dig in.
(Part 8) Leftover Love: Making the Most of Your Meal
You're probably not going to have much leftover, but if you do, it makes an amazing salad topping or a delicious sandwich filling. I like to slice the leftover hen and add it to a bed of greens with some roasted vegetables and a light vinaigrette.
(Part 9) The Cornish Hen Cookbook: Recipes to Inspire Your Culinary Journey
Table of Common cornish hen recipes: A World of Flavors
Here's a table highlighting some common cornish hen recipes to inspire your next culinary adventure:
| Recipe Name | Description | Side Dish Suggestions |
|---|---|---|
| Classic Roasted Cornish Hen | A simple recipe featuring a seasoned hen roasted to perfection. | Roasted vegetables, green salad, wild rice |
| Lemon Herb Cornish Hen | A bright and flavorful recipe with a citrusy touch. | Roasted potatoes with rosemary, couscous salad |
| Honey Garlic Cornish Hen | A sweet and savory recipe with a sticky glaze. | Glazed carrots, mashed sweet potatoes |
| Spiced Cornish Hen | A recipe with warm spices for a unique flavor profile. | Saffron rice, roasted butternut squash |
| Cornish Hen with Apricots | A recipe featuring sweet and savory flavors with dried apricots. | Wild rice pilaf, asparagus |
(Part 10) FAQs: Your Cornish Hen Questions Answered
1. How do I know if the Cornish hen is cooked?
The best way to check if your Cornish hen is cooked is to use a meat thermometer. Insert it into the thickest part of the thigh, and it should reach an internal temperature of 165°F (74°C). You can also check the skin to see if it’s nicely browned and crispy.
2. What if the skin isn't getting crispy?
If the skin isn’t getting crispy, try roasting the hen at a higher temperature for the first 20 minutes or so. You can also use a roasting rack to allow air to circulate around the bird. And don’t be afraid to give the skin a little pat with a paper towel to remove any excess moisture.
3. Can I freeze Cornish hen?
Yes, you can freeze Cornish hens. Wrap them tightly in plastic wrap and then place them in a freezer-safe bag. They can be frozen for up to 3 months. When ready to use, thaw them in the refrigerator overnight.
4. What if my Cornish hen is too salty?
If you find that your Cornish hen is too salty, you can try soaking it in cold water for about 30 minutes before roasting. This will help to remove some of the saltiness. You can also add a little bit of sugar to the pan drippings to help balance out the saltiness.
5. Can I roast Cornish hen with other poultry?
Yes, you can! You can roast Cornish hen with other poultry, such as chicken breasts or drumsticks. Just make sure to adjust the cooking time accordingly. For example, if you're roasting cornish hen with chicken breasts, you'll need to cook it for a shorter amount of time, as chicken breasts cook faster than Cornish hen.
So, there you have it. My ultimate guide to oven-roasted Cornish hen. Whether you’re a seasoned chef or just starting out in the kitchen, these tips and tricks will help you achieve crispy skin, tender meat, and a truly delicious meal. Go on, give it a try! You won’t regret it.
Everyone is watching

How to Cook Frozen Lobster Tails Perfectly: A Step-by-Step Guide
RecipesLobster. Just the word conjures up images of lavish meals, special occasions, and a taste of luxury. But let's...

Pigs in a Blanket Cooking Time: How Long to Bake for Perfect Results
RecipesAh, pigs in a blanket. Just the name conjures up images of those delightful little parcels of crispy pastry en...

Pork Fillet Cooking Time: How Long to Cook It Perfectly
RecipesPork fillet, or tenderloin as it's sometimes called, is a real favourite in our house. It's so versatile, and...

The Ultimate Guide to Cooking Delicious Frankfurters
RecipesLet's face it, we all love a good frankfurter. It's a classic, simple, and always satisfying. But let's be rea...

Wolf Meat Recipes: A Guide to Cooking Wild Game
RecipesLet's be honest, you don't see wolf meat at your local butcher shop every day. It's a bit of a wild card, but ...
