You've seen those drool-worthy photos of perfectly cooked brisket, with its glistening fat cap and melt-in-your-mouth tenderness. Maybe you've even heard the stories, whispered in hushed tones, about the sheer joy of biting into a perfectly smoked brisket. Well, let me tell you, it's all true! I've been obsessed with brisket for years, experimenting with different techniques, learning from my mistakes, and savoring every delicious bite. Now, I want to share my secrets with you, to guide you on your own journey to brisket perfection.
We're going to embark on a comprehensive exploration of everything brisket. We'll delve into the art of choosing the perfect cut, master the low-and-slow oven roasting method, and unlock the secrets of achieving that prized, crispy bark. We'll also explore different rub and sauce combinations to elevate your brisket from good to absolutely phenomenal. Get ready to take notes, because this is your ultimate guide to creating a brisket that will leave everyone speechless.
(Part 1) Choosing the Right Brisket: The Foundation of Flavor

Before we get our hands dirty, we need to start with a solid foundation – choosing the right brisket. This isn't a last-minute decision, folks. You want a brisket that's full of flavor, with a good amount of marbling for juicy tenderness.
Types of Brisket: Understanding the Cuts
First things first, let's talk about the two main types of brisket: the point and the flat.
- Point: Think of the point as the "fatty" side. It has a more irregular shape and contains a higher percentage of fat, giving it a rich, succulent flavor and melt-in-your-mouth texture.
- Flat: The flat is the leaner, more rectangular side. It's known for its uniform texture and slightly less intense flavor.
You can cook them separately, or together as a whole packer brisket. For beginners, I recommend starting with a whole packer – it's a bit more forgiving and simplifies the process.
Factors to Consider: A Checklist for Quality
Once you've decided on the type of brisket, here's how to choose a prime specimen:
- Marbling: This is where the magic happens. Look for a brisket with good marbling, meaning there's a good distribution of fat throughout the meat. This fat will melt during cooking, basting the meat and ensuring it stays moist and flavorful.
- Color: The meat should have a deep, healthy red color. Avoid any brisket with pale or dull patches, or brown or discolored areas. These could indicate poor quality or spoilage.
- Texture: The brisket should feel firm to the touch, not squishy. A firm texture indicates freshness and good quality.
My Experience: Sourcing the perfect brisket
I've had good luck sourcing brisket both at local butchers and supermarkets. Butchers can often offer expert advice and premium cuts, but supermarkets are increasingly stepping up their game, too. Don't be afraid to ask questions! Talk to the butcher or the staff at the supermarket, they're usually happy to share tips and recommendations.
(Part 2) Trimming and Preparing the Brisket: Setting the Stage for Success
Alright, your brisket is home! Now, it's time to prep it for the oven. This step is essential for ensuring even cooking and maximizing flavor.
Trimming the Fat: Finding the Right Balance
The first step is trimming the excess fat. This doesn't mean removing all of it – remember, we want that delicious fat to melt and baste the meat! You'll want to leave about a quarter-inch of fat covering the brisket, which is enough to keep it moist and render during cooking. Focus on trimming any thick, hard bits of fat that won't render properly.
The "Fat Cap": A Key to Flavor
The "fat cap" is the thick layer of fat on top of the point. It's a crucial part of the brisket, adding richness and flavor. You can leave it as is, or you can score it to help the fat render more evenly. I usually score mine in a diamond pattern, about a quarter-inch deep, to create a beautiful, crispy bark.
Salt and Pepper Rub: The Simplest, Yet Most Powerful Flavor Booster
Now, it's time for the rub. Keep it simple, friends. Salt and pepper are all you need to create a flavorful base for your brisket. Liberally rub the entire brisket with coarse salt and freshly ground black pepper. Don't be shy, go for it!
My Tip: A Touch of Smoked Paprika for Added Depth
I like to add a touch of smoked paprika to my rub for a hint of smoky, sweet flavor. But if you're sticking with the classics, salt and pepper are a winning combination.
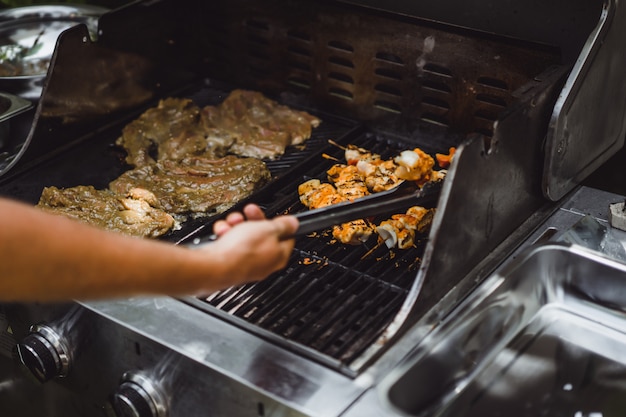
(Part 3) Oven-Roasting the Brisket: A Step-by-Step Guide to Tender Perfection
We're finally ready to start cooking! This is where the real magic happens, where patience and attention to detail are your best allies.
Step 1: Preheating the Oven: Setting the Stage for Low-and-Slow
Preheat your oven to a low temperature, around 275°F (135°C). This low and slow cooking method is essential for breaking down the tough connective tissue in the brisket, resulting in that melt-in-your-mouth texture we all crave.
Step 2: Placing the Brisket in the Oven: Ensuring Even Cooking
Place the brisket, fat side up, on a roasting rack in a large roasting pan. This allows air to circulate around the brisket, ensuring it cooks evenly and creates a crispy bark. You can add a cup of water to the pan to create a little steam, but it's not essential.
Step 3: cooking time: Patience is Key
This is where patience truly shines. A brisket needs at least 6-8 hours of cooking time, depending on its size and desired level of tenderness. I usually cook mine for around 8 hours, and it always turns out beautifully tender and flavorful.
Step 4: Monitoring the Temperature: Your meat thermometer is Your Friend
This is where a good meat thermometer becomes your best friend. You want to ensure the brisket reaches an internal temperature of 190°F (88°C). This indicates that the meat is cooked through and tender. Use a probe thermometer to monitor the temperature throughout the cook.
Step 5: Wrapping the Brisket: A Secret to Accelerated Tenderness
After about 4-5 hours of cooking, you can wrap the brisket in aluminum foil. This will trap the moisture and steam, helping to accelerate the cooking process and achieve a more tender result. If you're not wrapping, make sure to baste the brisket with its own juices every hour or so.
Step 6: Resting the Brisket: Letting the Juices Redistribute
Once the brisket reaches 190°F, it's time to take it out of the oven. But don't rush into slicing it just yet! Allow the brisket to rest for at least 2 hours, wrapped in foil, before slicing. This allows the juices to redistribute throughout the meat, resulting in a juicier, more flavorful brisket.
(Part 4) brisket rubs and Sauces: Elevating Flavor to New Heights
We've got the foundation down, now it's time to explore the world of flavors. The right rub and sauce can transform your brisket into a culinary masterpiece.
Rubs: Enhancing the Flavor Profile
A good brisket rub adds layers of flavor and creates that beautiful, crispy bark we all love. Here are a few classics to get you started:
- Salt and Pepper: The ultimate classic, providing a clean and simple flavor base. It allows the natural flavors of the brisket to shine.
- Sweet and Smoky: A combination of brown sugar, smoked paprika, and chili powder for a sweet and smoky kick. Perfect for those who love a bit of heat.
- Garlic and Herb: My personal favourite! Garlic powder, onion powder, dried oregano, and thyme for a fragrant and herbaceous rub.
- Spicy and Savory: A blend of paprika, cayenne pepper, garlic powder, onion powder, and black pepper for a bold and spicy flavor.
Sauces: Adding a Finishing Touch
While a great rub is key, a good sauce really brings the brisket together. Here are a few sauce options to complement the flavors beautifully:
- bbq sauce: The classic, sweet and smoky sauce, perfect for those who prefer a traditional taste.
- Mustard-Based Sauce: A tangy and bold sauce with a mustard base, perfect for those who enjoy a bit of heat.
- Vinegar-Based Sauce: A lighter and more tangy sauce, perfect for those who prefer a less sweet and more acidic taste.
- Spicy Sauce: A fiery sauce that packs a punch, perfect for those who like it hot.
My Tip: Experimenting for Your Perfect Flavor
Don't be afraid to experiment! Try different combinations of rubs and sauces to find your own perfect match. You can even make your own rubs and sauces from scratch for a truly personalized flavor experience.
(Part 5) brisket bark: The Secret to Crispy Perfection
You've probably seen those gorgeous photos of brisket with a beautiful, crispy bark. That's not just for show, folks! The bark is a crucial part of the brisket experience, adding a layer of texture and flavor that's simply irresistible.
What Creates the Bark: A Chemical Reaction of Flavor
The bark is created by the sugars in the rub reacting with the fat and heat in the oven. The longer the brisket cooks, the thicker and crispier the bark becomes.
Tips for a Crispy Bark: Achieving That Perfect Crunch
- Pat the Brisket Dry: Before putting the brisket in the oven, pat it dry with paper towels. This will help the bark to form more easily and create a beautiful, crispy finish.
- High Heat: During the last hour of cooking, you can increase the oven temperature to 350°F (175°C) for a crispier bark. Just make sure to keep a close eye on it to prevent it from burning.
- No Wrapping: If you're going for a super crispy bark, try not to wrap the brisket in foil. This will allow the bark to develop freely and become extra crispy. However, this can lead to a drier brisket, so it's a trade-off.
(Part 6) Troubleshooting Common Brisket Issues: Tackling Those Unexpected Challenges
You're following all the steps, but something's not quite right. Don't worry, it happens! Brisket can be a bit of a diva, but with a bit of troubleshooting, you'll be back on track.
Brisket is Dry: Restoring Moisture and Flavor
This is a common problem, and it usually happens when the brisket hasn't been cooked long enough, or when it hasn't been wrapped properly.
- Solution: Wrap the brisket tightly in foil and cook for another hour or two. You can also try adding a bit of beef broth to the pan to help keep the brisket moist.
Brisket is Tough: Achieving That Melt-in-Your-Mouth Texture
This usually happens when the brisket hasn't been cooked long enough or at a low enough temperature.
- Solution: Cook the brisket for another hour or two at a low temperature. You can also try using a meat mallet to tenderize the brisket before cooking.
Brisket is Burnt: Preventing Disaster
This happens when the oven temperature is too high, or when the brisket is cooked for too long without being wrapped.
- Solution: Reduce the oven temperature and wrap the brisket in foil. If the brisket is already burnt, you can try trimming off the burnt parts before serving.
Brisket is Undercooked: Ensuring Safety and Flavor
If you're unsure about the doneness of your brisket, it's always better to err on the side of caution. An undercooked brisket can be a food safety hazard.
- Solution: Check the internal temperature of the brisket with a meat thermometer. If it's not yet at 190°F (88°C), continue cooking until it reaches that temperature.
(Part 7) Slicing and Serving the Brisket: Presenting Your Culinary Creation
You've made it! The brisket is cooked, rested, and ready to be sliced and enjoyed.
Slicing the Brisket: The Art of Cutting Against the Grain
Use a sharp carving knife to slice the brisket against the grain. This means cutting perpendicular to the muscle fibers, resulting in tender and easy-to-chew slices.
Serving the Brisket: Creating a Feast to Remember
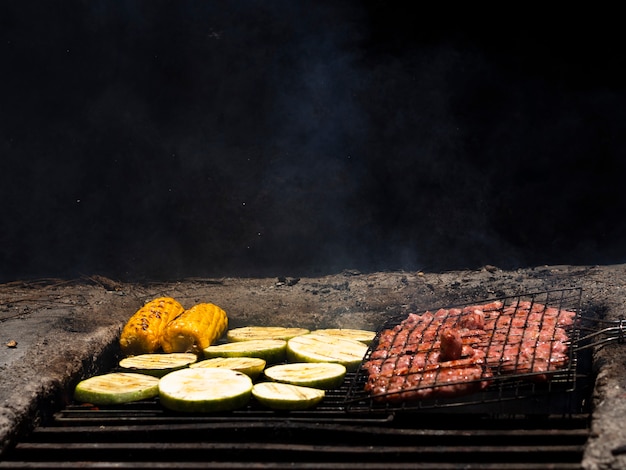
Serve the brisket hot, with your favourite sauce and sides. Some classic sides include mashed potatoes, coleslaw, and baked beans. You can also get creative and try different sides, such as roasted vegetables, cornbread, or potato salad.
Table Presentation: Making It Look as Good as It Tastes
To make your brisket presentation even more impressive, you can slice it and arrange it on a platter with a bed of greens or a colorful assortment of vegetables. This creates a visually appealing and delicious centerpiece for your meal.
(Part 8) Storing Leftover Brisket: Making the Most of Your Culinary Triumph
You've got a glorious feast on your hands, but what about those leftovers? No problem!
Storage Tips: Keeping Your Brisket Fresh
- Refrigerate: Store any leftover brisket in an airtight container in the refrigerator for up to 4 days.
- Freeze: You can freeze leftover brisket for up to 3 months. To freeze, wrap the brisket tightly in plastic wrap and aluminum foil.
Using Leftover Brisket: Transforming Leftovers into New Dishes
Don't let your leftover brisket go to waste! You can use it to create a variety of delicious meals. Here are a few ideas:
- Brisket Sandwiches: Slice the leftover brisket and pile it high on toasted bread with your favorite sauce.
- Brisket Chili: Shred the brisket and add it to your favorite chili recipe.
- Brisket Tacos: Warm up some tortillas and fill them with shredded brisket, salsa, and your favorite toppings.
FAQs
1. Can I cook brisket in a slow cooker?
Yes, you can cook brisket in a slow cooker. However, it will take longer than oven-roasting. You'll need to cook it on low for 8-10 hours, or on high for 4-6 hours.
2. What's the difference between a brisket and a chuck roast?
Both brisket and chuck roast are tough cuts of meat that benefit from slow cooking. However, brisket is a tougher cut with more fat than chuck roast. Brisket is also typically cooked whole, while chuck roast can be cooked in smaller pieces.
3. Can I use a pre-made rub?
Yes, you can use a pre-made rub. There are many different brands of brisket rubs available at supermarkets and online. However, if you're feeling adventurous, try making your own rub from scratch. You can experiment with different spices and herbs to create your own unique flavor profile.
4. Can I use a different type of sauce?
Absolutely! Use whatever sauce you like best. You can even experiment with different sauces to find your perfect match. From sweet and smoky to tangy and spicy, the world of BBQ sauces is vast and delicious.
5. How do I know if the brisket is done?
The brisket is done when it reaches an internal temperature of 190°F (88°C). You can use a meat thermometer to check the temperature. The meat should also be tender and easy to pull apart with a fork. If the brisket is still a bit tough, cook it for another 30 minutes to an hour.
Everyone is watching

How to Cook Frozen Lobster Tails Perfectly: A Step-by-Step Guide
RecipesLobster. Just the word conjures up images of lavish meals, special occasions, and a taste of luxury. But let's...

Pigs in a Blanket Cooking Time: How Long to Bake for Perfect Results
RecipesAh, pigs in a blanket. Just the name conjures up images of those delightful little parcels of crispy pastry en...

Pork Fillet Cooking Time: How Long to Cook It Perfectly
RecipesPork fillet, or tenderloin as it's sometimes called, is a real favourite in our house. It's so versatile, and...

The Ultimate Guide to Cooking Delicious Frankfurters
RecipesLet's face it, we all love a good frankfurter. It's a classic, simple, and always satisfying. But let's be rea...

Wolf Meat Recipes: A Guide to Cooking Wild Game
RecipesLet's be honest, you don't see wolf meat at your local butcher shop every day. It's a bit of a wild card, but ...