Let's be real, folks. Bacon isn't just breakfast food; it's a culinary masterpiece, a symphony of salty, smoky, and gloriously crispy goodness. But achieving that perfect crunch, that satisfying snap, can feel like a culinary quest. We've all been there – the limp, chewy bacon, the burnt edges, the unfortunate greasy mess. But fear not, my fellow bacon lovers, because I'm about to unveil the secrets to unlocking the ultimate pan-cooked bacon, a masterpiece that will have you singing its praises.
Part 1: The Foundation of Bacon Bliss

Choosing Your Bacon: A Culinary Conundrum
The first step in our bacon journey is choosing the right weapon. It's not just about grabbing whatever's on sale, folks. We're aiming for a bacon experience that will make your taste buds sing, and that starts with choosing the right cut.
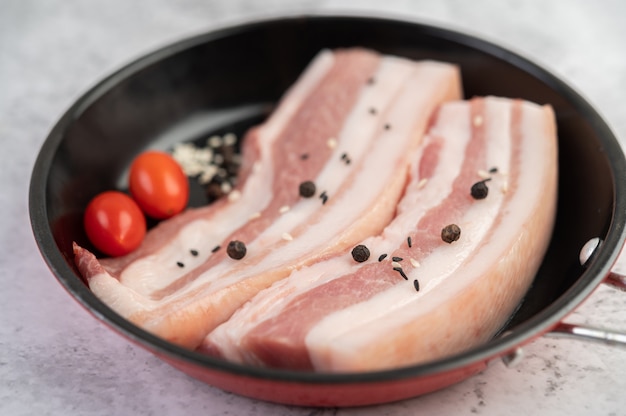
- thick-cut bacon: My personal favorite. It's got more fat, which renders down beautifully, creating a more flavorful, crispy result. You'll enjoy a more substantial bite, and that fat adds a richness that can't be beat.
- streaky bacon: A classic for a reason. This is the standard bacon you'll find in most supermarkets, and it strikes a lovely balance between fat and lean. You'll get that satisfying snap and a good amount of savory flavor.
- smoked bacon: This is where the real magic happens. The smoky aroma infuses the bacon with a depth of flavor that takes things to the next level. You'll find that the smoke adds a touch of complexity, making each bite more interesting.
Word of caution: Steer clear of pre-cooked bacon. It often has a higher salt content and doesn't crisp up as evenly. We're aiming for a bacon experience that's all about fresh, crispy perfection.
The Perfect Pan: A Culinary Companion
Next up, we need the right cookware. You want a pan that can handle the intense heat and distribute it evenly. My go-to is a cast iron skillet. It gets super hot and holds the heat beautifully, which is essential for rendering the fat and achieving that irresistible crisp. But a good quality stainless steel pan can also work wonders.
The Tools of the Trade:
Tongs: For flipping the bacon with precision and grace.
Spatula: To gently lift those crispy beauties out of the pan.
Paper towels: For absorbing excess fat and ensuring that your bacon is crisp and not swimming in a pool of grease.
Part 2: The Art of Pan-cooking bacon

Prepping Your Bacon: A Few Essential Steps
Now, let's get down to business. Before you even think about turning on the stove, there are a few crucial prepping steps that will elevate your bacon game:
- Let the bacon come to room temperature: This is a game changer. Taking your bacon out of the fridge about 30 minutes before cooking allows it to cook more evenly. The cold bacon will cool down your pan, potentially leading to soggy bacon. Let it warm up naturally for the best results.
- Pat the bacon dry: This is a must! Patting your bacon dry with paper towels will prevent splattering and ensure that your bacon cooks crispier. Excess moisture can create steam, which hinders the crisping process.
The Heat Factor:
Here's where we get serious. Crank up the stovetop to medium-high heat. We want that pan scorching hot! The high heat is key for rendering the fat quickly and creating that beautiful crispy exterior.
The Fat Factor:
Most bacon has enough fat to cook in, but if you're using lean bacon, add a tablespoon of neutral oil like sunflower or rapeseed. The oil will help create a good base for the bacon to cook in and prevent sticking.
The Layering Technique:
Don't overcrowd the pan! Bacon needs space to cook evenly. Lay the bacon in a single layer, ensuring that each piece has room to breathe. Overcrowding the pan will result in uneven cooking and soggy bacon.
The Flip: A Crucial Moment
Now, here's the magic. Once the bacon starts to render its fat and you see those edges curling, it's time to flip. That curling is a sign that the fat is rendering nicely and the bacon is starting to crisp up. Flip carefully with your tongs, ensuring that each side gets the same amount of heat.
Part 3: Mastering the Timing: The Bacon Clock

The Wait: Patience is Key
Now comes the waiting game. Let the bacon cook undisturbed for a few minutes, allowing the fat to render and the bacon to crisp up. Don't keep peeking! Give it time to work its magic.
The Test: The Bacon Check
If you're unsure if it's ready, gently nudge a piece of bacon with your tongs. If it feels firm and the edges are crispy, you're golden. You'll know it's done when you hear that irresistible crackle, a sure sign of crispy perfection.
The Drain: Removing Excess Fat
Once it's cooked to your liking, carefully lift the bacon out of the pan with a spatula and place it on a wire rack or a plate lined with paper towels to drain any excess fat. This step is crucial for ensuring that your bacon is as crispy as possible.
Part 4: The Finishing Touches: Elevating Your Bacon
Salt and Pepper: A Pinch of Perfection
Now, this is where you can add your personal touch. I like to sprinkle a little bit of salt and pepper on my bacon before serving. A touch of seasoning can enhance the flavor and make it even more irresistible.
The Crunch Factor: Taking Bacon to the Next Level
If you want to take your bacon to the next level, try broiling it for a minute or two after it's drained. The broiler will add an extra layer of crunch and intensify the flavor. Just keep an eye on it, you don't want to burn it!
Part 5: Bacon Beyond the Breakfast Plate: A culinary adventure
Unlocking the Versatility of Bacon:
Who says bacon is just for breakfast? It's incredibly versatile, adding a touch of salty, smoky goodness to a wide range of dishes. Think outside the box, and let your imagination run wild!
- Salads: A sprinkle of crispy bacon adds a salty, smoky touch to any salad, complementing fresh greens and dressing. It adds a textural contrast that elevates the experience.
- Pasta: Crumble bacon over your favorite pasta dish for a flavor bomb. The salty, smoky notes of bacon enhance creamy sauces and add a welcome depth to lighter dishes.
- Pizza: Bacon and pizza are a match made in heaven. Add some bacon to your next pizza for a real treat. The crispy bacon adds a satisfying crunch and pairs perfectly with cheese and tomato sauce.
- Soup: Bacon adds a smoky, salty depth to soups, especially creamy ones. It adds a richness that balances the creaminess and provides a textural element.
- Burgers: Top your burger with a few strips of bacon for a classic flavor combo. The salty, smoky bacon adds a layer of complexity and elevates the burger to a whole new level.
Part 6: Avoiding Bacon Blunders: Common Mistakes and Solutions
The Soggy Bacon: A Culinary Nightmare
We've all been there. You cook the bacon and it ends up soggy and chewy. It's a real heartbreaker, isn't it? Here are some common reasons why this happens:
- Not cooking it long enough: Bacon needs time to render its fat and become crispy. Be patient and let it cook until the fat is rendered and the bacon is firm.
- Not using enough heat: A low heat won't allow the fat to render properly. Crank up the heat and give your bacon the heat it deserves.
- Overcrowding the pan: Give each piece of bacon space to cook evenly. Overcrowding prevents the fat from rendering properly and can lead to soggy bacon.
The Burnt Bacon: A Culinary Tragedy
You've probably had this happen too. You get distracted for a minute and suddenly, your bacon is black as coal. Here's how to avoid that:
- Keep an eye on the bacon: It cooks faster than you think! Don't let it out of your sight. It's like watching a baby – constant vigilance is key.
- Lower the heat if needed: If it's starting to brown too quickly, lower the heat. Adjust the heat as needed to ensure even cooking and avoid burning.
Part 7: bacon storage: Keeping Your Bacon Fresh
Storing Your Bacon: Preserving the Goodness
Now, let's talk about how to store your bacon so it stays fresh and tasty. We want to ensure that you can enjoy your bacon for as long as possible.
- Refrigerate uncooked bacon: Keep it in its original packaging, sealed tightly, and refrigerate for up to a week. Make sure to store it properly to prevent cross-contamination.
- Freeze cooked bacon: Wrap it tightly in plastic wrap or aluminum foil and freeze for up to 3 months. You can even freeze it in portions for easy use. Freezing cooked bacon is a great way to have it on hand for quick meals or snacks.
Part 8: The Ultimate bacon guide Table: A Quick Reference
Here's a handy table summarizing all the key points we've covered:
| Step | Tips |
|---|---|
| Choosing bacon | Thick-cut, streaky, smoked |
| Pan | Cast iron or stainless steel |
| Prepping | Room temperature, pat dry |
| Heat | Medium-high |
| Cooking | Don't overcrowd pan, flip when edges curl |
| Timing | Cook undisturbed, check for firmness, listen for crackling |
| Draining | Wire rack or paper towels |
| Storage | Refrigerate uncooked, freeze cooked |
Part 9: bacon faqs: Answering Your Burning Questions
1. Why does my bacon curl up?
Bacon curls up during cooking because the fat on the outside renders and shrinks faster than the lean meat on the inside. This creates tension that causes the bacon to curl. It's a natural part of the cooking process and doesn't affect the flavor or texture.
2. How do I prevent bacon from splattering?
To minimize splattering, pat your bacon dry with paper towels before cooking. You can also try cooking it in a larger pan, which gives the bacon more space to move around.
3. Can I cook bacon in the oven?
Absolutely! oven-baked bacon is a great option if you're cooking a large batch or prefer a more hands-off approach. Simply place the bacon strips on a baking sheet lined with parchment paper and bake in a preheated oven at 375°F (190°C) for about 15-20 minutes, flipping halfway through.
4. What's the best way to reheat bacon?
To reheat cooked bacon, simply place it on a baking sheet and bake in a preheated oven at 350°F (175°C) for a few minutes. You can also reheat it in a microwave, but it might lose some of its crispness. For the best results, aim for a gentle reheating that won't make it tough or rubbery.
5. Can I cook bacon in the air fryer?
You bet! Air frying is a quick and easy way to cook bacon. Simply place the bacon strips in the air fryer basket and cook at 375°F (190°C) for about 5-8 minutes, shaking the basket halfway through. Just be careful not to overcrowd the basket.
Part 10: The Ultimate bacon recipe: A Culinary Masterpiece
Ingredients:
1 pound thick-cut bacon (about 10 slices)
Salt and pepper, to taste
Instructions:
1. Prepping: Remove the bacon from the refrigerator and let it sit at room temperature for 30 minutes. Pat the bacon dry with paper towels.
2. Heat: Heat a cast iron skillet or a good quality stainless steel pan over medium-high heat.
3. Cook: Place the bacon in the pan in a single layer, making sure not to overcrowd the pan. Cook undisturbed for 3-4 minutes per side, or until the fat has rendered and the bacon is crispy and golden brown.
4. Drain: Carefully remove the bacon from the pan and place it on a wire rack or a plate lined with paper towels to drain any excess fat.
5. Season: Sprinkle with salt and pepper to taste.
6. Broil: (Optional) For extra crunch, broil the bacon for 1-2 minutes.
7. Serve: Enjoy your perfectly crispy, delicious bacon!
There you have it, my friends. The ultimate guide to achieving crispy, perfect pan-cooked bacon. Now, go forth and conquer those breakfast plates (and everything else) with bacon so good, it'll have everyone asking for seconds. Happy cooking!
Everyone is watching

How to Cook Frozen Lobster Tails Perfectly: A Step-by-Step Guide
RecipesLobster. Just the word conjures up images of lavish meals, special occasions, and a taste of luxury. But let's...

Pigs in a Blanket Cooking Time: How Long to Bake for Perfect Results
RecipesAh, pigs in a blanket. Just the name conjures up images of those delightful little parcels of crispy pastry en...

Pork Fillet Cooking Time: How Long to Cook It Perfectly
RecipesPork fillet, or tenderloin as it's sometimes called, is a real favourite in our house. It's so versatile, and...

The Ultimate Guide to Cooking Delicious Frankfurters
RecipesLet's face it, we all love a good frankfurter. It's a classic, simple, and always satisfying. But let's be rea...

Wolf Meat Recipes: A Guide to Cooking Wild Game
RecipesLet's be honest, you don't see wolf meat at your local butcher shop every day. It's a bit of a wild card, but ...
