(Part 1) Bread: The Foundation of Your Garlic Toast
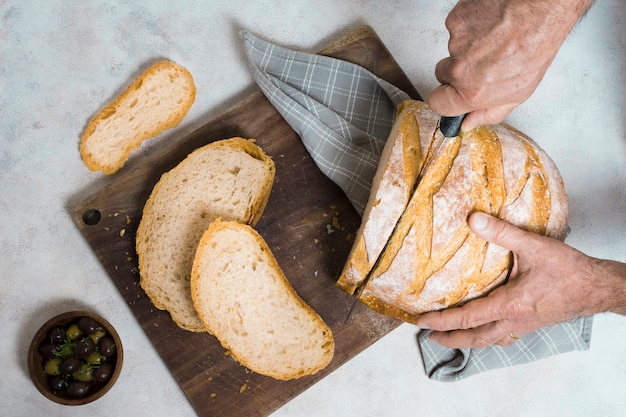
Let's start with the basics: the bread. This is your foundation, the canvas upon which you'll paint your masterpiece.The Importance of Choosing the Right Bread

I've experimented with all sorts of breads, from sourdough to ciabatta, and let me tell you, the right bread makes all the difference. You want a bread that's going to hold up to the garlic butter and crisp up beautifully in the oven.
What Breads to Choose:
- Sourdough: A personal favourite! The tangy flavour and dense crumb create a wonderful contrast with the garlic butter. Plus, it holds up amazingly well in the oven, resulting in a satisfyingly crunchy exterior. Sourdough's unique character really shines through when paired with the rich, garlicky flavour.
- Ciabatta: This Italian bread is known for its airy texture and crispy crust. It's light and airy, making it perfect for soaking up all those delicious flavours. Its slightly chewy texture provides a lovely counterpoint to the buttery garlic.
- French baguette: Classic for a reason! Its long, thin shape makes it perfect for dipping and its crispy crust is practically begging for garlic butter. The baguette's crispiness and long, slender shape make it ideal for sharing, and the perfect vessel for showcasing the garlicky goodness.
- Country loaf: A great all-rounder. It's sturdy, with a nice crumb and a decent crust. This versatile bread provides a solid base for your garlic toast, offering a good balance of texture and flavour.
What Breads to Avoid:
- Soft white bread: This will get soggy and won't hold up well in the oven. It lacks the structural integrity to stand up to the butter and heat, resulting in a mushy mess.
- Too dense breads: While they might have a good flavour, they won't achieve that desirable crispy crust. Their density prevents them from crisping up properly, leaving you with a soft, undercooked bread.
Slicing Your Bread for the Perfect Garlic Toast

Now, let's talk about slicing. This is where things get interesting. The thickness of your slices will determine how crispy your toast becomes, how much butter it absorbs, and how much of that delicious garlic flavour it holds.
Slicing Tips:
- Thick Slices (1/2 to 3/4 inch): These are best for soaking up butter and getting that crispy, crunchy texture. They're also great for making crostini, which is basically garlic toast on steroids. The thick slices provide a substantial base for a generous amount of garlic butter, making for a more satisfying bite.
- Thin Slices (1/4 to 1/2 inch): Perfect for a lighter, less intense garlic toast. They'll crisp up quickly and won't be as heavy. This thinner option is great if you're looking for a lighter, more delicate flavour and texture.
(Part 2) The Garlic Butter: Where the Magic Happens
Now we get to the real star of the show: the garlic butter! This is where you can get creative and experiment with different flavour combinations.The Basics of Garlic Butter

Let's start with the basics. You'll need:
- Butter: Unsalted butter is best, as it allows you to control the saltiness of the garlic butter.
- Garlic: The key ingredient! Fresh garlic is always best, but if you're short on time, jarred garlic will do the trick.
A good rule of thumb is to use 1 clove of garlic for every 1/4 cup of butter. This will give you a balanced flavour that isn't overly garlicky.
Infusing Flavor into Your Garlic Butter:
But what if we want to take our garlic butter to the next level? Here are a few ideas:
Herbs:
- Parsley: A classic combination. Its fresh, bright flavour complements the garlic beautifully. The parsley adds a vibrant, herbaceous touch that cuts through the richness of the butter.
- Rosemary: A hint of pine and earthiness adds depth and complexity. The rosemary adds a warm, woodsy aroma that enhances the savoury notes of the garlic.
- Thyme: A subtle, earthy flavour that works wonderfully with both garlic and bread. The thyme provides a gentle, earthy note that complements the garlic perfectly.
Spices:
- Red pepper flakes: A touch of heat adds a kick to your garlic butter. Red pepper flakes add a welcome kick of heat, creating a vibrant contrast with the rich butter.
- Paprika: A sweet, smoky flavour that complements garlic nicely. Paprika brings a depth of flavour, adding smoky notes that complement the garlic beautifully.
- Black pepper: Adds a little bite and balances out the richness of the butter. Black pepper adds a touch of sharpness that balances out the richness of the butter.
Citrus:
- Lemon zest: A bright, tangy flavour that cuts through the richness of the garlic butter. The lemon zest adds a refreshing, citrusy note that brightens up the flavour profile.
- Orange zest: A citrusy, sweet flavour that adds a touch of elegance. The orange zest brings a touch of sweetness and complexity, elevating the garlic butter to a new level.
Making Your Garlic Butter:
Once you've chosen your flavour combinations, it's time to make your garlic butter.
Method:
- Soften the butter: Take your butter out of the fridge and let it soften at room temperature for about 30 minutes. This will make it easier to work with. It's important to let the butter soften properly so it's easily blendable with the garlic and other ingredients.
- Mince the garlic: Use a garlic press or finely mince the garlic.
- Mix the ingredients: In a bowl, combine the softened butter with the minced garlic and your chosen flavourings.
- Mix well: Use a spatula or fork to mix the ingredients until they are well combined. Make sure the garlic is evenly distributed throughout the butter for a consistent flavour.
- Chill: Chill the garlic butter in the refrigerator for at least 30 minutes, or even better, overnight. This will allow the flavours to develop and the butter to firm up. Chilling the butter helps to solidify the flavours and makes it easier to spread on the bread.
(Part 3) Applying the Garlic Butter: Techniques and Tips
Now comes the fun part: applying the garlic butter to your bread. This is a crucial step, as it determines how much butter your toast absorbs and how evenly the flavour is distributed.The Brushing Technique:
This is the classic method, and for good reason! It's simple, effective, and allows for a precise application of the garlic butter.
- Use a pastry brush: This is the best tool for the job. It allows you to apply the garlic butter evenly without tearing the bread.
- Brush liberally: Don't be shy! You want a good coating of garlic butter on each slice.
- Don't overdo it: While you want to use enough garlic butter to get a good flavour, you don't want to soak the bread. This will make it soggy and prevent it from crisping up properly.
The Spreading Technique:
This technique is a bit more messy, but it's a good option if you want a more intense garlic butter flavour.
- Use a knife: A butter knife will do the trick, but a small, sharp knife is even better.
- Spread evenly: Use a light hand to spread the garlic butter evenly across each slice.
- Be careful: Don't press too hard, as you don't want to tear the bread.
The "Wrap and Chill" Technique:
This is a great technique for achieving maximum flavour absorption and crispy results.
- Spread the garlic butter: Spread a generous amount of garlic butter on each slice of bread.
- Wrap in foil: Wrap the slices in foil, making sure the garlic butter is evenly distributed.
- Chill: Chill the wrapped slices in the refrigerator for at least 30 minutes, or even better, overnight.
- Unwrap and toast: Unwrap the slices and toast as usual.
(Part 4) Toasting Perfection: Techniques and Tips
Now we're getting to the heart of the matter: toasting. This is where the magic happens, where the bread transforms into that golden-brown, crispy masterpiece.Oven Toasting:
This is the traditional method and it's a great way to achieve even browning and a crispy crust.
Method:
- Preheat the oven: Set your oven to 400°F (200°C).
- Arrange the slices: Place the garlic buttered slices on a baking sheet, making sure they're not overlapping.
- Toast: Toast for 5-7 minutes, or until the slices are golden brown and crispy.
- Watch carefully: Ovens vary, so keep an eye on your toast to avoid over-toasting.
Broiler Toasting:
This method is quicker and can achieve a more intense browning, but it requires a bit more care.
Method:
- Preheat the broiler: Set your oven to broil.
- Place the slices: Place the garlic buttered slices on a baking sheet lined with foil.
- Broil: Broil for 1-2 minutes, or until the slices are golden brown and crispy.
- Watch carefully: Broilers are very powerful, so keep a close eye on your toast to avoid burning.
Pan Toasting:
This method is a bit more hands-on, but it allows for more control over the browning process.
Method:
- Heat a pan: Heat a non-stick skillet or pan over medium heat.
- Toast: Toast the garlic buttered slices for 2-3 minutes per side, or until they are golden brown and crispy.
- Watch carefully: Keep an eye on your toast to avoid over-toasting.
(Part 5) Serving Your Garlic Toast
Now, the moment of truth! You've created the perfect crispy, flavorful garlic toast, so how do you serve it? Here are a few ideas:On its Own:
Sometimes, the simplest things are the best. Enjoy your garlic toast as a side dish, a snack, or even a light lunch.
With Soup:
This is a classic combination! The crispy garlic toast soaks up the broth beautifully, adding a delicious textural contrast to your soup.
With Salads:
Add a touch of indulgence to your salads with a few slices of garlic toast. The crispiness and garlic flavour add a wonderful dimension to your greens.
As a Base for Other Toppings:
Let your garlic toast be the canvas for other delicious toppings. Here are a few ideas:
- Cheese: Add a sprinkle of grated Parmesan cheese for a salty, cheesy flavour.
- Tomatoes: Top with diced tomatoes for a fresh, tangy twist.
- Avocado: Mash some avocado on top for a creamy, healthy topping.
- Mushrooms: Sauté some mushrooms and add them to your garlic toast for a savory, earthy flavour.
(Part 6) The Art of Customization
Garlic toast is a blank canvas, ready for your personal touch. Let your imagination run wild and experiment with different flavours and toppings.Flavour Combinations:
Here are a few flavour combinations to inspire you:
Italian-Inspired:
- Garlic butter with oregano and basil: A classic Italian combination that's both simple and delicious. The aromatic herbs of oregano and basil bring a familiar, comforting Italian flavour to your garlic toast.
- Garlic butter with sun-dried tomatoes and Parmesan cheese: A rich, flavorful combination that's perfect for dipping in tomato soup. This combination adds a touch of Mediterranean flair, with the sweetness of the sun-dried tomatoes and the salty tang of Parmesan cheese.
French-Inspired:
- Garlic butter with thyme and Dijon mustard: A sophisticated combination with a hint of spice. The combination of thyme and Dijon mustard creates a subtle, complex flavour that's both elegant and satisfying.
- Garlic butter with rosemary and sea salt: A simple yet elegant combination that's perfect with a glass of wine. Rosemary and sea salt are a classic pairing that adds a touch of rustic elegance to your garlic toast.
Asian-Inspired:
- Garlic butter with ginger and soy sauce: A savory, umami-rich combination that's perfect for dipping in Asian-inspired soups. The combination of ginger and soy sauce brings a distinct Asian flavour profile to your garlic toast, offering a unique and delicious experience.
- Garlic butter with sriracha and sesame oil: A spicy, nutty combination that's perfect for dipping in a spicy noodle soup. This combination delivers a fiery kick with the sriracha and a nutty, fragrant flavour from the sesame oil, making it perfect for spicy food lovers.
Toppings:
Here are a few topping ideas to take your garlic toast to the next level:
- scrambled eggs: Top your garlic toast with some scrambled eggs for a hearty and satisfying meal.
- Pulled pork: Add some pulled pork for a BBQ-inspired treat.
- Roasted vegetables: Top your garlic toast with some roasted vegetables for a healthy and flavorful meal.
- Pesto: Spread some pesto on top for a vibrant, herbaceous topping.
(Part 7) Tips and Tricks for Mastering Garlic Toast
Here are a few tips and tricks that I've learned along the way, to help you create the perfect garlic toast:Tip 1: Don't Over-toast
The key to perfect garlic toast is to toast it just until it's golden brown and crispy. Over-toasting will make the bread dry and brittle.
Tip 2: Use High-Quality Butter
The butter is the star of the show, so use a high-quality butter for the best flavour. Unsalted butter is best, as it allows you to control the saltiness of the garlic butter.
Tip 3: Fresh is Best
Use fresh garlic for the best flavour. If you're using jarred garlic, make sure it's finely minced or crushed.
Tip 4: Don't Be Afraid to Experiment
Garlic toast is a blank canvas, so don't be afraid to experiment with different flavour combinations and toppings.
Tip 5: Enjoy!
The best part of making garlic toast is enjoying it. So, relax, have fun, and savor every bite.
(Part 8) FAQs: Your Garlic Toast Questions Answered
I've been there myself, wondering about the best way to make garlic toast. So, here are some of the most frequently asked questions about garlic toast, answered for you.
FAQ 1: What if my garlic toast gets soggy?
This is a common problem, but it's easily avoidable. The key is to use a bread that's sturdy enough to hold up to the garlic butter and toasting. Avoid using soft white bread, as this will get soggy quickly. Also, be sure not to overdo it with the garlic butter.
FAQ 2: How do I make garlic toast crispy on the outside but soft on the inside?
To achieve this perfect balance, use a thicker slice of bread and don't over-toast it. The thicker slice will give you a crispy exterior while still maintaining a soft interior.
FAQ 3: How do I store leftover garlic toast?
Leftover garlic toast is best eaten fresh, but if you have some leftover, store it in an airtight container at room temperature for up to 2 days. You can also freeze leftover garlic toast for up to 3 months. To reheat, toast it in the oven or under the broiler.
FAQ 4: What's the best way to make garlic toast with no butter?
For a butter-free option, you can use olive oil instead. Simply heat some olive oil in a pan over medium heat and toast the garlic buttered slices for 2-3 minutes per side, or until they are golden brown and crispy.
FAQ 5: Can I make garlic toast ahead of time?
You certainly can! In fact, it's a great idea to make the garlic butter ahead of time and chill it in the fridge overnight. This will allow the flavors to develop and the butter to firm up. When you're ready to toast, simply spread the garlic butter on the bread and toast as usual.
(Part 9) The Final Word
There you have it! Your ultimate guide to making the perfect crispy, flavorful garlic toast. I hope you've enjoyed this journey as much as I have. Remember, the key to delicious garlic toast is to use high-quality ingredients, don't over-toast it, and don't be afraid to experiment with different flavours and toppings. Now, go forth and conquer your garlic toast dreams!Bonus Tip: If you're looking for a unique twist, try using a garlic-infused oil instead of butter. You can find these at most specialty food stores.
Pro Tip: To prevent the garlic butter from sticking to your pastry brush, dip the brush in hot water before applying the butter.
Now, go forth and create your own garlic toast masterpiece!
Everyone is watching

How to Cook Frozen Lobster Tails Perfectly: A Step-by-Step Guide
RecipesLobster. Just the word conjures up images of lavish meals, special occasions, and a taste of luxury. But let's...

Pigs in a Blanket Cooking Time: How Long to Bake for Perfect Results
RecipesAh, pigs in a blanket. Just the name conjures up images of those delightful little parcels of crispy pastry en...

Pork Fillet Cooking Time: How Long to Cook It Perfectly
RecipesPork fillet, or tenderloin as it's sometimes called, is a real favourite in our house. It's so versatile, and...

The Ultimate Guide to Tender, Juicy Pulled Pork
RecipesRight, let's talk pulled pork. It's one of those dishes that just screams "comfort food," doesn't it? I mean...

The Ultimate Guide to Cooking Sweet Potatoes: From Roasting to Mashing
RecipesSweet potatoes. Just the name conjures up images of warm, comforting dishes, bursts of vibrant color, and a to...
