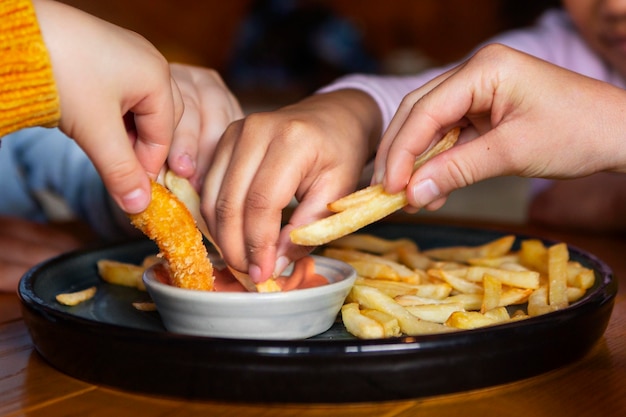
Let's be honest, nothing beats the satisfaction of sinking your teeth into a perfect chip, you know, the kind that’s crispy on the outside, fluffy on the inside, and makes you want to lick your fingers clean. Forget those limp, soggy things from the freezer aisle – we're talking about homemade chips, the real deal.
My personal quest for the ultimate homemade chips has been a bit of a rollercoaster ride. I've seen it all: soggy messes, undercooked disasters, and even a few burnt offerings. But after countless experiments and a fair share of burnt pans, I've finally cracked the code to chip-making glory.
This guide is your complete roadmap to achieving chip-shop-worthy fries at home. We'll cover everything from picking the right potatoes to nailing that perfect golden brown colour. So grab your apron, gather your spuds, and let's dive into the delicious world of homemade chips!
(Part 1) choosing the right potatoes

The Foundation of Frying: Understanding potato varieties
The first rule of chip-making is choosing the right potato. It's not just about grabbing whatever's on sale. You need a potato that's got the perfect balance of starch and moisture – something that holds its shape when cooked and doesn't disintegrate into mush.
The Stars of the Chip Show: My Favourite Potato Varieties
Over the years, I've tried a variety of potatoes, and these are my go-to picks for chip perfection:
maris piper: A true classic for a reason, Maris Piper strikes a beautiful balance between starch and moisture, resulting in chips that are both crispy and fluffy.
king edward: Another top contender, King Edward boasts a beautifully fluffy texture and a hint of sweetness. They're perfect for those who prefer a slightly softer chip.
Desiree: While a bit waxy, Desiree holds its shape incredibly well during frying. It also boasts a gorgeous golden colour, making it a real winner.
Agria: A newer but highly esteemed variety, Agria is renowned for its high starch content, which contributes to a remarkably crispy texture.
Potato Selection Tips: Looking for the Right Spud
No matter what variety you choose, remember to look for potatoes that are:
Fresh: Avoid any spuds that show signs of sprouting, rot, or damage. Look for firm, unblemished potatoes.
Starchy: A good chip potato should feel firm to the touch, not soft or mushy.
Similar in Size: Aim for potatoes that are roughly the same size for even cooking.
(Part 2) Preparing the Potatoes: From Wash to Chop

Cleaning and Peeling: Getting Rid of the Rough Edges
First things first, give your potatoes a good wash to get rid of any dirt or grit. Next, it's time for peeling. I find that using a sharp knife works best, but if you prefer, feel free to use a potato peeler.
The Art of the Chip Cut: Achieving the Perfect Shape
Now, this is where things get interesting – the cutting! You can go for thick chips, thin fries, or a mix of both, but I always recommend a combination to add variety.
Thick Chips: These are the classics, big and chunky, perfect for dipping. Aim for about 1cm thickness.
Thin Fries: A bit more delicate and faster cooking, these are ideal for those who crave a quicker chip fix. Think about 0.5cm thickness.
A Word of Caution: Don't Overcrowd the Pan!
This is crucial! Overcrowding the pan will cause the oil temperature to drop, resulting in soggy, greasy chips. Give your chips plenty of space to breathe and cook evenly.
The Importance of Soaking: A Chip-Making Secret
After cutting your potatoes, soak them in cold water for at least 30 minutes. This step is essential for removing excess starch, which can make the chips sticky and less crispy. Plus, it helps to achieve that extra-crispy finish!
(Part 3) The double fry technique: Unveiling the Secrets of Crispy Perfection

Why Double Fry? A Tale of Two Stages
You might be wondering why I'm advocating for this double frying business. Trust me, it's worth the effort! Here's why:
Crispy Exterior: The first fry cooks the potatoes through and creates a foundation of flavour and a nice initial crust.
Fluffy Interior: The second fry, at a higher temperature, gives you that super crispy exterior without drying out the fluffy interior.
The First Fry: Laying the Foundation
1. Heat the Oil: Heat your chosen oil (more on that later) to about 140°C (285°F).
2. Fry the Potatoes: Gently lower the potatoes into the hot oil, being careful not to overcrowd the pan. Fry for about 5-7 minutes, or until they're slightly softened and starting to turn opaque.
3. Drain and Cool: Remove the potatoes from the oil and drain them thoroughly on kitchen paper. Let them cool completely.
The Second Fry: Achieving Crispy Perfection
1. Heat the Oil Again: Raise the oil temperature to about 180°C (355°F).
2. Return the Potatoes: Carefully lower the potatoes back into the hot oil, giving them space to cook evenly. Fry for about 3-5 minutes, or until they reach a beautiful golden brown and are incredibly crispy.
3. Drain and Season: Remove the potatoes from the oil and drain them well on kitchen paper. Immediately season with salt and pepper, or add your favourite seasonings.
(Part 4) The best oils for frying: Choosing Your Weapon of Choice
The Oil Factor: Finding the Right Partner in Crime
The type of oil you use is critical to achieving those perfect chips. You need an oil with a high smoke point that won't break down at high temperatures, ensuring your chips don't end up tasting burnt or greasy. Here are my top choices:
vegetable oil: A classic for frying, vegetable oil is readily available and relatively inexpensive.
Sunflower Oil: Another reliable option, sunflower oil has a slightly nutty flavour that adds a subtle dimension.
Groundnut Oil: Known for its high smoke point and neutral flavour, groundnut oil is ideal for frying because it won't interfere with the taste of your chips.
Rapeseed Oil: If you're looking for a healthier option, rapeseed oil is a good choice, offering a decent smoke point and a mild flavour.
Temperature Control: Keeping the Oil in Check
Using a thermometer to monitor the oil temperature is essential. If the oil isn't hot enough, your chips will absorb too much oil and become greasy. If it's too hot, they'll burn. Aim for the temperatures mentioned in the frying steps above for the best results.
(Part 5) Seasoning and Serving: Elevating Your Chip Game
Salt and Pepper: A Classic Duo
You can't go wrong with a good sprinkling of salt and pepper. I prefer freshly ground black pepper for a more intense flavour.
Spice Things Up: Exploring Beyond the Basics
But don't be afraid to experiment! There's a whole world of seasoning options waiting to be explored:
Garlic Powder and Paprika: For a Mediterranean flavour boost.
Cajun Spice: For a fiery kick that will set your taste buds on fire.
Herbs: Try rosemary, thyme, or oregano for an earthy flavour.
Cheese: Sprinkle on some grated parmesan or cheddar for a cheesy delight.
Dipping Delights: Taking Your Chips to the Next Level
Serve your homemade chips with a variety of dips to complement their deliciousness:
Mayonnaise: A classic for a reason, mayonnaise adds a creamy touch.
Garlic Mayo: A tangy and garlicky twist that's sure to please.
Tomato Ketchup: A timeless favourite that complements the crispy chips perfectly.
bbq sauce: For a smoky and sweet flavour that adds a unique dimension.
Guacamole: A fresh and healthy option that provides a contrasting flavour profile.
(Part 6) Troubleshooting: Fixing Common Chip-Making Challenges
The Soggy Chip Syndrome: Identifying the Culprit
Soggy chips are a common chip-making nightmare. Here are some possible reasons why your chips might be turning out less than crispy:
Overcrowding the Pan: Remember, give your chips space to cook! Overcrowding lowers the oil temperature, leading to soggy chips.
Not Frying Long Enough: Make sure you cook the chips for the full amount of time, especially during the second fry.
Not Draining Properly: After each fry, drain the chips thoroughly on kitchen paper to remove excess oil.
The Burnt Chip Disaster: Avoiding Charcoal Chips
Burnt chips are another common problem. Here's what might be causing them:
Oil Temperature Too High: Use a thermometer to ensure the oil temperature doesn't exceed the recommended levels.
Over-Frying: Don't fry the chips for too long, especially during the second fry.
(Part 7) Tips and Tricks: Enhancing Your Chip-Making Skills
The Spatula Secret: Flipping for Even Cooking
Use a slotted spatula to gently flip the chips during frying. This will help ensure they cook evenly on all sides.
Salt Timing: The Key to Crispness
Salt your chips after they've been fried. Salting too early will make them soft and soggy.
Leftover Chip Storage: Keeping Those Fries Crispy
Store leftover chips in an airtight container at room temperature. They'll stay crispy for a few hours.
(Part 8) FAQs: Answering Your Chip-Making Questions
What is the best way to store potatoes?
Potatoes should be stored in a cool, dark, dry place, ideally in a paper bag or a wicker basket. Avoid storing them in the fridge, as this can make them starchy and affect their flavour.
What is the ideal oil temperature for frying chips?
The ideal oil temperature for the first fry is about 140°C (285°F), and for the second fry, it's about 180°C (355°F).
Can I use any type of oil for frying chips?
Not all oils are suitable for frying. Choose an oil with a high smoke point that won't break down at high temperatures, such as vegetable oil, sunflower oil, groundnut oil, or rapeseed oil.
What if my chips are too thick?
If your chips are too thick, they might not cook through properly. You can try cutting them thinner or increasing the frying time.
How can I make my chips extra crispy?
The secret to extra crispy chips is to double fry them. The first fry cooks the potatoes through and develops a crust, while the second fry at a higher temperature ensures a super crispy exterior.
Conclusion: Your Chip-Making Journey Begins Now
There you have it – my comprehensive guide to crafting the best homemade chips! It's all about choosing the right potatoes, prepping them correctly, and frying them at the perfect temperature. With a bit of practice and patience, you'll be creating chip-shop quality chips in your own kitchen in no time. So, go forth and conquer the chip world!
Everyone is watching

How to Cook Frozen Lobster Tails Perfectly: A Step-by-Step Guide
RecipesLobster. Just the word conjures up images of lavish meals, special occasions, and a taste of luxury. But let's...

Pigs in a Blanket Cooking Time: How Long to Bake for Perfect Results
RecipesAh, pigs in a blanket. Just the name conjures up images of those delightful little parcels of crispy pastry en...

Pork Fillet Cooking Time: How Long to Cook It Perfectly
RecipesPork fillet, or tenderloin as it's sometimes called, is a real favourite in our house. It's so versatile, and...

The Ultimate Guide to Cooking Delicious Frankfurters
RecipesLet's face it, we all love a good frankfurter. It's a classic, simple, and always satisfying. But let's be rea...

Wolf Meat Recipes: A Guide to Cooking Wild Game
RecipesLet's be honest, you don't see wolf meat at your local butcher shop every day. It's a bit of a wild card, but ...
