So, you've finally taken the plunge and bought yourself a pizza stone. You're probably thinking, "Great, now I can finally make pizza like the Italians do!". And you know what? You're absolutely right! A pizza stone is a game-changer when it comes to pizza. It's the secret to getting that crispy crust, those perfectly blistered edges, and that overall authentic pizza experience. But let me tell you, it's not just about throwing some dough on a hot stone and calling it a day. There's a bit of an art to it, and that's where I come in.
This guide is your ultimate companion on your pizza stone journey. We'll be covering everything from choosing the right stone to understanding the science behind it all, and of course, tackling some of those common pizza stone pitfalls. I'm going to share my own personal experiences, tips, and tricks that I've learned along the way, and hopefully, by the end, you'll be making pizzas that would make even the most discerning Italian chef jealous.
So grab your apron, get those hands nice and floury, and let's get started!
(Part 1) Choosing the Right Pizza Stone

The Basics: Ceramic vs. Cordierite
When it comes to pizza stones, you've got two main players: ceramic and cordierite. Ceramic stones are the classic choice, often the most affordable, and they do a great job. They're generally made from a blend of clay and other minerals, and they work by absorbing and retaining heat.
Cordierite stones, on the other hand, are a bit more high-end. They're made from a type of mineral that conducts heat exceptionally well. This means they heat up faster and hold onto that heat longer, resulting in a super-crispy crust.
Personally, I started with a basic ceramic stone, and it's served me well for years. It's a good starting point, and if you find yourself making pizza more often, you can always upgrade to a cordierite one later.
Size Matters: Finding the Right Fit for Your Kitchen
Now, the size of your pizza stone depends on what you're planning on making. If you're a solo pizza enthusiast, then a smaller stone might be all you need. But if you're planning on feeding a crowd, or you just love the idea of making a giant, 18-inch pizza, then go for a bigger stone.
My advice? Think about how many people you'll usually be feeding. A 12-inch stone is a good starting point for most households, and it's easy to store.
Baking Steel: A Serious Contender for the Crispy Crust Crown
And then there's the baking steel. They are, basically, giant, flat slabs of steel that you use the same way as a pizza stone. They heat up insanely fast, giving you that wickedly crispy crust in a flash. I have to admit, I’m a bit of a baking steel convert. The crispness it produces is just incredible. However, they can be quite heavy and bulky, so consider your space before buying one.
(Part 2) Getting to Know Your Pizza Stone: Preheating, Handling, and Seasoning

Preheating: The Key to Crispy Perfection
So, you've got your pizza stone, and you're ready to roll. Hold your horses! Before you even think about tossing dough onto that bad boy, you need to preheat it. I'm talking seriously hot, like oven-on-high hot. This is crucial for getting that signature crust.
The best way to preheat your stone is to place it on the bottom rack of your oven. It's important to allow at least 30 minutes, and even longer if you're using a cordierite stone. Don't forget to check your oven manual to ensure you’re following the recommended preheating temperatures for your stone.
Handling with Care: A Hot Stone Requires Respect
Once your stone is hot, it's time to get hands-on. And by hands-on, I mean "hands-off". Treat your pizza stone like a hot potato, because, well, it essentially is. Always use oven mitts, and be extra careful when moving it. You don't want to end up with a broken stone, and trust me, that's a tragedy waiting to happen.
Seasoning the Stone: Creating a Natural Non-stick Surface
Now, this might sound fancy, but seasoning your pizza stone is basically just giving it a good ol' scrub. After preheating, you can sprinkle a little bit of coarse salt on the stone and let it sit for a few minutes. This helps to create a natural non-stick surface, which will make your pizzas slide off easily.
(Part 3) Mastering the Pizza Dough: The Heart of Your Pizza

The Secret to Perfect Pizza Crust: Homemade is Best
Alright, now we're getting into the good stuff – the dough. Making your own dough is the best way to get that authentic pizza experience. But I know, I know, it can seem daunting. Don't worry, it's not as complicated as it looks.
There are loads of great pizza dough recipes out there, and you can find a tonne of them online. Personally, I'm a big fan of using a simple, no-knead dough recipe. It's super easy, and it yields a delicious crust that's both chewy and crispy.
Stretching and Shaping the Dough: A Gentle Touch is Key
Once your dough is ready, it's time to stretch it out. This is where a lot of people get a bit nervous, but trust me, it's not rocket science. The key is to be gentle and patient.
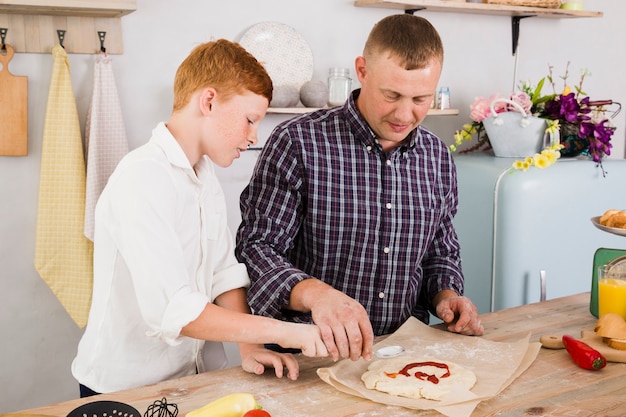
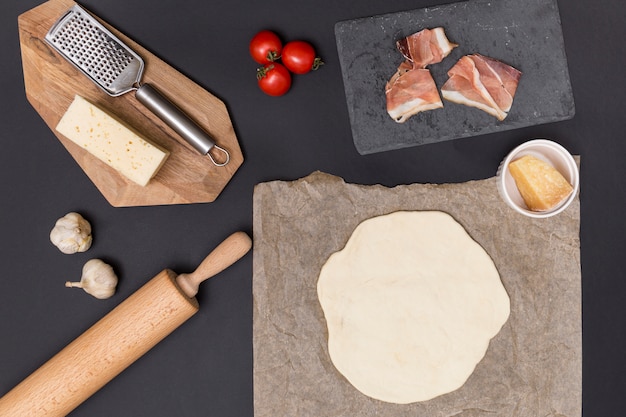
Start by dusting your work surface with flour. Then, use your fingertips to gently press the dough out from the centre. Don't worry about making it perfectly round, a bit of irregularity is actually part of what makes pizza so charming.
If you find the dough is sticking to your fingers, just sprinkle a little more flour on your hands. And if you're struggling to get it to stretch out, try using a rolling pin or simply let gravity do the work by letting the dough hang over the edge of the counter.
Tossing the Dough: A Touch of Flair (Optional)
Now, if you're feeling really fancy, you can try tossing the dough. It's a bit of a performance, and it definitely gets some oohs and aahs from the audience. But it's also a bit of a skill, so don't worry if it takes a few tries to get the hang of it.
Start by holding the dough in the middle with both hands. Then, using your wrists, toss the dough into the air, spinning it around in a circular motion. It sounds complicated, but with practice, you'll be a pizza-tossing pro in no time.
(Part 4) Building Your Perfect Pizza: Sauce, Cheese, and Toppings
The Sauce: Laying the Foundation for Flavor
Now, let's talk about the sauce. This is where you can really get creative and put your own personal stamp on your pizza.
There are countless different sauces you can use, from classic tomato sauce to creamy pesto or even spicy harissa. My personal favourite is a simple tomato sauce made with fresh tomatoes, garlic, and a touch of oregano.
The Cheese: The Melty Heart of the Pizza
Next comes the cheese. And this is where things get really interesting. You could go for a classic mozzarella, but don't be afraid to experiment with other cheeses.
I love using a combination of mozzarella and fontina for that extra creamy, gooey texture. You could also add some provolone, parmesan, or even goat cheese for a touch of tanginess.
The Toppings: Expressing Your Culinary Creativity
Finally, we're onto the toppings. This is your chance to let your culinary creativity run wild.
The classic pizza topping combinations are endless. But here are a few of my personal favourites:
- Margherita: This is a simple but timeless classic. A base of tomato sauce, mozzarella, and basil.
- Pepperoni: A real crowd-pleaser. A base of tomato sauce, mozzarella, and pepperoni.
- Mushroom and Spinach: A healthy and delicious option. A base of tomato sauce, mozzarella, mushrooms, and spinach.
- BBQ Chicken: A fun and flavourful pizza. A base of bbq sauce, mozzarella, chicken, and red onion.
- Hawaiian: This one is controversial, but I love it. A base of tomato sauce, mozzarella, ham, and pineapple.
Assembly Tips: Layering for Success
When assembling your pizza, start by spreading the sauce evenly over the dough. Then, add the cheese, making sure to cover the entire surface. Finally, add your toppings, keeping in mind the pizza will be cooking for a short time. Avoid heavy, chunky ingredients that might not cook through.
(Part 5) Baking the Perfect Pizza: Timing, Temperature, and the Pizza Stone's Magic
Getting the Timing Right: The Dance of Heat and Dough
Okay, your pizza is ready to go into the oven. Remember, you need that pizza stone piping hot for perfect results. Place your pizza directly onto the hot stone, making sure to use oven mitts to avoid any nasty burns.
The baking time will vary depending on your oven and the thickness of your dough. But as a general rule, you'll want to bake your pizza for around 5-8 minutes, or until the crust is golden brown and the cheese is melted and bubbly.
Keep an Eye on It: A watchful baker makes the best pizza
Keep a close eye on your pizza while it's baking. You'll want to check on it every few minutes to make sure it's not burning. If you notice that the crust is browning too quickly, you can move the pizza to a lower rack in the oven.
The Magic of the Pizza Stone: Unveiling the Science of Crispy Crust
The pizza stone works its magic by distributing heat evenly, helping to create a crispy crust with a beautifully blistered edge. It also helps to absorb moisture from the dough, preventing it from becoming soggy.
(Part 6) Taking Your Pizza Out of the Oven: Safety First, then Enjoyment!
Handling With Care: A Hot Pizza Needs Respect
Once your pizza is baked, it's time to take it out of the oven. Again, be extra careful, as your pizza stone will still be incredibly hot. Use oven mitts to slide a pizza peel or a baking sheet underneath the pizza and gently lift it out of the oven.
Let It Cool: Patience Yields the Best Slice
Once your pizza is out of the oven, let it cool for a few minutes before slicing and serving. This will give the crust a chance to set and the cheese to solidify, which will make it easier to cut.
(Part 7) Cleaning Your Pizza Stone: Keeping Your Stone in Top Shape
The Importance of Cleaning: A Clean Stone is a Happy Stone
Now, let’s talk about cleaning. You've created your culinary masterpiece, but before you dive in, you need to clean your pizza stone. Don't worry, it's not a complicated process.
Simple Cleaning Techniques: Gentle Care for a Long Life
You're going to want to wait until it's cooled down completely before you give it a wash. No need to use soap or detergents. Just a good scrub with a stiff brush and some warm water is all you need. You can also use a scraper to remove any stubborn bits of food.
Dealing with Leftover Crust: Tackling Those Stubborn Bits
If you’ve got a little bit of crust stuck on, don’t worry. You can easily remove it by using a little bit of baking soda and water. Make a paste, apply it to the crusty bits, let it sit for a few minutes, and then scrub it off with a brush.
The Importance of Drying: Preventing Cracks and Ensuring Longevity
After cleaning, make sure to dry your pizza stone thoroughly. You can pat it dry with a clean towel, or you can let it air dry completely. The key is to make sure there’s no moisture left on the stone, as this could cause it to crack.
Storing It Properly: A Safe Haven for Your Pizza Stone
Now that your pizza stone is sparkling clean, store it in a safe and dry place, preferably in a spot where it’s not going to get bumped or knocked.
(Part 8) Troubleshooting: Common Pizza Stone Problems and Solutions
The Crust Isn't Crispy: Diagnosis and Remedies
This is a common problem, and it usually comes down to not preheating the stone enough. Make sure you're preheating your stone for at least 30 minutes, and even longer if you're using a cordierite stone.
Another potential reason might be that your dough is too wet. If you're using a store-bought dough, make sure to give it a good squeeze to remove any excess moisture.
The Pizza Sticks to the Stone: Breaking Free from a Sticky Situation
This can be a real pain. It's usually because the stone isn't hot enough, or because the dough isn't properly floured. Make sure your stone is preheated to the maximum temperature of your oven and sprinkle a generous amount of flour onto your work surface and onto the dough before putting it on the stone.
The Stone Cracks: Dealing with a Broken Heart
This is a bummer, but it's not necessarily the end of the world. If your stone cracks, it's usually because it's been exposed to a sudden change in temperature, like going from a hot oven to a cold countertop. Try to avoid this by letting your stone cool down slowly before cleaning it.
The Stone Is Not Evenly Heated: Seeking a Consistent Heat
This can happen if you're not preheating the stone long enough, or if you're using a stone that's too small for your oven. Make sure you're using a stone that's the right size for your oven and allow it to preheat for at least 30 minutes.
(Part 9) The Ultimate Pizza Stone FAQs: Answers to Your Burning Questions
1. Can I use my pizza stone for other things?
You can absolutely use your pizza stone for more than just pizza! It's great for baking bread, cookies, and even roasted vegetables. Just make sure you preheat it properly before using it for any other purpose.
2. How long does a pizza stone last?
A good quality pizza stone can last for years, if not decades. Just take care of it, and it will take care of you.
3. Is a pizza stone better than a baking sheet?
Absolutely. A pizza stone provides even heat distribution and helps to create a crispy crust that you just can't get with a baking sheet.
4. What is the best way to clean a pizza stone?
Just a good scrub with a stiff brush and some warm water is all you need. Avoid using soap or detergents, as these can damage the stone.
5. What if my pizza stone cracks?
If your pizza stone cracks, it's not necessarily the end of the world. You can try to use it, but it may not be as effective. A cracked pizza stone is still great for cooking other things, like bread or vegetables.
(Part 10) Conclusion: Embrace Your Pizza Stone Journey
And there you have it, your ultimate guide to cooking with a pizza stone. I hope this has been helpful and has inspired you to get out there and start making some delicious pizzas. Remember, practice makes perfect, and don't be afraid to experiment with different recipes and toppings. Happy pizza-making!
Everyone is watching

How to Cook Frozen Lobster Tails Perfectly: A Step-by-Step Guide
RecipesLobster. Just the word conjures up images of lavish meals, special occasions, and a taste of luxury. But let's...

Pigs in a Blanket Cooking Time: How Long to Bake for Perfect Results
RecipesAh, pigs in a blanket. Just the name conjures up images of those delightful little parcels of crispy pastry en...

Pork Fillet Cooking Time: How Long to Cook It Perfectly
RecipesPork fillet, or tenderloin as it's sometimes called, is a real favourite in our house. It's so versatile, and...

The Ultimate Guide to Tender, Juicy Pulled Pork
RecipesRight, let's talk pulled pork. It's one of those dishes that just screams "comfort food," doesn't it? I mean...

The Ultimate Guide to Cooking Sweet Potatoes: From Roasting to Mashing
RecipesSweet potatoes. Just the name conjures up images of warm, comforting dishes, bursts of vibrant color, and a to...
