(Part 1) Choosing the Right Rib Eye
The first step in crafting your masterpiece is selecting the right rib eye. Trust me, it’s not all about picking the biggest one in the butcher’s shop. There’s a bit more to it, and you’ll be happy you paid attention!Picking the Perfect Cut

Think of it like a treasure hunt. You’re looking for a rib eye with good marbling, meaning those lovely streaks of fat running through the meat. This fat is what gives the rib eye its juicy tenderness and rich flavor. No marbling? You’re facing a dry, chewy disappointment, and we definitely don’t want that, do we?
Next, consider the shape. You want a nice, even piece with a good amount of surface area. This ensures even cooking. You wouldn’t want some parts overdone while others are still raw. Now, I'm not saying you can't get creative and cook a weird-shaped roast. I've done it, but I'm also not saying it's always the best idea.
Lastly, check the color. A nice, bright red color is what you’re aiming for. Avoid dull or purplish tones, which can be a sign of improper storage.
Understanding the Different Grades

We’ve all heard about different grades of beef, like Prime and Choice. These grades are based on factors like marbling, the animal's age, and its upbringing.
Prime is the top dog, often found in butcher shops or specialty stores. It’s the most marbled, resulting in the most tender and flavorful cuts.
Choice is still pretty darn good, just a bit less marbled. It’s a great option if you’re looking for a good balance of price and quality.
Select is the lowest grade, usually leaner and less flavorful than Prime or Choice. You’ll find it in most supermarkets.
Now, which grade is "best" really depends on your taste and budget. Prime is the gold standard for an undeniably decadent rib eye roast, but Choice or Select can still be delicious if cooked properly. Personally, I believe there’s nothing wrong with a Select rib eye if you know how to handle it.
Getting the Right Weight

Alright, so how much do you need? It depends on the size of your crew, of course.
A good rule of thumb is about 1 pound per person. If you’re planning on having leftovers, bump it up to 1.5 pounds.
(Part 2) Preparing the Rib Eye
Alright, so you’ve got your perfect rib eye. Now what? Let's dive into the preparation stage.Patting It Dry
First things first, pat your rib eye dry with paper towels. This helps it brown nicely in the pan. Water and heat don’t mix, it’s science!
Salt and Pepper
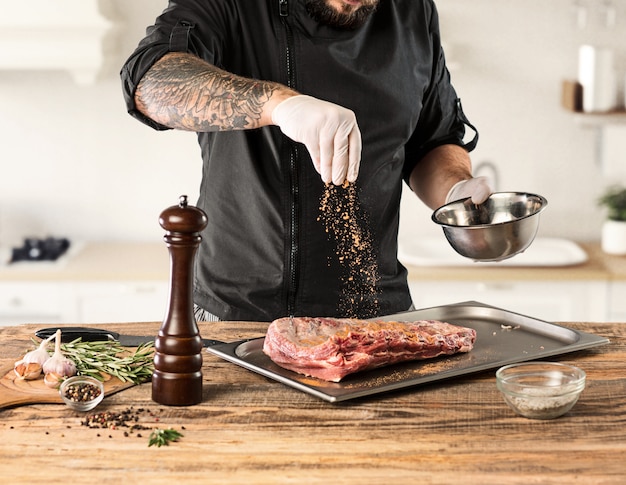
Now for the seasoning. Salt and pepper are your best friends here. Opt for kosher salt for a coarser grain that clings beautifully to the meat. Season generously, and don’t be afraid to give it a good rub.
Some folks like to add other spices, like garlic powder, onion powder, or paprika. But personally, I like to keep it simple and let the inherent flavor of the rib eye shine through.
Room Temperature
This one might be a bit controversial, but trust me, bringing the rib eye to room temperature before cooking is key. This ensures even cooking and prevents the middle from being cold.
I know what you’re thinking. “Isn’t that risky?” Well, it's a balancing act. You don’t want to leave it out for hours. Aim for 30 minutes to an hour. Just make sure to keep an eye on it and never leave it unattended, especially if you have pets like I do. Those mischievous pups would definitely try to take a bite!
(Part 3) Cooking Methods
Now that our rib eye is prepped, let’s talk about cooking methods. I’ve tried them all, and I’ll share my favorite techniques for the perfect rib eye.reverse searing
This is my go-to method. I know it sounds fancy, but it’s surprisingly straightforward.
The idea is to cook the rib eye slowly in a low oven until it reaches your desired internal temperature, then sear it on the stovetop for a beautiful crust.
It’s the most foolproof way to achieve a perfectly cooked rib eye. You’ll get a juicy, tender centre with a crispy, flavorful exterior. It’s a winning combination every time.
(Part 4) Reverse Searing Guide
Let’s break down the reverse searing method step by step.Step 1: Preheat the Oven
Preheat your oven to 250 degrees Fahrenheit (120 degrees Celsius).
Step 2: Cook in the Oven
Place your rib eye in a roasting pan and cook for about 2 hours.
Step 3: Rest
Remove the rib eye from the oven and let it rest for 15 minutes. This is crucial for allowing the juices to redistribute and prevent the meat from drying out.
Step 4: Sear on the Stovetop
While the rib eye is resting, heat a cast iron skillet or a heavy-bottomed pan over medium-high heat. Add a tablespoon of oil, or, for an extra boost of flavor, some rendered beef fat.
When the oil is shimmering, sear the rib eye for 2-3 minutes per side. Aim for a nice, deep brown crust.
Step 5: Rest Again
Take the rib eye off the heat and let it rest for another 10-15 minutes. You want that ultimate juicy, tender experience.
Step 6: Slice and Serve
Now, you’re ready to carve and serve. Slice the rib eye against the grain for the most tender bites.
The Perfect Internal Temperature
Here’s a table that shows the internal temperatures for different levels of doneness:
| Level of Doneness | Internal Temperature (°F) |
|---|---|
| Rare | 125-130 |
| Medium Rare | 130-135 |
| Medium | 135-140 |
| Medium Well | 140-145 |
| Well Done | 145-150 |
Remember, these are just guidelines. You might prefer your rib eye a little more or less done. Use a meat thermometer to ensure it’s cooked to your liking.
(Part 5) Other Cooking Methods
Reverse searing is my personal favorite, but there are other methods that can deliver fantastic results with your rib eye roast.Grilling
Who doesn’t love a good BBQ? Grilling is a fantastic way to cook a rib eye roast, especially during the summer months.
Make sure to get your grill nice and hot, around 450-500 degrees Fahrenheit. Season the rib eye and cook for about 10 minutes per side, or until you reach your desired internal temperature.
For an extra touch of flavor, consider adding some wood chips to the grill for a smoky aroma.
Pan-Searing
For a quick and easy method, try pan-searing. Heat a heavy-bottomed pan over medium-high heat. Add some oil and sear the rib eye for 4-5 minutes per side.
Transfer the pan to a preheated oven and cook for another 10-15 minutes, or until the internal temperature is reached.
(Part 6) Serving Your Rib Eye Roast
Alright, you’ve cooked your rib eye to perfection. Time to bring it to the table!side dishes
What goes with a rib eye? It really depends on your culinary preferences.
For a classic pairing, you can’t go wrong with roasted potatoes, asparagus, and a creamy mushroom sauce.
If you’re feeling a little more adventurous, try something like roasted brussels sprouts with bacon, or a salad with a vinaigrette dressing.
And don’t forget about the wine! A bold red wine, like Cabernet Sauvignon or Merlot, will beautifully complement the richness of the rib eye.
Presentation
Don’t forget about presentation! It’s not just about the taste, it’s about the whole dining experience.
Carve the rib eye into thick slices and arrange them on a platter. You can add some sprigs of fresh rosemary or thyme for a pop of color.
Enjoy!
Now, sit back, relax, and enjoy your delicious rib eye roast. You’ve earned it!
(Part 7) FAQs
Now, I’ve covered a lot, but I know you’ve probably got some questions. So, here are some of the most common FAQs about cooking a rib eye roast.1. Can I Freeze a Rib Eye Roast?
Yes, you can freeze a rib eye roast. Wrap it tightly in plastic wrap and then in foil. It should last for about 3-4 months in the freezer. Thaw it in the refrigerator for a couple of days before cooking.
2. What's the Best Way to Reheat a Rib Eye Roast?
If you’ve got leftovers, the best way to reheat a rib eye roast is in a low oven. Preheat your oven to 250 degrees Fahrenheit (120 degrees Celsius) and place the rib eye in a roasting pan. Cook for about 15-20 minutes, or until heated through.
You can also reheat it in a skillet over medium heat. Just be careful not to overcook it!
3. Can I Use a Rib Eye Roast for Steak?
Absolutely! A rib eye roast can be cut into individual steaks. Just make sure you cut them at least 1 inch thick for the best results.
4. How Do I Tell if My Rib Eye Is Done?
The most reliable way to tell if your rib eye roast is done is to use a meat thermometer. Insert it into the thickest part of the roast and make sure it’s reached the desired internal temperature.
You can also check for doneness by pressing the meat. Rare meat will feel soft, medium rare will feel springy, and well done will feel firm.
5. Why is My Rib Eye Tough?
If your rib eye is tough, it’s likely because it was overcooked. Rib eye is a very tender cut of meat, so it doesn’t need to be cooked for very long. Make sure you use a meat thermometer to ensure it’s cooked to your liking.
(Part 8) Conclusion
Right, there you have it, the ultimate guide to cooking a perfect rib eye roast. I hope you’ve found it helpful and informative.Remember, the key is to choose a good-quality cut of meat, prepare it properly, and cook it to your liking. And don’t be afraid to experiment with different methods and seasonings to find what you enjoy most.
Now, go forth and cook a rib eye that will impress your friends and family!
Everyone is watching

How to Cook Frozen Lobster Tails Perfectly: A Step-by-Step Guide
RecipesLobster. Just the word conjures up images of lavish meals, special occasions, and a taste of luxury. But let's...

Pigs in a Blanket Cooking Time: How Long to Bake for Perfect Results
RecipesAh, pigs in a blanket. Just the name conjures up images of those delightful little parcels of crispy pastry en...

Pork Fillet Cooking Time: How Long to Cook It Perfectly
RecipesPork fillet, or tenderloin as it's sometimes called, is a real favourite in our house. It's so versatile, and...

The Ultimate Guide to Cooking Delicious Frankfurters
RecipesLet's face it, we all love a good frankfurter. It's a classic, simple, and always satisfying. But let's be rea...

Wolf Meat Recipes: A Guide to Cooking Wild Game
RecipesLet's be honest, you don't see wolf meat at your local butcher shop every day. It's a bit of a wild card, but ...
