You've got yourself an arm roast, and you're probably wondering what to do with it. It’s a cut that can sometimes seem a little intimidating, but I'm here to assure you – cooking an arm roast is an absolute joy, and it's way easier than you might think. From choosing the perfect cut to mastering the art of slow cooking, we'll cover everything you need to know to create a truly magnificent meal.
I've been cooking arm roasts for years, and I've learned a thing or two along the way. I've experimented with different techniques and flavour combinations, and I'm ready to share my tips and tricks, my personal preferences, and even some of the mistakes I've made (so you don't have to!). Let's get started!
(Part 1) Choosing the Right Arm Roast

The first step in this culinary adventure is picking out the perfect arm roast. It's not just about grabbing the first one you see – there are a few things to consider.
The Cut
Arm roasts, also known as shoulder roasts, come from the foreleg of the animal. They’re typically a bit tougher than cuts from the hindquarters, but that's actually a good thing! It means they're perfect for slow cooking methods like roasting or braising. The long, slow cooking breaks down the connective tissue, making the meat incredibly tender and juicy.
You'll usually find a few different arm roast cuts available, and each one has its own unique characteristics:
- Top Blade Roast: Often called the "chuck roast," this cut is known for its good marbling, which adds flavour and tenderness. It’s a versatile option that works well for many cooking methods.
- Blade Roast: Similar to the top blade roast, but it might have a slightly higher fat content. It can be a bit tougher, but it also tends to have a deeper flavour. It’s perfect for slow cooking where the longer cooking time helps to tenderize the meat.
- Shoulder Roast: This is a less common cut, but it's fantastic for slow cooking. It usually has a good amount of fat and connective tissue, which makes it extra tender and flavorful. This cut truly shines when cooked low and slow, allowing the fat to render and the flavors to meld.
I personally love the top blade roast for its versatility. It’s a good all-rounder, with a nice balance of flavour and tenderness.
The Fat
Don't be afraid of fat! It's what makes an arm roast juicy and flavorful. Look for a roast with a good layer of fat on the outside, and make sure it's marbled throughout. This fat will render during cooking, adding moisture and flavour to the meat. Don't be tempted to trim it all off – you'll be missing out on a lot of flavour!
The Size
Consider how many people you're feeding. A smaller roast (about 2-3 pounds) is perfect for a couple or a small family, while a larger roast (4-5 pounds) will feed a crowd. Don't be afraid to go for a larger roast – you can always freeze the leftovers for another meal.
(Part 2) Preparing the Arm Roast

Now that you've got your perfect arm roast, it's time to get prepped for cooking. Don't worry, this part is easy peasy.
Trim the Fat
You don't need to remove all the fat, but you can trim away any excess. I usually leave a good layer on top for flavour and moisture, but I trim off any large chunks or excess fat. Just make sure to leave some fat on there! It’s the key to keeping the meat moist.
Season It Up
This is where you can get creative! I like to keep it simple with salt, pepper, and a sprinkle of garlic powder. It’s a classic for a reason! But you can also add other spices like rosemary, thyme, paprika, or even a bit of chili powder for a kick.
Here's a little trick I've learned: rub the seasoning directly onto the roast. It helps the flavour penetrate the meat.
Sear It (Optional)
Searing the arm roast is not essential, but it can add a lovely caramelized crust. If you're doing this, make sure your pan is hot before adding the roast. Brown the roast on all sides, then remove it from the pan before cooking. Searing creates a beautiful crust that locks in the juices, giving your roast a wonderful texture.
However, if you're pressed for time, feel free to skip this step. The roast will still be delicious even without the sear.
(Part 3) Cooking the Arm Roast: Slow and Steady Wins the Race

Time to get down to business – the slow roasting! This is where the magic happens, and it's really quite simple.
oven roasting
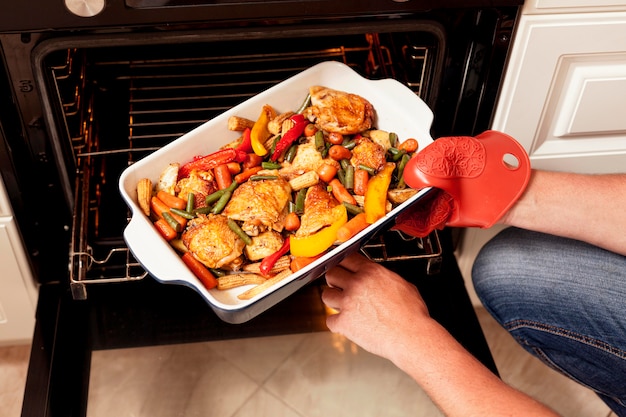
This is my go-to method. Pre-heat your oven to 325°F (160°C). Place the seasoned roast in a roasting pan and cover it tightly with foil. Covering it with foil helps to create a moist environment, ensuring that the meat cooks evenly and doesn’t dry out. Cook for about 3-4 hours, or until the internal temperature reaches 145°F (63°C) for medium-rare.
Once the roast is cooked, remove it from the oven and let it rest for at least 15 minutes before slicing. This allows the juices to redistribute throughout the meat, making it even more tender and flavourful. It’s a crucial step in achieving that melt-in-your-mouth texture.
slow cooker
If you're looking for an even easier option, a slow cooker is your friend. Place the seasoned roast in the slow cooker, add a cup of broth or water, and cook on low for 6-8 hours, or on high for 4-6 hours. You can also add vegetables, like carrots, onions, or potatoes, during the last hour of cooking. This is perfect for those busy days when you want to come home to a delicious meal that's practically ready to go.
Braising
For a richer, more intense flavour, braising is the way to go. Brown the roast on all sides in a dutch oven, then add vegetables, broth, and herbs. Bring to a simmer, then cover and cook in the oven at 325°F (160°C) for 2-3 hours. Braising creates a truly luxurious dish, with a rich sauce that’s perfect for soaking up with bread.
No matter which method you choose, remember that patience is key. The longer you cook an arm roast, the more tender and flavorful it will become.
(Part 4) The Secret Sauce: Making a Delicious Gravy
Let's be real, no roast is complete without a fantastic gravy! Here's my simple and delicious gravy recipe, perfect for finishing off your arm roast.
Ingredients
- 2 tablespoons of butter
- 2 tablespoons of all-purpose flour
- 2 cups of beef broth
- 1 tablespoon of Worcestershire sauce
- Salt and pepper to taste
Instructions
1. In a saucepan, melt the butter over medium heat. Whisk in the flour and cook for 1 minute, stirring constantly. This forms a roux, which will thicken the gravy.
2. Gradually whisk in the beef broth until smooth. Bring to a simmer and cook for 5 minutes, stirring occasionally. This allows the flavours to meld and the gravy to thicken.
3. Stir in the Worcestershire sauce and season with salt and pepper to taste. Worcestershire sauce adds a wonderful depth of flavour to the gravy.
4. Strain the gravy through a fine-mesh sieve to remove any lumps. This gives the gravy a silky smooth consistency.
5. Serve immediately over the sliced roast. The gravy is best served hot, so don't let it sit for too long.
(Part 5) The Perfect side dishes: What to Serve with Your Arm Roast
Now you've got your juicy roast and luscious gravy, but what about the rest of the meal? Here are a few side dish ideas that pair perfectly with an arm roast.
Classic Comforts
- mashed potatoes: A timeless classic that's always a crowd-pleaser. You can add a touch of butter, cream, or cheese for extra richness. The creamy texture of mashed potatoes complements the rich flavors of the arm roast perfectly.
- Roasted Vegetables: A healthy and delicious side dish, perfect for showcasing the season's bounty. Think roasted carrots, parsnips, Brussels sprouts, or sweet potatoes. Roast them in the oven with the roast to save time and create a symphony of flavors.
- green beans: A simple yet satisfying side dish, best cooked with a little butter and salt. Green beans provide a refreshing contrast to the richness of the roast.
Bold Flavors
- Garlic Bread: A cheesy, garlicky delight that's perfect for soaking up the juices from the roast. The combination of garlic and cheese is a match made in heaven.
- Macaroni and Cheese: A comforting and indulgent side that complements the rich flavours of the roast. A creamy macaroni and cheese is always a hit, especially when paired with a hearty arm roast.
- Cornbread: A Southern classic that adds a touch of sweetness and texture to the meal. The slight sweetness of cornbread balances out the savory flavors of the roast and creates a delightful contrast in texture.
(Part 6) Serving Your Arm Roast Masterpiece
It's finally time to present your culinary creation! Here's how to make it a truly memorable experience.
Carving
Let the roast rest for 15 minutes before carving to allow the juices to redistribute. You can carve it right on the platter, or you can transfer it to a cutting board for easier slicing. Slice the roast against the grain, creating thin and tender slices. This is essential for ensuring that the meat is easy to chew and melts in your mouth.
Plating
Arrange the slices of roast on a platter or serving dishes. Spoon some of the delicious gravy over the meat, and top with your chosen side dishes. Presentation is everything! Make your roast look as good as it tastes.
Garnish
Add a final touch of elegance with a few garnishes. Some ideas include:
- Fresh herbs, like rosemary or thyme.
- A sprig of parsley.
- A few lemon wedges.
(Part 7) Leftovers: Don't Waste a Bite
Let's face it, arm roasts are generous portions, and you're bound to have some leftovers. But don't let them go to waste! There are plenty of ways to transform those leftovers into delicious meals.
Sandwiches
Slice the leftover roast and layer it on some bread with your favourite toppings, like cheese, mustard, and pickles. A classic roast beef sandwich is always a winner!
Soup
Add the leftover roast to your favourite soup recipe. It adds a hearty and flavorful dimension to soups like beef stew or french onion soup. The leftover roast will add a wonderful depth of flavour to your soup.
Pasta
Shred the leftover roast and toss it with pasta, vegetables, and your favourite sauce for a delicious and satisfying meal. This is a great way to use up leftover roast and create a quick and easy meal.
(Part 8) Tips and Tricks from a Seasoned Cook
Here are a few extra tips and tricks I've picked up over the years to make your arm roast even more amazing.
- Use a meat thermometer: This is the best way to ensure your roast is cooked to your desired level of doneness. It takes the guesswork out of cooking and ensures that your roast is cooked to perfection.
- Don't overcook it: Arm roasts can easily become dry if they're overcooked. Keep an eye on the temperature and remove them from the oven or slow cooker once they've reached the desired internal temperature. It’s better to err on the side of undercooked than overcooked.
- Basting is your friend: Basting the roast regularly during cooking helps to keep it moist and flavorful. This is especially helpful for oven roasting, where the roast isn't submerged in liquid.
- Let it rest: Patience is key! Allow the roast to rest for at least 15 minutes before carving to allow the juices to redistribute. This is a crucial step in ensuring that the meat is tender and flavorful.
- Experiment with flavour: Don't be afraid to try different seasonings and herbs to find your favourite combination. You can add smoked paprika for a smoky flavor, or try a blend of herbs like rosemary, thyme, and oregano.
(Part 9) FAQs
1. Can I freeze an arm roast?
Yes, you can freeze an arm roast. Wrap it tightly in plastic wrap and then in aluminum foil. It can be frozen for up to 3 months. Thaw it in the refrigerator for 2-3 days before cooking. Freezing is a great way to save time and have a delicious meal ready to go whenever you need it.
2. How do I know when my arm roast is cooked?
The best way to know when your arm roast is cooked is to use a meat thermometer. For medium-rare, the internal temperature should reach 145°F (63°C). For medium, it should reach 160°F (71°C). A meat thermometer is the most accurate way to ensure that your roast is cooked to your liking.
3. What if my arm roast is too tough?
If your arm roast is too tough, it's probably because it was overcooked. Try braising it in a slow cooker or in the oven with liquid to help tenderize it. Braising is a great way to tenderize tough cuts of meat.
4. Can I use a different type of broth for the gravy?
Yes, you can use chicken broth or even vegetable broth if you prefer. Chicken broth will add a slightly different flavor, while vegetable broth will make the gravy vegetarian-friendly.
5. What are some other side dish ideas?
You can also serve your arm roast with other classic sides like mashed sweet potatoes, butternut squash soup, or roasted asparagus. There are endless possibilities when it comes to side dishes, so get creative and find what you enjoy most.
And there you have it, folks! Your ultimate guide to cooking a delicious arm roast. With a little time, a few simple ingredients, and a dash of culinary confidence, you'll be creating a masterpiece that will have everyone begging for seconds. So go forth, embrace the challenge, and enjoy the fruits of your labour. Happy cooking!
Everyone is watching

How to Cook Frozen Lobster Tails Perfectly: A Step-by-Step Guide
RecipesLobster. Just the word conjures up images of lavish meals, special occasions, and a taste of luxury. But let's...

Pigs in a Blanket Cooking Time: How Long to Bake for Perfect Results
RecipesAh, pigs in a blanket. Just the name conjures up images of those delightful little parcels of crispy pastry en...

Pork Fillet Cooking Time: How Long to Cook It Perfectly
RecipesPork fillet, or tenderloin as it's sometimes called, is a real favourite in our house. It's so versatile, and...

The Ultimate Guide to Cooking Delicious Frankfurters
RecipesLet's face it, we all love a good frankfurter. It's a classic, simple, and always satisfying. But let's be rea...

Wolf Meat Recipes: A Guide to Cooking Wild Game
RecipesLet's be honest, you don't see wolf meat at your local butcher shop every day. It's a bit of a wild card, but ...
