Let’s talk beans, folks. They might not be the most glamorous ingredient, but trust me, once you get the hang of cooking them, you’ll be a bean convert in no time. They’re ridiculously versatile, incredibly affordable, and packed with protein and fibre – what's not to love? I've been a bean enthusiast for years, and I’m here to share everything I've learned, from my first clumsy attempts to the expert tips I’ve picked up along the way. We’re going to cover everything from choosing the right beans to getting them perfectly cooked every time, and explore all the delicious ways you can use them in your cooking. So, grab your favourite mug, brew a cuppa, and let’s dive in!
(Part 1) Why dried beans Are the Best

Look, I’m not saying canned beans are bad – they have their place. But there's something truly satisfying about cooking dried beans from scratch. They’re simply cheaper, and the flavour is out of this world. Seriously, you can’t beat the taste of a hearty bowl of homemade bean soup or the satisfying crunch of beans in a salad. And let's not forget about the nutritional benefits – dried beans are packed with goodness, and they’re a great source of protein, fibre, and essential vitamins and minerals. It's a nutritional powerhouse!
The Magic of Flavour
Dried beans are like blank canvases – they soak up the flavours of whatever you cook them with. Add spices, herbs, garlic, onions, or even a bit of bacon – the possibilities are endless. And the longer you cook them, the more intense the flavour becomes. It’s a real game-changer. Remember that time I made a big pot of black beans with smoked paprika and cumin? They were like little explosions of flavour in my mouth. Honestly, I could eat them every day. The flavour just intensifies with each bite.
From budget-friendly to Super Convenient
Right, let's talk about the price. Dried beans are a total steal compared to canned beans. They’re incredibly budget-friendly, especially if you buy them in bulk. Plus, they have a long shelf life, so you can stock up and always have them on hand. And once you’ve cooked a big batch, you can freeze them for later use. Seriously, it's the ultimate convenience. I love having a big freezer stash of beans ready to go!
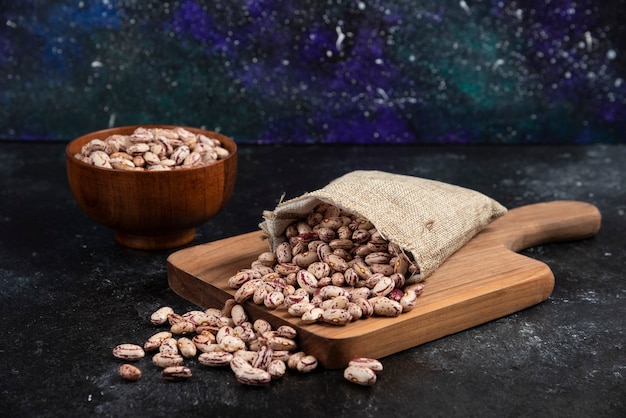
(Part 2) Choosing the Right Beans
With so many different varieties of dried beans out there, it can be a bit overwhelming. But don’t worry, I’m here to guide you through the bean jungle. The most important thing is to choose beans that are fresh and free of any defects. You want them to be plump, firm, and free of any cracks or blemishes. Also, pay attention to the colour – they should be a vibrant colour, not dull or faded. Here are a few of my favourite bean varieties:
My Top Bean Picks
- Black Beans: These guys are super versatile and great in soups, stews, dips, and salads. Their rich, earthy flavour just screams comfort food. I love them in my black bean salsa.
- kidney beans: These are another classic choice. They hold their shape well, making them perfect for chillis, burritos, and salads. And don’t forget about those bright red kidney beans – they really add a pop of colour. They're a staple in my chilli!
- pinto beans: These are a bit milder than black or kidney beans, making them great for creamy dips, refried beans, and Southwestern dishes. They’re also relatively quick to cook. Try them in my creamy pinto bean dip!
- cannellini beans: Cannellini beans, with their creamy texture and mild flavour, are perfect for soups, salads, and pasta dishes. They’re also fantastic for bean salads. They're my go-to bean for Italian-inspired dishes.
- Chickpeas (Garbanzo Beans): These beauties are packed with protein and fibre. They’re a staple in Mediterranean and Middle Eastern cuisines and are delicious in salads, dips, and stews. Think hummus, falafel, and more. I use them in my homemade hummus!
(Part 3) The Art of soaking beans
Now, let’s talk about soaking. Soaking dried beans is crucial for a few reasons. First, it softens them up, making them quicker and easier to cook. Second, it reduces the amount of gas-producing compounds, making them easier to digest. Don’t worry, we’re going to talk about those gas-producing compounds a bit later. Finally, soaking also helps to enhance the flavour of the beans.
Two Ways to Soak: Traditional or Quick
You can soak beans in the traditional way – by covering them with water and leaving them to soak overnight. But if you’re short on time, you can also soak them quickly. Here’s what you need to do:
- Place the beans in a large pot and cover them with water by about 2-3 inches.
- Bring the water to a boil, then reduce the heat to a simmer and let the beans soak for about an hour. The beans should have softened up considerably.
- Drain the beans and rinse them thoroughly before proceeding with cooking.
The Truth About Soaking Time
You’ll often hear that you need to soak beans for eight hours or overnight. But here’s the truth – you can get away with soaking them for just one hour. Yes, you read that right. Soaking for a shorter time works just as well, and you won’t have to plan ahead so much. But remember, if you’re using really old beans, you might need to soak them for a bit longer.
(Part 4) Mastering the Art of cooking beans
You’ve soaked your beans, now it’s time to cook them. Don’t worry, it’s pretty simple. The key is to cook them until they’re tender, but not mushy. You want them to have a slight bite. We're going for that perfect balance of tenderness and texture.
Cooking Beans on the Stovetop
To cook beans on the stovetop, you’ll need a large pot. Here’s how to do it:
- Rinse the soaked beans thoroughly under cold water.
- Transfer the beans to a large pot and cover them with fresh water by about 2 inches.
- Bring the water to a boil, then reduce the heat to a simmer.
- Simmer the beans, uncovered, for about 1-2 hours, or until they’re tender. You’ll want to check them every 30 minutes or so to make sure they’re not sticking to the bottom of the pot.
- Season with salt and pepper to taste, and you’re good to go!
For richer flavour, you can add herbs, spices, onions, garlic, or other aromatics to the cooking water. And remember, if you’re cooking a large batch of beans, you might need to add more water as they cook. Just keep an eye on the water level and add more as needed.
pressure cooker Perfection
Now, let’s talk pressure cooking. I love my pressure cooker – it’s a total game-changer for cooking beans. It cuts down on the cooking time significantly, and the beans always come out perfectly tender. Here’s how to do it:
- Rinse the soaked beans thoroughly under cold water.
- Transfer the beans to your pressure cooker and cover them with fresh water by about 2 inches.
- Add any desired aromatics, like onions, garlic, or herbs.
- Secure the lid and cook according to your pressure cooker’s instructions. Depending on the type of beans, you might need to cook them for 20-40 minutes.
- Allow the pressure to release naturally, then release any remaining pressure.
- Season with salt and pepper to taste.
Pressure cooking beans is quick and easy, and it’s a great way to get a perfectly cooked batch of beans on the table fast. But remember, always follow the instructions for your specific pressure cooker. The pressure cooker is a true time-saver!
The instant pot Shortcut
If you’re a fan of Instant Pots, you’re in luck. Instant Pots are perfect for cooking beans – they’re quick, easy, and they always come out tender and delicious. Here’s how to cook beans in your Instant Pot:
- Rinse the soaked beans thoroughly under cold water.
- Transfer the beans to your Instant Pot and cover them with fresh water by about 2 inches.
- Add any desired aromatics, like onions, garlic, or herbs.
- Secure the lid and cook on the manual setting for about 20-40 minutes, depending on the type of beans.
- Allow the pressure to release naturally for about 10 minutes, then release any remaining pressure.
- Season with salt and pepper to taste.
Instant Pots are a lifesaver for busy cooks, and they make cooking beans a breeze. But remember, always follow the instructions for your specific Instant Pot. The Instant Pot truly makes cooking beans effortless!
(Part 5) The Bean Whisperer: Knowing When They’re Ready
You’re cooking your beans, and you’re anxious to know when they’re ready. But how can you tell? Here are a few ways to check:
- The Pinch Test: Take a bean out of the pot and give it a gentle pinch. If it gives way easily, it’s ready. But if it’s still hard and firm, it needs more time to cook.
- The Fork Test: Insert a fork into a bean. If it slides in easily and the bean breaks apart, it’s done. But if the fork meets resistance, it needs more time.
- The Visual Test: Once the beans are cooked, they’ll have softened and plumped up. They should also look more evenly coloured and have a creamy texture.
Don’t overcook the beans. Overcooked beans become mushy and lose their shape. You want them to be tender but still have a slight bite. And remember, different types of beans have different cooking times. It’s always best to check them as they cook to make sure they’re not overcooked.
(Part 6) The Bean Whisperer’s Secrets to Perfect Beans
Now, let’s talk about a few tricks I’ve learned over the years to make my beans even more delicious:
- Salt Late: Salting your beans too early can actually toughen them up. Wait until the very end of cooking to add salt, or even better, season them after you’ve drained them. This helps to prevent the beans from absorbing too much water and becoming mushy.
- Acid Magic: Adding a touch of acid, like lemon juice, vinegar, or tomato paste, to your beans can help to break down the tough outer layer and make them more tender. It also adds a nice flavour boost. A squeeze of lemon juice really brightens up the flavour.
- The Bean Broth: Don’t throw away the bean cooking liquid – it’s a treasure trove of flavour and nutrients. You can use it to make soups, stews, and sauces, or even add it to your favourite recipes for a boost of flavour. Just make sure you strain it first to remove any foam or impurities. This is pure bean magic!
- frozen beans: Once you’ve cooked a big batch of beans, you can freeze them for later use. They’ll last for up to three months in the freezer. Just thaw them overnight in the refrigerator before using.
(Part 7) The Gas-Producing Bean Mystery Solved
Let’s be honest, beans have a reputation for causing gas. But the good news is, there are things you can do to reduce the gas-producing effects. The culprit is a type of sugar called raffinose, which is found in beans. When raffinose gets to your gut, it’s fermented by bacteria, which produces gas.
The Secret Weapon: Soaking and Cooking
Soaking and cooking beans can help to reduce the amount of raffinose and lessen the chances of gas. The longer you soak the beans, the more raffinose is broken down. And when you cook the beans, the heat further breaks down the raffinose. So, if you’re worried about gas, make sure you soak your beans properly and cook them until they’re tender.
Other Tips to Reduce Gas
Here are a few other things you can try:
- Add Digestive Enzymes: You can find digestive enzymes, like Beano, at most drugstores. These enzymes break down raffinose in the gut, reducing the amount of gas produced.
- Eat Beans in Moderation: If you’re prone to gas, start with small amounts of beans and gradually increase the amount as you get used to them.
- Don’t Eat Beans on an Empty Stomach: Eating beans with other foods can help to slow down the digestion process and reduce the amount of gas produced.
- Stay Hydrated: Drinking plenty of water can help to flush out the gas-producing compounds in your system.
If you’re still concerned about gas, talk to your doctor. They can help you determine if you have any underlying conditions that might be contributing to your symptoms.
(Part 8) The Ultimate Bean Cookbook
Now that you’re a bean expert, let’s talk about some of the delicious ways you can use them in your cooking. Here are a few of my favourite bean recipes:
Bean Soup Classics
Bean soup is a staple in my kitchen – it’s hearty, comforting, and so easy to make. Here are a few of my go-to recipes:
White Bean and Sausage Soup
This soup is a real crowd-pleaser. It’s packed with flavour and has a creamy texture thanks to the white beans. You can use any type of sausage you like – italian sausage, chorizo, or even ground beef.
lentil soup
Lentil soup is another classic. It’s super affordable and packed with protein. I love to add a touch of curry powder for extra flavour.
black bean soup
Black bean soup is a great option for a vegetarian or vegan meal. It’s hearty, flavourful, and very satisfying.
Bean Salads
Bean salads are perfect for a light and refreshing meal. Here are a few of my favourites:
Three-Bean Salad
This salad is a classic for a reason. It’s simple, delicious, and perfect for potlucks or picnics. Just combine your favourite beans with some corn, tomatoes, onions, and a tangy dressing.
chickpea salad
This salad is a great source of protein and fibre. It’s made with chickpeas, celery, onions, and a creamy tahini dressing.
Black Bean and corn salad
This salad is a flavour explosion. It’s made with black beans, corn, red onion, cilantro, and a lime dressing.
Bean Dips and Spreads
Bean dips are a great way to add some flavour and protein to your snacks or appetizers. Here are a few of my favourites:
Hummus
Hummus is a classic Middle Eastern dip made with chickpeas, tahini, lemon juice, and garlic. It’s delicious with pita bread, vegetables, or crackers.
White Bean Dip
This dip is creamy and delicious. It’s made with white beans, garlic, lemon juice, and olive oil. It’s perfect with pita bread, crackers, or even as a sandwich spread.
Black Bean Dip
Black bean dip is a great option for a vegetarian or vegan appetizer. It’s made with black beans, lime juice, cilantro, and cumin.
Bean-Based Main Courses
Beans can also be the star of your main course. Here are a few ideas:
Chilli
Chilli is a classic comfort food. It’s made with beans, meat, vegetables, and spices. You can use any type of beans you like – kidney beans, black beans, or pinto beans are all great choices.
Burritos
Burritos are a delicious and versatile meal. They can be filled with beans, rice, meat, cheese, and vegetables.
Enchiladas
Enchiladas are another great Mexican-inspired dish. They’re made with corn tortillas filled with beans, cheese, and vegetables, then baked in a tomato sauce.
(Part 9) The Bean-Loving Community
You’re not alone in your bean obsession! There’s a whole community of bean lovers out there. Join online forums, follow bean-focused Instagram accounts, and even start your own bean blog. Share your recipes, tips, and bean-related adventures with other enthusiasts. You’ll be amazed at the creativity and passion you’ll find in the bean community.
(Part 10) Bean-Spiration: Ideas to Fuel Your Passion
Now that you’re a bean expert, it’s time to let your imagination run wild. Here are a few ideas to inspire your bean-based creations:
- Experiment with Different Bean Combinations: Don’t be afraid to mix and match different types of beans in your recipes. You might be surprised at the delicious results.
- Explore Different Flavour Profiles: Try incorporating different spices, herbs, and flavourings into your bean recipes. From spicy to sweet, there’s a world of flavour to explore.
- Get Creative with Textures: Play around with different textures, from creamy dips to chunky salads.
- Bean-ify Your Favourite Dishes: Add beans to your favourite soups, stews, salads, and even desserts. You might be surprised at how well they work.
(Part 11) FAQs: Bean-ing Your Questions Answered
Let’s tackle those burning bean questions:
FAQs
| Question | Answer |
|---|---|
| How long do dried beans last? | Dried beans can last for up to a year if stored properly in an airtight container in a cool, dry place. Keep them away from direct sunlight and heat. |
| What happens if I don’t soak my beans? | If you don’t soak your beans, they’ll take much longer to cook and they may not be as tender. They might also be harder to digest. You might find you need to cook them for an extra hour or two if you don't soak them. |
| Can I cook beans in the oven? | Yes, you can cook beans in the oven. Just preheat your oven to 350 degrees F (175 degrees C). Place the beans in a baking dish, cover them with water, and bake for 2-3 hours, or until they’re tender. This is a great option if you don't have a stovetop or pressure cooker. |
| Why do my beans foam when they cook? | The foam that forms on top of the beans is caused by the sugars in the beans breaking down. You can skim off the foam if you like, but it’s not necessary. It's a natural part of the cooking process. |
| Can I reheat cooked beans? | Yes, you can reheat cooked beans on the stovetop or in the microwave. Just add a little water or broth if they seem dry. Reheating beans is a great way to use up leftovers! |
And there you have it – the ultimate guide to cooking dried beans. Now you’re ready to take on the bean world. So, get out there, experiment, and enjoy the deliciousness of these humble but mighty legumes!
Everyone is watching

How to Cook Frozen Lobster Tails Perfectly: A Step-by-Step Guide
RecipesLobster. Just the word conjures up images of lavish meals, special occasions, and a taste of luxury. But let's...

Pigs in a Blanket Cooking Time: How Long to Bake for Perfect Results
RecipesAh, pigs in a blanket. Just the name conjures up images of those delightful little parcels of crispy pastry en...

Pork Fillet Cooking Time: How Long to Cook It Perfectly
RecipesPork fillet, or tenderloin as it's sometimes called, is a real favourite in our house. It's so versatile, and...

The Ultimate Guide to Cooking Delicious Frankfurters
RecipesLet's face it, we all love a good frankfurter. It's a classic, simple, and always satisfying. But let's be rea...

Wolf Meat Recipes: A Guide to Cooking Wild Game
RecipesLet's be honest, you don't see wolf meat at your local butcher shop every day. It's a bit of a wild card, but ...