Let's be honest, folks. There's something truly magical about a dippy egg. It's not just breakfast, it's an experience. That perfect, runny yolk, oozing with richness, begging to be devoured with a crisp, golden toast soldier. We're not talking about hard-boiled eggs here, my friends. We're talking about a culinary masterpiece, a delicate dance between texture and flavour, a symphony of the senses, if you will.
This guide is dedicated to helping you achieve dippy egg nirvana. It's a journey into the science, the tools, the techniques, and even the philosophy behind this delightful dish. We'll explore the perfect timings, the perfect bread, and the perfect pairings, leaving no stone unturned in our quest for the ultimate dippy egg experience.
So grab your favourite mug, brew a pot of tea, and settle in. We're about to embark on an egg-cellent adventure.
Part 1: The Science Behind the Perfect Dippy Egg
You see, the magic of the dippy egg lies in understanding the intricate science behind the humble egg. It's all about protein transformation, a delicate dance between heat and coagulation.
The White: A Story of Texture
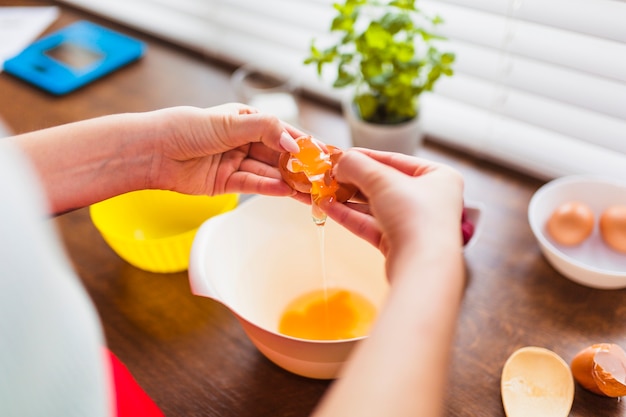
The egg white is primarily water and protein. When you apply heat, those proteins unfold and link together, creating the familiar solid structure of a cooked white. But it's a fine line. Too much heat and you'll end up with a rubbery, overcooked mess. Not enough heat, and your white will remain runny, more like a poorly-made omelette than a dippy egg masterpiece.
The Yolk: The Heart of the Matter
The yolk is a different story. It's mostly fat and protein, and it takes a bit more heat to coagulate. This is the secret to the dippy egg - the white sets before the yolk, creating that beautiful contrast between the firm white and the luscious, runny yolk. The trick is to cook the white just enough, and then stop the process before the yolk starts to firm up. It's a delicate dance, my friends, but the rewards are truly worth the effort.
Part 2: The Tools of the Trade: Equipping Your Dippy Egg Arsenal
Now, let's talk about the weapons in your dippy egg arsenal. Having the right tools is like having the right ingredients for a delicious recipe – it sets you up for success.
1. The Perfect Pot: A Stainless Steel Hero
Firstly, you need a pot. And not just any pot - a pot that's the right size for the number of eggs you're cooking. A small saucepan is perfect for a single dippy egg, while a larger pot is needed for a group breakfast. Personally, I prefer a stainless steel pot. Why? Because it heats evenly and allows you to watch the eggs cook, giving you a visual gauge of their progress. It's like having a window into the heart of your dippy egg operation.
2. egg timer: Your Countdown to Perfection
An egg timer is your dippy egg ally. I'm talking about those classic hourglass timers, the kind that sits on the counter and visually counts down the seconds. They're a simple yet indispensable tool, letting you know exactly how long those eggs have been simmering. No more guessing, no more surprises - just perfectly cooked dippy eggs.
3. Slotted Spoon: A Gentle Retriever
A slotted spoon is a must-have for gently lifting those delicate eggs from the hot water. It allows the excess water to drain away, preventing those eggs from cooling down too quickly. Remember, we're aiming for that perfect, runny yolk, and a slotted spoon ensures a smooth transfer from pot to ice bath.
4. Ice Bath: The Quick Cool-Down
Speaking of ice baths, that's another crucial element in our dippy egg quest. It's the ultimate way to stop the cooking process and prevent those yolks from becoming overcooked. Just imagine: a perfectly cooked white, a luxuriously runny yolk - that's the promise of a well-timed ice bath.
5. Toast Soldiers: The Dippable Delights
And finally, we come to the quintessential dippy egg companion - toast soldiers. These little bread masterpieces are the perfect vehicle for transporting those golden yolks straight to your mouth. They add a satisfying crunch to every bite, complementing the smooth, velvety texture of the egg.
Part 3: Cooking Methods: Exploring the Options
Alright, let's get down to the cooking itself. There are a few different methods for achieving dippy egg perfection, each with its own advantages and nuances.
1. The Classic Boiling Method: Tried and True
This is the most traditional approach, the one most people know and love. It's a tried and true method, but it requires a bit of finesse and a keen eye for timing.
1. Boiling Water Bliss: First, you need a pot of boiling water. Bring that water to a rolling boil, like a bubbling, eager beast, ready to cook your eggs.
2. Gently Lower the Eggs: Now, gently lower those eggs into the boiling water. Don't just drop them in, treat them with care. Remember, the yolk is delicate, and we don't want any cracks.
3. Timer is Your Guide: Set your egg timer, based on the level of runniness you're after. We'll delve into specific timings later.
4. Ice Bath is Key: Once the timer is up, carefully remove those eggs from the boiling water and immediately plunge them into an ice bath. This stops the cooking process, ensuring that yolk stays gloriously runny.
2. The Steaming Method: Gentle and Precise
For a gentler, more even cooking process, consider steaming your eggs. This method produces a consistently cooked egg, with a softer white and a smoother yolk.
1. Simmer and Steam: Fill your saucepan with a few inches of water and bring it to a simmer. Think gentle bubbles, not a roaring boil.
2. Steamer Basket is Your Friend: Place a steamer basket in the saucepan, and carefully lay those eggs inside.
3. Cover and Cook: Cover the saucepan and let the eggs steam for the desired time. Remember, steaming takes a bit longer than boiling, so adjust your timings accordingly.
4. Ice Bath is Your Hero: Once the eggs are cooked, remove them from the steamer basket and immediately plunge them into an ice bath. It's the secret to maintaining that silky, smooth texture.
3. The Microwave Method: A Quick Fix
Yes, you can actually cook dippy eggs in the microwave! It's a convenient option when you're short on time, although it may not be the most traditional approach.
1. Microwave-Safe Bowl is Key: Place your eggs in a microwave-safe bowl. Make sure it's a good quality bowl, one that can handle the heat.
2. A Splash of Water: Add a tablespoon of water to the bowl. This helps create steam, which will cook the eggs more evenly.
3. Cover Up: Cover the bowl with a microwave-safe lid or plastic wrap. This prevents splattering and helps the eggs cook more evenly.
4. Microwave Magic: Microwave on high for 30-60 seconds, depending on the size of your eggs. Start with a shorter time and adjust as needed.
5. Rest and Cool: Once the eggs are cooked, let them sit for a few minutes to cool slightly before plunging them into an ice bath. This helps prevent them from cracking.
Part 4: Mastering the Perfect Dippy Egg: It's All in the Timing
Timing is everything when it comes to the dippy egg. It's the key to achieving that perfect balance between a firm white and a luxuriously runny yolk. Here's a guide to the different timings and the resulting textures:
1. The 3-Minute Miracle: The Ultimate Runny Yolk
For those who crave the ultimate runny yolk, 3 minutes is your magic number. The yolk will be practically liquid, a creamy delight that oozes with richness. This is for the dippy egg connoisseurs, those who truly appreciate the essence of a perfectly cooked yolk.
2. The 4-Minute Delight: The Classic Dippy Egg
If you prefer a more classic dippy egg, with a yolk that's still runny but slightly more set, 4 minutes is your sweet spot. This is a good starting point for those who aren't quite ready for the ultimate runny yolk experience, but still want a touch of that indulgent softness.
3. The 5-Minute Softness: A Balanced Approach
For those who like their yolks a bit firmer, 5 minutes is the way to go. The yolk will be soft but not runny, offering a more balanced texture. It's a good option for those who want a touch of firmness, but still want that creamy, satisfying feel.
4. The 6-Minute Soft Set: A Touch of Firmness
If you prefer a yolk that's softly set but not completely hard, 6 minutes will be your happy place. The yolk will be firm enough to hold its shape, but still creamy and enjoyable. It's a good option for those who want a bit more texture, without sacrificing the deliciousness of a runny yolk.
Part 5: The Art of the Toast Soldier: A Dippable Masterpiece
Let's talk toast soldiers. They're not just a side dish - they're an integral part of the dippy egg experience. They're the dippers, the carriers, the conduits for that perfect runny yolk.
1. The Perfect Bread: The Foundation of Your Soldier
The best bread for toast soldiers is a good quality white bread, with a firm texture. You want a bread that can hold its shape when dipped in the yolk, without crumbling apart. Look for a bread with a good crust, as this will add a satisfying crunch to your toast soldier.
2. The Cutting Technique: A Precise Slice
Cut your bread into long, thin strips, about an inch wide. This will give you the ideal toast soldier shape - perfect for dipping and soaking up all that delicious yolk. Aim for even cuts to create a uniform soldier experience.
3. The Toasting Process: Achieve the Desired Crunch
Toast your bread strips until they are golden brown and slightly crispy. This will provide the perfect contrast to the soft egg yolk, adding a delightful crunch to each bite. You can toast them in the oven, under the broiler, or in a toaster - whatever method you prefer. Just make sure they are toasted evenly and to the desired level of crispness.
Part 6: The Perfect Pairing: What to Serve with Your Dippy Eggs
Dippy eggs are incredibly versatile, and they pair beautifully with a variety of different sides and toppings. Here are a few ideas to get your creative juices flowing:
1. The Classic Combination: Toast Soldiers and Salt
The simplest and most classic pairing is with toast soldiers and a pinch of salt. It's a timeless combination that lets the pure, delicious flavour of the egg shine through. It's a perfect example of less is more.
2. A Touch of Spice: Smoked Paprika and Chives
For a more flavourful twist, sprinkle your dippy eggs with smoked paprika and chopped chives. The smokiness of the paprika adds a depth of flavour, while the fresh, grassy notes of the chives provide a delightful counterpoint to the richness of the yolk.
3. A Sweet Treat: Honey and Nutmeg
For a sweet and savoury combination, drizzle your dippy eggs with a touch of honey and sprinkle with freshly grated nutmeg. The sweetness of the honey balances the richness of the yolk, while the warm, aromatic nutmeg adds a comforting touch. This is a perfect pairing for those who enjoy a bit of sweet and savoury in their breakfast.
4. A Savoury Indulgence: Bacon and Salt
For a classic breakfast pairing, serve your dippy eggs with crispy bacon and a sprinkle of salt. The salty, smoky flavour of the bacon complements the richness of the yolk beautifully. It's a classic combination that's sure to please any breakfast lover.
Part 7: dippy egg tips and tricks: Elevating Your Breakfast Game
Now, let's sprinkle in a few tips and tricks to take your dippy egg game to the next level. It's all about those little details that make a big difference.
1. The Cold Egg Trick: A Secret Weapon for Runny Yolks
For the most perfectly runny yolk, use cold eggs straight from the refrigerator. Cold eggs take longer to cook, giving you more control over the timing and ensuring a luxuriously runny yolk. It's a simple trick, but it makes a big difference.
2. The Salt Solution: A Hint of Flavour
Add a teaspoon of salt to the boiling water. This will help prevent the eggs from cracking, and it also enhances the flavour of the eggs. It's a subtle touch, but it adds a layer of depth and complexity.
3. The Gentle Handling: No More Cracks
Handle your eggs with care, especially when transferring them to the boiling water. Gently lower them in, rather than dropping them. This helps prevent cracking and ensures a smooth cooking experience.
4. The Ice Bath Immersion: A Quick Cool-Down
Submerge your eggs in an ice bath immediately after removing them from the boiling water. This stops the cooking process quickly, preventing the yolk from becoming overcooked and preserving that creamy, runny texture. It's a crucial step in the dippy egg process.
5. The Toast Soldier Storage: A Crispy Delights
If you're making your toast soldiers ahead of time, store them in an airtight container to keep them crispy. This will ensure that your soldiers are still crunchy and satisfying when you're ready to dip them into your perfectly cooked eggs.
Part 8: FAQs: The Dippy Egg Decoded
Finally, let's address some of the most common questions about dippy eggs. Consider this your dippy egg FAQ handbook.
1. Can I use older eggs for dippy eggs?
Yes, you can use older eggs for dippy eggs. However, they may not have as smooth a texture as fresher eggs. Older eggs tend to have a slightly thicker white, which can make them more difficult to cook perfectly. But if you're in a pinch, older eggs will still do the trick.
2. What happens if I overcook my dippy eggs?
If you overcook your dippy eggs, the yolk will become firm and rubbery. You'll end up with hard-boiled eggs, not the creamy, delicious dippy egg you were hoping for. Keep a close eye on your timer and remember, it's better to undercook than overcook.
3. What is the best way to store cooked dippy eggs?
Cooked dippy eggs should be stored in the refrigerator in a sealed container. They will keep for up to 3 days, although they'll be best enjoyed fresh. If you do need to store them, make sure the container is airtight to prevent them from drying out.
4. Can I make dippy eggs ahead of time?
Yes, you can cook dippy eggs ahead of time. However, it's best to cook them just before serving, as the yolk will become firmer over time. If you do cook them ahead of time, be sure to store them in the refrigerator and reheat them gently before serving.
5. Can I use other things besides toast soldiers for dipping?
Absolutely! Toast soldiers are the classic choice, but feel free to get creative. Croissants, bagels, biscuits, even slices of sourdough bread - use whatever suits your fancy. You can also explore different dips, like avocado, hummus, or even a dollop of pesto. The possibilities are endless, and that's the beauty of dippy eggs. It's a canvas for your culinary creativity.
I hope this guide has given you all the information you need to cook the perfect dippy egg. Now, go forth and enjoy the deliciousness! It's a breakfast ritual that's truly worth savouring. Happy dipping!
Everyone is watching

How to Cook Frozen Lobster Tails Perfectly: A Step-by-Step Guide
RecipesLobster. Just the word conjures up images of lavish meals, special occasions, and a taste of luxury. But let's...

Pork Fillet Cooking Time: How Long to Cook It Perfectly
RecipesPork fillet, or tenderloin as it's sometimes called, is a real favourite in our house. It's so versatile, and...

Pigs in a Blanket Cooking Time: How Long to Bake for Perfect Results
RecipesAh, pigs in a blanket. Just the name conjures up images of those delightful little parcels of crispy pastry en...

The Ultimate Guide to Cooking Delicious Frankfurters
RecipesLet's face it, we all love a good frankfurter. It's a classic, simple, and always satisfying. But let's be rea...

Wolf Meat Recipes: A Guide to Cooking Wild Game
RecipesLet's be honest, you don't see wolf meat at your local butcher shop every day. It's a bit of a wild card, but ...