The mere mention of ham evokes images of festive gatherings, family feasts, and that irresistible aroma wafting from the kitchen. For years, I've been a devotee of this culinary treasure, experimenting with different cooking methods and flavour profiles, constantly seeking that perfect balance of juicy, tender, and oh-so-savoury. This guide, born from my passion for all things ham, is your roadmap to achieving ham perfection. We'll cover everything from choosing the right cut to mastering the art of glazing and serving, leaving you with a repertoire of techniques that'll impress even the most discerning palate. So, grab your apron, settle in, and let's embark on this culinary adventure together.
Part 1: The Anatomy of a Ham
Before we dive into the delicious world of cooking ham, let's get acquainted with our star ingredient. Understanding the different types of ham is essential for selecting the perfect one for your culinary needs. It's like choosing the right tool for the job – you wouldn't use a hammer to screw a nail, would you?
1.1 Ham Cuts
Ham, essentially the leg of a pig, comes in various cuts, each offering a unique flavour and texture.
- whole ham: This is the entire leg, bone-in and uncut, perfect for large gatherings or those who enjoy carving at the table. It's a substantial piece, requiring a bit more effort, but rewards you with a truly impressive display of culinary prowess.
- half ham: As the name suggests, this is a whole ham cut in half, offering a more manageable size for smaller gatherings or for those who prefer a less intimidating portion. This cut is still quite impressive, and offers a great balance of size and impact.
- spiral-sliced ham: A whole or half ham that's been boned and spiral-sliced, this is a dream come true for ease of carving and serving. Ideal for buffets, potlucks, or when you want to avoid the "carving pressure."
- Picnic Ham: A smaller, less expensive cut, often from the shoulder and usually bone-in. This is a good option for families or smaller gatherings, offering a satisfying and economical choice.
- Butt Ham: This cut, often referred to as a "city ham" in some regions, comes from the hindquarters and is known for its rich flavour, making it particularly suited for roasting.
1.2 Types of Curing
Ham can be cured in various ways, each imparting a distinct flavour and texture. The most common methods are:
- dry-cured ham: This traditional method uses salt, sugar, and spices to draw out moisture and develop flavour over time. Dry-cured hams are known for their intense flavour, firm texture, and often a slightly salty aroma.
- wet-cured ham: This method involves immersing the ham in a brine solution, resulting in a more tender and juicy product. Wet-cured hams are often found pre-cooked and ready to eat, making them a convenient option for busy schedules.
Part 2: Picking Your perfect ham

Now that we've familiarized ourselves with the different types of ham, it's time to pick the perfect one for your culinary creation. Think of it as choosing the right ingredient for your recipe – it's all about finding the perfect match for your taste and occasion.
2.1 The Label Game
Pay close attention to the labels when selecting a ham. Here's what to look for:
- "Cured and Smoked": This indicates a ham that's been dry-cured and smoked, resulting in a rich flavour and a slightly firm texture. The smoky aroma adds a layer of depth and complexity to the ham's flavour profile.
- "Cooked" or "Ready to Eat": These hams are fully cooked and can be enjoyed as is. You can simply reheat and serve, making them a convenient option for last-minute meals.
- "Uncooked" or "Fresh": These hams need to be cooked thoroughly before consumption. These are often referred to as "green" hams and require careful preparation to ensure safety and deliciousness.
- "Bone-In" or "Boneless": This will determine how easily the ham can be carved and sliced. bone-in hams offer a more traditional experience and often have a deeper flavour, while boneless hams are easier to handle and carve.
2.2 The "Smell Test"
Trust your senses, folks! A good quality ham should have a pleasant aroma, not a sour or pungent smell. This is a good indicator of freshness. If the ham smells off, it's best to avoid it, as it could be a sign of spoilage.
2.3 Size Matters
Consider the size of your gathering when choosing a ham. A small picnic ham will suffice for a family dinner, while a whole ham is ideal for a large party. Don't be afraid to overestimate, as leftover ham is always a welcome addition to sandwiches, salads, or soups.
Part 3: Getting Ready to Cook
The anticipation is building! You've selected your perfect ham, and now it's time to prepare for the culinary magic to unfold. It's like getting your kitchen ready for a grand symphony – everything needs to be in its rightful place.
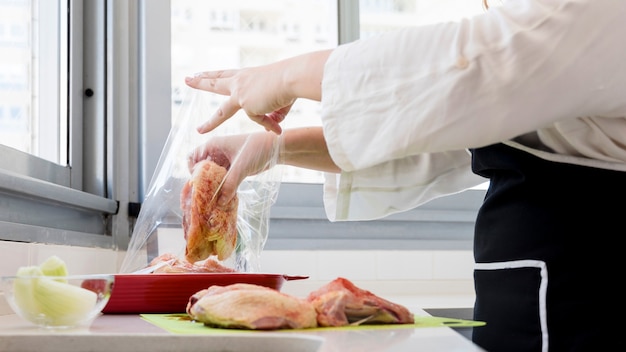
3.1 The "Soaking" Ritual
For uncooked hams, soaking is a crucial step in ensuring even cooking and enhancing flavour. It's a bit like a spa treatment for your ham, rehydrating and plumping up the meat.
- Soaking Time: Soak the ham in cold water for 15 to 20 minutes per pound. This allows the ham to absorb moisture and helps to even out the saltiness.
- The Soaking Solution: While plain water is perfectly fine, you can also add flavour by adding a cup of apple cider vinegar or a few tablespoons of brown sugar to the soaking water. This adds a subtle sweetness and helps to break down the saltiness of the ham.
3.2 "Score It"
Scoring the ham, or making shallow cuts into the fat, helps the ham cook more evenly and allows for the glaze to penetrate, creating a beautiful and delicious crust.
- Diamond Pattern: This classic scoring pattern creates a visually appealing design and allows for greater penetration of the glaze. It's a bit more intricate, but adds an elegant touch to your ham.
- Crosshatch Pattern: A simpler pattern, but equally effective in achieving even cooking and allowing the glaze to seep into the ham. This is a practical option for those who want a quick and efficient method.
Part 4: The Art of Glazing
Ah, the glaze! It's the finishing touch that elevates a good ham to a truly extraordinary one. Think of it as the final flourish of a masterpiece, adding a touch of brilliance and complexity to the palate. It's like painting a culinary masterpiece, transforming a simple ham into a feast for the eyes and the taste buds.
4.1 Classic Glaze Recipes
These glaze recipes have stood the test of time, providing a rich and satisfying flavour that complements the ham perfectly. They are a combination of sweet, savoury, and tangy elements that create a harmonious symphony of flavours.
4.1.1 honey mustard glaze
Ingredients:
- 1/2 cup honey - Adds sweetness and a touch of floral notes.
- 1/4 cup Dijon mustard - Provides a tangy bite and a hint of spice.
- 2 tablespoons brown sugar - Enhances the sweetness and adds a touch of caramelisation.
- 1 tablespoon apple cider vinegar - Adds a subtle acidity that balances the sweetness of the honey and brown sugar.
- 1/2 teaspoon ground ginger - Provides a warm, earthy flavour that complements the other ingredients.
- Combine all ingredients in a saucepan and bring to a simmer over medium heat. Stir constantly to prevent sticking and ensure even cooking.
- Reduce heat and simmer for 5 minutes, stirring occasionally, until the glaze thickens slightly. This will create a consistency that coats the ham beautifully without being too runny.
- Brush the glaze onto the ham during the last 30 minutes of cooking, basting frequently. This ensures even coverage and creates a beautiful, caramelized crust.
4.1.2 brown sugar glaze
Ingredients:
- 1 cup packed brown sugar - The star ingredient, providing a rich and deep sweetness.
- 1/4 cup water - Helps to dissolve the sugar and create a smooth glaze.
- 1 tablespoon Dijon mustard - Adds a tangy and slightly spicy element that balances the sweetness.
- 1 teaspoon ground cloves - Provides a warm and slightly spicy flavour, complementing the brown sugar.
- 1/2 teaspoon ground cinnamon - Adds a warm, comforting aroma and flavour.
- Combine all ingredients in a saucepan and bring to a simmer over medium heat. Stir continuously to prevent burning and ensure the sugar dissolves properly.
- Reduce heat and simmer for 5 minutes, stirring occasionally, until the glaze thickens slightly. This creates a glaze that adheres to the ham beautifully.
- Brush the glaze onto the ham during the last 30 minutes of cooking, basting frequently. This ensures even coverage and helps the glaze caramelize and create a delectable crust.
4.1.3 Maple Pecan Glaze
Ingredients:
- 1/2 cup maple syrup - Provides a rich, buttery sweetness and a touch of caramelisation.
- 1/4 cup chopped pecans - Adds a crunchy texture and a nutty flavour that complements the maple syrup.
- 2 tablespoons butter - Adds a rich, creamy texture and a delicate buttery flavour.
- 1 tablespoon Dijon mustard - Provides a tangy and slightly spicy element that balances the sweetness of the maple syrup.
- 1/2 teaspoon ground cinnamon - Adds a warm, comforting aroma and flavour, complementing the maple syrup and pecans.
- Combine all ingredients in a saucepan and bring to a simmer over medium heat. Stir constantly to prevent burning and ensure the sugar dissolves properly.
- Reduce heat and simmer for 5 minutes, stirring occasionally, until the glaze thickens slightly. This creates a glaze that coats the ham beautifully and adds a delicious crunch from the pecans.
- Brush the glaze onto the ham during the last 30 minutes of cooking, basting frequently. This ensures even coverage and helps the glaze caramelize and create a delectable crust.
4.2 Glaze Tips and Tricks
Here are a few tips to help you achieve the perfect glaze:
- Consistency is Key: The glaze should be thick enough to coat the ham, but not so thick that it becomes sticky or runs off easily. You want a glaze that adheres to the ham and creates a beautiful, caramelized crust without becoming a sticky mess.
- The Basting Technique: Baste the ham frequently with the glaze during the last 30 minutes of cooking. This ensures even coverage and helps to create a beautiful, caramelized crust. Don't forget to use a basting brush to ensure the glaze is evenly distributed over the entire ham.
- Experiment with Flavours: Don't be afraid to experiment with different flavour combinations. Try adding a touch of orange zest, ginger, or even a pinch of cayenne pepper to your glaze for a unique twist. These additions can elevate your glaze to a whole new level of flavour and create a signature dish that you'll be proud to share.
Part 5: Cooking Methods for Ham
Now, the exciting part! It's time to put our culinary knowledge to the test and cook that ham. We'll explore various cooking methods, each yielding a distinct texture and flavour profile. It's like choosing the right musical instrument for a symphony – each method brings its own unique character and sound to the culinary experience.
5.1 Roasting
Roasting is a classic method that yields a tender and juicy ham with a beautifully golden-brown crust. It's like a warm hug for your ham, creating a perfectly balanced and satisfying dish.
- Preheat the Oven: Preheat your oven to 325°F (160°C). This ensures even cooking and helps to create a crispy crust. This is a crucial step, as it guarantees a consistent temperature throughout the cooking process, resulting in a perfectly cooked ham.
- The roasting time: The cooking time will depend on the size and type of ham you're using. As a general rule, allow 15-20 minutes per pound for a bone-in ham and 10-15 minutes per pound for a boneless ham. This is a guideline, but always check the packaging for specific recommendations.
- The Temperature Check: Use a meat thermometer to ensure the ham is cooked through. The internal temperature should reach 145°F (63°C) for a safe and delicious ham. Don't rely on visual cues alone, as they can be misleading. A meat thermometer is your best friend in ensuring a safe and perfectly cooked ham.
- The Resting Period: Allow the ham to rest for 10-15 minutes before carving. This allows the juices to redistribute, resulting in a more tender and flavorful ham. This is a vital step in ensuring a juicy and flavorful ham, as it allows the juices to redistribute and permeate the meat.
5.2 slow cooking
For an incredibly tender and flavorful ham, slow cooking is the way to go. It's like giving the ham a long, luxurious bath in a flavourful broth. The slow and gentle heat allows the ham to break down, resulting in a melt-in-your-mouth experience.
- slow cooker Prep: Place the ham in the slow cooker and add a cup of liquid, such as apple cider, chicken broth, or water. This adds moisture and flavour to the ham as it cooks.
- Slow Cooking Time: Cook on low for 6-8 hours or on high for 3-4 hours. The ham will be tender and succulent, ready to be sliced and served. This method is perfect for those who want to cook hands-free and enjoy the aroma of delicious ham filling their home.
- The "Glazing Touch": During the last hour of cooking, add a glaze to the ham and continue cooking until the glaze has caramelized. This adds a beautiful shine and a burst of flavour to your ham.
5.3 Grilling
Looking for a more adventurous approach? Grilling your ham adds a smoky depth of flavour that's truly irresistible. It's a perfect choice for those who love a touch of char and smoky goodness.
- Grill Preparation: Preheat your grill to medium heat. For best results, use a gas grill with even heat distribution. This ensures the ham cooks evenly and doesn't burn before it's cooked through.
- The Ham on the Grill: Place the ham on the grill, ensuring it's over indirect heat. This prevents burning and allows the ham to cook evenly. This is a crucial step in grilling ham, as it ensures the ham doesn't get burnt and allows the smoke flavour to permeate the meat.
- Grilling Time: Cook the ham for 15-20 minutes per pound, flipping it every 30 minutes to ensure even cooking. This ensures the ham cooks evenly and allows the glaze to caramelize properly.
- The Glazing Touch: During the last 30 minutes of grilling, brush the ham with your favourite glaze and continue grilling until the glaze has caramelized. This adds a beautiful shine and a burst of flavour to your ham.
Part 6: Serving Up Your Ham Masterpiece
The moment has arrived! Your ham is perfectly cooked, glazed to perfection, and ready to be devoured. Let's create a symphony of flavours and textures to complement this culinary star.
6.1 The side dish Symphony
side dishes should complement the ham's richness without overpowering it. Think light and refreshing, or hearty and comforting, depending on your preference. It's like choosing the supporting actors in a play – they should enhance the main character without stealing the show.
- Classic Choices: mashed potatoes, green bean casserole, sweet potato casserole, macaroni and cheese, and fruit salad are all timeless choices that pair well with ham. These side dishes offer a comforting and familiar experience that complements the richness of the ham.
- Creative Options: For a more adventurous touch, try a roasted vegetable medley, a fresh salad with a citrus vinaigrette, or a creamy coleslaw with a touch of sweetness. These options add a touch of freshness and complexity to the meal, providing a contrasting element to the richness of the ham.
6.2 The Presentation Power
Make your ham the centrepiece of your table.
- Carving Elegance: Slice the ham neatly, using a sharp carving knife. If you're serving a bone-in ham, carve around the bone and then slice the meat into thin, even pieces. This adds a touch of elegance and professionalism to your serving.
- Plating Perfection: Arrange the slices of ham attractively on a platter or serving dish. Add some greenery, like parsley or rosemary sprigs, for a touch of visual appeal. This adds a touch of artistry to your presentation, making your ham a truly captivating centrepiece.
Part 7: Leftover Love
Don't let those delicious leftovers go to waste! They are the gift that keeps on giving. It's like a culinary treasure chest, filled with opportunities to create new and exciting dishes.
7.1 Ham Salad Heaven
Ham salad is a classic way to repurpose leftover ham. It's a simple and satisfying dish that's perfect for sandwiches, salads, or as a snack.
- Mix it Up: Combine diced ham with mayonnaise, celery, onion, and seasonings of your choice. Add a touch of sweetness with a tablespoon of honey or a sprinkle of brown sugar. This combination of textures and flavours creates a delightful and satisfying ham salad.
- Creative Combinations: Experiment with different flavour profiles by adding ingredients like chopped apples, dried cranberries, or chopped walnuts. These additions add a burst of flavour and texture to your ham salad, making it a unique and delightful dish.
- Serving Options: Serve ham salad on bread, crackers, or as a filling for sandwiches or wraps. This versatile dish can be enjoyed in various ways, making it a perfect option for lunch, dinner, or a quick snack.
7.2 Ham and bean soup
A hearty and comforting soup, perfect for a cold winter day. It's like a warm hug in a bowl, filled with flavour and nourishment.
- The Base: Start with a base of diced ham, onions, celery, and carrots. This creates a flavourful broth that's the foundation of your soup.
- Bean Bounty: Add your favourite beans, such as kidney beans, pinto beans, or black beans. Beans add protein, fibre, and a satisfying texture to your soup.
- Flavour Fusion: Season with a combination of spices, such as garlic powder, onion powder, paprika, and oregano. This adds depth and complexity to the soup, creating a harmonious blend of flavours.
7.3 ham and cheese quiche
A sophisticated and satisfying dish, perfect for a brunch or lunch. It's like a culinary masterpiece, combining the richness of ham with the creamy texture of cheese and eggs.
- The Crust: Start with a pre-made pie crust for convenience. This saves you time and effort, allowing you to focus on the delicious filling.
- Filling Inspiration: Combine diced ham, grated cheese, eggs, milk, and seasonings. The combination of these ingredients creates a flavourful and creamy filling that's perfect for quiche.
- Baking Bliss: Bake the quiche in a preheated oven until the filling is set and golden brown. This ensures the quiche is cooked through and creates a beautiful golden-brown crust.
Part 8: Ham-tastic Tips and Tricks
Here are some valuable tips and tricks to help you master the art of ham cooking. They are like secret weapons in your culinary arsenal, helping you achieve ham perfection.
- Don't Overcook: Overcooked ham will become dry and tough. Use a meat thermometer to ensure the internal temperature reaches 145°F (63°C), but no more. This is a crucial step in ensuring a juicy and flavorful ham.
- Resting is Key: Allow the ham to rest for 10-15 minutes after cooking. This allows the juices to redistribute, resulting in a more tender and flavorful ham. This is a crucial step in ensuring a juicy and flavorful ham.
- Glaze It Right: Brush the glaze onto the ham during the last 30 minutes of cooking. This helps to create a beautiful, caramelized crust and enhances the flavour. This is a vital step in achieving a perfectly glazed ham with a delicious crust.
- Store Leftovers Properly: Store leftover ham in the refrigerator in an airtight container. It should last for 3-4 days. This helps to keep the ham fresh and flavorful.
- Freeze It for Later: Leftover ham can be frozen for up to 3 months. Thaw it in the refrigerator overnight before using. This is a great way to save leftover ham for later use in soups, sandwiches, or salads.
FAQs
Let's answer some frequently asked questions about cooking ham:
8.1 Can you eat ham raw?
No, it's not safe to eat ham raw. Ham needs to be cooked thoroughly to kill any harmful bacteria. This is a crucial safety tip, as raw ham can contain harmful bacteria that can cause foodborne illness.
8.2 How do you tell if ham is cooked?
The best way to tell if ham is cooked is to use a meat thermometer. The internal temperature should reach 145°F (63°C). If you don't have a thermometer, check for a clear, slightly pink juice when you poke the ham with a fork. Always use a meat thermometer to ensure your ham is cooked to a safe temperature.
8.3 What happens if you overcook ham?
Overcooked ham will become dry and tough. It will also lose some of its flavour. This is why using a meat thermometer and adhering to cooking times is so important.
8.4 Can you eat ham bone?
Ham bones are generally safe to eat, but they can be quite tough. You can use them to make stock or soup, but most people prefer to discard them. However, if you do choose to consume them, be cautious as they can be a choking hazard.
8.5 What is the best way to reheat ham?
The best way to reheat ham is in the oven. Preheat your oven to 325°F (160°C) and place the ham in a baking dish. Cover it with foil and bake for 20-30 minutes, or until heated through. You can also reheat ham in the microwave, but it might become a bit dry. These methods ensure the ham is heated evenly and retains its moisture and flavour.
And there you have it, your complete guide to cooking delicious ham! Whether you're a seasoned chef or a culinary newbie, this guide will help you create a truly unforgettable ham experience. Now, go forth, experiment, and let your creativity run wild as you master the art of cooking this culinary gem. Happy Hamming!
Everyone is watching

How to Cook Frozen Lobster Tails Perfectly: A Step-by-Step Guide
RecipesLobster. Just the word conjures up images of lavish meals, special occasions, and a taste of luxury. But let's...

Pigs in a Blanket Cooking Time: How Long to Bake for Perfect Results
RecipesAh, pigs in a blanket. Just the name conjures up images of those delightful little parcels of crispy pastry en...

Pork Fillet Cooking Time: How Long to Cook It Perfectly
RecipesPork fillet, or tenderloin as it's sometimes called, is a real favourite in our house. It's so versatile, and...

The Ultimate Guide to Cooking Delicious Frankfurters
RecipesLet's face it, we all love a good frankfurter. It's a classic, simple, and always satisfying. But let's be rea...

Wolf Meat Recipes: A Guide to Cooking Wild Game
RecipesLet's be honest, you don't see wolf meat at your local butcher shop every day. It's a bit of a wild card, but ...